Payor: Invoice Administrator Guide
Table of Contents
- Welcome
- Manage Invoices
- Manage Compliance
- Manage Payment Holds
- Manage Payment Requirements
- Manage Lien Waivers
- Manage Sub-Tier Waivers
Get Started as an Invoice Administrator
 |
This Invoice Administrator Guide provides companies that have purchased Procore Pay This guide assumes your team has completed the steps in the Payor Setup Guide. Topics include:
|
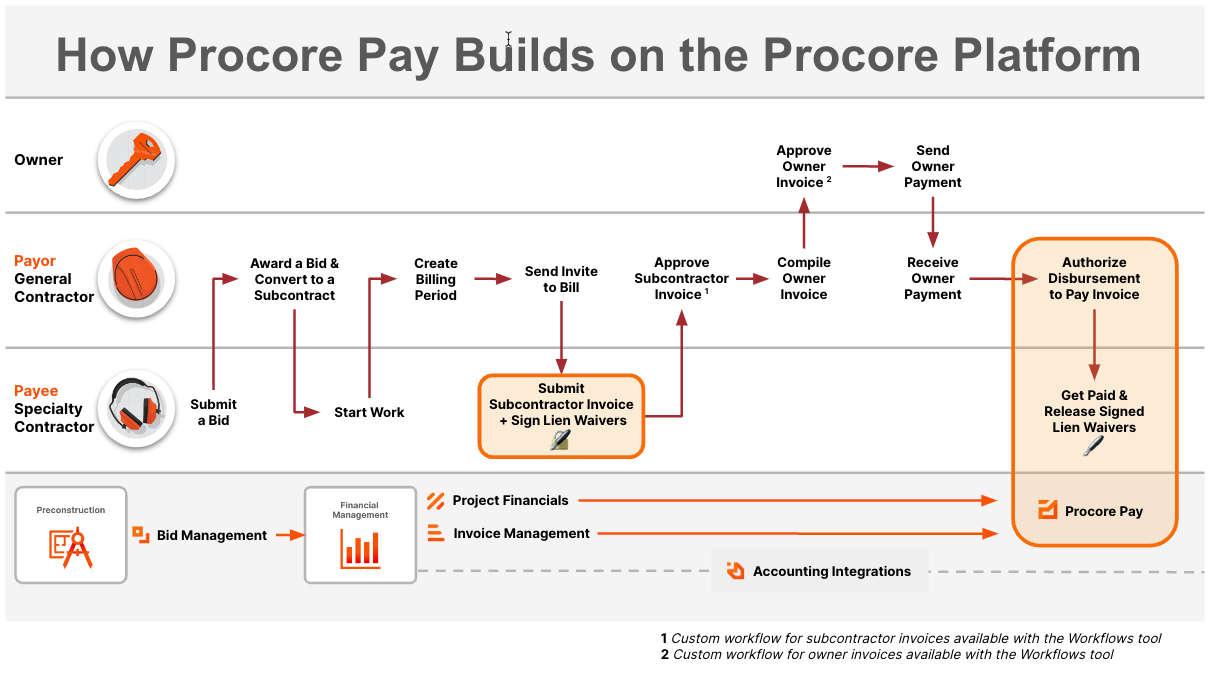
What is Pay?
Important
Author note: Link to source file: https://docs.google.com/presentation...98af4431df_0_0Pay builds on the existing Project Financials and Invoice Management tools in Procore to streamline the subcontractor invoice payment process and automate the lien waiver exchange.
What is an invoice administrator?
Create Subcontractor Invoices
Add Invoice Contacts
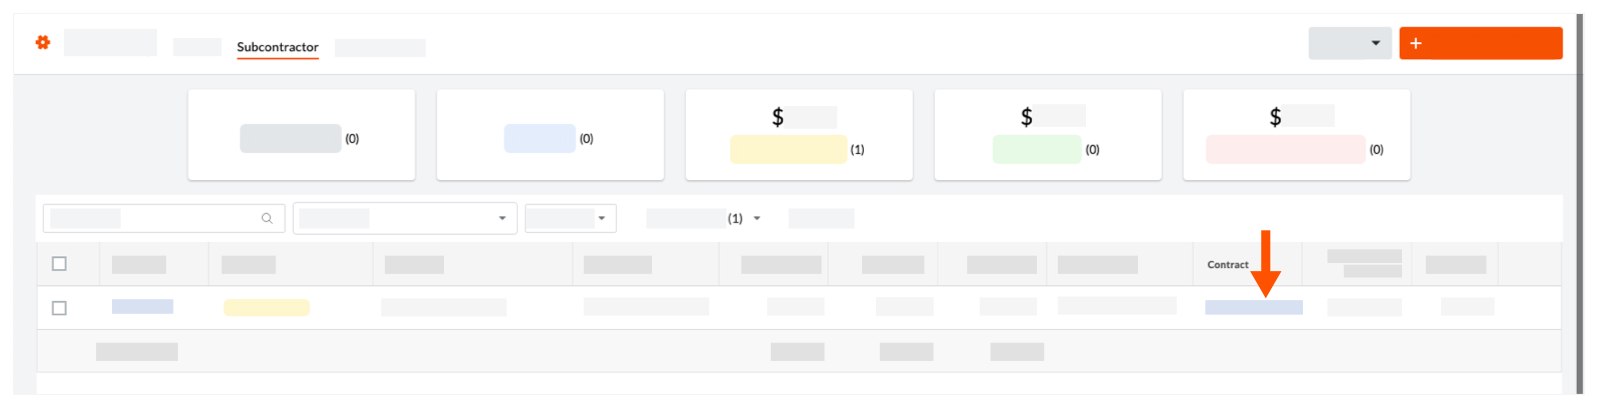
- Navigate to the project's Invoicing tool.
- Click the Subcontractor tab.
- Locate the invoice to update, and click its Contract link.
This opens the commitment. A subcontractor invoice originates from a commitment.
- In the commitment, click Edit.
- Under General Information, do the following:
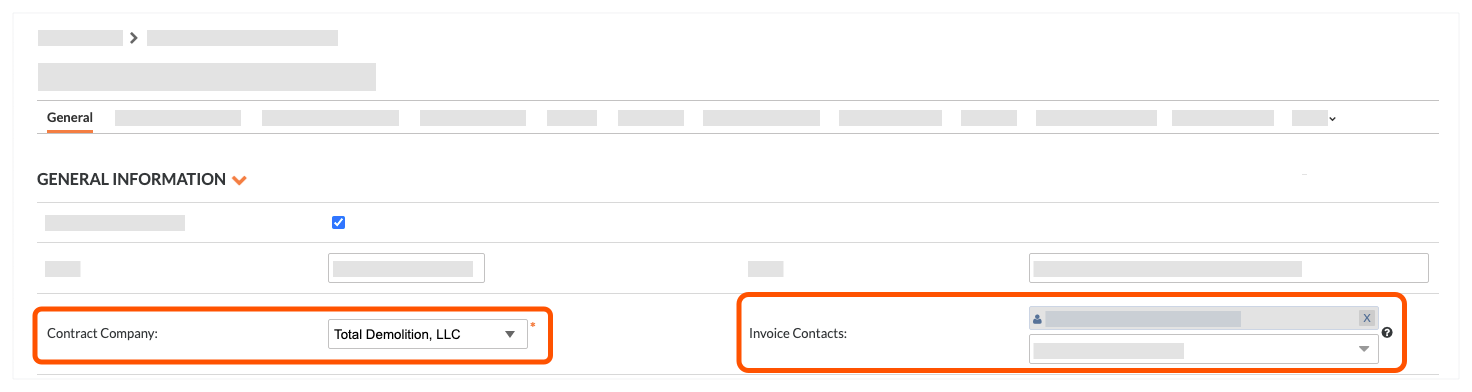
- Contact Company. Select the company record from the drop-down list.
- Invoice Contacts. Select an employee of the company from the drop-down list.
Tips
- Don't see the right company in the 'Contact Company' list? The company record must be added to the Project Directory. See Add a Company to the Project Directory.
- Don't see the desired user in the list? The user must ben an employee of the company record in the Project Directory. See Add a User Account to the Project Directory.
- Click Save.
Invite Beneficiaries to Pay
- Invite a Beneficiary from the Payments Tool
- Invite a Beneficiary from the Commitments Tool
- Invite a Beneficiary from the Invoicing Tool
Invite a Beneficiary from the Payments Tool
A Payments Admin or a Payments Beneficiary Approver can invite a beneficiary company to set up Procore Pay and add beneficiary accounts from the Payments tool.
- Navigate to the company's Payments tool.
- On the Beneficiaries tab, click Invite Company.
- In the Invite to Procore Pay prompt, take the following steps under Invite Beneficiary Company:
- Select the payee's company record from the Company drop-down list.
- Select one (1) of the company's employees from the Send Invite To drop-down list. You can invite up to 20 companies.
Tip
- Company already connected? If the
 icon and gray banner appears above the Company drop-down list, the company is already connected to the system, the system preselects the company's authorized contacts for you.
 - Can't find the company or person in the drop-down lists? If a company has already received an invite, they won't appear in this list. If you need to add a new company, see Add a Company to the Company Directory.
- Want to invite company contacts in bulk? If so, click the Add Another Company button and repeat the steps above for each company to add. You can invite up to ten (10) companies at a time.
- Company already connected? If the
- Click Invite.
An email message with the subject line 'Invitation to Procore Pay' or 'Link Bank Account to Receive Payments' is sent to the invoice contact. The message sent depends on whether the 'Contract Company' on the commitment already has a free or paid Procore account (and also if the company doesn't have a Procore company account). The invoice contact can continue with the next step.
Invite a Beneficiary from the Commitments Tool
An invoice administrator can invite invoice contacts to set up Procore Pay and add beneficiary accounts.
- Navigate to the project's Commitments tool.
- Under the Contracts tab, locate your commitment contract. Then, click the number link to open it.
- Locate the Procore Pay banner.
- Based on the button in the banner, take the following steps:
- Click Set Up Procore Pay.
- Select the invoice contact for the 'Contract Company' on the commitment. The invite is sent to this Procore user.
- Click Invite.
- Click Request Bank Account.
- Click Request.
- Click Set Up Procore Pay.
An email message with the subject line 'Invitation to Procore Pay' or 'Link Bank Account to Receive Payments' is sent to the invoice contact. The message sent depends on whether the 'Contract Company' on the commitment already has a free or paid Procore account (and also if the company doesn't have a Procore company account). The invoice contact can continue with the next step.
Invite a Beneficiary from the Invoicing Tool
An invoice administrator can invite invoice contacts to set up Procore Pay and add beneficiary accounts.
- Navigate to the project's Invoicing tool.
- Click the Subcontractor tab.
- Locate the invoice for the subcontractor and click the invoice number link.
- Locate the Procore Pay banner.
- Based on the button in the banner, take the following steps:
- Click Set Up Procore Pay.
- Select a user of the company to send an invitation to.
- Click Invite.
- Click Request Bank Account.
- Click Request.
- Click Set Up Procore Pay.
An email message with the subject line 'Invitation to Procore Pay' or 'Link Bank Account to Receive Payments' is sent to the invoice contact. The message sent depends on whether the 'Contract Company' on the commitment already has a free or paid Procore account (and also if the company doesn't have a Procore company account). The invoice contact can continue with the next step.
Next Step
Review & Approve Invoices
- Navigate to the project's Invoicing tool.
- Click the Subcontractor tab.
- Locate the invoice to review and click its Invoice link.
- Scroll to the Schedule of Values card.
- Click the Edit button.
- In the Line Item Approval column, approve or reject each line item on the invoice as follows:
Notes
As you review each line item, keep in mind:
- Invoice administrators can review line items on any invoice:
- You are NOT limited to reviewing only the most recent invoice.
- Rejecting line item(s) does NOT change line item amount(s). Amounts must be updated by an invoice administrator or invoice contact.
- Downstream invoice contacts can only update invoices when granted the required user permissions to submit invoices. See Revise & Resubmit an Invoice as an Invoice Contact.
- If you have turned the 'Show Amounts Subcontractors Claim' toggle ON in the Invoicing tool the 'Proposed Amount' column appears.
- To learn how to create a payment schedule from the Invoicing tool, see Create a Payment Schedule.
- To learn how to create a payment schedule from the Progress Billings tool, see Create a Payment Schedule from the Progress Billings Tool.
- When this toggle is turned ON, Procore includes the rejection comment on the invoice in the "Reasons for Difference" box in the PDF export of the invoice.
- The 'Proposed Amount' column can reflect what an invoice contact submitted, a user with 'Admin' level permissions can adjust the 'Work Completed This Period' and 'Materials Presently Stored' columns separately to set the appropriate amounts.
- To approve a line item, click the GREY checkmark to approve it. A GREEN checkmark indicates you have approved the line item.

- To reject a line item:

- Click the GREY 'x' to reject it. A RED 'x' indicates you have rejected the line item.
This opens the Reason (Optional) box. - Enter a reason in the Reason (Optional) box.
- Click Add.
Important
Comments entered in the 'Reason (Optional)' box are NOT included in the automated email sent to the invoice contact. However, you can export a PDF that includes a 'Reasons for Difference' table that shows the comments as entered. See Export a Subcontractor Invoice.
- Click the GREY 'x' to reject it. A RED 'x' indicates you have rejected the line item.
- Invoice administrators can review line items on any invoice:
- Click one (1) of the save options:
- Save. Click this button to save the invoice and keep it in the 'Under Review' status.
OR - Save & Change Status. Click this button to open the 'Save Edits and Change Status' window. Then, select the desired status and enter any information that you want to convey to the invoice contact in the Overall Comments box. Then click Save & Change Status.
Tips
What status do I change the invoice to? To learn more about the available statuses, see What are the default statuses for Procore invoices?
- Save. Click this button to save the invoice and keep it in the 'Under Review' status.
Manage Insurance Documents & Statuses
The steps to follow depend on the management method your team decides to use:
- Manage Insurance Compliance Status with the Commitments Tool
OR - Manage Insurance Documents and Compliance Status with the Directory Tool
Manage Insurance Compliance Status with the Commitments Tool
If your company simply wants to track whether a commitment is compliant with insurance requirements or not, users with the appropriate permissions can input the commitment's status directly in the Commitments tool.
- Navigate to the Project level Commitments tool.
- Under the Contracts tab, locate the commitment to work with.
- Click the Number link to open it.
- Click the Compliance tab.
- In the Insurance card, click the Edit button.
Note
When managing insurance compliance status with the Commitments tool, you do not use the Add Insurance button. The add button is only used when managing insurance documents and compliance status with the Directory tool. See Manage Insurance Documents and Compliance Status with the Directory Tool.
- In the Compliance Status drop-down list, select one of the following statuses:
- Compliant. If the commitment contract is in compliance with its insurance requirements, select this option.
- Not Compliant. If the commitment contract is NOT in compliance with its insurance requirements, select this option.
- Not Required. If tracking compliance status is not required for this commitment, select this option. Selecting this option has no effect on the commitment's overall insurance compliance status.
- Enter any information about the insurance compliance status in the Description field.
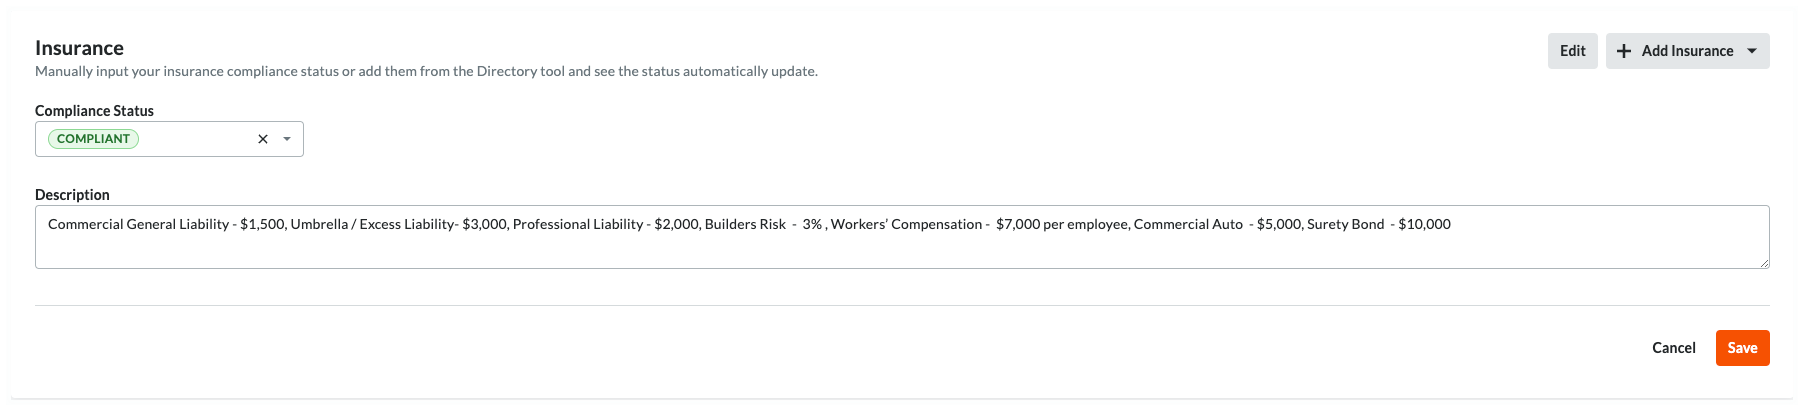
- Click Save.
This saves the insurance compliance status and logs your entry in the commitment's Change History tab. You can change the status or description at any time using the Edit button.Tip
Want to switch from managing insurance compliance with the Commitments tool to managing insurance documents and compliance status with the Directory tools? If you initially manage insurance compliance status with the Commitments tool and later decide to manage insurance documents and compliance statuses with the Directory tools, any previous compliance status changes are saved in the commitment's Change History tab. See View the Change History of a Commitment. After you switch, insurance changes are logged in the Company or Project level Directory tool's Change History tab.
Manage Insurance Documents and Compliance Statuses with the Directory Tools
If your company adds insurance documents for your contractors, subcontractors, and vendors in the Company and/or Project Directory tools, Procore automatically manages the insurance compliance status of each document for you.
Video
Steps
- Navigate to the Project level Commitments tool.
- Under the Contracts tab, locate the commitment to work with.
- Click the Number link to open it.
- In the commitment, click the Compliance tab.
- Scroll to the Insurance card.
- Choose from these options:
Note
When managing insurance information with the Directory tools, actions are always logged in the Change History tab of the corresponding Directory tool instead of the commitment's Change History tab.
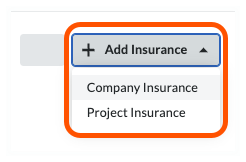
Add Insurance
To add new insurance information, choose the appropriate option:
Note
The Add Insurance and Edit menu buttons are only visible and available to an invoice administrator who is also a designated Insurance Manager (see Designate an Insurance Manager for Your Procore Company) or who has 'Admin' level permissions on the Company level Directory tool.| When adding the first insurance document... | For subsequent insurance documents... |
|---|---|
 |
 |
After you choose a menu option, Procore launches the Company or Project level Directory tool and opens the company profile of the 'Contract Company' to the Insurance tab. You can then follow the steps in:
- Add Insurance to a Company Record in the Company Directory
- Add Project Insurance to a Company Record in the Project Directory
View Insurance
If the 'Contract Company' on the commitment has any existing insurance information stored in the company profile of the Directory tools, that insurance information appears as rows in the table in the commitment's Insurance card.

Insurance Card
This table details the elements of the Insurance card in a commitment.
| Element | Type | Description |
|---|---|---|
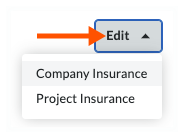
| Add Insurance or Edit | Menu Buttons | Users with the appropriate permissions can either click the Add Insurance button (if this is the first insurance entry) or the Edit button (if this is a subsequent insurance entry) and choose one (1) menu option:
NoteThe Add Insurance and Edit menu buttons are only visible and available to an invoice administrator who is also a designated Insurance Manager (see Designate an Insurance Manager for Your Procore Company) or granted 'Admin' level permissions on the Company level Directory tool. |
| Compliance Status | Status | Procore looks at the insurance information stored in the Directory tools to determine the commitment's status:
|
| Name | Field | Shows the name from the Company or Project Directory. Typically, users enter the name of the insurance certificate, policy, or document in this field. |
| Level | Field | Shows whether the insurance information was added to the Company or Project Directory. |
| Effective Date | Field | Shows the effective date for the insurance information in the Company or Project Directory. |
| Expiration Date | Field | Shows the expiration date from the Company or Project Directory. These icons also alert users when the insurance is nearing or past the expiration date: Expiring Soon. Starts showing 14 days before the expiration date set for the insurance. Expiring Soon. Starts showing 14 days before the expiration date set for the insurance. Expired. Starts showing one (1) day after the expiration date set for the insurance. Expired. Starts showing one (1) day after the expiration date set for the insurance.Note: Expiration notifications are managed in the Procore web application's Directory tool. To learn how to configure notifications, see Add Project Insurance to a Company Record in the Project Directory and Add Insurance to a Company Record in the Company Directory. |
| Notes | Menu | Shows any notes for the insurance information in the Company or Project Directory. |
 |
Attachment |
|
Edit Insurance
To edit existing insurance documents, click the Edit button and choose the Company Insurance or Project Insurance menu option. This launches the corresponding Directory tool and opens the company profile to the Insurance tab.
Next, click the Edit button in the Insurance tab of the company profile in the corresponding Directory tool. To learn about your editing options, see:
- Add Insurance to a Company Record in the Company Directory
- Add Project Insurance to a Company Record in the Project Directory
Note
When managing insurance with the Directory tools, changes to the insurance insurance are logged in the Change History tab of the corresponding Directory tool. Changes are not logged in the commitment's Change History tab.Remove Insurance
Insurance documents must be removed from the Directory tools. To remove insurance, click the Edit button and choose the Company Insurance or Project Insurance menu option. This launches the corresponding Directory tool and opens the company profile to the Insurance tab.
You can then follow the steps in:
Create Contract Documents & Statuses
- Navigate to the project's Commitments tool.
- In the Contracts tab, locate the commitment to work with.
- Click the Number link to open it.
- In the commitment, click the Compliance tab.
- Scroll to the Contract Compliance Documents card.
- Click Create New.
Note
The Create New button is only visible and available to users granted invoice administrator permissions on the project's Commitments tool. - In the Details pane, enter:
- Name. Type the name of the compliance requirement. For example, type: Surety Bond
- Type. Select a requirement type from the drop-down list. The choices are Bond, License, Master Agreement, Permit, Safety, W-9, or Other.
- Status. Choose a status for the requirement: Compliant or Not Compliant.
- Effective Date. Select an effective date for the compliance requirement.
- Expiration Date. Select an expiration date for the compliance requirement.
- Send Expiration Notification. Mark this checkbox to send a daily email notification to the commitment's invoice contacts when the compliance requirement is within fourteen (14) days of the set 'Expiration Date'.
Note
To stop the email notification, change or remove the expiration date. Procore stops sending notifications sixty (60) days after the Expiration Date passes. - Notes. Enter any relevant comments about the compliance requirement.
- Attachment. Click the Attach Files button or use a drag-and-drop operation to add one (1) file.
Tips
- To cancel your new entry, click the Cancel link or Close button. A 'Discard Unsaved Changes' message appears.
- To remove all data and information from Procore, click Discard. This action cannot be undone and data cannot be recovered.
- Click Save.
Note
If your web browser supports viewing the file type in Procore, a preview appears after you click Save to complete the upload.
A GREEN success banner confirms that the contract compliance document has been added to the table. The add action is also noted in the Change History tab of the commitment.Example
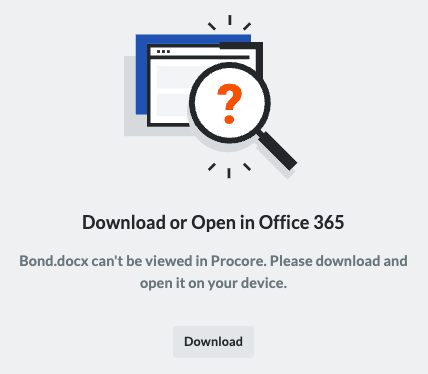
If your web browser supports viewing a file type in Procore, the file appears in the preview window next to the Details pane when you re-open the entry.

If your web browser doesn't support viewing a file type in Procore, a Download button appears in the preview window next to the Details pane so you can view it on your computer.
Create Holds
Edit Holds
Release Holds
What tool are you using?
Depending on your role and permissions settings, you can navigate to a subcontractor invoice from one of these tools:
I am using the Payments tool.
Payment Admins, Payment Disbursers, and users with 'Admin' level permissions on the Payments tool can use these steps to create, edit, view, and release Invoice or Vendor holds on subcontractor invoices. To learn more, see What permissions do you need to manage holds on subcontractor invoices?
- Navigate to the Company level Payments tool.
- Click the Subcontractor Invoices tab. This tab is active by default.
- Locate the invoice for the hold.
- Choose one of these options:
- Click the information icon to open the Payment Requirements panel.
OR - Click the Invoice # link to open the invoice in the Project level Commitments tool. Then click the Payment Requirements tab.
- Click the information icon to open the Payment Requirements panel.
- Under Payment Requirements, click the Holds tab.
I am using the Commitments tool.
Payment Admins and Payment Disbursers can create, edit, view, and release Invoice or Vendor holds on subcontractor invoices from the Commitments tool. To learn more, see What permissions do you need to manage holds on subcontractor invoices?
Note
Users granted only Invoice administrator permissions are limited to creating, editing, and releasing Invoice Holds. They are limited to only viewing Vendor Holds on subcontractor invoices using a project's Commitments or Invoicing tool.- Navigate to the Project level Commitments tool.
- Under the Contracts tab, locate the contract in the table. Then, click the Number link to open it.
- In the contract, click the Invoices tab.
- Locate the invoice in the Invoices (Requisitions) table. Then, click the Invoice # link to open it.
- In the invoice, click the Holds tab.
I am using the Invoicing tool.
Payment Admins and Payment Disbursers can create, edit, view, and release Invoice or Vendor holds on subcontractor invoices from the Invoicing tool. To learn more, see What permissions do you need to manage holds on subcontractor invoices?
Note
Users granted only Invoice administrator permissions are limited to creating, editing, and releasing Invoice Holds. They are limited to only viewing Vendor Holds on subcontractor invoices using a project's Commitments or Invoicing tool.- Navigate to the Project level Invoicing tool.
- Click the Subcontractor tab, locate the invoice in the table.
- Click the Invoice # link to open it.
- Under Payment Requirements, click the Holds tab.
When you see the Holds tab on the subcontractor invoice, continue with the steps in Release Holds.
Release Holds
- In the Holds tab, Locate the hold to release.
Tips
- Not sure which hold to release? To view details about each manual hold, click the BLUE arrow to expand the hold details and view any attachments. You can alternatively click the Edit button. To learn more, see Edit a Manual Hold on an Invoice.
- Can't release a vendor hold? You must be a Payments Admin or Payments Disburser to release a vendor hold.
- Click the Release button.
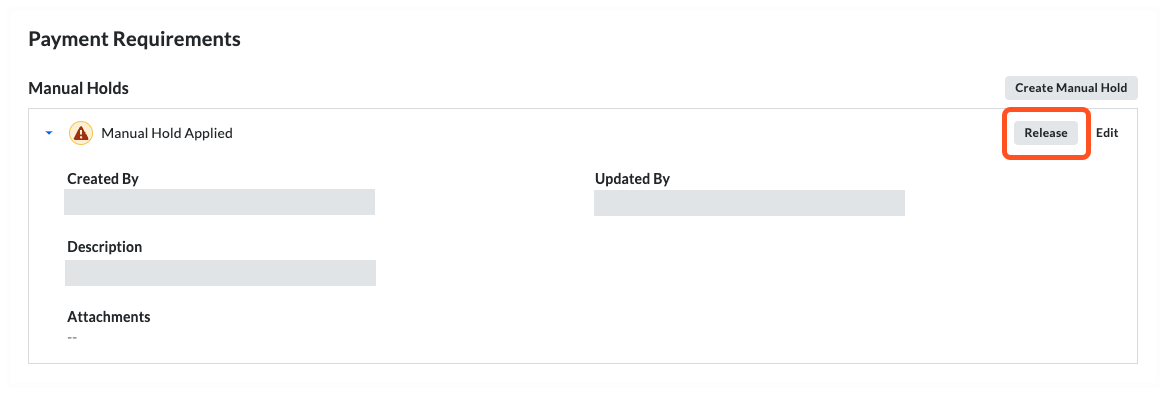
Procore releases the hold from the selected invoice. This action is logged in the invoice's Change History tab.
Configure Requirements
View Requirements
- Navigate to the Project level Invoicing tool.
- Click the Subcontractor tab
- Locate the invoice and click the Invoice # link to open it.
Tip
Did you know you can also open invoices from the Commitments tool? Navigate to the Commitments tool, click the commitment to open, and then click the Invoices tab. Click the Invoice # link and then follow the steps below. - In the invoice, click the Payment Requirements tab.
Available Payment Requirements
The Payment Requirements tab shows the following information:

Payment Requirements
Author Note: If you make changes to the table below, you must:
- Replace same table in this page: https://support.procore.com/products...ct-for-a-payee.
This table details the payment requirements.
Note
If you are an invoice administrator, these buttons are visible in this tab:
- View. Opens the subcontractor invoice so you can view or edit the corresponding item.
- Request. Lets you send an email request to an invoice contact to request that they unlock a signed unconditional lien waiver.
- Manage. Opens the Lien Rights tab of the subcontractor invoice.
| Category | Requirement | When the requirement is ON... | When the requirement is OFF... | Learn More |
|---|---|---|---|---|
| Commitment | Commitment Executed | Tracks the commitment associated with the invoice to ensure a check mark appears in the 'Executed' box. | Doesn't track the 'Executed' state on the commitment. | Create a Commitment Edit a Commitment |
|
Contract Compliant |
Tracks the status of the contract compliance documents for the commitment. | Doesn't track the compliance status of the insurance certificates | Manage Contract Compliance Documents & Statuses for a Commitment | |
|
Insurance Compliant |
Tracks the status of the insurance certifications for the commitment. | Doesn't track the compliance status of the insurance certificates. | Manage Insurance & Compliance Statuses for a Commitment | |
| Holds Released | Tracks the status of any payment holds applied to invoices. Holds must be released before payment. | Doesn't track invoices for payment holds. | Manage Payment Holds as a Payor | |
| Invoice | Change Orders Executed | Tracks change orders that impact the contract associated with the invoice and require them to be in the 'Executed' state. | Doesn't track change orders. | Create a Change Order |
| Invoice Approved | Tracks invoices to ensure they are in one of these statuses: Approved, Approved as Noted, and Pending Owner Approval. See What are the default statuses for Procore invoices? | Doesn't track invoice status. | Bulk Edit the Status of Subcontractor Invoices with the Invoicing Tool | |
| Owner Funding Received | Ensures the owner invoice is shown as fully paid on the 'Payment Received' tab. | Doesn't track 'Payment Received' entries on owner invoices or compare values on the subcontractor invoice. | Create a Record for a Payment Received | |
| Sync to ERP | Tracks the invoice to ensure it is synced with an integrated ERP system. | Doesn't track invoice syncing with ERP | ERP Integrations | |
| Lien Waiver | First-Tier Conditional Lien Waiver Signed | Tracks first-tier signatures on conditional lien waivers on your invoices. Note: Only appears on an invoice when the requirement is enabled on its project. See Enable Lien Waiver Templates on a Project. |
Doesn't track signatures | Create Lien Waiver Templates |
| First-Tier Unconditional Lien Waiver Signed | Tracks first-tier signatures on unconditional lien waivers for your invoices. Note: Only appears on an invoice when the requirement is enabled on its project. See Enable Lien Waiver Templates on a Project. |
Doesn't track signatures | Create Lien Waiver Templates | |
|
|
Tracks first-tier signatures on unlocked unconditional lien waivers for the commitment's previous invoices. Notes: Only appears on an invoice when the requirement is enabled on its project. See Enable Lien Waiver Templates on a Project. |
Doesn't track signatures | An invoice administrator can Send a Request to Unlock a Signed Unconditional Lien Waiver. An unconditional lien waiver can only be unlocked by an invoice contact. See Unlock a Signed Unconditional Lien Waiver as an Invoice Contact. |
|
| Conditional Sub-Tier Waivers Uploaded and Approved for this Invoice | Tracks when sub-tier waivers are in the 'Approved' status. This requirement will not exist on projects that has disabled sub-tier waivers. Note: If sub-tier waivers are disabled on a project, this requirement won't appear. See Enable the Sub-Tiers Card & Add Instructions on Project Invoices. |
Doesn't track signatures | Manage Sub-Tier Waivers | |
| Unconditional Sub-Tier Waivers Uploaded and Approved for this Invoice | Tracks when sub-tier waivers are in the 'Approved' status. This requirement will not exist on projects that has disabled sub-tier waivers. Note: If sub-tier waivers are disabled on a project, this requirement won't appear. See Enable the Sub-Tiers Card & Add Instructions on Project Invoices. |
Doesn't track signatures | Manage Sub-Tier Waivers |
About Lien Waivers
Lien Waiver Types
With Procore Pay, payors can create four (4) different types of lien waiver templates to use on their construction projects: Progress Conditional, Progress Unconditional, Final Conditional, and Final Unconditional.
Tip
How do you create a lien waiver template? See Create Lien Waiver Templates.| Progress | Final | |
|---|---|---|
|
Conditional |
Used for progress payments on a job. Waiver effective when signed. |
Used once for final payment on a job. Waiver effective when signed. |
|
Unconditional |
Used for progress payments on a job. Waiver effective when payment is received. |
Used once for final payment on a job. Waiver effective when payment is received. |
Enable Waivers & Set Default Templates
Enable Lien Waivers
- Navigate to the Project level Invoicing tool.
- Click the Settings
 icon.
icon.
This opens the Invoicing tool's Settings page. - Scroll to the Lien Waivers section. Then choose from these options:
Tips
- Don't see any options? The lien waiver settings must be enabled for Procore Pay. See Enable Lien Waivers in the Company Payments Tool. See The project must have a 'State' selected in the Project level Admin tool on the General tab in the Project Location section.
- What do the different lien waiver types mean? To learn about the types, see What types of lien waiver templates can you create?
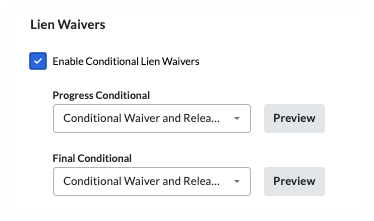
- Enable Conditional Lien Waivers
Mark this checkbox to enable the use of any conditional lien waiver templates created for use by your company. Clear the checkbox to disable the use of those templates. When you mark the checkbox, you also have the option to set the default template for the project:
Tips
- Why am I seeing a 'No template' message? If the 'No template' message appears, create a lien waiver template for the waiver type. See Create Lien Waiver Templates. To appear in this list, the 'State' defined for the template must match the Procore project's Project Location information.
- How do I know if a lien waiver is compliant with State requirements? For states that mandate the use of a specific lien waiver form, Procore Pay's Levelset integration provides lien waiver templates that comply with state requirements. For states without mandates, best practice templates are available. See Lien Waiver Release Forms - State by State
 on the Levelset website. Note: Your company must ensure that lien waiver templates comply with all applicable laws and regulations. Always consult a legal advisor.
 - Why can't I select a template from the drop-down list? If the drop-down list is grayed out and unavailable, Levelset's lien waiver database has determined that lien waiver type is unavailable in the project's State.
- What do the different lien waiver types mean? To learn about the types, see What types of lien waiver templates can you create?
- Progress Conditional
Select the template to use as your project's default lien waiver template. Click Preview to download a PDF version of the template. - Final Conditional
Select the template to use as your project's default lien waiver template. Click Preview to download a PDF version of the template.Tip
Why did the template open in a browser or third-party application? Your computer or browser settings are most likely configured to open PDF files automatically. To change your system's settings, search for instructions online or contact your company's IT department for assistance.
- Enable Unconditional Lien Waivers
Mark this checkbox to enable the use of any conditional lien waiver templates created for your company. Clear the checkbox to disable the use of those templates. When you mark the checkbox, you also have the option to set the default template for the project:
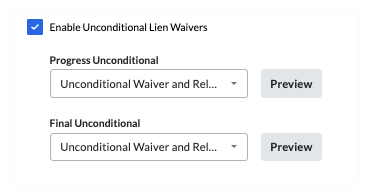
- Progress Unconditional
Select the template to use as your project's default lien waiver template. Click Preview to download a PDF version of the template. - Final Unconditional
Select the template to use as your project's default lien waiver template. Click Preview to download a PDF version of the template.
- Progress Unconditional
- Enter the name of the project's owner in the Property Owner field. This required field becomes active when the Conditional and/or Unconditional Lien Waivers options are enabled.

Note
The 'Property Owner' name can be added as a placeholder in a lien waiver template. See What variables can we include as placeholders in a lien waiver template? - Click Save.
Tip
Want to collect sub-tier lien waivers from the sub-tier contractors who perform work for your first-tier subcontractor? To learn how to enable sub-tier lien waiver collection, see Enable Sub-Tier Waivers on Subcontractor Invoices as an Invoice Administrator.Enable First- and Sub-Tier Waivers with Sworn Statements
For payors who want to collect sworn statements, contact your Procore point of contact for assistance with adding the sworn statement table to your custom template the first time.
- Navigate to the Project level Invoicing tool.
- Click the Settings icon.
This opens the Invoicing tool's Settings page. - Under First-Tier Waivers, choose one (1) or both of these options:
- Enable Conditional Lien Waivers
Mark this checkbox to enable the use of any conditional lien waiver templates created for your company. Clear the checkbox to disable the use of those templates. - Enable Unconditional Lien Waivers
Mark this checkbox to enable the use of any conditional lien waiver templates created for your company. Clear the checkbox to disable the use of those templates.Tips
- Are you planning to collect sworn statements in your lien waivers? Typically, users who enable sworn statement collection only choose the Enable Unconditional Lien Waivers option. To include sworn statements table in a custom template, contact your Procore point of contact.
- What do the different lien waiver types mean? To learn about the types, see What types of lien waiver templates can you create?
- Enable Conditional Lien Waivers
- Under When Should First Tier Lien Waivers be Requested, always choose the Request at Invoice Approval option. This option ensures Procore Pay only generates the project's lien waiver after your team has collected and/or input the required sub-tier information for the sworn statement.
- Under Sub-Tiers, mark the Enable Sub-Tier Waivers check box.
- Under How Should Sub-Tier Waivers be Collected on this Project?, always choose the Require Unconditional Waivers for the Current Invoice option.
- Mark the Display Custom Instructions about Sub-Tier Waiver Submission check box.
- Type any instructions in the Enter Custom Instructions box.
- Mark the Require Collection of Extended Sub-Tier Information for Use on Sworn Statements or Contractor Affidavits box.
- Enter the name of the project's owner in the Property Owner field. This required field becomes active when the Conditional and/or Unconditional Lien Waivers options are enabled.
Note
The 'Property Owner' name can be added as a placeholder in a lien waiver template. See What variables can we include as placeholders in a lien waiver template? - Under Templates, configure the desired lien waiver template for each enabled lien waiver type. Always select the lien waiver template that contains the sworn statement fields.
Tip
- Why am I seeing a 'No template' message? If the 'No template' message appears, create a lien waiver template for the waiver type. See Create Lien Waiver Templates. To appear in this list, the 'State' defined for the template must match the Procore project's Project Location information.
- How do I know if a lien waiver is compliant with State requirements? For states that mandate the use of a specific lien waiver form, Procore Pay's Levelset integration provides lien waiver templates that comply with state requirements. Best practices templates are available on the Levelset website. See Lien Waiver Release Forms - State by State . Your company must ensure that your lien waiver templates comply with all applicable laws and regulations. If you have questions, consult a legal advisor.
- Why can't I select a template from the drop-down list? If the drop-down list is grayed out, that type of lien waiver is not available in the project's state, according to Levelset's lien waiver database.
- Click Save.
Generate Lien Waivers
- Create a new invoice or open an existing invoice on a Procore project.
Tip
How do you create an invoice? An invoice administrator can create an invoice and enter the data on behalf of the invoice contact. Alternatively, the administrator can invite the downstream collaborator's invoice contact to enter and submit their invoice. See Create a Subcontractor Invoice. - In the invoice, scroll down to the Lien Waivers card.
Procore Pay automatically generates the appropriate lien waiver(s) and shows the date on the Lien Waivers card. New lien waivers are automatically placed in the Pending Signature status.

Tips
- How does Procore know what kind of lien waiver(s) to generate? First, your company's Payments Admin follows the steps in Create Lien Waiver Templates and Enable Lien Waivers in the Company Payments Tool. Next, an invoice administrator on your project follows the steps in Enable Lien Waivers & Set Default Templates on Projects. The project must have a 'State' selected in the Project level Admin tool on the General tab in the Project Location section. It must also match the 'State' defined in the project's default template.
- Don't see a Lien Waivers card on the invoice? A Payments Admin must Enable Lien Waivers in the Company Payments Tool. In addition, an invoice administrator must complete the steps in Enable Lien Waivers & Set Default Templates on Projects. Once enabled, the Generate Lien Waivers button appears.
- Are specialty contractors notified about lien waivers? Yes. To alert specialty contractors when one or more lien waivers are available to sign, Procore Pay sends an automated email notification to all designated invoice contacts on the commitment. See Add Invoice Contacts to a Purchase Order or Subcontract.

Preview Lien Waivers
- Create a new invoice or open an existing one.
Tips
How do you create a new invoice? The steps you follow in your environment depend on your role and the permissions you've been granted to the Invoice Management tools in the payor's Procore project. See Create a Subcontractor Invoice.
- In the invoice, scroll to the Lien Waivers card.
- Locate the lien waiver to preview in the table. The table lists lien waivers in the 'Pending Signature' and/or 'Signed' state.
Tip
How does Procore populate the lien waivers list? First, your company's Payments Admin follows the steps in Create Lien Waiver Templates and Enable Lien Waivers in the Company Payments Tool. Next, an invoice administrator on your project follows the steps in Enable Lien Waivers & Set Default Templates on Projects. The template(s) that populate the list in the Lien Waivers card are based on the 'Billing Type' option set on the invoice and the default template.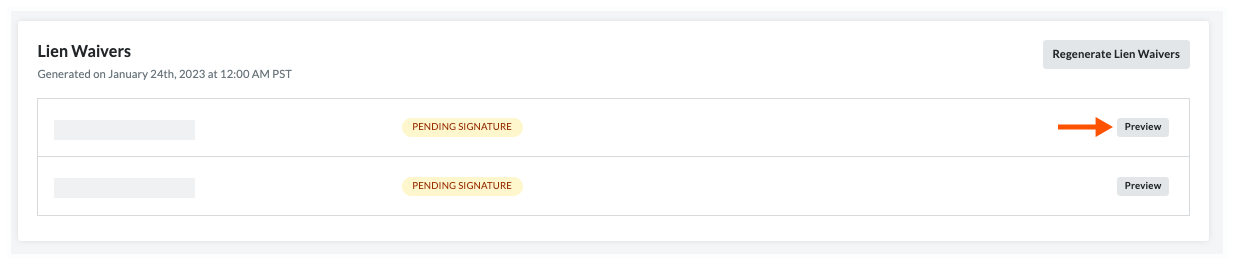
- Optional. Click the Preview button.
This downloads a PDF copy of the lien waiver to your computer.Tips
- Where is the downloaded file? Most web browsers save files to a Downloads folder on your computer. To find this location, Procore recommends checking your web browser's settings. You can also search for instructions online or contact your IT department for assistance.
- Why is the downloaded file opening automatically? Your computer's operating system or web browser is most likely configured to open PDF files in a specific software program. To change this setting, search for instructions online or contact your IT department for assistance.
- Why does my button label say View? After an invoice contact signs a lien waiver, the status of the lien waiver changes to 'Signed', and the Preview button's label changes to View.
Request to Unlock Signed Unconditional Waivers
- Navigate to the Project level Commitments tool.
- Locate the contract for the invoice with the signed unconditional lien waiver. Then click its Number link to open it.
- In the commitment, click the Invoices tab.
- Locate the invoice with the signed unconditional lien waiver. Then click the Invoice # link to open it.
- In the invoice's General tab, scroll down to the Lien Waivers card.
- Optional. To send an email request to unlock the unconditional lien waiver to the invoice contact on the commitment, click Request.

- At the Send Request to Unlock Lien Waiver? prompt, click Send Request.
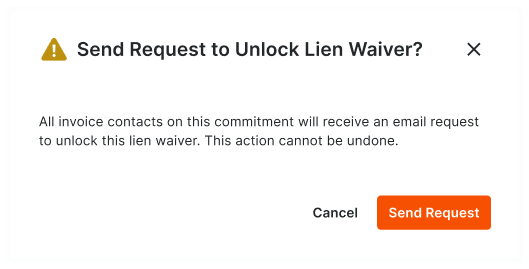
A GREEN banner appears to confirm that the system sent a request to unlock the lien waiver to all invoice contacts designated on the commitment. As shown below, the GRAY banner corresponding to the lien waiver shows the last requested date and time.

Tip
Need to send another request at a later time? You can send another request at a later time by clicking the Request Again button.
What is a sub-tier subcontractor?
Enable Sub-Tier Waivers on a Subcontractor Invoice
- Navigate to the Project level Invoicing tool.
- Click the Settings icon.
- Scroll to the Lien Waivers section.
Tips
- Don't see any options? Lien waivers must enabled for Procore Pay. See Enable Lien Waivers in the Company Payments Tool.
- Mark the Enable Sub-Tier Waivers check box to show the 'Sub-Tiers' card on the 'Lien Rights' tab of the project's subcontractor invoices. Clear the checkbox to hide the sub-tier card.
- Under the How should sub-tier waivers be collected on this project? section, you have these options to collect signed waivers from sub-tier contractors:
Note
Invoice contacts must collect signatures from their sub-tier contractors outside of Procore. Next, they upload and submit the signed waivers with their subcontractor invoice for the Open billing period. See Upload Sub-Tier Waivers to a Subcontractor Invoice as an Invoice Contact.- Require unconditional waivers from all sub-tiers before paying the next invoice
Most payors collect unconditional waivers for the previous invoice before paying the next invoice. - Require either a conditional or unconditional waiver from each sub-tier before paying the current invoice, and ensure a complete set of unconditional waivers before paying the next invoice
Some payors collect either a conditional or unconditional waiver before paying the current invoice. They also ensure a complete set of unconditional waivers are collected for the previous invoice, before paying the next invoice. - Require unconditional waivers from all sub-tiers before paying the current invoice
Some payors collect only unconditional sub-tier waivers before paying the current invoice.
- Require unconditional waivers from all sub-tiers before paying the next invoice
- Mark the Display Custom Instructions About Sub-Tier Waiver Submission checkbox to type a custom instruction message about sub-tier waiver submissions in the Enter Custom Instructions box.
Example
If you only want to collect sub-tier waiver signatures from sub-tier subcontractors who invoiced over a certain amount (for example,$10,000.00), type the instructions and the amount in the text box. If you require notarized signatures on sub-tier waivers, include that in the instructions.

The 'Instructions from [General Contractor Name]' area on the sub-tiers card. If you are NOT required to collect waiver information on an invoice, the 'Sub-Tier Information for This Invoice' card appears on the invoice. If you are required to collect waivers for the current invoice or a previous invoice, the card name(s) match the project's waiver collection requirements set on the Invoicing tool by an invoice administrator. See Enable Sub-Tier Waivers on Subcontractor Invoices as an Invoice Administrator.

- Under Property Owner, type the property owner's name. Your entry appears on this project's first- and sub-tier lien waivers.
- Under Templates, select the desired lien waiver template for each lien waiver type from the drop-down lists.
Tips
- What are the different lien waiver types? What type of lien waivers can you create in Procore Pay?
- How do you enable a lien waiver type in Procore Pay? See Enable Lien Waivers & Set Default Templates on Projects and Enable Sub-Tier Waivers on Subcontractor Invoices as an Invoice Administrator.
- Click Preview to view your selected lien waiver types.

- Click Save.
Add Sub-Tier Information for a Subcontractor Invoice
Note for subcontractors
To add or update sub-tier information, the invoice must be in Draft or Revise & Resubmit status.
To access the sub-tier entry fields:
1. Open the subcontractor invoice in Edit mode.
2. Click Next to progress through the invoice tabs.
3. Locate the Lien Rights section to edit information and click Save.
- Navigate to the Project level Invoicing tool.
- Click the Subcontractor tab to view a list of the project's subcontractor invoices.
- Locate the invoice and click its Invoice # link to open it.
- In the invoice, click the Lien Rights tab.
- Scroll to the Sub-Tier Waivers card for this invoice.
Note
The invoice may include one or more sub-tier waiver cards based on the project's configuration settings for waiver collection. See Enable Sub-Tier Waivers on Subcontractor Invoices as an Invoice Administrator. - Choose from these options:
Add Sub-Tiers
To provide a complete list of everyone working on a project:
- Scroll to the desired sub-tier card in the invoice and click Edit.

This places the selected card into editing mode. - Click Add Sub-Tier at the bottom of the data table, and click Create New.

This opens the Add Sub-Tier panel. - Enter the following information in the line item:
Note
An asterisk (*) below denotes a required field.- Sub-Tier Company Name.* Type a name for the sub-tier.
- Kind of Work. Enter the type of work for the sub-tier company. This is a free-form text entry.
- Hired By. Choose the sub-tier's hiring company from the Contract Company or Sub-Tiers section of the drop-down list.
- Phone Number. Type the primary telephone number for this sub-tier.
- Sub-Tier Type. Choose the Supplier or Subcontractor option to indicate the company's business type.
- Street Address. Type the primary address for this sub-tier.
Note
To add an apartment, suite, or unit number, click the Add Apt, Suite, Unit link to show those entry fields. - City.* Enter the city for this sub-tier's primary address.
- State.* Enter the state for this sub-tier's primary address.
- ZIP.* Enter the postal code for this sub-tier's primary address.
- Country.* Enter the country for this sub-tier's primary address.
- Amount Billed This Invoice*. Enter the amount the sub-tier billed you for this invoice.
Important
No amount billed for this invoice? If one of the listed sub-tiers didn't bill an amount for this invoice, enter $0.00 in the Amount Billed This Invoice field. This field cannot be blank. - Est. Contract Amount. Enter the estimated contract amount for the sub-tier.
- Sub-Tier Waiver Contact Email Address. Type the email address of the person signing the lien waiver for the sub-tier subcontractor. This person does not need a Procore user account.
- Billing Type. Choose Progress or Final.
- Click Add Sub-Tier.
- Repeat the step above for each sub-tier subcontractor.
- Click Save.
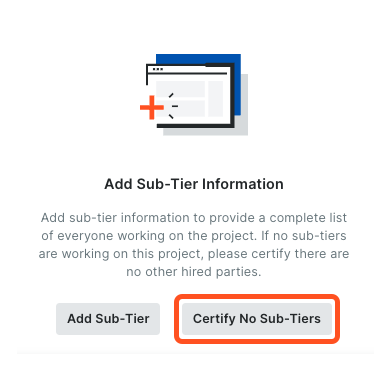
Certify No Sub-Tiers
If there are no sub-tier subcontractors for the project invoice, click the Certify No Sub-Tiers button. The message 'You have certified no sub-tiers are involved in this project' appears.
View Sub-Tier Information on a Subcontractor Invoice
- Navigate to the Project level Invoicing tool.
- Click the Subcontractor tab.
- Locate the invoice to open in the table.
- Click the Invoice # link to open it.
- Click the Lien Rights tab.
Tip
Don't see the 'Lien RIghts' tab? A user with the appropriate permissions must complete the steps in Enable Lien Waivers in the Company Payments Tool. - Scroll to the Sub-Tiers card.
Tips
- Don't see the 'Sub-Tiers' card? A user with the appropriate permissions must complete the steps in Enable Sub-Tier Waivers on Project Invoices.
- No sub-tier information? To learn how sub-tier information is added to an invoice, see Add Sub-Tiers to a Project Invoice.
- View the information added to the Sub-Tiers card.
Tips
- Can I view details about a specific sub-tier waiver? Yes. After a waiver is uploaded to Procore, you can click the View or Review button. The cards and button labels you see depend on the waivers being collected, your role, and the status of a waiver. See What are the default statuses for sub-tier lien waivers in Procore Pay?
- Can I download a sub-tier waiver? Yes. Click the Download
 icon in the Waivers column.
Sub Tiers Card
The Sub-Tiers card shows information about sub-tier subcontractors on the project invoice. This table details the columns in all sub-tier cards. To learn about the different cards, see Upload Sub-Tier Waivers to a Subcontractor Invoice as an Invoice Contact. To learn how to add information to a card, see Add Sub-Tiers to a Project Invoice.
| Column Name | Description |
|---|---|
| Sub-Tier Name | Shows the name of the sub-tier subcontractor. |
| Billing Type | Shows the invoice's billing type: Progress or Conditional. |
| Amount Billed on this Invoice | Shows the amount you were billed by the sub-tier subcontractor for this invoice. If a sub-tier subcontractor didn't bill on this invoice, $0.00 shows in this box. |
| Amount Billed to Date | On a Progress invoice, shows the total amount billed by the sub-tier from any previous invoices. This total includes the amount in the 'Amount Billed on this Invoice' box. On a Final invoice, shows the total amount billed for all invoices. This includes the amount on this invoice in the 'Amount Billed on this Invoice' box. |
| Est. Contract Amount | Shows the estimated contract amount for the sub-tier. |
Review Sub-Tier Lien Waviers as an Invoice Administrator
- Navigate to the project's Invoicing tool.
- Click the Subcontractor tab.
- Locate the invoice to open in the table.
- Click the Lien Rights tab.
- Depending on the lien waivers that your team collects, you will see one or more of the following cards on the invoice:
Tip
How do we decide what type of lien waivers to collect? Your project team makes that decision. Your team can show or hide these cards on the project's invoices on the Invoicing Settings page. To learn more, see Configure Settings: Invoicing.- Unconditional Sub-Tier Waivers for the Previous Invoice. When you see this card, your team collects signed unconditional sub-tier waivers for the previous billing period. An invoice contact must first upload the signed sub-tier waivers with their subcontractor invoice for the current Open billing period. See Upload Sub-Tier Waivers to a Subcontractor Invoice as an Invoice Contact.
- Unconditional Sub-Tier Waivers for this Invoice. When you see this card, your team collects signed unconditional sub-tier waivers for the current Open billing period. An invoice contact must first upload the signed sub-tier waivers with their subcontractor invoice for the current Open billing period. See Upload Sub-Tier Waivers to a Subcontractor Invoice as an Invoice Contact.
- Conditional Sub Tier Waivers for this Invoice. When you see this card, your team collects signed conditional sub-tier waivers for the current Open billing period. An invoice contact must first upload signed sub-tier waivers with their subcontractor invoice for the current Open billing period. See Upload Sub-Tier Waivers to a Subcontractor Invoice as an Invoice Contact.
- Sub-Tier Information for this Invoice. When you see this card, sub-tier waivers aren't being collected. There will be no waivers to review in this card.
- Scroll to the card that contains the sub-tier waivers to review. Once sent by an invoice contact, the waivers are placed in the Review Pending status.
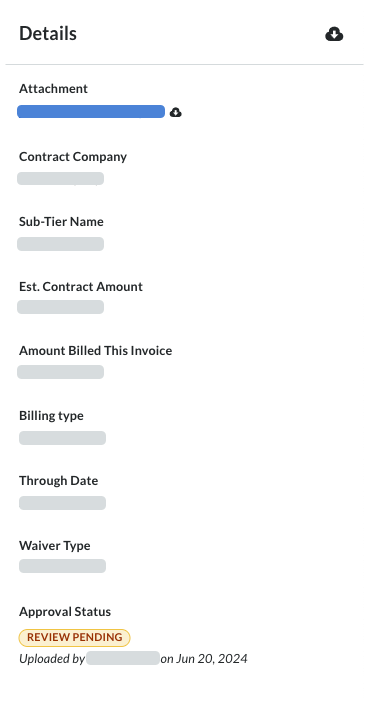
- In the Waivers column, click Review.
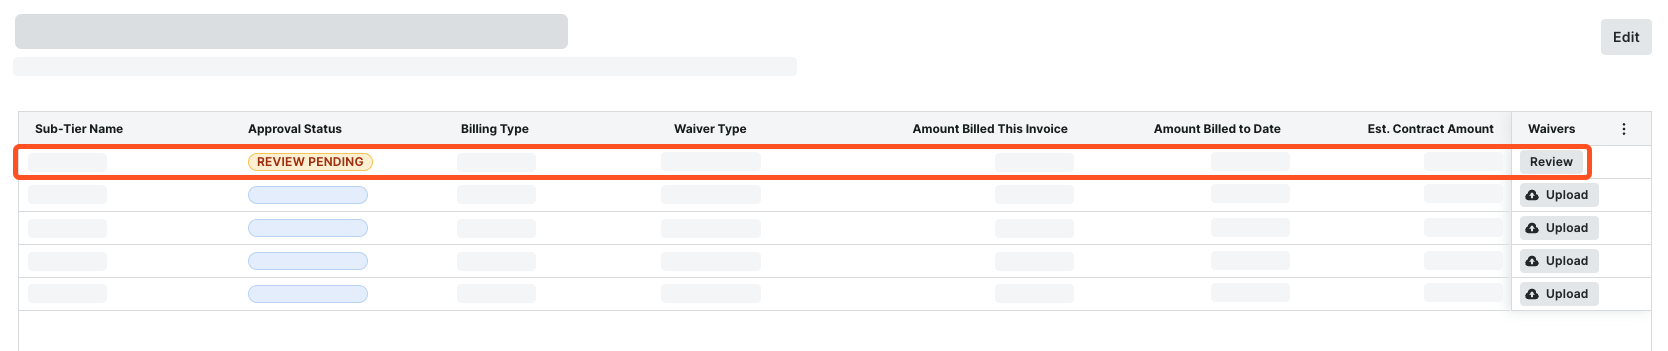
This opens the waiver in the attachment viewer. The Details pane is active.Notes
In the Details pane, you can also:
- Click the Download icon to download a copy of the file.
- Edit the value in the Amount Billed This Invoice field and the Billing Type setting.
- Click the Download
- Review the file and its details.
Next, request a revision or approve a waiver.
Request a Revision
If the waiver is missing information or a signature, you can request a revision:
- In the Details pane, click Request Revision.

This opens the Request Revision window. - In the Reason for Revision box, enter an explanation for the request. Include any details about the revision request for the waiver contact.
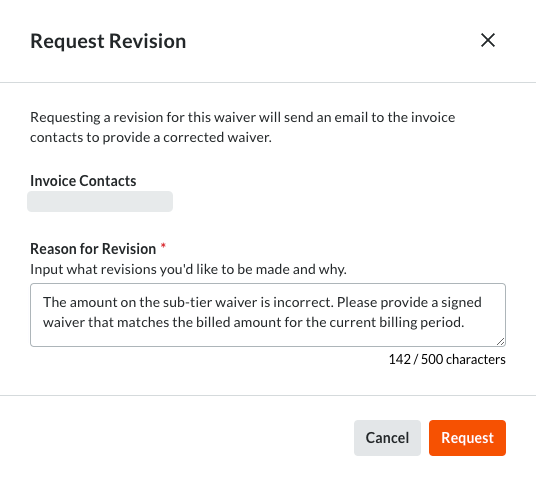
- Click Request.
Procore Pay notifies the invoice contact of the request by email.
Approve a Waiver
To approve the submitted sub-tier waiver, click Approve in the Details pane. This changes the status to Approved.

Once Approved, the sub-tier waiver requirement for the invoice is met. See Configure Payment Requirements.