Payee: User Guide
General Availability in Select Markets (United States)
 Procore Pay
Table of Contents
- Welcome
- Sign the Commitment
- Commitment is Approved
- Pay Agreements
- Steps to Invoice
- Manage Lien Waivers
- Sub-Tier Waivers
- Submit an Invoice
- Done! What happens next?
Get Started as a Payee
 |
This Payee User Guide provides specialty contractors with the steps you need to take to receive payments from a general contractor using Procore Pay. This guide provides an overview of Procore Pay and shows you how to:
NoteIf have not yet set up Procore Pay for your company, first follow the steps in the Payee Setup Guide. |
What is Pay?
Important
Author note: Link to source file: https://docs.google.com/presentation...98af4431df_0_0Pay builds on the existing Project Financials and Invoice Management tools in Procore to streamline the subcontractor invoice payment process and automate the lien waiver exchange.
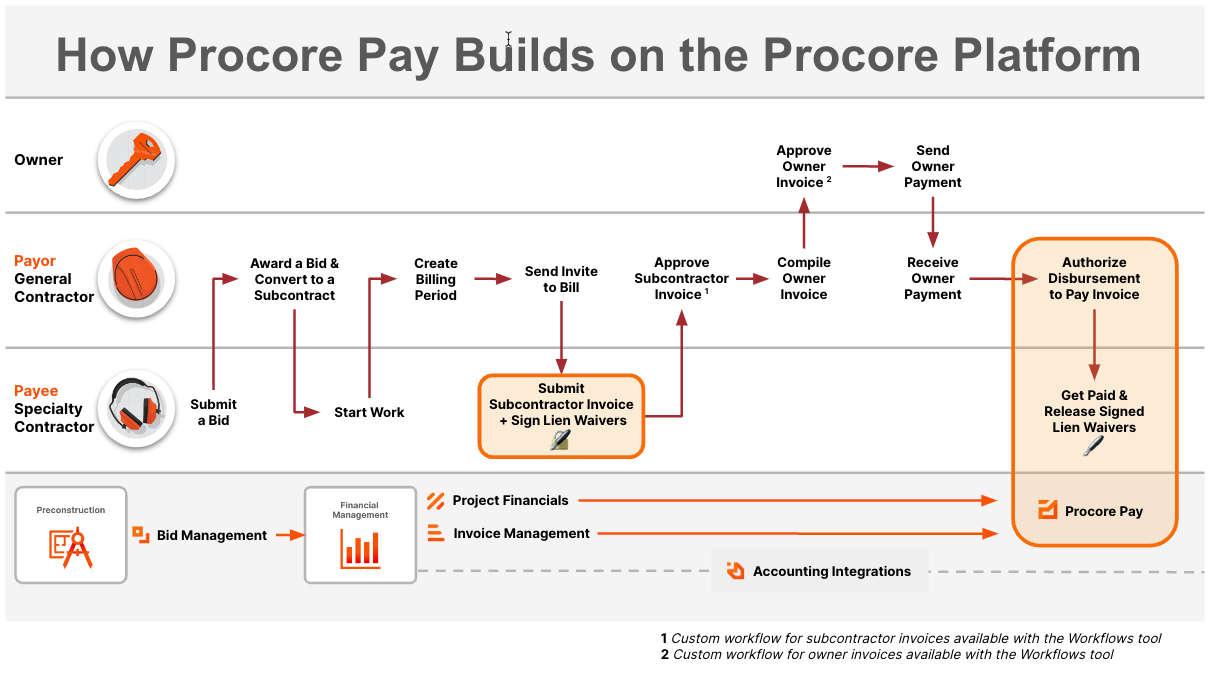
Process to Receive Payment
.png?revision=3)
Required User Permissions
Show/Hide Permissions
Permissions
Important
 Users can take the action with this permission level. Users only need ONE of the marked permissions per row to take the action.
Payment Administrators have access to the Payments tool and permissions to take any action within the tool. When the tool is initially set up for a payee company, either by setting up Procore Pay or accepting an invitation to Procore Pay, the existing Company Administrators and System Administrators are given Payment Administrator permissions.
After the initial set up, Payment Administrator permissions are managed solely in the Payments tool.
| In your Payee Account | In the Payor's Account | ||
|---|---|---|---|
| Action (Alphabetical) | Payment Admin
|
'Read Only' or higher on Project Commitments | Notes |
|
Add a Bank Account as a Payee |
|||
|
Deactivate a Bank Account as a Payee |
|||
|
Disable Payments as a Payee |
|||
|
Edit a Bank Account as a Payee |
|||
|
Generate Lien Waivers on Subcontractor Invoices |
Users must also be the designated Invoice Contact on the commitment. | ||
|
Manage Active Procore Pay Agreements as a Payee |
|||
|
Manage Payment Permissions |
|||
|
Preview Lien Waivers on Subcontractor Invoices |
Users must also be the designated 'Invoice contact' on the commitment. | ||
|
Reassign a Procore Pay Invitation Web |
No permissions in Procore are required to reassign a Procore Pay invitation. However, to receive the initial invitation, users must have 'Read Only' level permissions or higher to the payors account's Commitments tool and be the designated Invoice Contact on the commitment. | ||
|
Regenerate Lien Waivers on Subcontractor Invoices |
|||
|
Review and Accept a Pending Procore Pay Agreement as a Payee |
|||
|
Search and Filter Payments as a Payee |
|||
|
Send a New Invoice as an Invoice Contact Using Procore Pay |
Users must also be the designated Invoice Contact on the commitment. | ||
|
Send a Request to Unlock a Signed Unconditional Lien Waiver |
Users must also be the designated Invoice Contact on the commitment. | ||
|
Set Up Procore Pay as a Payee |
Users with 'Read Only' access or higher on the Commitments tool must also be the designated Invoice Contact on the commitment. | ||
|
Share Lien Waiver Signature Authority from a Subcontractor Invoice |
Users must also be the designated Invoice Contact on the commitment. | ||
|
Share Lien Waiver Signature Authority from an Email |
Users must also be the designated Invoice Contact on the commitment. | ||
|
Sign Lien Waivers on Subcontractor Invoices |
Users must also be the designated Invoice Contact on the commitment. | ||
|
Unlock a Signed Unconditional Lien Waiver as an Invoice Contact |
Users must also be the designated Invoice Contact on the commitment. | ||
|
Upload Bank Verification Documentation as a Payee |
|||
|
View Bank Accounts as a Payee |
|||
|
View Payment Requirements as an Invoice Contact |
Users must also be the designated Invoice Contact on the commitment. | ||
|
View Signed Lien Waivers on Subcontractor Invoices |
Users must also be the designated Invoice Contact on the commitment. | ||
|
View the Payments Dashboard as a Payee |
|||
|
View the Payments List as a Payee |
What is a Commitment?
Sign and Upload as an Attachment
Sign with DocuSign
- Open the signature request email you received from DocuSign®.
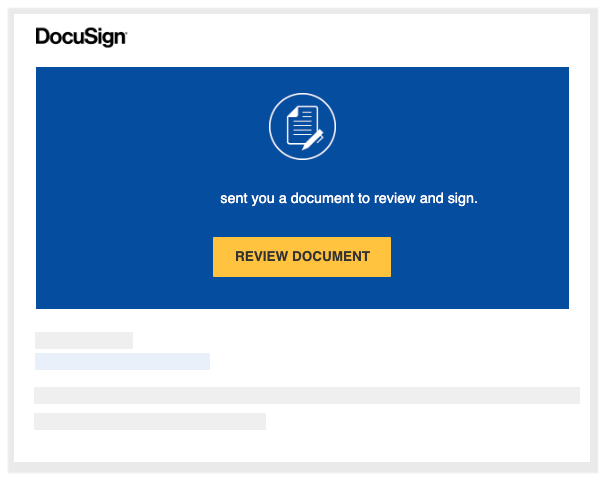
- Click Review Document.
This launches the DocuSign® application.Note
- You do NOT need a DocuSign® account to review or sign a document. See Do I need a DocuSign© account?
- In the 'Please Review & Act on These Documents' window, do the following:

- Click the Electronic Record and Signature Disclosure. You must read and agree to the 'Agreement to do business' page that appears. You have download, print, and close the page.
- After reading the disclosure, place a mark in the I agree to use electronic records and signatures check box.
- Click Continue.
- Click Start on the left side of the page. This takes you to the first place to sign (or initial) in the document.
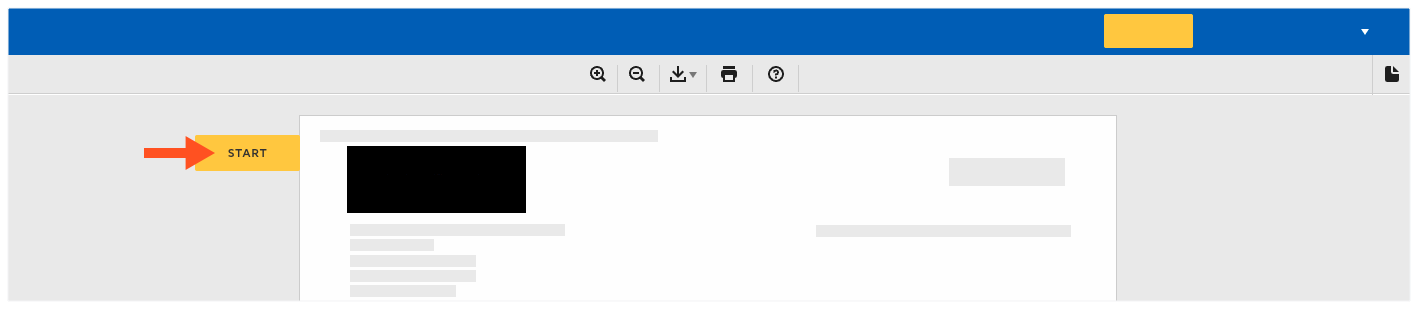
- Click the Sign box.
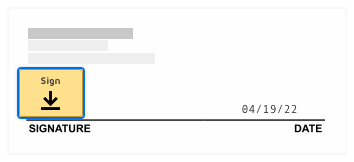
- If this is the first time you are signing a document, the 'Adopt Your Signature' window appears.
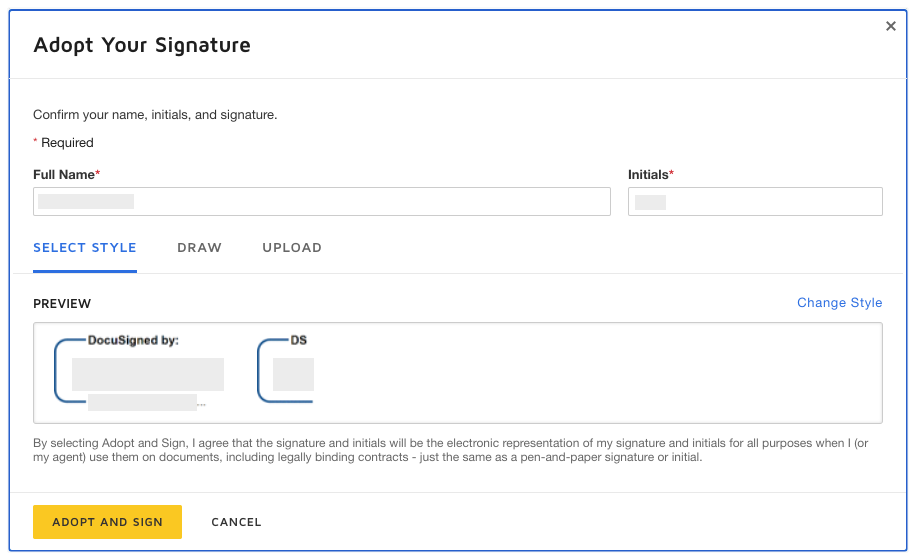
- Full Name. Type your full name in the box.
- Initials. Type your initials in the box.
Note
You can optionally change the style of your signature, draw your signature, or upload a signature. To learn how to use these features, visit: https://support.docusign.com
- When you are ready to proceed, click Adopt and Sign.
The Required Signature applied tooltip appears.
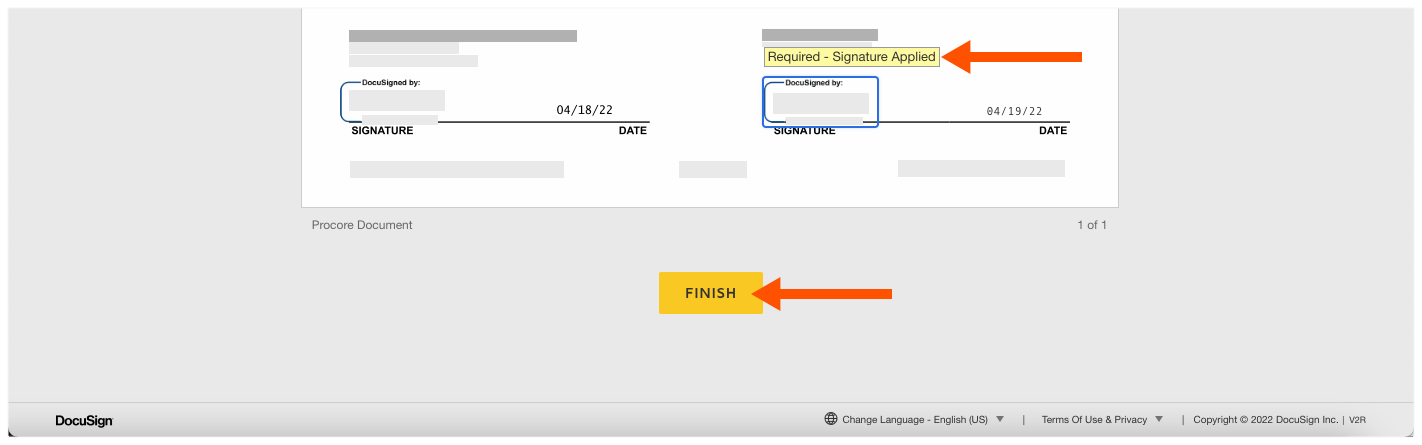
- Some documents require you to sign in more than one position. Continue to sign the document as required, until you reach the Finish button.
- When you are ready to complete the signature process, click Finish.
Note
A message appears to confirm you are done signing. Use the Download or Print icon to save a copy of the signed document. The sender in Procore receives an email notification with a copy of the signed document. The signed document is saved in the sender's Procore and DocuSign® accounts.
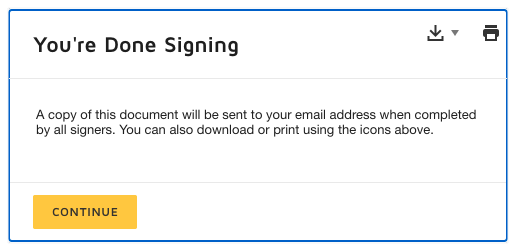
- Click Continue.
DocuSign® sends you an email copy when all of the required signatures are completed.
Commitment is Approved
Considerations
Review and Accept Pay Agreements
What is a Subcontractor Invoice?
Receive the Invite to Bill
When a General Contractor sends a downstream collaborator an 'Invite to Bill', they invite an invoice contact to send a response. If you receive an invite, the Invited By person is the invoice administrator for the commitment that the invoice is billing against. This means you are an invoice contact and you can submit an invoice for work completed in the Billing Period. For instructions, see Respond to the Invite to Bill.
Tip
Does Procore send reminders about a Due Date? Yes. Procore emails a reminder to the invoice contact before the Due Date. It also sends a daily reminder after the Due Date passes. To limit the number of reminders you receive, always submit a Yes or No response before the Due Date. After you send your completed invoice or a No response, the reminders stop.
Example
Below is an example of an 'Invite to Bill' sent to an invoice contact. The Subject line is: "Project Name: [Procore User] has invited you to bill." Note that the do-no-reply address from Procoretech is unmonitored and only sends transactional notifications.
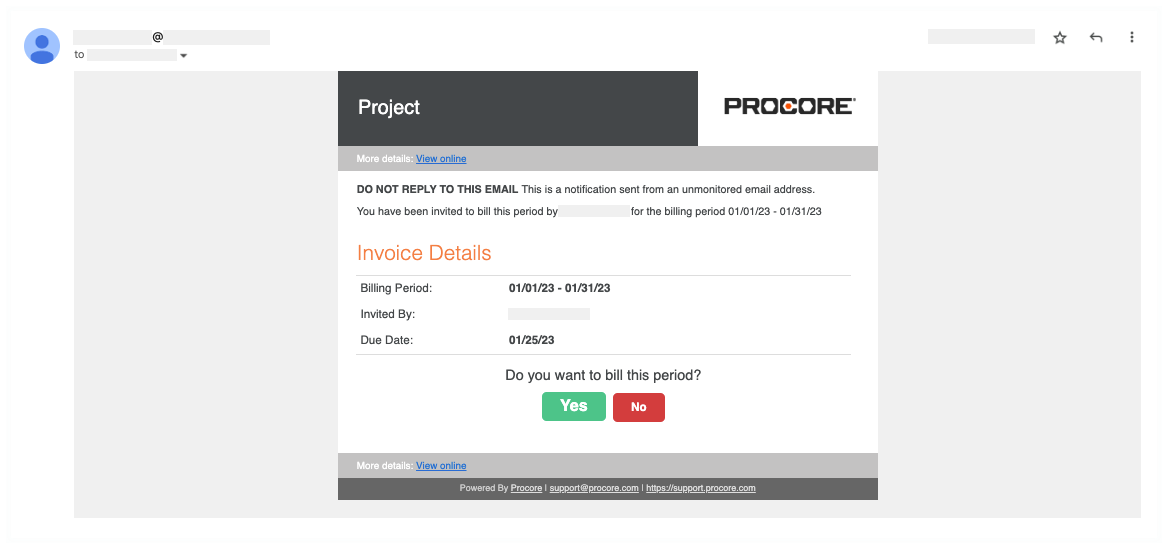
Accept the Invite to Bill
To respond, review the Invoice Details in the invite. Under Do you want to bill this period? click a button:

- Yes
- To submit an invoice now, click Yes to launch the Procore web application and log in. Next, continue with Update the New Invoice.
- To submit an invoice later, keep the invite and click Yes or No before the Due Date.
- No
- To decline the invite, click No before the Due Date. A Thank You message acknowledges your response. To change your response, click Yes before the Due Date.
Tip
Can't find your 'Invite to Bill'? Invoice contacts are granted permission to log into the Procore project. They also have 'Read Only' permissions or higher on the Commitments tool. If you can't find your invite, you can submit your invoice directly using the Commitments tool. For instructions, see What if my 'Invite to Bill' is lost or missing?Update the General Information
In the New Invoice for [Contract #] page, update these sections: General Information and Schedule of Values before clicking Send.
Example
Below is an example of the New Invoice for [Contract #] page that uses the Amount-Based accounting method. There are two accounting methods in Procore, but an invoice administrator can only select one for all of a project's contracts and invoices. See How do I set the accounting method for a contract?
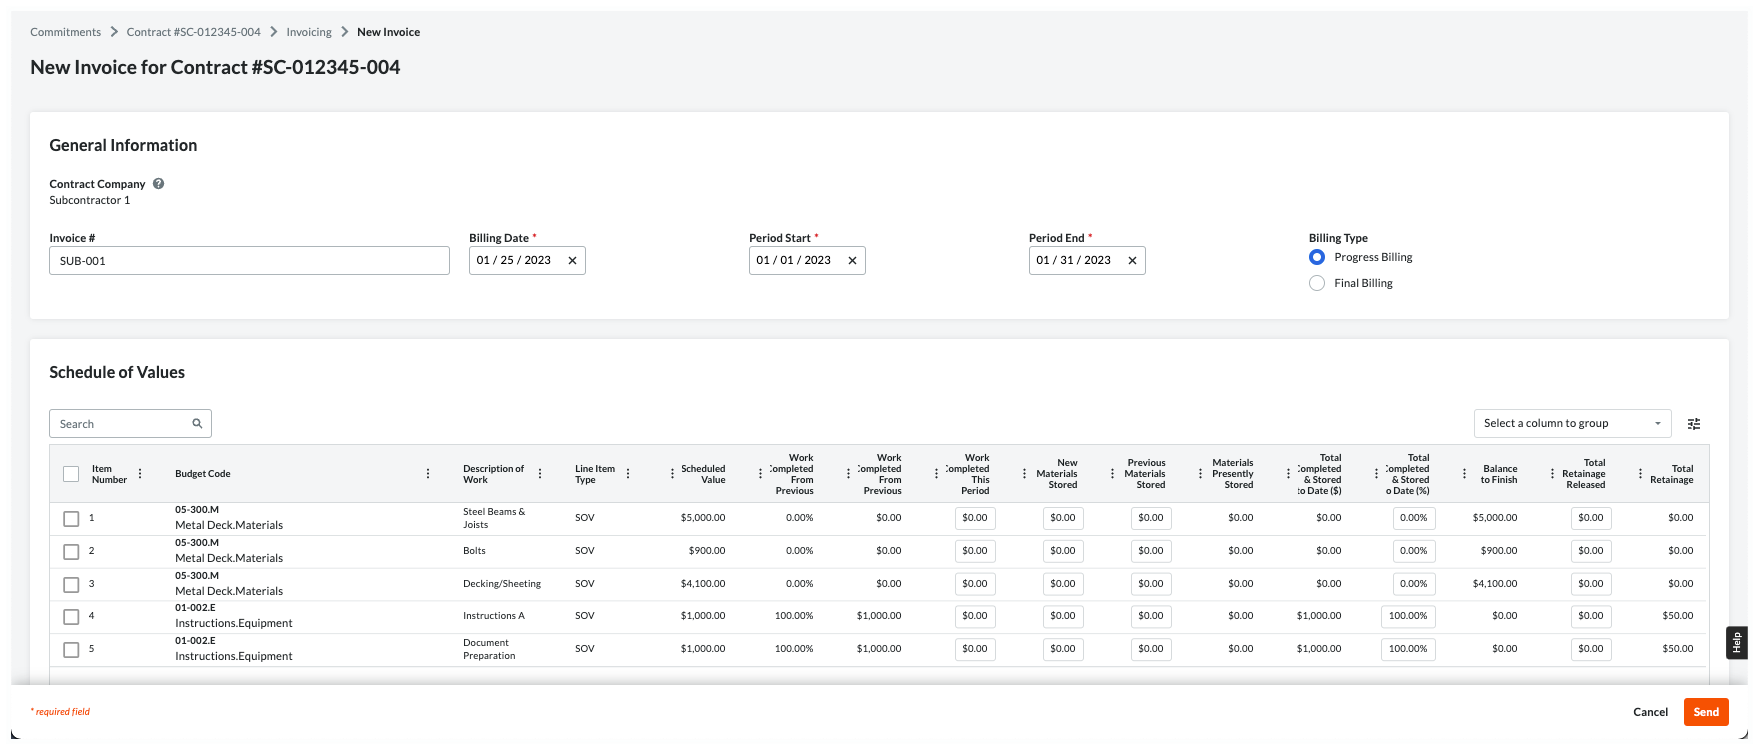
General Information
This table provides you with helpful information to complete the data entry.
Notes
- The 'Billing Type' option buttons are only available with Procore Pay when a Payments Admin completes the steps in Enable Lien Waivers on All Projects. A user with 'Admin' level permissions on the Invoicing tool can also Set the Default Lien Waivers on a Project.
- In the table below, an asterisk (*) indicates an entry is required.
| Field | Field Type | Description | How to complete the entry... | How is this created? |
|---|---|---|---|---|
| Contract Company | Read Only | Shows your company name. Note: This is the 'Contract Company' assigned on the purchase order or subcontract. The name is stored in the Company Directory. |
Verify your company name. If the name is wrong, contact the Invited By person on the 'Invite to Bill'. Important! Do not attempt to contact the person by replying to the invite. It's sent from an unmonitored do-no-reply address. |
Add a Company to the Company Directory |
| Invoice # | Text | Optional. Enter your invoice number. | If your company is using custom invoice numbers, you can enter your invoice number here for reference. You can also leave the field blank. | - |
| Billing Date* | Date | Shows the billing date for the current billing period. This is set by the invoice administrator. | Leave the date or choose a different one. | Manage Billing Periods |
| Period Start* | Date | Shows the start date for the current billing period. This is set by the invoice administrator. | Leave the date or choose a different one. | Manage Billing Periods |
| Period End* | Date | Shows the end date for the current billing period. This is set by the invoice administrator. | Leave the date or choose a different one. | Manage Billing Periods |
| Billing Type: Progress Billing |
Option | Shows the 'Billing Type' option. Set by the invoice administrator, this determines whether you sign a Progress or Final lien waiver. Note: Depending on your agreement, you may be required to sign a Conditional and/or Unconditional lien waiver. |
Select this option if you will be billing incrementally for work completed. Note: To learn the difference between a Progress Conditional and Progress Unconditional lien waivers, see How are lien waivers categorized? |
Set the Default Lien Waivers on a Project |
| Billing Type: Final Billing |
Option | Shows the 'Billing Type' option. Set by the invoice administrator, this determines if you must sign a Progress or Final lien waiver. Note: Depending on your agreement, you may be required to sign a Conditional and/or Unconditional lien waiver. |
Select this option if this is your final invoice. To learn about lien waiver types, see What is a lien waiver? Note: To learn the difference between Final Conditional and Final Unconditional lien waivers, see How are lien waivers categorized? |
Set the Default Lien Waivers on a Project |
Update the Schedule of Values
Important
Before you get started, important things to know about the Schedule of Values:
- What is the accounting method? An invoice administrator sets the accounting method for your contract. This cannot be changed. To learn more, see How do I set the accounting method for a contract or funding?
- For companies using a multi-tier change order configuration setting for Contract Management in Project Financials:
- The 'Change Orders' section is only visible and available when the company's Procore Administrator has enabled the two (2) or three (3) tier change order configuration on the commitment. See Configure the Number of Commitment Change Order Tiers.
- After expanding a line in the 'Change Orders' section, click the commitment change order line(s) and potential change order line(s) in order to expand them until you reach the data entry line items.
Amount-Based Accounting Method
Use this method to invoice lump-sum amounts for the invoice line items on the Schedule of Values (SOV). Procore automatically calculates and adjusts the other entries on the line item for you. If you want to release retainage, enter a dollar amount as needed. Depending on your specific commitment, you may also have the option to bill for stored materials (pictured below). For details about the additional columns that appear when billing for stored materials, see About Stored Materials on Invoices.
Click here for more detailed information about the Amount Based accounting method.
Unit-Based Accounting Method
Use this method when invoicing for materials you've ordered in quantity. With this method, you either enter a percentage value 'Total Progress' column or a monetary value in the 'Work Progress' column. Procore automatically calculates and adjusts the other entries on the line item for you. If you want to release retainage, you can enter a dollar amount in the 'Retainage Released' column needed.
Click here for more detailed information about the Unit-Based accounting method.
The Unit-Based accounting method requires you to enter a quantity and unit price for each line item on the SOV. With this method, Procore automatically calculates line item totals for you.
Note
An asterisk (*) in the list below indicates that you can edit the value of the SOV line item on your invoice.- Quantity
Shows the total number of units for the line item. - Unit Price
Shows the expense incurred for each unit for the line item. - Value
Shows the total dollar amount of the line item. This is the sum of the Unit Price + Quantity values. - Previous Quantity
Shows the total number of units invoiced in previous billing periods. - Previous Value
Shows the total dollar amount invoiced in previous billing periods. - Total Progress %.*
Enter a percentage amount that reflects your total progress. Your entry must reflect the cumulative progress of any previous billing periods and the current billing period. - New Quantity.*
Enter a new quantity to reflect the quantity being billed this period on the new invoice.Note
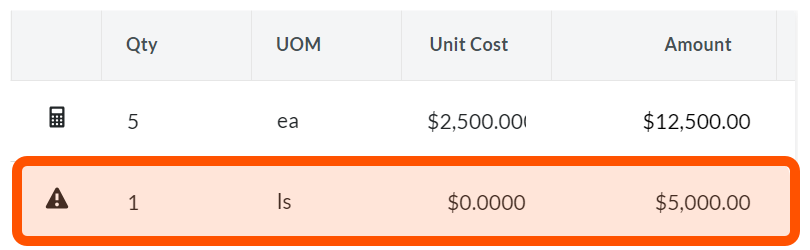
A
 calculator icon indicates that Procore automatically calculates the line item's Amount based on the entries in the Qty, UOM, and Unit Cost fields. Click here to see an example.
 - New Value.*
Enter a new value to reflect the value of the line item being billed this period on the new invoice.Note
A
 warning icon indicates a user's Amount entry overrides the automatic calculation with a custom amount. Click here to see an example.
 - Retainage Released.*
Enter a dollar amount of retainage to be released this billing period. - Total Retainage
Shows the total dollar amount of retainage to be released for the line item.
Add Attachments
To add attachments, click Attach Files to upload any files. You can also drag-and-drop any files.

Tip
Want to attach new files at a later time? To attach files after an invoice administrator approves your invoice (see What are the default statuses for Procore invoices?), you must have 'Standard' level permissions on the project's Commitments tool. Typically, invoice contacts are not granted 'Standard' permissions. However, some invoice administrators choose to make exceptions for trusted contacts on a case-by-case basis.Save as a Draft or Send for Review
To send your invoice back to the invoice administrator for review, click one of these buttons:
- To save a Draft invoice, click Save as Draft. You can complete it later before the Due Date.
OR
Tip
Want to share your invoice with others? If so, see Export Subcontractor Invoices. Then insert the exported file as an email attachment or review it as a printout. - To send your completed invoice for review, click Send. This changes the invoice's status to Under Review and sends an email to the invoice administrator.
Note: If lien waivers are present, the button will say Next. Click Next to review and sign associated lien waivers.


Important
- Unless the invoice administrator changes the invoice's status to 'Revise & Resubmit', you can no longer edit the invoice. To learn about the review process, see Review a Subcontractor Invoice as an Invoice Administrator. For status information, see What are the default statuses for Procore invoices?
Overview
What is a Lien Waiver?
Important
Author note: Log page changes in JIRA ILR board: https://procoretech.atlassian.net/browse/ILR-94
- The Answer on this page is being used as source content in the Payor Setup Guide.
- Content is being reused in the Payee User Guide.
General Availability in Select Markets (United States)
Procore Pay Answer
A lien waiver is a legal document signed in exchange for payment that waives the signer's right to file a lien for the amount specified in the waiver. A lien is a legal claim filed by a contractor or supplier against the property. The property is used as collateral to satisfy the debt(s) to the downstream collaborator(s). See What is a downstream collaborator?
In the simplest terms:
- A lien protects a contractor or supplier from not getting paid.
- A lien waiver protects the property owner from a lien.
Example
An Owner-Builder acting as their own General Contractor on a job or a General Contractor hires you, the specialty contractor, to perform work on a construction project. As the specialty contractor, you possess the right to file a lien against the owner's property until the Owner-Builder or General Contractor pays you for your work. Any subcontractors or suppliers that you hire to perform work or deliver materials on the job site also have the right to file a lien against the property, which serves as collateral for the work and/or materials they provide. A lien waiver signifies that a contractor (a general contractor, a specialty contractor, a subcontractor, and/or a supplier) has released their right to file a lien against the property.
Common Questions
- Who provides a lien waiver?
- Why provide a lien waiver?
- What types of lien waiver templates can you create in Procore?
- How are lien waivers categorized?
Who provides a lien waiver?
In the United States, a signed lien waiver is typically provided by anyone working on a job site. This includes vendors who supply materials for a construction project and any specialty contractors or subcontractors who are not being directly paid by the property owner. With Procore Pay, a project's downstream collaborator(s) submit their lien waivers to the general contractor who is managing the project in Procore. Lien waivers are generated with the invoice that is submitted in the Project level Invoicing tool. See Create a Subcontractor Invoice.
Why provide a lien waiver?
On constructions projects, lien waivers provide these legal and financial protections to the contract parties:
- Upstream collaborators collect lien waivers from downstream collaborators to ensure liens won't be filed against the property owner.
- Downstream collaborators provide lien waivers to upstream collaborators to get paid.
What types of lien waiver templates can you create in Procore?
With Procore Pay, payors can create four (4) different types of lien waiver templates to use on their construction projects: Progress Conditional, Progress Unconditional, Final Conditional, and Final Unconditional.
Tip
How do you create a lien waiver template? See Create Lien Waiver Templates.| Progress | Final | |
|---|---|---|
|
Conditional |
Used for progress payments on a job. Waiver effective when signed. |
Used once for final payment on a job. Waiver effective when signed. |
|
Unconditional |
Used for progress payments on a job. Waiver effective when payment is received. |
Used once for final payment on a job. Waiver effective when payment is received. |
How are lien waivers categorized?
Lien waivers are generally grouped into these categories:
Progress Waivers
A progress waiver is provided to the property owner by the downstream contractor(s) and supplier(s) with a progress billing. A progress billing is an incremental invoice submitted by a downstream collaborator to the upstream collaborator (see What is a upstream collaborator?). Progress billing helps to ensure that downstream collaborators get paid for work completed throughout a construction job, particularly on jobs that take years to complete.
Tip
When do I send a progress waiver to the property owner? If you are working on a longer job (i.e., more than a few months), downstream contractors generally provide a progress lien waiver to the property owner at the end of each billing period. Typically, invoicing is performed monthly. However, invoicing timelines can vary, depending on the payment terms in the contract.Final Waivers
A final waiver is provided to the property owner one time. Typically, at the end of the construction job, with a final billing. A final billing is the last invoice submitted by a downstream collaborator to the upstream collaborator at the end of a project.
Tip
When do I send a final waiver to the property owner? Downstream collaborators provide a final lien waiver at the end of the job.Conditional Waivers
A conditional waiver is sent to the property owner before payment. It indicates the downstream collaborator is willing to waive their lien rights on the condition of getting paid.
Tip
When do you send a conditional waiver to the property owner? In the United States, contractors typically send lien waivers every thirty (30) days. The common practice is to send the lien waiver when the invoice is issued.
Unconditional Waivers
An unconditional waiver is sent to the property owner after payment is made. It indicates the downstream collaborator is willing to waive their lien rights, even if they don't receive payment from the property owner.
Tip
When do you send an unconditional waiver to the property owner? In the United States, executing and processing lien waivers can take several months. The common practice for general contractors is to send lien waivers after being paid for their work by the owner. However, practices can vary.
Preview Lien Waivers
To preview the invoice's lien waivers, scroll to the Lien Waivers card and click the Preview button. This downloads a PDF copy of the selected lien waiver. If your computer is set up to open PDF in a third-party PDF viewer, this opens the PDF. For instructions, see Preview Lien Waivers on Project Invoices.

Sign Lien Waivers
- Open the invoice with the lien waiver to sign.
Tip
How to open an invoice? If you are an invoice contact, you can open the invoices using one of these methods:
- Navigate to the Project level Commitments tool. Next, locate your commitment and click the Number link. In the contract, click the Invoices tab. Locate the invoice and click its Invoice # link.
- If you received an invite to bill for the Procore project, open the message in your email program's Inbox and click the View Online link.
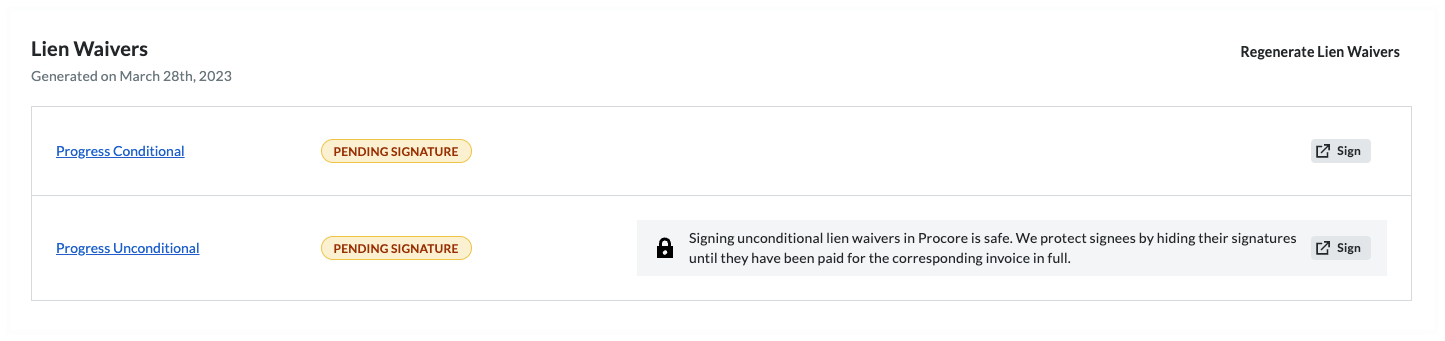
- Scroll to the Lien Waivers card.
- Click Sign.
Tips
- Where is the Sign button? The Sign button only appears when the lien is in the Pending Signature state.
- Is it safe to sign an unconditional lien waiver before receiving this invoice payment? Yes. For unconditional lien waivers, a GRAY banner indicates that your signature is hidden from the payor until the corresponding invoice is paid in full. Although it is uncommon to provide the payor with a signed lien waiver before receiving payment, you do have the option to manually unlock a signed unconditional lien waiver. For instructions, see Unlock a Signed Unconditional Lien Waiver as an Invoice Contact.
- What if I don't have legal authority to sign lien waivers for my company? As an invoice contact, you can share signature authority with the appropriate person. To learn more, see Share Lien Waiver Signature Authority.
- In the [Company Name] is Requesting a Lien Waiver window, click Fill Out & Sign.
This opens the Fill Out Document window. - Conditional. Choose from these options, depending on the type of lien waiver you are signing:
Caution
- Before signing a lien waiver, it is important to understand the different lien waiver types. See What is a lien waiver?
- A signed lien waiver is your legal acknowledgment that payment has been received. When you receive a progress and/or final payment, a signed lien waiver may be required by your general contractor. Depending on the job location, the State government may also require a mandatory lien waiver form, which is included with your invoice.
- To protect your legal and financial interests, it is important to understand what you are signing and when you furnish a signed lien waiver.
- Conditional. A conditional lien waiver should be signed when you expect to receive a progress or final payment. Signing a conditional lien waiver only waives your lien rights for the amount specified through a specific date on the condition that payment through that date is received.
- Unconditional. An unconditional lien waiver is not conditioned on actual payments. Because signing an unconditional lien waiver waives your lien rights immediately, note that Procore Pay protects signees by hiding their signatures until they have been paid for the corresponding invoice in full. A lock is placed on the signed lien waiver until you unlock it.
- Click Next.
- Under Who should receive this document? prompt, choose your signature options:
Notes
- If the lien waiver template allows e-signatures, the eSign tab appears.
- If the lien waiver template has the 'requires Notary' setting, the Print + Sign tab appears.
- Use the controls in the eSign or Print + Sign tab:
- Signature. The signature block includes a default signature for use when signing a lien waiver. To change your signature, click Update Signature. Then type, draw, or upload a new signature.
- Requester. To add new recipients, click the Add Recipient list to select one of your existing contacts or add a new recipient. When adding a new recipient, be sure to assign the contact a Contact Role and enter as much information for the contact as possible and click Save.
- Email Options: To add a note to accompany the email, enter a message in the Add a Note box. To send a copy to yourself, type your email address in the Send a Copy To box.
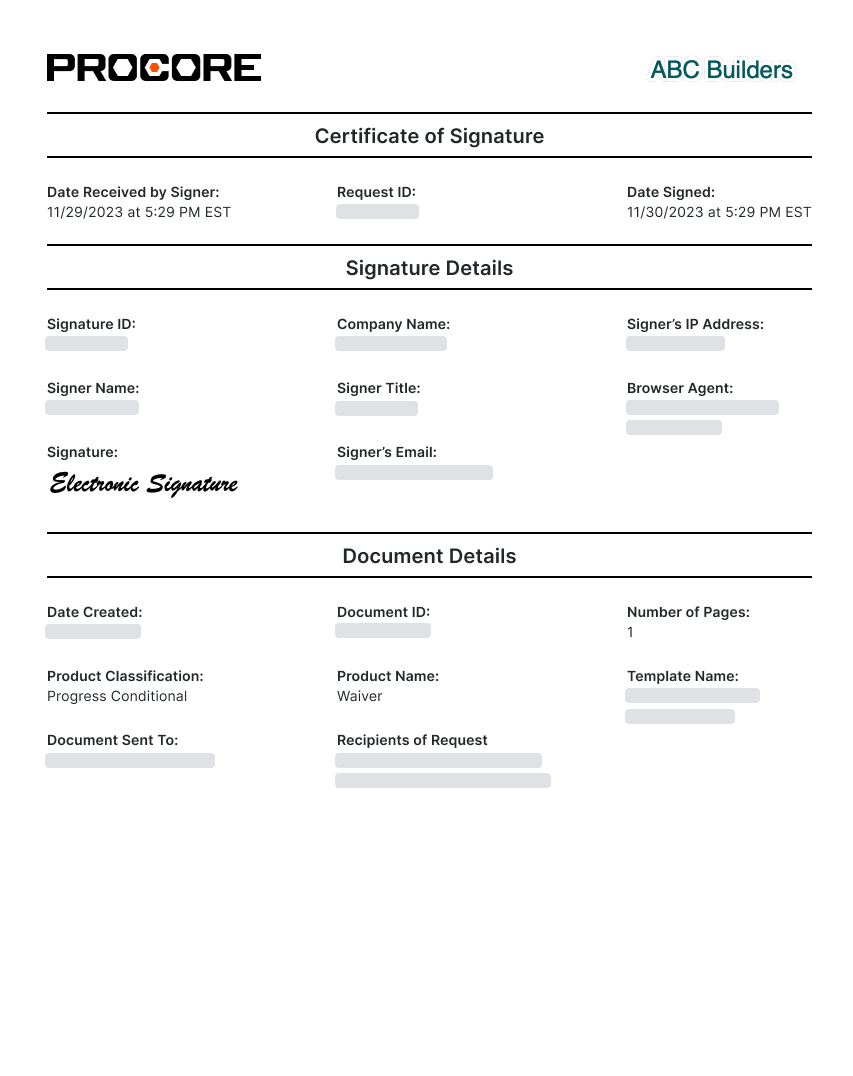
Notes
- If the lien waiver template allows e-signatures, click the Fill Out and Sign button to sign the lien waiver. Once signed, Procore Pay appends a Certificate of Signature to the lien waiver when users compile or download the waiver. Click here for an example.
- If the lien waiver template has the 'requires Notary' setting, you must print the waiver, sign it, and then click Upload Signed PDF to upload your signed copy.
-
When you are ready to send the lien waiver to your recipients, read the Terms of Service provided and click Accept Terms and Send Document.
-
Once you are done signing the lien waivers you will come back into the Procore Invoice and you will need to click one of these buttons:
-
To save a Draft invoice, click Save as Draft. You can complete it later before the Due Date.
OR -
To send your completed invoice for review, click Send. This changes the invoice's status to Under Review and sends the invoice administrator an email.

Regenerate Lien Waivers
- Open an invoice and scroll down to the Lien Waivers card.
Tip
How do you open an invoice? Navigate to the Project level Invoicing tool, click the Subcontractor tab, locate the invoice, and then click its Invoice # number link. Alternatively, you can navigate to the Project level Commitments tool, locate the invoice's contract, and then click its Number link to open it. In the contract, click the Invoices tab and then click the appropriate Invoice # link to open it. - Click the Regenerate Lien Waivers button. To alert specialty contractors when one or more lien waivers are available to sign, Procore Pay sends an automated email notification to all designated invoice contacts on the commitment. See Add Invoice Contacts to a Purchase Order or Subcontract.
 Procore Pay generates the lien waiver(s) and updates the generated date/time on the Lien Waivers card. Invoice administrators can click the Regenerate Lien Waivers button once every five (5) minutes.
Tip
How does Procore know what kind of lien waiver(s) to generate? First, your company's Payments Admin follows the steps in Create Lien Waiver Templates and Enable Lien Waivers in the Company Payments Tool. Next, an invoice administrator on your project follows the steps in Enable Lien Waivers & Set Default Templates on Projects. The project must have a 'State' selected in the Project level Admin tool on the General tab in the Project Location section and it must match the 'State' defined in the project's default template.
About the Sub-Tiers Card on a Subcontractor Invoice
Add Sub-Tier Information for a Subcontractor Invoice
Note for subcontractors
To add or update sub-tier information, the invoice must be in Draft or Revise & Resubmit status.
To access the sub-tier entry fields:
1. Open the subcontractor invoice in Edit mode.
2. Click Next to progress through the invoice tabs.
3. Locate the Lien Rights section to edit information and click Save.
- Navigate to the Project level Invoicing tool.
- Click the Subcontractor tab to view a list of the project's subcontractor invoices.
- Locate the invoice and click its Invoice # link to open it.
- In the invoice, click the Lien Rights tab.
- Scroll to the Sub-Tier Waivers card for this invoice.
Note
The invoice may include one or more sub-tier waiver cards based on the project's configuration settings for waiver collection. See Enable Sub-Tier Waivers on Subcontractor Invoices as an Invoice Administrator. - Choose from these options:
Add Sub-Tiers
To provide a complete list of everyone working on a project:
- Scroll to the desired sub-tier card in the invoice and click Edit.

This places the selected card into editing mode. - Click Add Sub-Tier at the bottom of the data table, and click Create New.

This opens the Add Sub-Tier panel. - Enter the following information in the line item:
Note
An asterisk (*) below denotes a required field.- Sub-Tier Company Name.* Type a name for the sub-tier.
- Kind of Work. Enter the type of work for the sub-tier company. This is a free-form text entry.
- Hired By. Choose the sub-tier's hiring company from the Contract Company or Sub-Tiers section of the drop-down list.
- Phone Number. Type the primary telephone number for this sub-tier.
- Sub-Tier Type. Choose the Supplier or Subcontractor option to indicate the company's business type.
- Street Address. Type the primary address for this sub-tier.
Note
To add an apartment, suite, or unit number, click the Add Apt, Suite, Unit link to show those entry fields. - City.* Enter the city for this sub-tier's primary address.
- State.* Enter the state for this sub-tier's primary address.
- ZIP.* Enter the postal code for this sub-tier's primary address.
- Country.* Enter the country for this sub-tier's primary address.
- Amount Billed This Invoice*. Enter the amount the sub-tier billed you for this invoice.
Important
No amount billed for this invoice? If one of the listed sub-tiers didn't bill an amount for this invoice, enter $0.00 in the Amount Billed This Invoice field. This field cannot be blank. - Est. Contract Amount. Enter the estimated contract amount for the sub-tier.
- Sub-Tier Waiver Contact Email Address. Type the email address of the person signing the lien waiver for the sub-tier subcontractor. This person does not need a Procore user account.
- Billing Type. Choose Progress or Final.
- Click Add Sub-Tier.
- Repeat the step above for each sub-tier subcontractor.
- Click Save.
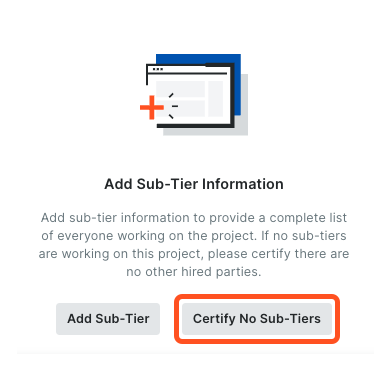
Certify No Sub-Tiers
If there are no sub-tier subcontractors for the project invoice, click the Certify No Sub-Tiers button. The message 'You have certified no sub-tiers are involved in this project' appears.
Upload Sub-Tier Waivers
- Navigate to the Project level Invoicing tool.
- Click the Settings
 icon.
icon.
This opens the Invoicing tool's Settings page. - Click the Subcontractor tab.
- Locate the invoice to open and click the Invoice # link.
- Click the Lien Rights tab.
Important
The options that you see on the Lien Rights tab are dependent on the Invoicing Settings set by the payor. For details, see Enable Sub-Tier Waivers on Project Invoices. - Choose the option that corresponds to the card(s) that you see on the Lien Rights tab:
- I see one card named 'Unconditional Sub-Tier Waivers for the Previous Invoice': Show/Hide
- When you see this card, you must upload signed unconditional sub-tier waivers for the previous billing period. You must include these in your subcontractor invoice for the current Open billing period.
Example
If you are submitting a subcontractor invoice for the billing period 3/1/2024 - 3/31/2024, you can:
- Collect signed unconditional lien waivers from your sub-tier contractors for the previous billing period (2/1/2023 - 2/29/2024).
- Upload and submit the signed sub-tier waivers on your subcontractor invoice for 3/1/2024 - 3/31/2024.
If you need to add sub-tiers to this card, complete the steps in Add Sub-Tiers to a Subcontractor Invoice.
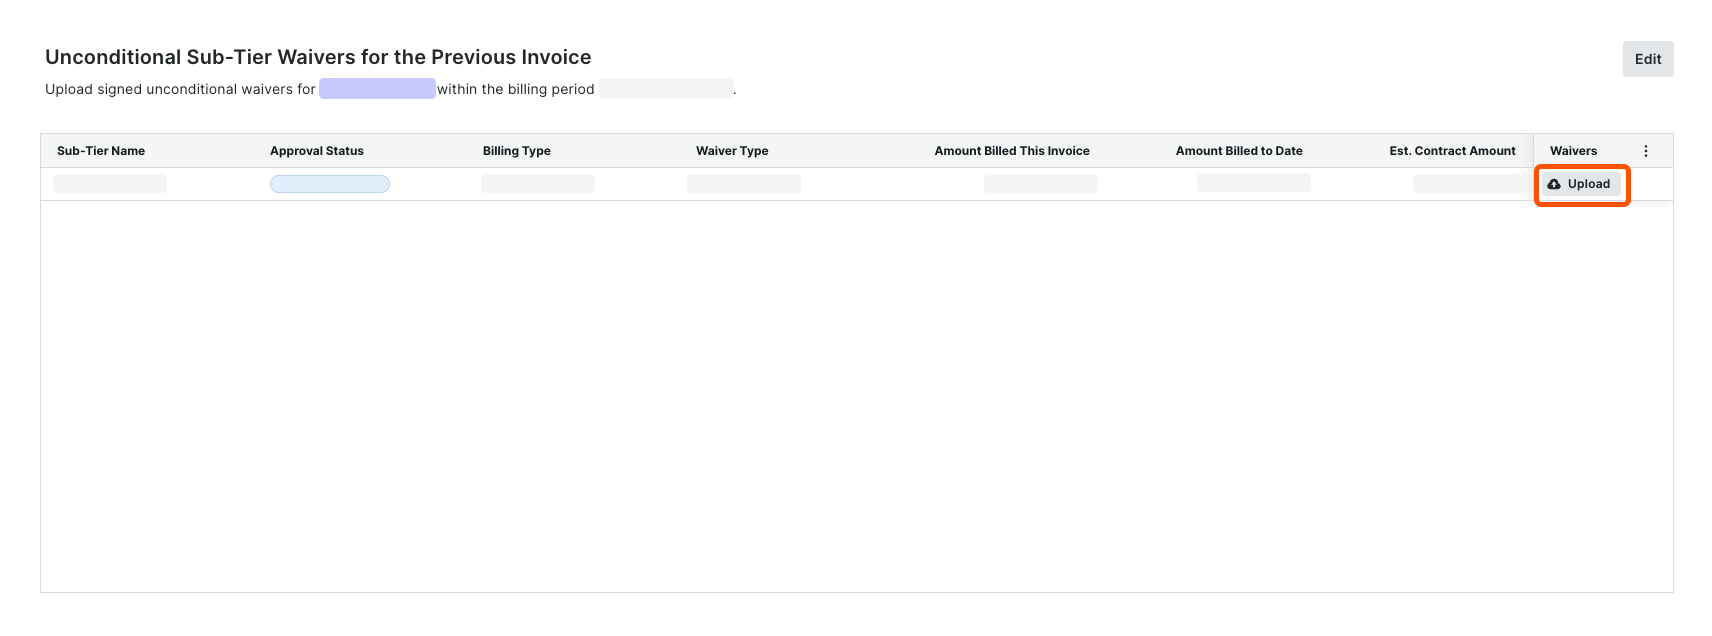
- Scroll to the Unconditional Sub-Tier Waivers for the Previous Invoice card.
- For each Sub-Tier Name, do the following:
- In the Waivers column, click Upload.
This opens an attachment viewer. The Details panel is active. - Under Attachment:
- Click Attach File.
OR - Drag and drop a file from your computer or network to the Attachment area.
The file upload is complete when it appears in the viewer and a Download icon appears in the top-left corner of the page. Until you submit it, the file's status is Not Submitted.
- Click Attach File.
- In the Waivers column, click Upload.
- Enter an amount in the Amount Billed This Invoice field.
- Choose a Billing Type option: Progress or Final.
- Click Submit.
A GREEN success banner confirms the upload and the file status changes to Review Pending. - Repeat these steps for each sub-tier subcontractor.
- When you see this card, you must upload signed unconditional sub-tier waivers for the previous billing period. You must include these in your subcontractor invoice for the current Open billing period.
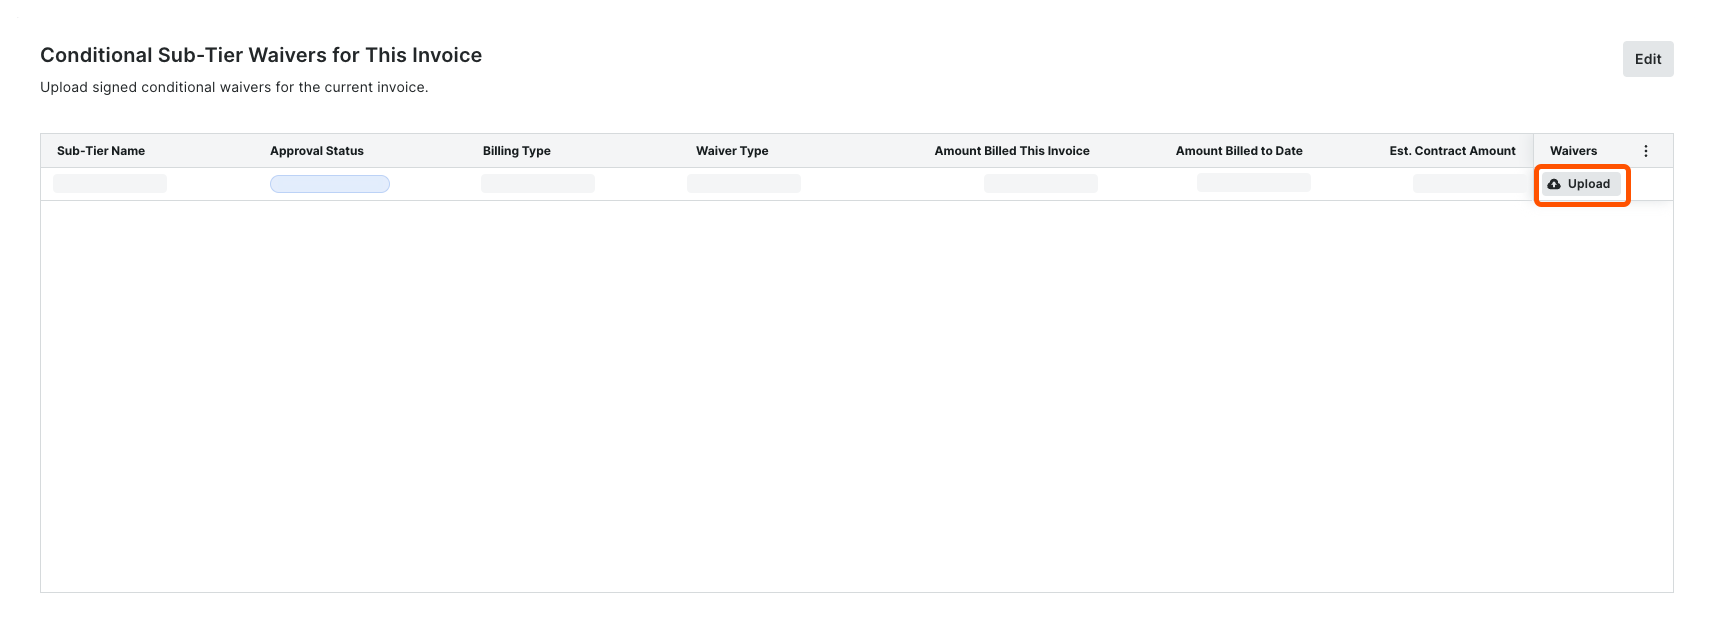
- I see one card named 'Unconditional Sub-Tier Waivers for this Invoice': Show/Hide
- When you see this card, you must upload signed unconditional sub-tier waivers for the current Open billing period. You must include these in your subcontractor invoice for the current Open billing period.
Example
If you are an invoice contact submitting a subcontractor invoice for the billing period 3/1/2024 - 3/31/2024, you can:
- Collect signed unconditional lien waivers from your sub-tier contractors for the current billing period (3/1/2024 - 3/31/2024).
- Upload and submit the signed sub-tier waivers on your subcontractor invoice for 3/1/2024 - 3/31/2024.
If you need to add sub-tiers to this card, complete the steps in Add Sub-Tiers to a Subcontractor Invoice.

- Scroll to the Unconditional Sub-Tier Waivers for this Invoice card.
- For each Sub-Tier Name, do the following:
- In the Waivers column, click Upload.
This opens an attachment viewer. The Details panel is active. -
- Under Attachment:
- Click Attach File.
OR - Drag and drop a file from your computer or network to the Attachment area.
The file upload is complete when it appears in the viewer and a Download icon appears in the top-left corner of the page. Until you submit it, the file's status is Not Submitted.
- Click Attach File.
- Under Attachment:
- Enter an amount in the Amount Billed This Invoice field.
- Choose a Billing Type option: Progress or Final.
- In the Waivers column, click Upload.
- Click Submit.
A GREEN success banner confirms the upload and the file status changes to Review Pending. - Repeat these steps for each sub-tier subcontractor.
- When you see this card, you must upload signed unconditional sub-tier waivers for the current Open billing period. You must include these in your subcontractor invoice for the current Open billing period.
- I see two cards named 'Conditional Sub-Tier Waivers for this Invoice' and 'Unconditional Sub-Tier Waivers for the Previous Invoice': Show/Hide
- When you see both of these cards, invoice contacts must upload either signed conditional sub-tier waivers for the current Open billing period or signed unconditional sub-tier waivers for the previous invoice. You must include these in your subcontractor invoice for the current Open billing period.
Example
If you are submitting a subcontractor invoice for the billing period 3/1/2024 - 3/31/2024, you can:
- Collect signed unconditional lien waivers from your sub-tier contractors for the Open billing period (3/1/2024 - 3/31/2024).
- Collect signed unconditional lien waivers from your sub-tier contractors for the previous billing period (2/1/2024 - 2/29/2024).
If you need to add sub-tiers to this card, complete the steps in Add Sub-Tiers to a Subcontractor Invoice.
- Scroll to the Conditional Sub-Tier Waivers for this Invoice card. For each Sub-Tier Name, do the following:
- In the Waivers column, click Upload.
This opens an attachment viewer. The Details panel is active. -
- Under Attachment:
- Click Attach File.
OR - Drag and drop a file from your computer or network to the Attachment area.
The file upload is complete when it appears in the viewer and a Download icon appears in the top-left corner of the page. Until you submit it, the file's status is Not Submitted.
- Click Attach File.
- Under Attachment:
- Enter an amount in the Amount Billed This Invoice field.
- Choose a Billing Type option: Progress or Final.
- In the Waivers column, click Upload.
- Scroll to the Unconditional Sub-Tier Waivers for the Previous Invoice card. For each Sub-Tier Name, do the following:
- In the Waivers column, click Upload.
This opens an attachment viewer. The Details panel is active. - Under Attachment:
- Click Attach File.
OR - Drag and drop a signed waiver into the Attachment area.
The file upload is complete when it appears in the viewer and a Download icon appears in the top-left corner of the page. Until you submit it, the file's status is Not Submitted.
- Click Attach File.
- In the Waivers column, click Upload.
- Click Submit.
A GREEN success banner confirms the upload and the file status changes to Review Pending. - Repeat these steps for each sub-tier subcontractor.
- When you see both of these cards, invoice contacts must upload either signed conditional sub-tier waivers for the current Open billing period or signed unconditional sub-tier waivers for the previous invoice. You must include these in your subcontractor invoice for the current Open billing period.
Submit an Invoice
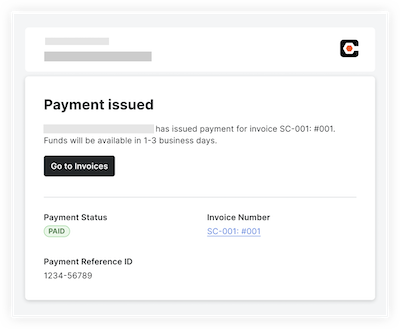
Done! What happens next?
After your invoice is submitted and approved by the general contractor, they will create a disbursement for the invoice amount. After a disbursement is created, the following actions are automated through Procore:
|
 |