Payee: Setup Guide
- Last updated
- Save as PDF
General Availability in Select Markets (United States)
 Procore Pay
Table of Contents
- Welcome
- Enable the Pay Tool
- Set Up Your Bank Account
- Success
Get Started as a Payee
 |
This Payee Setup Guide provides specialty contractors with setup and configuration information so you can receive payments from a general contractor using Procore Pay. This guide provides an overview of Procore Pay and shows you how to:
|
What is Pay?
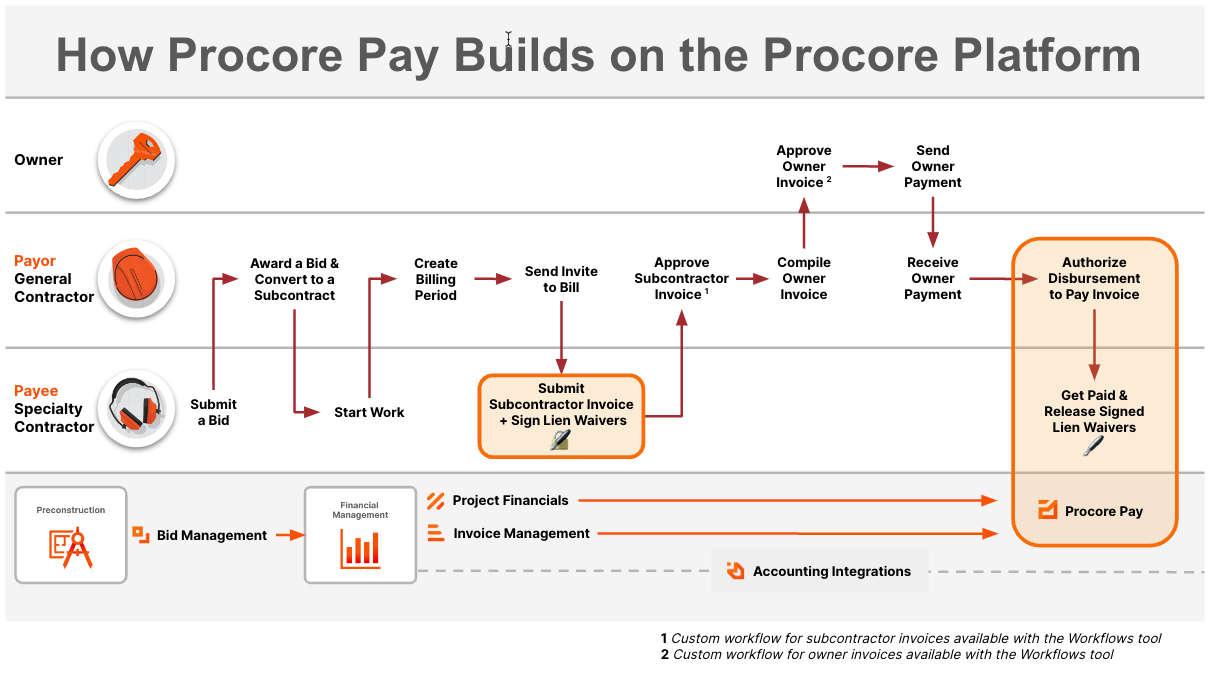
Pay builds on the existing Project Financials and Invoice Management tools in Procore to streamline the subcontractor invoice payment process and automate the lien waiver exchange.

Accept an Invitation from a Payor
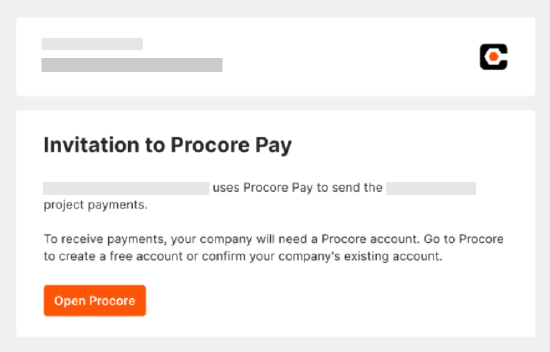
- In your email client, open the Procore Pay invitation email.

- Click Open Procore.
- To receive payments through Procore, your company must have its own Procore Company Account. You will be prompted to log in with your existing log in credentials to identify whether you are marked as an employee on an existing free or paid company account. See How can I tell if I have a free or paid Procore company account?
Depending on your account, the following will happen:- No Company Account
- If your company does not have its own free or paid account, you will be prompted to create a free Procore company account and add a bank account.
- Paid Company Account
- If your company has its own paid account and you are not marked as an employee on the company account, you need to reach out to your company's administrator and request to be added as an employee. After you are added, users with 'Company Admin' permissions at your company will be able to access the Payments tool and add a bank account.
- Free Company Account
- If your company has its own free account and you are not marked as an employee on the company account, you will need to request to join the company and be added as a 'System Administrator' before proceeding.
Note: Your company's System Administrator will be notified by email when you request to join the company.
- If your company has its own free account and you are not marked as an employee on the company account, you will need to request to join the company and be added as a 'System Administrator' before proceeding.
- No Company Account
Request the Pay Tool as an Invoice Contact
- Navigate to the project's Commitments tool.
- Under the Contracts tab, locate your commitment contract. Then, click the number link to open it.
- In the commitment contract, click the Invoices tab.
- Locate the invoice and click the invoice number link.
- Click Set Up Procore Pay in the banner.
Note: The banner is only visible if the general contractor is able to make payments through Procore Pay.

- To receive payments through Procore, your company must have its own Procore Company Account. You will be prompted to log in with your existing log in credentials to identify whether you are marked as an employee on an existing free or paid company account. See How can I tell if I have a free or paid Procore company account?
Depending on your account, the following will happen:- No Company Account
- If your company does not have its own free or paid account, you will be prompted to create a free Procore company account and add a bank account.
- Paid Company Account
- If your company has its own paid account and you are marked as an employee, users with 'Company Admin' permissions at your company will be able to access the Payments tool and add a bank account.
- If you are not marked as an employee on the company account, you need to reach out to your company's administrator and request to be added as an employee. After you are added, users with 'Company Admin' permissions at your company will be able to access the Payments tool and add a bank account.
Note: Your company's Company Admins will be notified by email when you request to join the company.
- Free Company Account
- If your company has its own free account and you are listed on their Team page, users with 'System Administrator' permissions at your company can access the Payments tool and add a bank account.
- If your company has its own free account and you are not listed on their Team page, you will need to request to join the company. After you are added, users with 'System Administrator' permissions at your company can access the Payments tool and add a bank account.
Note: Your company's System Administrator will be notified by email when you request to join the company.
- No Company Account
Add Your Bank Account
- Navigate to your company's homepage. See How do I change companies?
- Navigate to the Payments tool.
- Click the Configure Settings
 icon.
icon. - Click External Bank Accounts.
- Click Add External Account.
- Enter a unique Nickname for the bank account.
Tip
Why does an account need a nickname? A bank account requires a nickname to help you identify an account. It protects your financial privacy by eliminating the need to provide the payment distributors with your full account number. - Read the Terms and Conditions.
- Mark the checkboxes confirming that you 'Understand and agree to User Terms of Service'.
Note
It's important to review the terms and conditions, which include more detail about the following:
- Procore follows US Security and Data Governance standards to securely store your data.
- Procore does not sell your data.
- Fees, if incurred, are incurred upon the payment of the invoice.
- Click Agree & Continue.
- Click Continue.
This launches the Modern Treasury identity verification steps.
Get Started with Identity Verification
To protect your company's personal and financial information, identity verification is powered by Modern Treasury.
- At the 'Procore Partners with Modern Treasury to Verify Your Identity' prompt, click Get Started.
- Enter your 'Business Details':
- Company Name. Enter your company's name.
- Address 1. Enter your company's street address.
- Optional. Address 2. Enter your company's
- City. Enter the city.
- State. Enter a valid state or territory abbreviation.
- ZIP Code. Enter a valid ZIP code.
- Phone Number. Enter a telephone number with an area code.
- Click Continue.
- In Taxpayer Identification Number, enter your Business EIN for the Internal Revenue Service (IRS).
Note
Your Business EIN must be a valid Taxpayer Identification Number for the IRS. This information is used by Modern Treasury to verify the identity of the bank account linked to Procore Pay. Acceptable entry options include these numbers:
- Social Security Number (SSN)
- Individual Taxpayer Identification Number (ITIN)
- Employer Identification Number (EIN)
- Click Continue.
- On the Bank Account Details page:
Note
The following information is typically printed at the bottom of your checks. To learn more about finding this information, see Where do I find my routing and account number?- Account Type. Click Checking or Savings.
- Account Number. This is your bank account number. Account numbers can be up to 17 digits.
- Routing Number. This is your account's nine (9) digit American Banking Association (ABA) routing transit number. It is typically printed on the bottom of your checks.
- On the Congratulations page, click Complete to start the verification process.
If the linking process is successful, you'll see the Bank Account Successfully Linked page. - Click Next.
On the Dashboard tab, your linked account is listed on the Bank Accounts card in the Pending status. To learn about the different statuses, see What are the default verification statuses for bank accounts?
Troubleshooting: Bank Information
For companies using Procore Pay, you will need to link your bank account information to the system to send or receive payments. Once verified, you can send or receive money with Goldman Sachs TxB. To find this information, see the bottom of your bank account's checks or contact your banking service provider.

Success
Congratulations! You are ready to receive payments. See the Payee User Guide to get started.

