Creating and Modifying 3 Week Lookahead Schedules
 Background
Creating lookahead schedules is one of the most important jobs a superintendent performs. Koester’s 3 Week Lookahead schedule has been created and formatted for easy use once you understand the process and learn a few things to do and not to do when editing. Excel formatting can be tricky. Not following these instructions will modify the spreadsheet formatting and make the document much more difficult to use. Please understand the steps below as they will make this important task much easier to accomplish.
Things to Consider
As one of the most important tasks superintendents are asked to perform, understanding how to edit the 3 week schedule is important. Whether or not you understand, you are still responsible for detailed, well thought out lookahead schedules updated weekly. Spend as much time as necessary to follow and understand the steps below so that when creating or updating, you can focus on the schedule and not how to enter the information on the spreadsheet.
Steps
Steps 1-2 cover opening and saving a copy of a new or existing file template.
Steps 4-5 cover initial setup of a blank schedule. Follow these to create your job specific schedule.
Step 5b covers changing the start date of the schedule. This step will be performed every week to change the start date of the schedule to match the document file date.
Steps 6-7 cover adding/editing black group headings as well as how to add more blank rows for additional tasks under each heading.
Step 8 covers editing individual tasks. It is very important to follow these steps as written. By not doing so, you will modify the formatting and the schedule will not update and auto-fill correctly.
-
Open the 3-Week Schedule template you want to build from in Procore found here: (use the previous week’s schedule for weekly updates once the initial schedule has been setup.)
a. Job\Documents\Internal Documents\06 Schedule\Three Week Look-Ahead
b. File Name: 3-Week Schedule (or previous weeks schedule if building from there)
c. Right click and choose Open in Excel. This will open the document directly from Procore saving the steps of downloading and having to upload new versions.
2. Save the file with project specific details as follows: Important: Save a copy prior to editing otherwise you are modifying the template document.
a. File Name: Job Name - 3-Week Schedule – YYYY-MM-DD
- The date at the end should be the Monday associated with the first week represented in this update of the 3-week schedule.
- Opening the document from Procore as in step 1 will automatically save the new file to the schedule folder in your Procore job.
3. BEFORE PROCEEDING, ABSOLUTELY DO NOT MODIFY, CHANGE OR EDIT ANY CELLS OR PART OF THE DOCUMENT OUTSIDE OF THESE INSTRUCTIONS. IT WILL CORRUPT THE FILE AND PREVENT IT FROM OPERATING CORRECTLY.
4. The first step is to enter the Holidays and Non- Working Days, Scopes of work and Subcontractor names. To complete that, click on the “Project Info” tab at the bottom of the spreadsheet.

a. Holiday Section:
1. There is a list of Federal Holidays already entered. If there are project specific Holidays or Dates in which there shall be no work on site (Due to owner request, or otherwise), those can be entered at the bottom of the list.
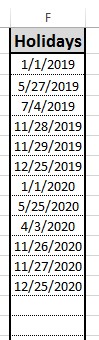 If there are additional non-working days for the project, those can be entered here at the bottom of the standard Fed Holidays
b. Subcontractor Information Section:
1. Scope of Work Column – This column (Column C) has a sample listing of scopes already entered. This list can be modified to fit the specific project scopes.
2. Subcontractor / Vendor – This column (Column D) is where the Subcontractor’s business names that correspond to the scope of work can be entered. Do not type in the contact name, just the business name.
a. Note: These Names need to be typed in exactly as they need to be shown on the Schedule. Once the names are typed here, they will be listed in the dropdown options within the Schedule. (Spelling, punctuation, capitalization, etc.)
b. Note: The scopes and names can be changed later in the project if needed.
5. The next step is to enter the Project Name and the Date of which the project is to start. To complete this, click on the “Schedule” tab at the bottom of the spreadsheet.
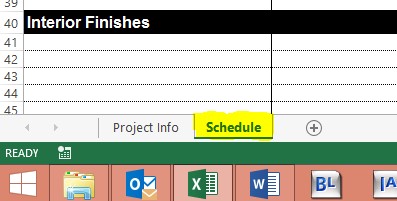
a. Enter the PROJECT NAME on top.
b. Enter the START DATE which should be the Monday that represents the first week of work to be done on site.

Note: This date will be updated every week when the 3-Week Schedule is updated. Changing this date shifts the entire schedule cells in the body of the spreadsheet.
6. The next step is to set up the various Group or Activity Headings. These are shown as the Black Bolded sections within the schedule. There are sample headings (Koester Self-Perform, Exterior Site, Building Shell, Interior Finishes) already established to provide the user with examples. These will be project specific and can be modified to fit the project’s needs. Follow these steps to modify the Headings.
a. Other than the Koester Self-Perform heading, there are 6 other sample headings provided in the template. If 6 headings is enough to fit the project’s needs, simply type over the existing headings with the desired names.

b. If 6 headings is not enough, more can be added. IT IS INCREDIBLY IMPORTANT TO FOLLOW THESE STEPS EXACTLY! To add more headings, complete the following 6 steps.
1. On the left hand side of the Excel Spreadsheet, there are Row Numbers starting at 1 and going to infinity. Click on the number of any of the headings and it will highlight that entire row.
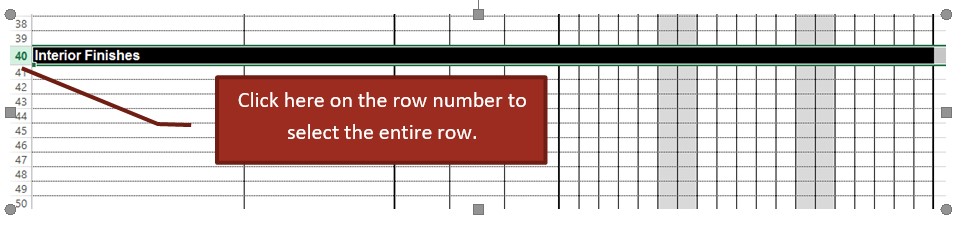
2. Once the entire heading row is selected, click and hold down on the same row number again. With your mouse held down, drag the mouse down the row numbers and Excel will
select all of the rows as you drag.

3. Now, with the mouse, right click on any of the highlighted/selected row number.

4. After right clicking, a selection window will open. Click on “Copy” within this window. This will copy all of the highlighted rows so they can be inserted/added in the next steps.

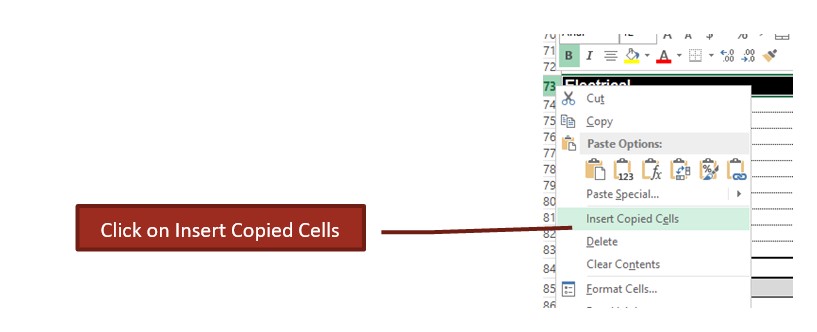
5. Now, determine where in the spreadsheet the new Heading section should be entered. In this step, the section that was just copied will be entered ABOVE the row that is selected in this step. In this example, the copied section will be added ABOVE the Electrical heading. To do this, find the row associated with the Electrical heading; in this example, row 73. Right Click on this Row.
6. After right clicking, a selection window will open. Click on “Insert Copied Cells” within this window. This will Insert/add all of the highlighted/copied rows above the row selected and completes the process.
Click on Insert Copied Cells

7. After setting up all of the Headings, each Activity can be entered. There are 10 activities set up under each one of the headings in the template and are represented by the blank rows. These will be specific to the project and specific to each heading they are under. Follow these steps to enter the Activities.
a. Other than the Koester Self-Perform heading, there are typically 10 Activity lines under each heading. If 10 headings is enough to fit the project’s needs, simply type the Activity Description in the blank spaces provided.

b. If 10 activities is not enough, more can be added. IT IS INCREDIBLY IMPORTANT TO FOLLOW THESE STEPS EXACTLY! To add more activities, complete the following 5 steps.
1. On the left hand side of the Excel Spreadsheet, there are Row Numbers starting at 1 and going to infinity. Click on the number of any of the activities and it will highlight that entire row. (Similar to adding Headings, multiple rows can be selected and added if desired, follow the sections above to copy multiple rows.)

2. Now, with the mouse, right click on any of the highlighted/selected row number.
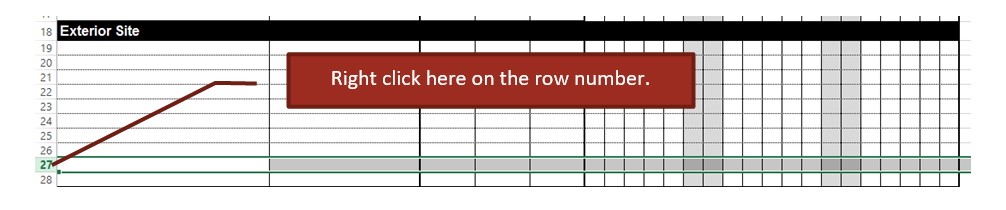
3. After right clicking, a selection window will open. Click on “Copy” within this window. This will copy all of the highlighted rows so they can be inserted/added in the next steps.
4. Now, determine where in the spreadsheet the new Activity (Activities) should be entered. In this step, the section that was just copied will be entered ABOVE the row that is selected in this step. In this example, the copied section will be added ABOVE the Building Shell
heading, and effectively adding one activity under the Exterior Site Heading; Exterior Site will now have 11 activities. To do this, find the row associated with the Building Shell heading; in
this example, row 29. Right Click on this Row.

5. After right clicking, a selection window will open. Click on “Insert Copied Cells” within this window. This will Insert/add all of the highlighted/copied rows above the row selected and completes the process.
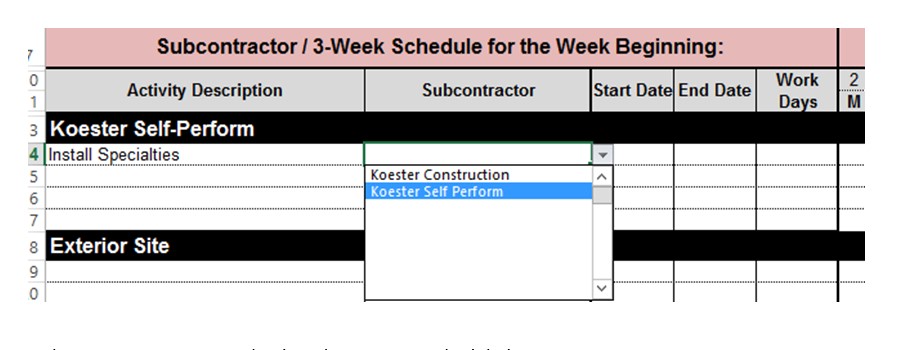
8. After the Headings and Activities have been entered, the remaining information for each Activity can be entered (Subcontractor, Start Date, Work Days). To do that, complete the following. It is important to follow the next steps. By not doing so you will change the formatting and the automatic function of the document will not work.
a. Subcontractor: When the Subcontractor cell is selected, Excel will provide a dropdown list of the Subcontractor’s names that were typed in “Project Info” tab in previous steps. Select the respective Subcontractor that is associated with the activity.

c. End Date: Do not type anything in this box. The End Date will automatically calculate after the Work Days are entered.
d. Work Days: Enter the number of days the activity is scheduled to take. After typing in the Work Days, the cells under the schedule will automatically fill in with color on the days the activity is to take place. Excel will automatically account for weekends and any non-working days.

9. Complete steps 6-8 until all activities within the 3-week period are included.
a. The 3-week schedule is intended to provide more precise detail than the overall project schedule provides. Utilize the Weekly Subcontractor Meetings on site to get specific details and dates from the Subcontractors. Ask them to give dates they can agree to commit do and encourage them to be reasonable, yet aggressive with their dates.
b. General Construction activities should be broken down into more specific activities.
1. Example: Drywall could be shown as 3 separate activities.
a. Drywall Hanging
b. Drywall Finishing
c. Drywall Texture
2. Example: Footings could be shown as multiple activities
a. Footing Layout (Survey/Batter Boards)
b. Excavate Footings
c. Form Spread Footings
d. Install Spread Footing Rebar
e. Pour Spread Footings
f. Form Foundation Walls – 1st Side
g. Install Foundation Rebar
h. Form Foundation Walls – 2nd Side
i. Pour Foundation Walls
The following views are available for the Project level Schedule tool:
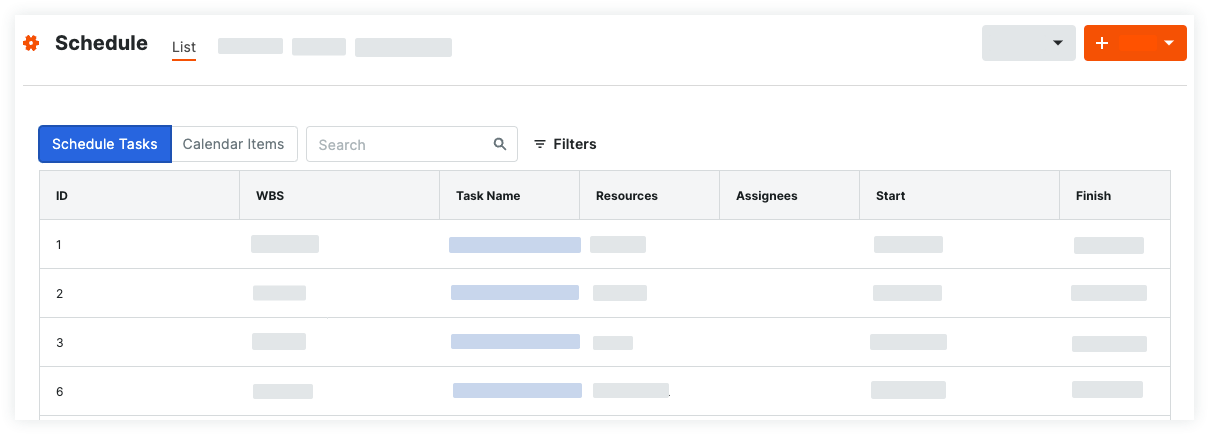
List
- Navigate to the project's Schedule tool.
- Click the List tab.
You will see a list of all scheduled tasks, as well as their resource, WBS, start and finish date, and percentage complete. You can also switch between viewing Schedule Tasks and Calendar Items by clicking the toggle at the top of the list.
Calendar
The Calendar view gives you the options to look at a schedule from a day, week, or month view.
Day View
- Navigate to the project's Schedule tool.
- Click the Calendar tab.
- Select Day from the Day, Week, Month toggle.
You will see a list of all tasks scheduled for that day, as well as the resource, the start and finish date and the percentage complete for each task.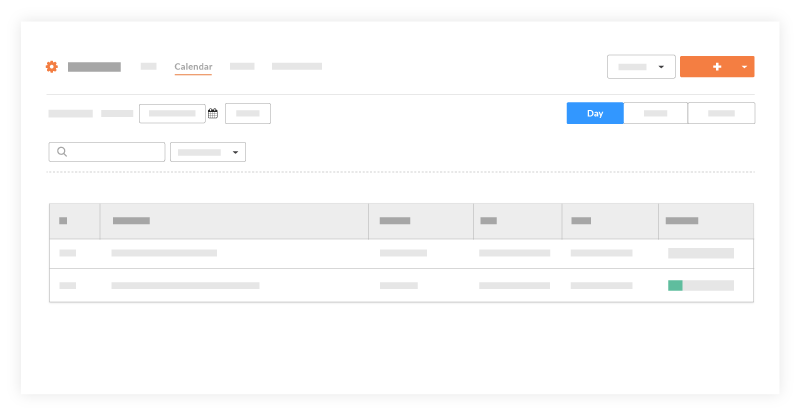
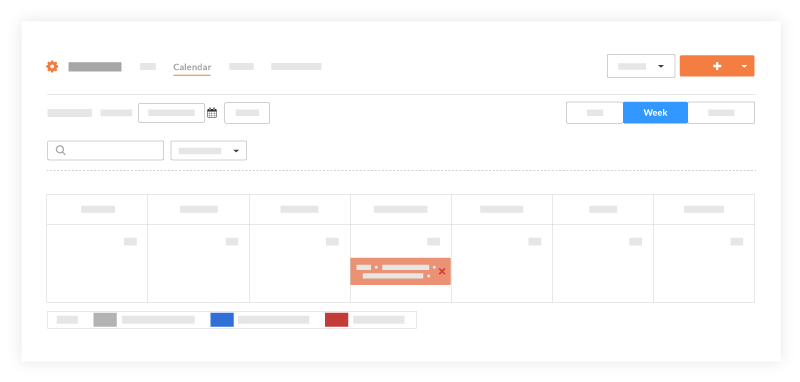
Week View
- Navigate to the project's Schedule tool.
- Click the Calendar tab.
- Select Week from the Day, Week, Month toggle.
You will see the week's calendar with all completed tasks, tasks in progress, and critical paths for that week.
Month View
- Navigate to the project's Schedule tool.
- Click the Calendar tab.
- Select Month from the toggle.
You will see the month's calendar with all completed tasks, tasks in progress, and critical paths for that month.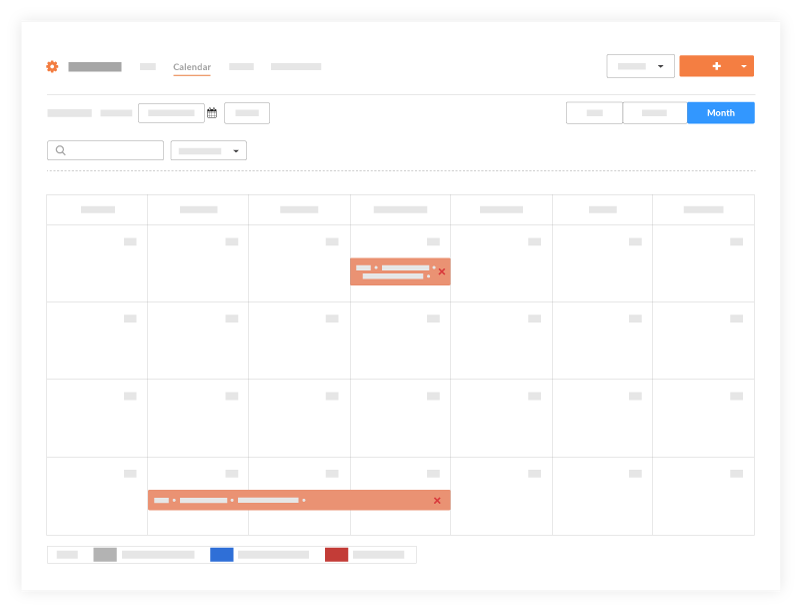
Gantt View
- Navigate to the project's Schedule tool.
- Click the Gantt tab. See View a Gantt Schedule.
You will see a Gantt chart with horizontal bars that illustrate the amount of work done relative to the amount of time given to complete that task. The bars on the chart are based on your schedule logic. See Update a Project Schedule File.
Note: When Percent (%) Complete is enabled, the color of the bars will have a lower saturation of color to indicate the percentage that is complete.
The following options are available when viewing a Gantt chart:
- Configure Columns: Allows you to filter what columns are shown on the Gantt chart. Configured columns can also be sorted numerically or alphabetically depending on the field type.
- View Toggles: Allows you to filter what you want to show on the Gantt chart (critical paths, % complete, dependencies, etc.)
- Filter Options: Allows you to filter what you want to see on the Gantt chart. If you only want to see Critical Paths from a certain date range use the filter options to adjust the Gantt.
- Zoom Levels: Allows you to zoom in and out of the Gantt chart.

Lookaheads
- Navigate to the project's Schedule tool.
- Click the Lookaheads tab.
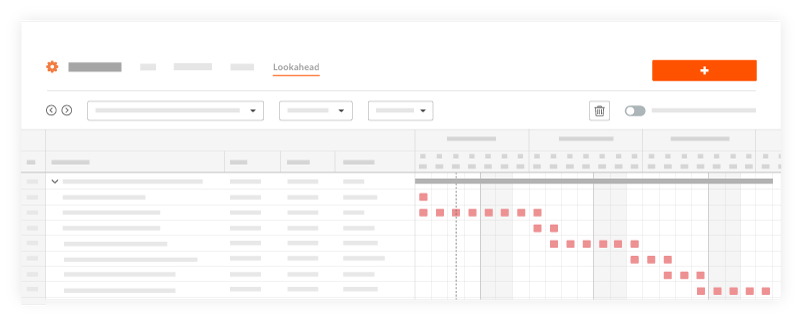
You will see a lookahead showing the date range you selected. A Lookahead can be created to range from one to six weeks. See View Lookahead Schedules.
The following colors and symbols can be seen on a lookahead:

- Blue: Non-Critical
- Red: Critical
- Grey Hatch Pattern: Baselines compare to master schedule
- Hazard Symbol: Date differs from the master schedule
- Configure Columns: Allows you to filter what columns are shown on the lookahead.
- Filter Options: Allows you to filter what you want to see on the Gantt chart. If you only want to see Critical Paths from a certain date range use the filter options to adjust the Lookahead.
- Compare to Latest Master: Compares Lookaheads to items on the last master schedule updated in Procore.
- Delete lookahead
 : Click the trash icon to delete lookaheads you've created.
Further Information


Schedule
Important
Permissions
| | The action is available on Procore's Web, iOS, and/or Android application. Click to view the article.
 Users can take the action with this permission level.
 Users can take this action with this permission level AND one or more additional requirements, like granular permissions.
What granular permissions are available for the Project level Schedule tool?
| Action | None | Read Only | Standard | Admin | Notes |
|---|---|---|---|---|---|
|
Add Related Items to a Scheduled Task |
|
||||
|
Configure Advanced Settings: Schedule |
|
||||
|
Configure Schedule Notification Emails |
|
Users also need 'Admin' level permission to the project's Directory tool. | |||
|
Configure the Project Level Schedule Tool for Primavera P6 |
|
||||
|
Clear an Integrated Schedule |
|
||||
|
Create a Calendar Item |
|
|
|||
|
Create Lookahead |
|
|
|
||
|
Create Lookahead Tasks |
|
|
|
||
|
Delete Calendar Item |
|
||||
|
Delete Lookahead |
|
|
|
||
|
Delete Lookahead Tasks |
|
|
|
||
|
Edit Any Calendar Item |
|
||||
|
Edit a Calendar Item You Created |
|
|
|||
|
Edit Lookahead Task |
|
|
|
On a mobile device, this action can be performed offline if the item was previously viewed and cached on your mobile device. Tasks performed offline sync with Procore when a network connection is reestablished. | |
|
Export a Project Schedule |
|
|
|||
|
Request a Schedule Change |
|
|
|||
|
Search and Filter for Scheduled Tasks |
|
|
|
||
|
Send Recurring Project and Resource Schedules |
|
||||
|
Update a Project Schedule File |
|
||||
|
Update Lookahead Tasks |
|
|
|
||
|
Update Task Completion Percentage |
|
|
|
||
|
Upload a Project Schedule File to Procore's Web Application |
|
||||
|
Upload an Asta Powerproject Schedule |
|
||||
|
View a Project Schedule |
|
|
|
||
|
View a Scheduled Task |
|
|
|
||
|
View Lookahead |
|
|
|
||
|
View the Change History of Lookaheads |
|
|
|