Subcontractor Guide

Table of Contents
Welcome
Project Contacts
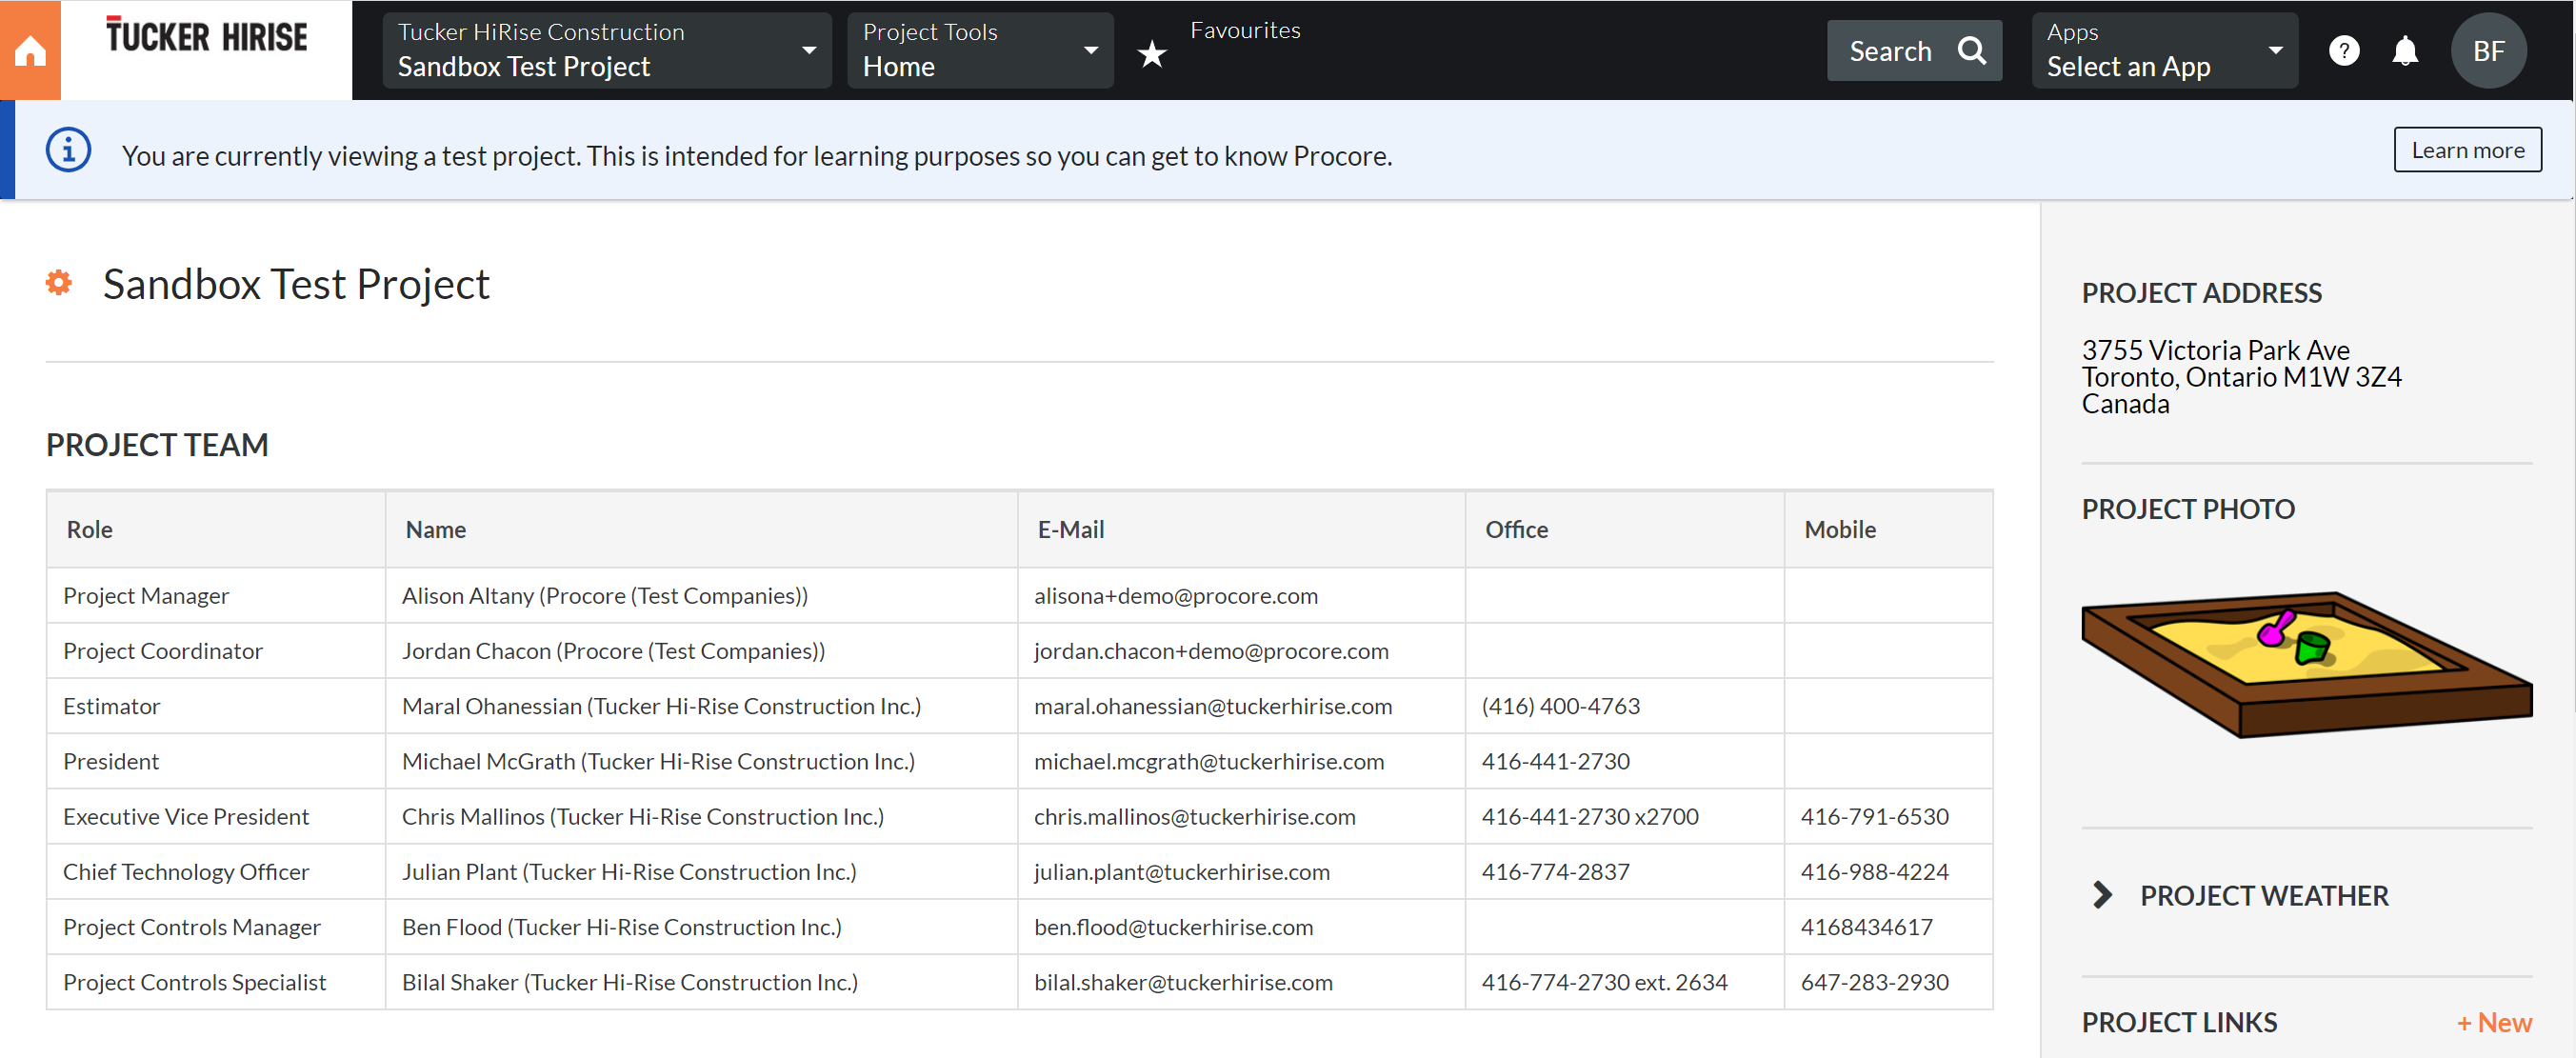
All relevant contacts for your Project can be found when logged into Procore on the Project Home Screen at the very top in the Project Team table. Here you will see relevant names and contact information for key parties on the project. For feedback and access beyond your site team, or for any help or questions regarding Procore, please email Procore@tuckerhirise.com
Training
While specific quick-start tutorials can be found in the table of contents to the left, Tucker HiRise also recommends that all of our partner's Procore users complete Procore Certification courses relevant to their role.
- Tendering: Confirming intent to bid, submitting tenders, responding to tender addendums
- Project Management: Drawings, Specifications, RFIs, Submittals, Instructions
- Quality & Safety: Deficiencies, Incidents, Inspections, Observations
- Complete Certification Course Catalog
Support
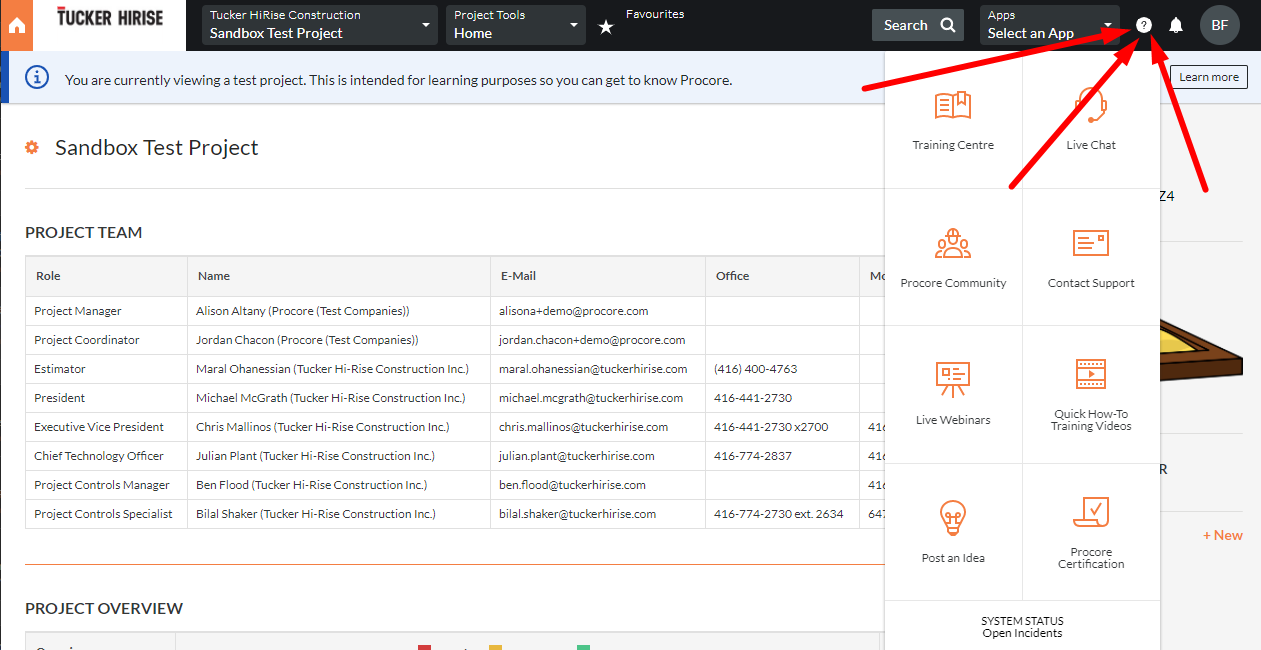
For how to support including accessing this guide, live chat, and more, please follow the steps below. If you are still unable to find the answers you need, please email Procore@tuckerhirise.com and we will be happy to assist you.
Log Into Procore and click on  in the upper right corner. From the drop down menu:
- Select Training Centre to return to this guide at any time.
- Select Live Chat to chat with a Procore Support Agent (great for general how-to questions)
- Select Procore Certification to view the certification course catalog listed above
Email Notification Settings
By default, Procore is configured to send email notifications relevant to you for many types of updates in all of its various tools. With so much going on, it is easy for these emails to become overwhelming and clutter your inbox with items you may not find useful. Fortunately, we have the ability to customize which actions trigger emails in each tool.
ImportAnt
If you are receiving too many emails, irrelevant emails, or believe you are missing critical updates please send an email to Procore@tuckerhirise.com or contact the PM or APM on your project and they will adjust the project's email settings accordingly. 
Tender Invitations(ITBs)
Download Bid Documents (Subcontractor)
There are two ways you can download the bid documents.
See the following sections which outline how to accomplish each of these.
From the Invitation Email
- To download the bid documents for this project, simply click the download link in the "Invitation to Bid" email.

From the Planroom
- You may also download the documents from the Planroom in Procore.
- Log in to Procore.
- Navigate to the Company level Planroom.
- Click on the bid package you would like to download the bid documents from.
This reveals the bid package's Bid Sheet. - Click the orange Bid Documents button in the top right corner.
Note: If you are having problems, please see Why am I unable to download and open a .zip file?.
Indicate Your Intention to Bid (Subcontractor)
When a general contractor invites you to bid, you will probably not know your bid amount right away. However, you will want to make sure the general contractor knows that you intend to bid on the project and are looking into gathering information.
There are two ways you can indicate your intention to bid on a project.
From the Invitation Email
- Open the email you received inviting you to bid on a project.
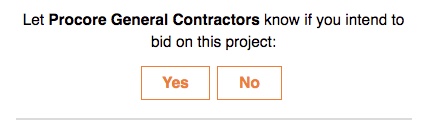
- Click Yes or No under "Let [Name of Company that invited you] know if you intend to bid on this project"
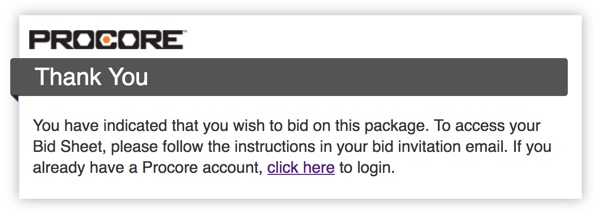
- You have indicated intent to bid on the package and can access the bid sheet by logging in.
From the Planroom
- You may also indicate your intention to bid from the Planroom in Procore.
- Log in to Procore.
- Navigate to the Company level Planroom.
- Click on the bid package you would like to indicate your intention to bid on.
- Click the button I plan on bidding or Decline to bid in the banner at the top of the page.

Submit a Pre-Bid Question (Subcontractor)
- If you have been invited to bid on a project that is being managed using Procore's cloud-based construction software, you should have received an email invitation like the example below in your inbox. Make sure to log into your account using the email this email was sent to because only this email will give you access to the project in Procore.

There are two ways you can submit a question/RFI to the project's GC:
Reply to the invitation email
- Simply respond to the invitation email with your question or RFI, and the GC will receive an email. They can respond directly back to your email.
Note: When you reply to the email, it will show up as a reply to the original email you replied to in the Email subtab in the Planroom's bid package.
Send an email to the thread's link
- When you log into Procore, navigate to the project's Planroom tool.
- Click on the bid package you wish to submit a pre-bid question/RFI about.
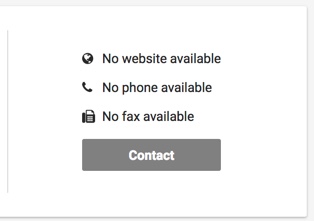
- Click Contact on the Bid Sheet.
OR - Click the Emails subtab.
- Copy and paste the email address or click the Open Email Client button in the blue header box that says, "To start a new thread associated with this bid, send an email to: ___".

Download Bid Documents (Subcontractor)
Download Bid Documents (Subcontractor)
There are two ways you can download the bid documents.
See the following sections which outline how to accomplish each of these.
From the Invitation Email
- To download the bid documents for this project, simply click the download link in the "Invitation to Bid" email.
From the Planroom
- You may also download the documents from the Planroom in Procore.
- Log in to Procore.
- Navigate to the Company level Planroom.
- Click on the bid package you would like to download the bid documents from.
This reveals the bid package's Bid Sheet. - Click the orange Bid Documents button in the top right corner.
Note: If you are having problems, please see Why am I unable to download and open a .zip file?.
View & Download Drawings
Select the Drawings Tool under Project Management from the Project Tools menu at the top of the screen.

View Drawings
Steps
View Drawings
- Navigate to the project's Drawings tool.
- If your project uses drawing areas, click the drawing area you want to open. See What are Drawing Areas?
- The page will automatically open to the Current Drawings page.
Note: This shows the list of drawings that are current, based on the drawing revisions that have been uploaded. - The following information is displayed for each drawing:
- Drawing No.
- Drawing Title
- Revision
- Drawing Date
- Received Date
- Set
- Status
- Optional: Search or filter drawings from this page. See Search for and Filter Drawings.
- To view all drawings in the project or drawing area:
- Click Drawing Sets.
- From the Thumbnails
 view, click the drawing set you want to open.
OR - From the List
 view, click View next to the drawing set you want to open.
- From the Thumbnails
- Click Drawing Sets.
- To view a list of all drawings (including those marked as obsolete), click All Sets and Revisions. See View the All Sets and Revisions Report.
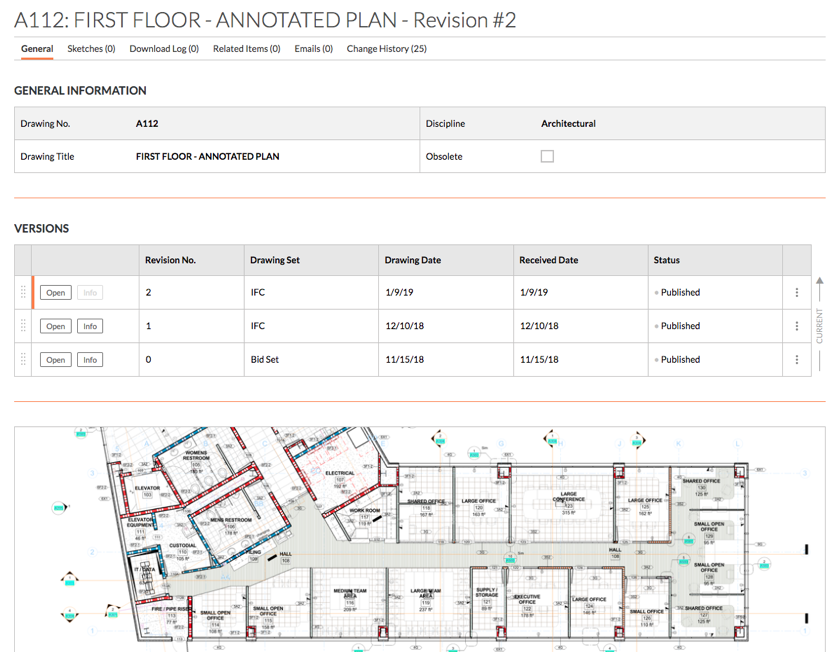
View Drawing Information
- Navigate to the project's Drawings tool.
- Click Info next to the drawing you want to view.
Note: You will see an image of the drawing and its general information. Additional information can be found within the related tabs (Sketches, Download Log, Related Items, Emails, and Change History).
Note:- Most fields can be edited in-line while viewing a drawing. See Edit Drawings.
- If you want to reorder revisions of the drawing, click the grip handle (⁞⁞) next to a drawing version and use a drag-and-drop operation to place them into a new order. See Reorder Revisions of a Drawing.
Open a Drawing in the Viewer
You can open drawings to see a larger version of the drawing. From the viewer mode, you can also add markups to the drawing, use the search bar, view detailed information, and download the drawing.
- Navigate to the project's Drawing tool.
- Click Open next to the drawing that you want to view in full-screen mode.
Note: This opens the drawing in the full-screen viewer. - The following information and actions are available in full-screen mode:
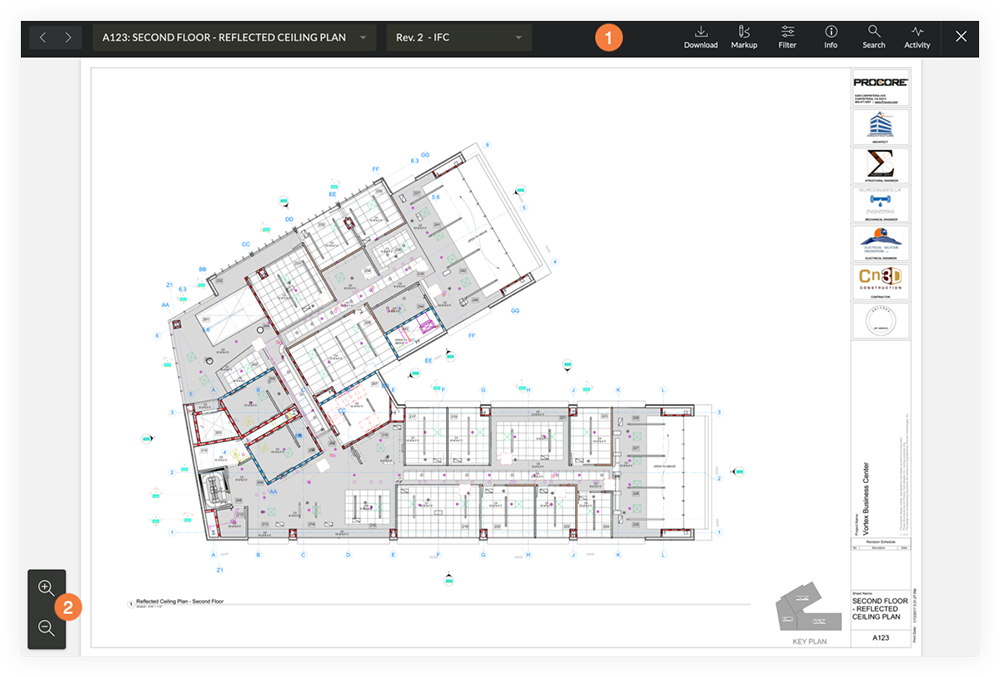
 Viewer Toolbar:
- Drawing Navigation: Clicking the forward and backward arrow icons to switch between different drawings or revisions. Use the drop-down menus to navigate to different drawings or drawing revisions.
Tip! You can also press the arrow keys on your keyboard to browse through different drawings and revisions.- Left Arrow: Previous drawing.
- Right Arrow: Next drawing.
- Up Arrow: Newer revision of the drawing.
- Down Arrow: Older revision of the drawing.
- Download: Click to download the drawing to your computer. See Download a Drawing from the Viewer.
Note: When downloading a drawing from the Viewer, all personal and published markups on the revision are included. - Markup: Click to open the markup toolbar. See Mark Up a Drawing.
- Filter: Click to filter between layers and markup types on the drawing. See Filter Drawing Markups.
- Info: Click to view general information about the drawing. Click Go to Info Page to navigate back to the Info page.
- Search: Click to initiate a drawings search. See Search for and Filter Drawings.
- Activity: Click to view any markup activity for the drawing.
- Exit: Click the X to exit out of the viewer.
 Viewing Options:
- Zoom in or out of the drawing by clicking the magnifying glass + and - icons.
- Pan across a drawing by clicking and dragging on the drawing.
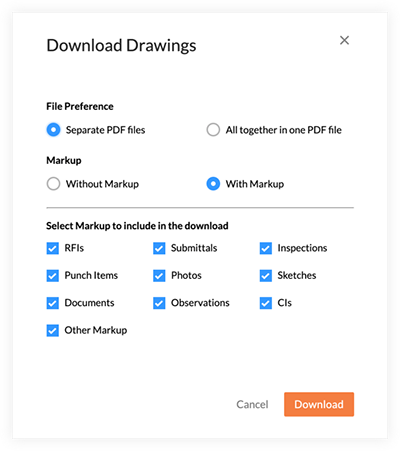
Download Drawings
- Also available on


Download Drawings
- Navigate to the project's Drawings tool.
- Mark the checkboxes next to the drawings you want to download, or mark the top-most checkbox to select all the drawings in the set you are viewing.
- Click Download Drawings.
- In the Download Drawings window, select your preferences for the download:
- File Preference:
- Select Separate PDF files or All together in one PDF file to determine whether the drawings will be downloaded as separate PDF files, or combined as one.
Note: You will have the option to download as a single PDF without markup or as a single PDF with markup only if you have more than one drawing selected.
- Select Separate PDF files or All together in one PDF file to determine whether the drawings will be downloaded as separate PDF files, or combined as one.
- Markup:
- Select Without Markup or With Markup to specify whether you want published markups on the drawings to appear.
Note: If you chose 'With Markup', the 'Select markup to include in the download' section appears.- Mark the checkboxes next to the markup types that you want to appear on the downloaded drawings.
- Mark the checkboxes next to the markup types that you want to appear on the downloaded drawings.
- Select Without Markup or With Markup to specify whether you want published markups on the drawings to appear.
- File Preference:
- Click Download.
Note: Depending on your selection, your download will either begin downloading to your computer or will be emailed to you.- If sketches were added to the drawing, they will download in a .zip file.
- If the download is emailed to you, click the link in your email to download the PDF.
Download a Drawing from the Viewer
When you download an individual drawing from the Viewer in the Drawings tool, any personal or published markups on the revision are included.
- Navigate to the project's Drawings tool.
- Locate the drawing you want to download.
- Click Open next to the drawing to open it in the Viewer.
Note: You can also open the drawing in the Viewer from the Info page by clicking Open in Viewer/Markup. - Click Download.
Note: The drawing will download to your computer.
View & Download Specifications
Once you are in your Project, Find the Toolbox at the top center of the screen, and find the Specifications Tool under Project Management

View Specifications
- Navigate to the project's Specifications tool.
- On the 'Current Specifications' page, locate the specification you want to view.
- Click Info next to the spec section to reveal general information and any revisions.
Note: To open the actual file of the spec section in Procore's PDF viewer, see Open Specifications. - By default, the General tab appears.
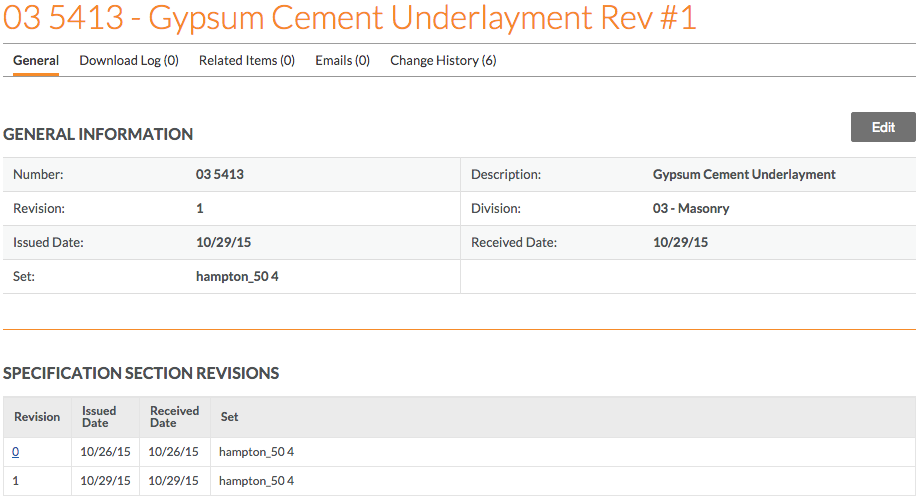
The following sections are visible on the General tab.- General Information
The following information is revealed for the spec section:- Number: The spec section number found in the spec book.
- Revision: The current revision number of the spec book. By default, Procore assigns the first revision number as 0 and subsequent revisions as 1, 2, 3, etc.
Note: The revision number ordering scheme depends on the project's configuration settings. To view revision details, see Specification Section Revisions. - Issued Date: The date that the spec section was issued for the project by the design team.
- Set: The set the spec section was originally added to when Uploading Specifications.
Note: This field cannot be edited. - Specification Section Obsolete: If the spec section has been marked as obsolete, a 'Yes' will appear in this field. See Mark Specifications as Obsolete.
- Description: The title of the spec section found in the spec book.
- Division: The division the spec section is categorized in.
- Received Date: The date the spec section was received by the GC, company, or project team.
- Specification Section Revisions
The following columns are displayed to summarize any revisions that have been uploaded:- Revision
- Issued Date
- Received Date
- Set
- General Information
- Depending on your permission level, the following tabs are also available to view:
Download Log
Click the Download Log tab to view details about spec section downloads. It shows the number of times the spec section was downloaded, when the download occurred, and by whom. To view this tab, you must have 'Admin' level permissions to the project's Specifications tool.
Related Items
Click the Related Items tab to view a list of all related items added by the Specification administrator (see Add a Related Item to a Specification). To view more detail about an item, click the link next to the desired description.
Emails
Click the Emails tab to view the email history for the spec section. See Email Specifications.
Change History
Click the Change History tab to view a historical summary of spec section modifications. This shows the date and time of each change and who made the change. It also shows the original value (changed from) and new value (changed to), if applicable.
Download Specifications
Navigate to the project's Specifications tool.
- (Optional) Search and Filter for Specifications.
- Use the checkboxes to make your selections.
- Select individual spec sections.
Note: If you select a spec section with multiple revisions, only the most recently published revision will be downloaded. If you only want to download a single spec section, you can also use the Download option when viewing the spec section revision. - Mark the checkbox next to a division to select all spec sections of that division.
- Mark the checkbox in the table's header to select all specifications in the set.
- Select individual spec sections.
- Click the Download button.
- If you selected only one spec section to download, the download will begin immediately, and the section will open in a new tab of your browser. If you selected multiple spec sections, you will be presented with the following steps.
- You will be prompted to choose whether you would like to download the spec sections as a single PDF or have each of the sections on a separate page.
Note: You will have these options only if you selected more than one spec section.
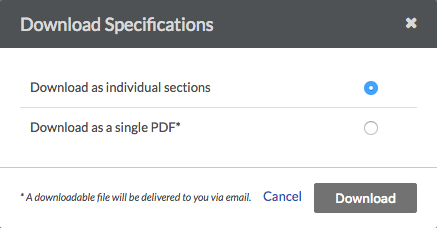
If you select "Download as individual sections," the file will be downloaded to your computer. If you select "Download as a single PDF," a downloadable file will be delivered to you via email.
View & Download Reports
Once in the platform, find the project you wish to post drawings for and select it from the Portfolio View.

Once you are in your Project, Find the Toolbox at the top left of the screen, and find the Documents Tool under Core Tools

Once inside the Documents Tool, find the ’02 Consultant Reports’ folder and click on it

Contract Signing (DocuSign)
To complete your DocuSign envelope, please follow the steps below.
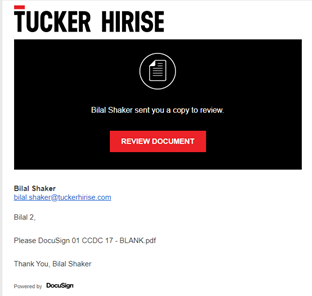
The email you receive from DocuSign should look like this. To open the document, please click on “Review Document”
If prompted, click on the checkbox highlighted below to agree to the use of electronic signatures and records, then click continue

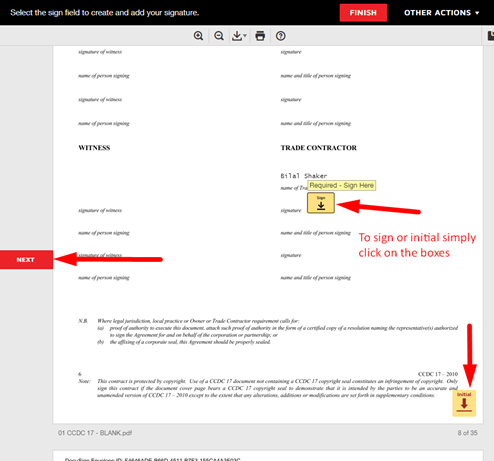
If the document requires your signature, DocuSign will take you directly to where you are required to take action. To sign or initial, simply click on the highlighted boxes. If you have been included for review purposes only, no signature fields will be available.
Once you are done signing, click on “Finish”.
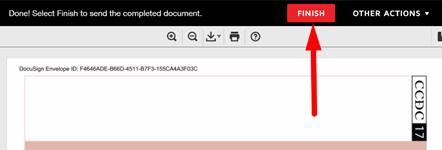
NOTE: You will automatically receive an email copy of the COMPLETE document once everyone has signed.
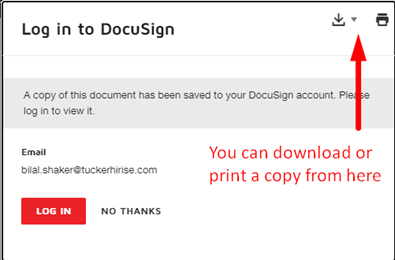
If you would still like to save a copy of the current document, you can click on the download button shown below. You are NOT required to create a DocuSign account in order to save a copy.
Create & Submit an Invoice
| Back | Current Lesson - 9/23 | Lesson 10 - Next |
- Invoices are to include work from the 20th day of the previous month to the 20th day of the current month.
- Invoices are due by the 20th of the current month.
- Invoices received prior to the 20th of the month will be entered the current draw period
- Any invoice received after the 20th of the month will be entered the subsequent draw period
- All invoices are to be accompanied with assigned Purchase Orders, Packing Slips or Delivery Slips, as well as required insurance documents.
- The Project Manager will review, confirm allocated cost codes and approve the general invoices before the end of the month and send to the owner for final review and payment.
- Prior to billing, you will receive an invitation to bill email from Procore by the 15th of the current month as shown below. If you have work or materials to invoice, but not have received an invitation to bill, please contact the Project Manager.
Submit from Email
- If the contractor has issued you an invitation to submit a bill, you'll receive an email notification like the one shown below.
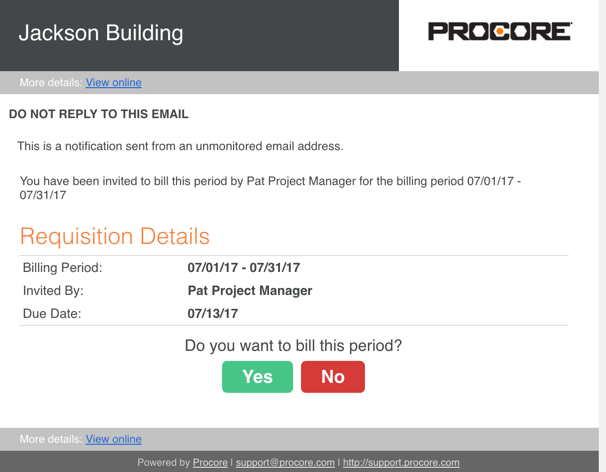
- Under the Do you want to bill this period? area, choose one of the following:
- If you want to submit the invoice, click Yes. Then click Post Response and continue with step 3.
OR - If you are not ready to submit the invoice, click No. Then click Post Response.
Note: If you change your mind after posting your response, you can update your response to the invitation if the 'Due Date' has not yet passed and the contractor who sent you the invitation has the 'Billing Period' set to 'Open'. To do this, click Do you want to bill this period? again, choose Yes, and then click the Post Response button.
- If you want to submit the invoice, click Yes. Then click Post Response and continue with step 3.
- At the Create New Invoice page in Procore, the Period Start, Period End, and Billing Date is pre-filled with what the contractor set. Enter the invoice number, if applicable.
- In the Detail section, enter either your percent complete or amount complete for each line item in your original schedule of values. See "For Commitments Formatted as Unit Quantity" and "For Commitments Formatted as Amount Based" in the See Also section below.
- Enter the materials presently stored amount. This will be added to the percent complete for each line item. See "For Commitments Formatted as Unit Quantity" and "For Commitments Formatted as Amount Based" in the See Also section below.
- In the Approved Commitment Change Orders section, repeat the process for each change order's line items by entering the percent or amount complete for each line item. Any new approved change orders will automatically be added here.
Note: You can only bill by line item on change orders that have been created after 11/6/2016. - Attach any required backup documentation, such as lien waivers.
- If the contractor requires the Invoice to be signed, complete the following steps:
- Click Save.
- Click Export and select PDF.
- Sign the PDF.
- Return to Procore and select the Summary tab.
- Click Edit.
- Attach the signed PDF.
- If the contractor requires the Invoice to be signed, complete the following steps:
- If you are not ready to submit to the contractor, click Save. This will set the status of the invoice to "Draft." If you are ready to submit it to the contractor, click Submit for Review. This will set the status of the invoice to "Under Review."
Note: Once you submit the invoice to the contractor, you will not be able to edit it unless the contractor changes the status to Revise & Resubmit.
Submit from Commitment
- Navigate to the commitment you want to create the invoice for.
- Click + Create Invoice.
- Complete steps #2-8 above.
For Commitments Formatted as Unit Quantity
- Fill out the following fields for each line items that will be paid for by the invoice:
- This Period (qty): Enter the quantity for each line item for this period and the dollar value will automatically be calculated. If you prefer to enter a percentage value for work completed instead, enter the percent and the quantity for this period and the dollar value will automatically be calculated.
- If you need to release retainage:
- Complete Steps 6 & 7 above.
- Click Save.
- In the Detail subtab, click Edit.
- Released this Period ($): Enter the dollar amount of retainage to be released this period.
- Finish Step 8 above.
- To save the invoice, click Save. To submit it for review, click Submit for Review.
For Commitments Formatted as Amount Based:
- Fill out the following fields for each line items that will be paid for by the invoice:
- Work Completed (This Period): Enter the dollar amount of work completed in the invoice's pay period. If you prefer to enter a percentage value of work completed instead, click the calculator icon and enter the percentage, and click Save. Procore will automatically translate the percentage of work into the equivalent dollar amount.
- Materials Presently Stored: Enter the dollar amount of materials presently stored on the job site or nearby storage facility that was not included in the costs for "Work Completed" (D and E ) columns. Please note that the values entered here will remain in this column on future invoices until it is manually moved to Work Completed. See "How do I bill for Stored Materials?" in the See Also section below for more information.
- If the contractor will create a payment schedule once the invoice is approved, enter the amounts for the work you are claiming this period in the Subcontractor Claimed This Period column of the invoice detail. In order for this column to appear, the payment schedule feature must be enabled in the Invoicing tool’s configuration settings. See "Configure Settings: Invoicing" in the See Also section below.
- If you need to release retainage:
- Complete Steps 6 & 7 above.
- Click Save.
- In the Detail subtab, click Edit.
- Released this Period - Work Retainage ($): Enter the dollar value of work retainage to be released this period.
- Released this Period - Materials Retainage ($): Enter the dollar value of materials retainage to be released this period.
- Finish Step 8 above.
- To save the invoice, click Save. To submit it for review, click Submit for Review.
Revise an Invoice (Subcontractor)
Steps
- Navigate to the project's Commitments tool.
- Click the Summary or Detailed tab.
- Locate the commitment with the invoice that has line items to review. Then click View.
- Click the Invoices tab.
- Locate the invoice to review. Click Edit.
- Review the invoices as follows:
- Items with a green checkmark
 to the left of the line show that the item has been approved.
 - Items with a red x
 to the left of the line item means that the line item has been rejected.
 - The Comment column to the right shows any comments that have been added to the line item by the Admin user.
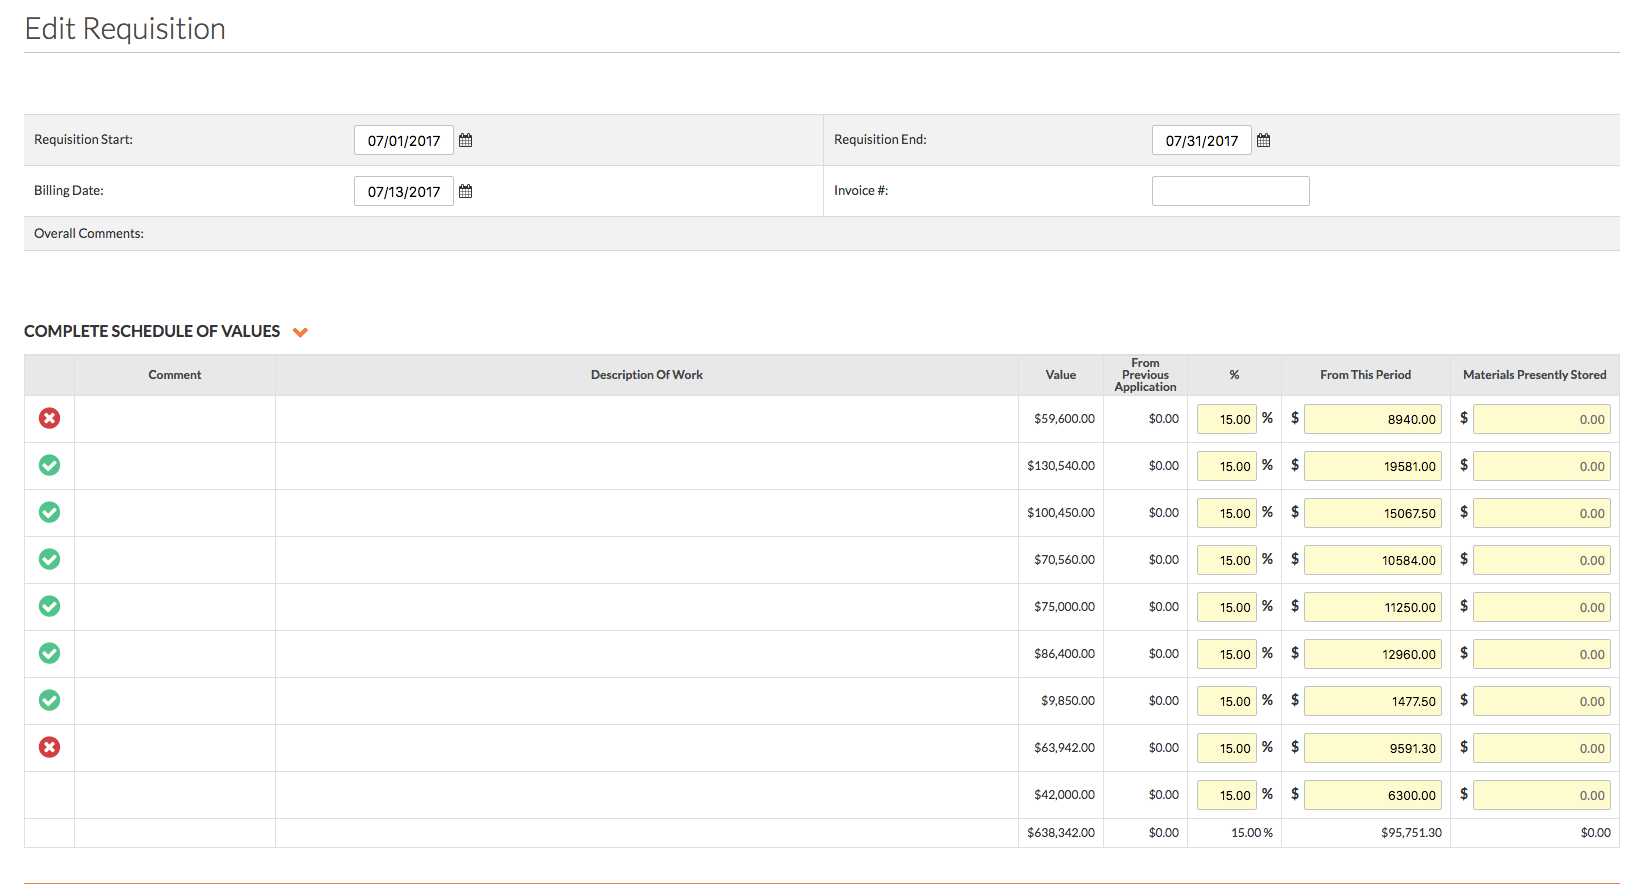
- Items with a green checkmark
- Adjust your line item amounts as needed.
- Click Submit for Review.
Responding to RFIs
RFIs in the Tucker Platform are digitally generated and will be sent to you via Email notification. RFIs can be viewed Online or by PDF by clicking on the relative buttons within the email, however the easiest way to respond to an RFI is simply to reply to the email which notified you. Any text or file attachment will carry through to the Tucker Platform and be logged appropriately as a response to the related RFI tagged with your credentials. Responses to RFIs and RFI emails should only contain answers, attachments, or questions for further clarification. Please DO NOT respond to RFIs or emails with something such as "We will review and respond shortly". This will incorrectly switch the Ball In Court away from you and the item will not show in the list of your open items.
Important
If your response to an RFI requires an SI, TA, PTA, Drawing Revision/Issuance, Sketch, Specifications, etc, you MUST follow these steps:
- Respond to the RFI stating it will be resolved by the forthcoming document with anticipated delivery date
- Create the new SI, TA, or PTA to address the issue (inclusive of cover sheet and updated documents) keeping in mind the following:
- Please bubble all changes
- Please Include references to which RFIs are being addressed on the cover sheet.
- For SIs that cover multiple disciplines, please update the model and drawings to ensure changes are communicated and coordinated.
- Please keep sheet views in the model.
- Upload the SI, TA, or PTA (with cover sheet and updated documents) to Procore's Instructions tool per instructions in the Procore Uploads tab.
Please note, if an RFI will be resolved in a forthcoming Site Instruction or revised set of documents, the RFI will remain open until such resolution is provided.
To view RFIs, select the RFIs tool from the Project Tools drop down menu:

Upload & Submit a Submittal
If the general contractor for a construction project assigns you to the 'Submitter' role in a submittal workflow, it means you will be required to perform an action on a submittal. For example, you might be required to upload drawings, plans, or other documents as attachments to the submittal in order to fulfill the submittal requirements and then proceed with the design review.
Typically, submittals in Procore are created by a submittal manager (however, the submittal manager role can be reassigned). That person names the submittal item and then completes the basic data entry on the submittal. The submittal manager also designates members of the project team as either a 'Submitter' or 'Approver' on the submittal workflow.
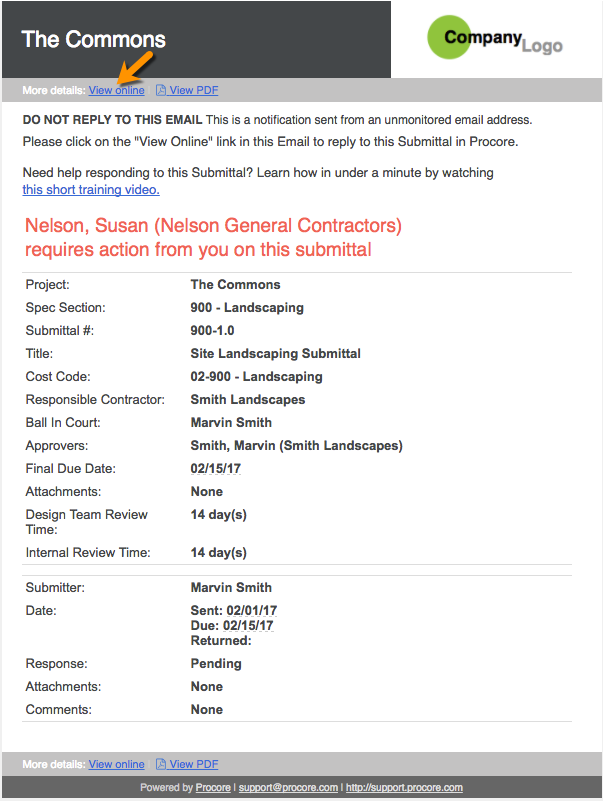
If you are designated as a 'Submitter' (typically a subcontractor), Procore will send you an automated email message with the subject line 'Action Required on a Submittal' to alert you that the general contractor requires your response on the submittal.
Depending on the specific requirements of your agreement, you may be required to upload attachments (documents, drawings, plans, etc.) to the submittal, which will later be sent to the design team for review and approval. To assist you with this process, the email notification (see illustration below) contains a View Online link. It may also contain attachments that you might need to download and review before responding to their request for action.
Respond to the Request for Action
- Choose from one of these options:
- Open the email message and click the View Online link. If you are not currently logged into Procore, you will be prompted to log in. See Log into Procore Web.

OR - Log in to Procore and navigate to the project's Submittals tool. Next, locate the submittal in the 'Items' view and click View next to the submittal. Your name will be listed in the 'Ball In Court' field.
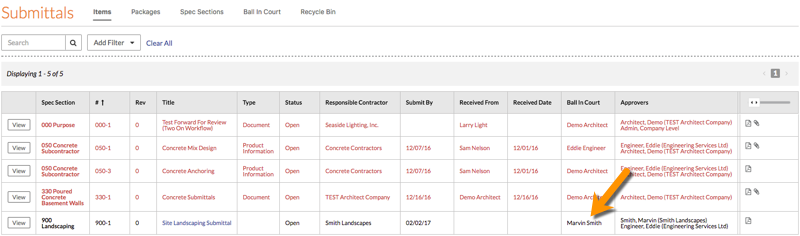
- Open the email message and click the View Online link. If you are not currently logged into Procore, you will be prompted to log in. See Log into Procore Web.
- Review the submittal's information and any included attachments.
- Click Respond next to your name in the 'Submittal Workflow' table.
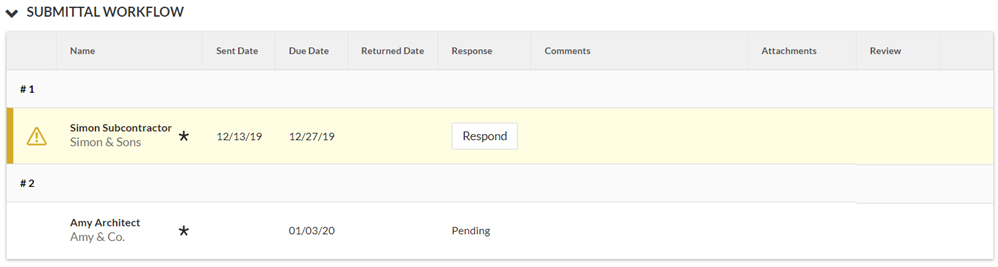
- Add the following information:
- Response. The system automatically selects the 'Submitted' as your response, or selects the custom response configured for a 'Submitted' item.
Note: The response automatically selected may be different if a custom response was configured in the tool's advanced settings. - Comments. Optional. Enter any comments to include with the response.
- Attach Files. Optional. Attach any files to include with the response.

- Response. The system automatically selects the 'Submitted' as your response, or selects the custom response configured for a 'Submitted' item.
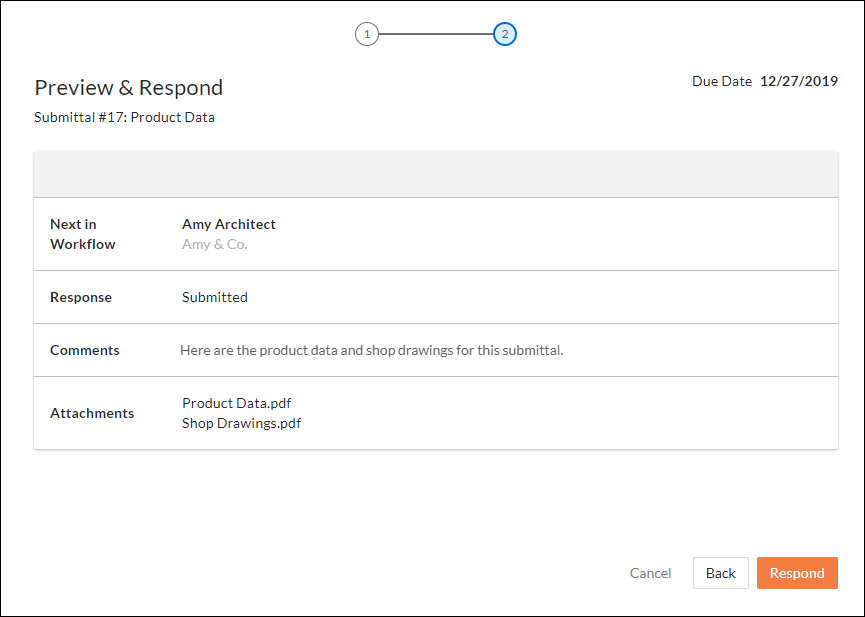
- Click Preview.
- Preview the information and click one of the following options:
- Click Respond to save your information and submit the submittal.
- Click Back if you need to change any information you added.
- Click Cancel to close the window and return to the submittal's page. Note: Any information you added before closing the window won't be saved.
Note: If there's another step in the submittal's workflow, the user's name or group of users' names in the next step will display in the 'Next in Workflow' field.
The system sends an email notification to any user types selected in the 'Submitter Role Submits (via Workflow)' email configuration after you save your response. See When does the Submittals tool send email notifications to Procore users?
The system waits until all required users in each step of a submittal's workflow respond before shifting the Ball In Court to the next step.
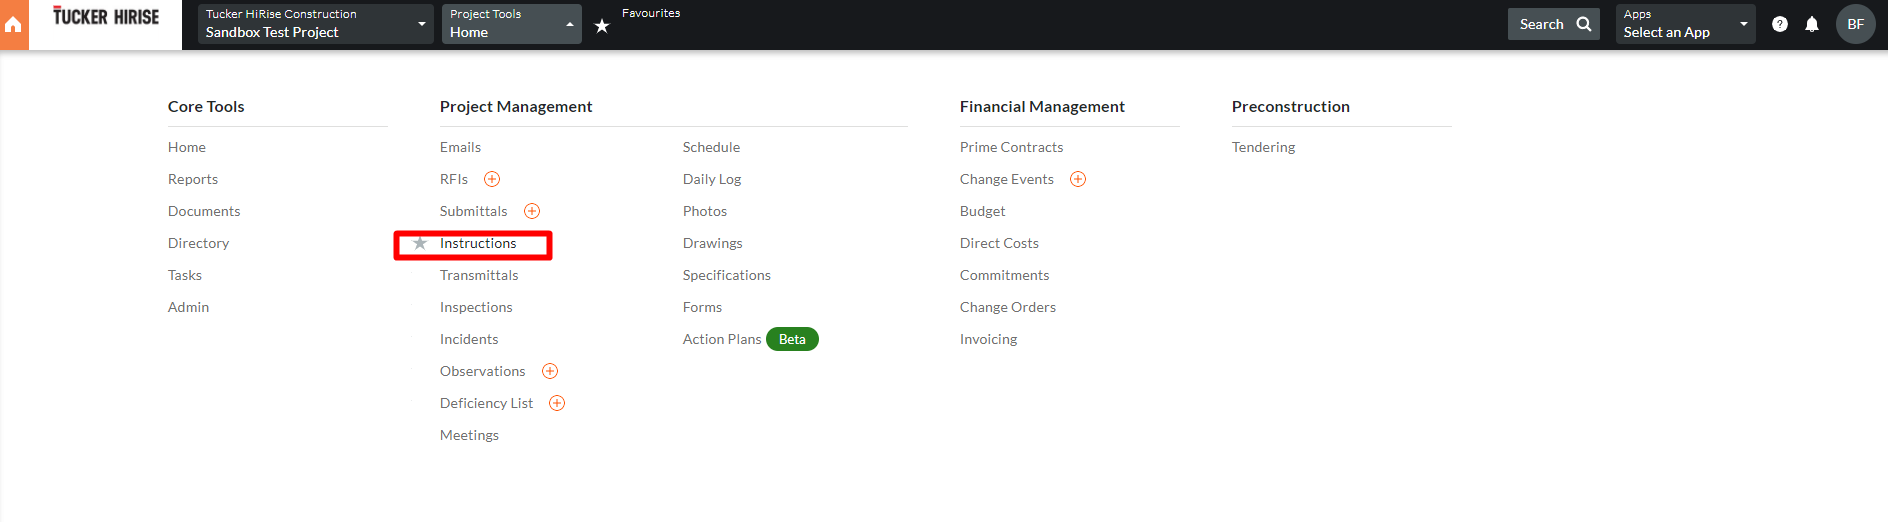
View & Download Instructions (SIs, ASIs)
When an Instruction is issued to you, you will receive an email notification that includes a link to download any associated documents.
If you would like to view all previous instructions, select the Instructions tool from the toolbox:
Respond to a Change Event RFQ
| Back | Current Lesson - 17/29 | Next |
If you have been invited to submit a response to an RFQ, the RFQ must be in the 'Out for Pricing' or 'Revise & Resubmit' status. In addition, your Procore user account must be granted 'Standard' permission or above on the project's Commitment tool and your user account must be added a member of the 'Private' list of the commitment associated with the RFQ. It is important to also note that RFQs are only available in a company's Procore account when the Change Events tool is enabled.
Additional Information:
- If you are a subcontractor who has been named as a recipient on the RFQ, you can use one of the procedures below to submit your response
- If you are a general contractor who has received written correspondence from a recipient who is NOT a Procore user, see Respond to an RFQ on Behalf of an RFQ Recipient.
Respond to the RFQ from the RFQ Email
If you are a subcontractor who has received an RFQ from a general contractor, follow the steps below to submit your response by email:
- Open the Request for Quote (RFQ) email.

- Review the information in the 'RFQ Details' section of the message. This includes the following information:
- The Procore project associated with the RFQ.
- The Title which typically summarizes the nature of the request (for example, Revised Paint Colors).
- The name of the individual requesting the quote.
- The due date for the quote.
- The origin of the RFQ.
- Any documents or attachments that were added to the RFQ by the individual who sent the request.
- Under RFQ Information, choose the appropriate response to the 'Do you have a cost or schedule impact associated with this scope?' question:
- No. Click this button if there is no cost or schedule impact. This updates the status to Closed and you will not be able to edit the RFQ unless the contractor changes the status to Revise & Resubmit.
- Yes. Click this button to indicate that there is a cost and/or schedule impact associated with the RFQ. This action will open the Procore login page:
- Enter your Procore login credentials in the Email Address and Password fields.
- Click Login.
Note: The system should automatically open the RFQ in Procore. A banner appears at the top of the RFQ with some instructions and the due date for your response. - Enter the following information below the banner:
- Quote Amount. Enter in the quoted amount for the change.
- Schedule Impact. If known, provide an estimate of the number of additional days that would be added to the project schedule due to the change.
- Comments. Add any additional comments regarding your pricing quote or schedule impact.
- Attachments/Details. Attach relevant documents or files.
Note
A user with 'Admin' permission on the Change Events tool can configure settings that will automatically include attachments in subsequent change orders. See Set Attachment Settings.
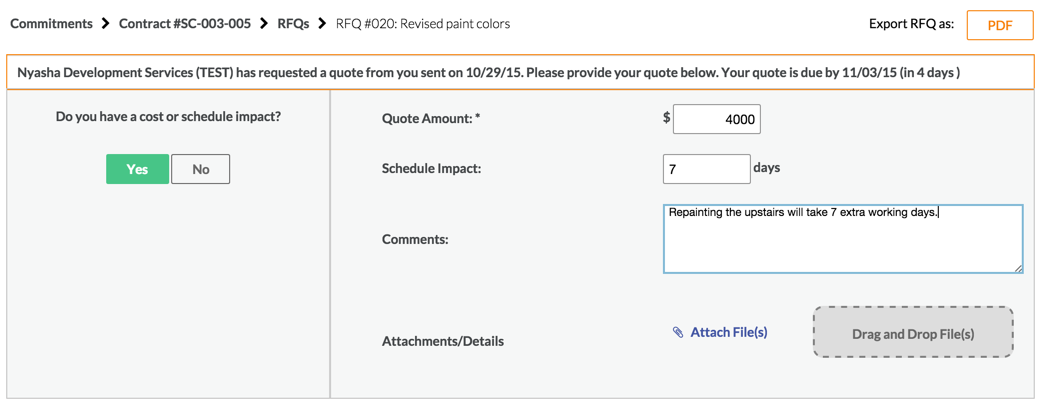
- Click Post Response.
Note: Your response to the RFQ will then be emailed to the person who had requested it, and the response will show up within the RFQ in the RFQ Response section of the Procore web application.
Respond to the RFQ from the Commitments Tool
- Navigate to the Commitments tool.
- Click View next to your Commitment.
- Click the RFQs subtab.
- Click View next to the RFQ.
Note: You can sort by the Status column to see RFQs that are in Out for Pricing or Revise & Resubmit, and/or you can sort by the Ball in Court column to see which RFQs you can respond to. - If you have a cost or schedule impact associated with the change, click Yes, then proceed to the next step. If there is no cost or schedule impact, click No. If you click No, the status will update to Closed and you will not be able to edit the RFQ unless the contractor changes the status to Revise & Resubmit.
- Complete steps #5-6 above.
Respond to a Deficiency Item
This guide includes only the steps that apply to trades and vendors. If you would like to view the start to finish Deficiency process, including steps performed by Tucker HiRIse, please Click Here.
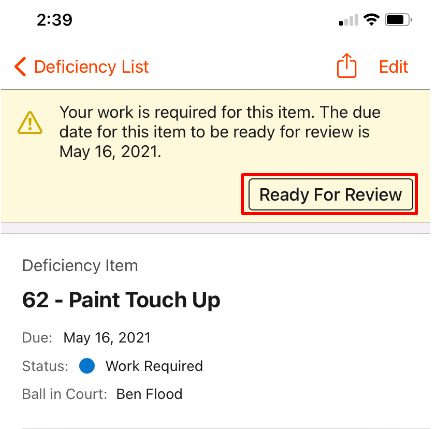
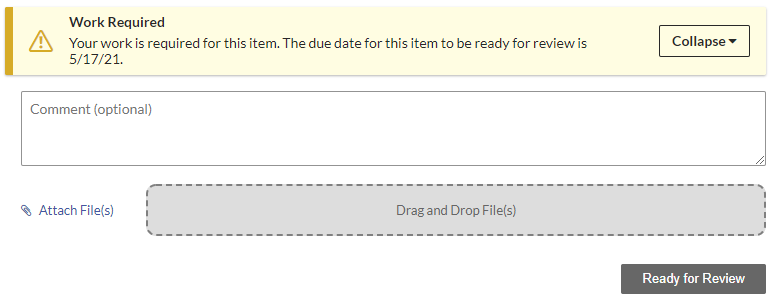
Work Completed & Ready for Review (Trade or Tucker HiRise)
| Procore Mobile App (iOS & Android) | Procore Web App (app.procore.com) |
|---|---|
|
A. Trade completes work. Once completed, Trade or Deficiency Item Manager adds a photo and marks Deficiency as “Ready for Review”
|
A. Trade completes work. Once completed, Trade or Deficiency Item Manager adds a photo and marks Deficiency as “Ready for Review”
|