Respond to a Submittal as an Approver
The creator of a submittal adds one or more approvers to the submittal workflow (see Add Users to the Submittal Workflow). Each approver must then submit a response as described in Steps below. If an approver's response becomes overdue, the system sends an automated email reminder to the reviewer until a response is submitted. If no response is received, a reminder is sent once a day for 45 days.
If you receive an email from Procore with the subject line "Action Required for Submittal," do the following:
- Review the Action Required Email for a Submittal
- Add Markup to Submittal PDF Attachments
- Respond to a Submittal in Procore
Review the Action Required Email for a Submittal
- Open your Email program. Then open the email with the Action Required for Submittal subject line.

- Review the contents of the message. The click one of the following options:
- View Online. This opens the Procore program to the appropriate submittal.
Notes:- If you are not currently signed into Procore, you will be prompted to log in.
- If you want to respond to the submittal right now, continue with Respond to a Submittal in Procore below.
- View PDF. This opens a PDF copy of the submittal's information in a new tab in your web browser.
- View Online. This opens the Procore program to the appropriate submittal.
Important
Procore's Submittal Markup feature allows all markups to happen directly in procore, including custom stamps. This feature is integrated into the workflow, so it is highly recommended that Approvers add all their markup directly in Procore, and then download a copy for their records. This will save the entire project team a lot of time and ensure any Approvers that follow will be reviewing your markups! For clarity, Approvers should not be downloading un-marked submittals, performing markup in an external PDF editor, or re-uploading as this entire process is much more efficient if performed entirely in Procore.Add Markup to a Submittal PDF Attachment
- Navigate to the project's Submittals tool.
- Click View next to the submittal with the PDF attachment you want to add markup to. Note that you bust be the Ball In Court for this feature to be available
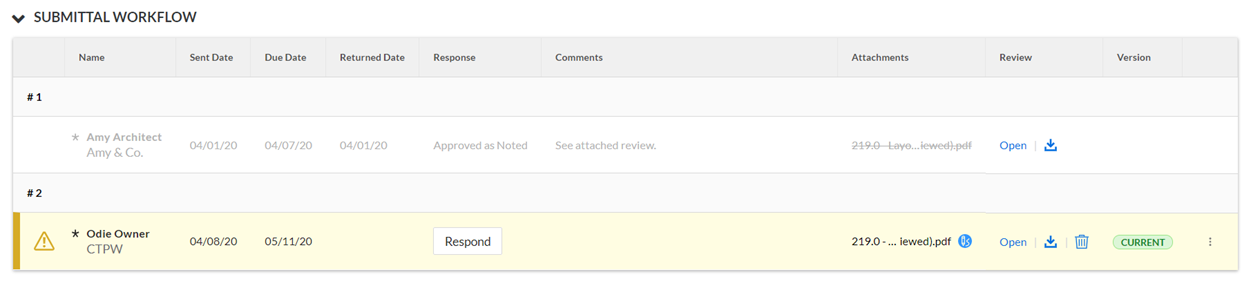
- In the 'Submittal Workflow' table, click Open next to the PDF attachment you want to add markup to.
Tip
Current attachments are indicated by a 'Current' label in the 'Version' column. - Use the markup tools to add markups or one of your submittal stamps to the file.
This table lists the features and available keyboard shortcuts to use when viewing and adding markups to submittal PDF attachments.
Button Label Action Windows Keyboard Shortcut Apple Keyboard Shortcut 
Hide/Show Page Navigator Hide or show the Page Navigator menu. ALT + T OPTION + T 
Select Click to select or move a markup on the page. To select multiple markups, hold SHIFT on your keyboard and click on each markup you want to select as part of a group. Press V Press V 
Pan Click and drag your cursor to move across the page.
For temporary panning, hold the SPACEBAR.SHIFT + V SHIFT + V 
Pen Draw a freehand line or shape. Press P to select this tool. Press P to select this tool. 
Line Draw a line. Press L to select this tool. Press L to select this tool. 
Arrow Draw an arrow. Press A to select this tool. Press A to select this tool. 
Rectangle Draw a rectangle. Press R to select this tool. Press R to select this tool. 
Ellipse Draw a circle or oval. Press E to select this tool. Press E to select this tool. 
Cloud Draw a rectangular cloud. Press C to select this tool. Press C to select this tool. 
Freehand Highlight Highlight with a freehand highlighter. Press F to select this tool. Press F to select this tool. 
Highlight Highlight text on a page. Press H to select this tool. Press H to select this tool. 
Text Add a text box. The text box must be filled to be selectable. The font size can be adjusted by selecting a filled text box and moving the slider above the text box. Press T to select this tool. Press T to select this tool. 
Stamp Open the stamp menu and click the stamp you want to add. See Create and Manage Custom Submittal Markup Stamps. Press S to open the stamp menu. Press S to open the stamp menu. 
Stroke Choose the desired stroke width for a selected markup. Adjusting the stroke width for a text box adds or modifies a border around the text box. N/A N/A 
Color Choose the color for a selected markup. N/A N/A 
Opacity Choose the opacity percentage for the fill color on a selected markup.
Note: The opacity cannot be adjusted for Line, Arrow, Cloud, or Stamp markups.N/A N/A N/A Delete Delete a selected markup. DELETE DELETE
Mozilla Firefox Only:
SHIFT + DELETEN/A Copy Copy a selected markup. CTRL + C CMD + C N/A Paste Paste a copied markup. CTRL + V CMD + V 
Zoom In Zoom in on the page. CTRL + Plus Sign (+) CMD + Plus Sign (+) 
Zoom Out Zoom out on the page. CTRL + Minus Sign (-) CMD + Minus Sign (-) N/A Zoom to Page Fit the full page in the document viewer. CTRL + 9 CMD + 9
Safari: CTRL + 9N/A Zoom to Width Fill the document viewer with the full width of the page. CTRL + 0 CMD + 0
or
CTRL + 0
Previous Page Move to the previous page. SHIFT + Up Arrow (↑) SHIFT + Up Arrow (↑) 
Next Page Move to the next page. SHIFT + Down Arrow (↓) SHIFT + Down Arrow (↓) N/A Scroll Up Scroll up the page. 1 Up Arrow (↑) Up Arrow (↑) N/A Scroll Down Scroll down the page. 1 Down Arrow (↓) Down Arrow (↓) N/A Scroll Left Scroll left on the page. 1, 2 Left Arrow (←) Left Arrow (←) N/A Scroll Right Scroll right on the page. 1, 2 Right Arrow (→) Right Arrow (→) 1 The page must be in 'Select' mode. Click the
 icon or press V on your keyboard.
2 Scrolling left and right is only available when the page view in the document viewer is narrower than the actual page width.
- When you are finished adding your markups and stamps, close the PDF viewer to return to the submittal's information page.
The submittal PDF attachment you added markups to will have a markup pencil icon next to it and 'Current' will display in the 'Version' column to indicate which version of the attachment is the most up-to-date.
Respond to a Submittal in Procore
- Click View Online in the Action Required email message.
OR - Navigate to the project's Submittals tool and click View next to the submittal that needs your response. Your name will be listed in the 'Ball In Court' field.
- Review the submittal's information and any included attachments.
- Review and Markup Submittal PDF Attachments in Procore. Note that this is not required but it is recommended that you review, markup, and stamp attachments directly in Procore instead of downloading editing, and re-uploading attachments.
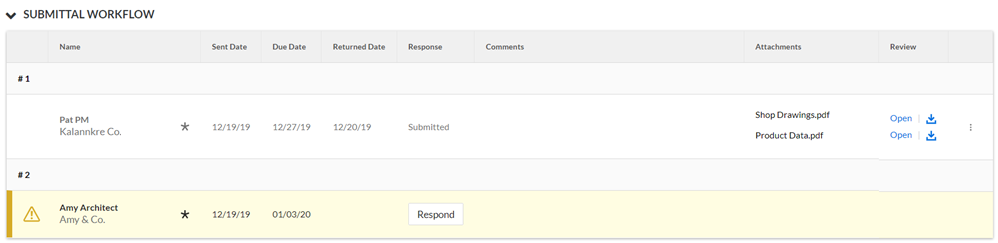
- Click Respond next to your name in the 'Submittal Workflow' table.
- Add the following information:
- Response. Select the appropriate response from the dropdown menu.
- Comments. Optional. Enter any comments to include with the response. Please DO NOT respond with anything other than a complete and final response. Doing so will shift the ball in court to the next step of the workflow prematurely. If you have questions or items that need to be discussed before you can complete your response, please initiate a communication via that submittal's Email button.
- Attach Files. Optional - Only required if you chose not to Review and Markup Submittal PDF Attachments in Procore. Attach any files to include with the response.
OR
Forward the submittal to another user to respond as a 'Reviewer'. See Forward a Submittal for Review.
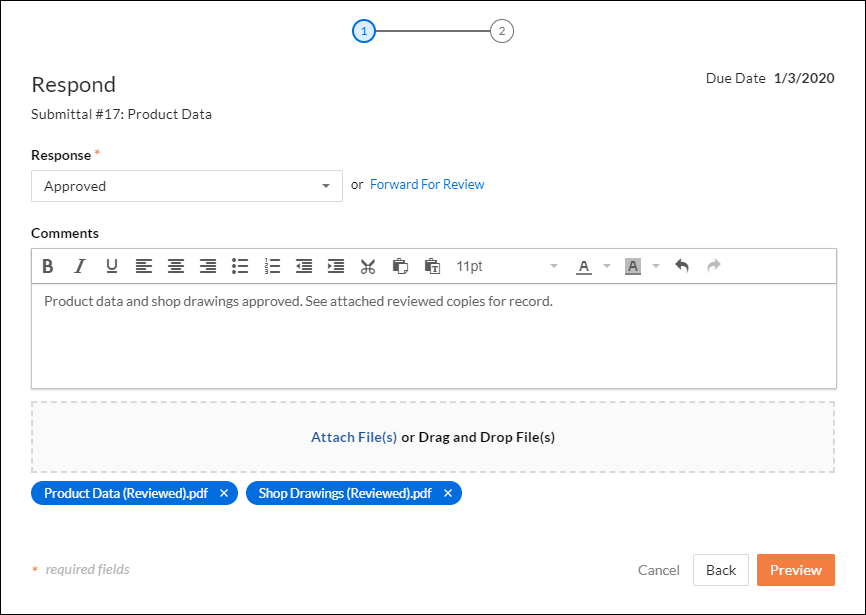
- Click Preview.
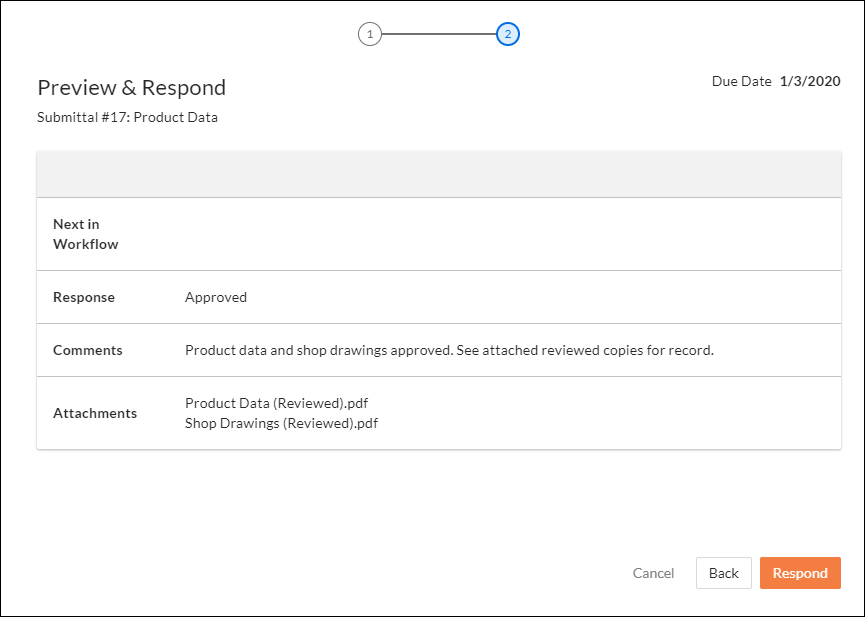
- Preview the information and click one of the following options:
- Click Respond to save your information and respond to the submittal.
- Click Back if you need to change any information you added.
- Click Cancel to close the window and return to the submittal's page. Note: Any information you added before closing the window won't be saved.
Note: If there's another step in the submittal's workflow, the user's name or group of users' names in the next step will display in the 'Next in Workflow' field.
The system sends an email notification to any user types selected in the 'Approver Role Responds (via Workflow)' email configuration after you save your response. See When does the Submittals tool send email notifications to Procore users?
The system waits until all required users in each step of a submittal's workflow respond before shifting the Ball In Court to the next step.