Add Related Items to a Submittal
When creating or reviewing a submittal or submittal package, the best practice is to create a link to any other items which may be related to the submittal or package. For example, if a submittal for a new RTU is now required due to an SI, the SI should be added as a Related Item. Without this link it would be difficult for an outside party or new team member to determine where that RTU was specified and if it failed to pass inspection and the drawings weren't clouded with the change.
Submittal
- Navigate to the project's Submittals tool.
- Click Items.

This reveals a list of the individual submittals on the project. - Locate the desired submittal in the list and click View.
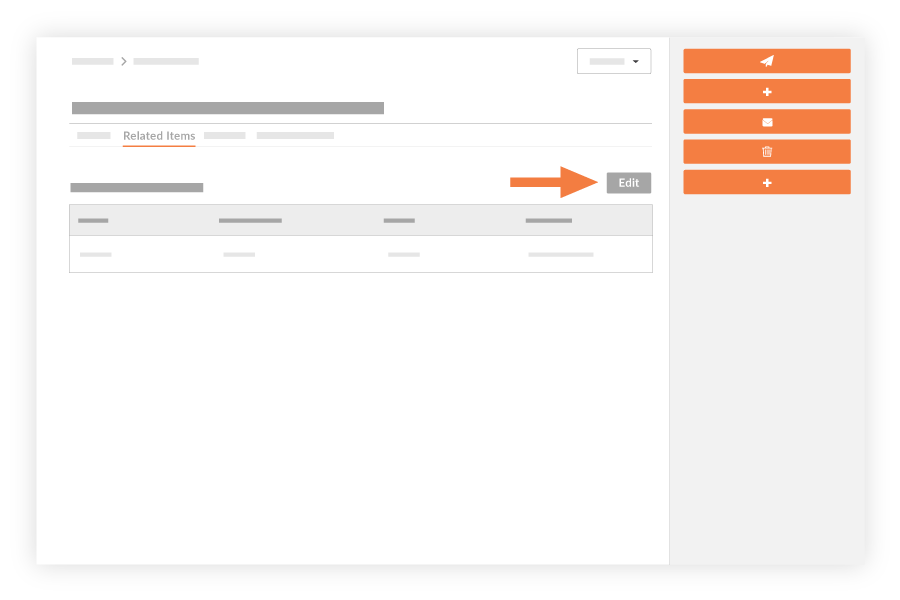
- Click the Related Items subtab.
- At the top-right of the Related Items page, click Edit.
This places the Related Items table into edit mode. - From the Type drop-down list, select the item to related to the submittal item. These selections correspond to existing Project level items in Procore.
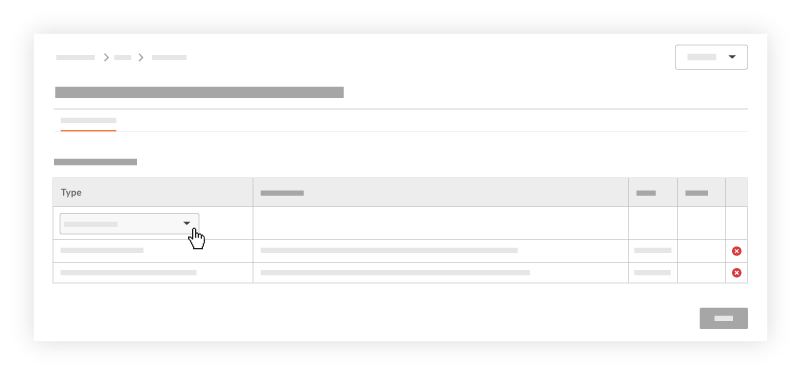
- Choose from the following selections. You must have the appropriate access permissions to the associated tool in order to select the items in the corresponding Description list:
- Bid. To associate the item with an particular bid submitted to the project, select this option. Then select the bid from the Bidding tool from the Description list. See Submit a Bid.
- Change Event. To associate the item with particular change event, select this option. Then select the specific event from the Description drop-down list. See What is a Change Event?
- Change Order Request. To associate the item with particular change order request, select this option. Then select the specific COR from the Description drop-down list. See Create a Change Order Request.
- Commitment Contract. To associate the item with a particular commitment contract, select this option. Then select the commitment contract from the Description drop-down list. See Create a Commitment.
- Commitment Contract Change Order. To associate the item with a particular commitment contract change order, select this option. Then select the company name from the Description drop-down list. See Create a Commitment Change Order.
- Company. To associate the item with a particular company, select this option. Then select the company name from the Description drop-down list. See Add a Company to the Project Directory.
- Contact. To associate the item with a particular person, select this option. Then select the contact's name from the Description drop-down list. See Add a User Account to the Project Directory.
- Cost Code. To associate the item with a cost code, select this option. Then select the desired cost code from the Description drop-down list. See Request a Cost Code Import or Edit and Add Cost Codes and Descriptions.
- Custom. To associate the item with an item from a custom tool, select this option. Then select the generic tool item from the list. See Procore Customs.
- Daily Construction Report Log. To associate the item with an entry from the project's daily construction report log, select this option. Then select the lot item from the Description drop-down list. See Daily Construction Report Log.
- Document. To associate the item with a related document, select this option. Then click Attach Files, enter any additional information in the Notes box, and click Add. See Upload Files into a Folder.
- Drawing Revision. To associate the item with a related drawing revision, select this option. Then select the drawing revision from the Description drop-down list. See Upload a Drawing Revision.
- Email. To associate the item with an email message stored in the project's Email tool, select this option. Then select the email message from the Description drop-down list. See Create an Email.
- Field Order. To associate the item with a field order, select this option. Then select the specific field order from the Description drop-down list.
- Image. To associate an item with an image, select this option. Then select the specific Image from the Description drop-down list.
- Inspection. To associate an item with an inspection, select this option. Then select the specific inspection from the Description drop-down list. See Create a Project Level Inspection.
- Location. To associate an item with a location, select this option. Then select the location from the Description drop-down list.
- Meeting. To associate an item with a particular meeting, select this option. Then select the Meeting from the Description drop-down list. See Create a Meeting.
- Meeting Item. To associate an item with a business item from a meeting, select this option. Then select the item from the Description drop-down list. See Add a Business Item.
- Observation. To associate an item with an observation, select this option. Then select the project's observation from the Description drop-down list. See Create an Observation.
- Payment Application. To associate an item with a payment application, select this option. Then select the payment application from the Description drop-down list. See Create a Payment Application (Pay App)
- Potential Change Order. To associate an item with a PCO, select this option. Then select the PCO from the Description drop-down list. See Create a Potential Change Order.
- Prime Contract. To associate an item with a prime contract, select this option. Then select the prime contract from the Description drop-down list. See Create a Prime Contract.
- Prime Contract Change Order. To associate an item with a PCCO, select this option. Then select the PCCO from the Description drop-down list. Create a Prime Contract Change Order (PCCO).
- Productivity Log. To associate an item with a productivity log entry, select this option. Then select the log entry from the Description drop-down list. See Add Productivity Log Entries.
- Punch Item. To associate an item with a Punch List item, select this option. Then select the punch list item from the Description drop-down list. See Create a Punch List Item.
- Purchase Order Contract. To associate an item with a contract PO, select this option. Then select the contract PO from the Description drop-down list.
- RFI. To associate an item with an RFI, select this option. Then select the RFI from the Description drop-down list. See Create an RFI.
- Request for Quote. To associate an item with an RFQ, select this option. Then select the RFQ from the Description drop-down list. See Create RFQs.
- Specification Section Revision. To associate an item with a spec section revision, select this option. Then select the spec section revision from the Description drop-down list. See Edit Spec Sections.
- Submittal Package. To associate an item with a submittal package, select this option. Then select the submittal package from the Description drop-down list. See Create a Submittal Package (with Submittal Workflow) or Create a Submittal Package (with Package Workflow).
- Submittals. To associate an item with a submittal, select this option. Then select the submittal from the Description drop-down list. See Create a Submittal.
- Task. To associate an item with a schedule task, select this option. Then select the task from the Description drop-down list. See Schedule.
- Transmittals. To associate an item with a transmittal, select this option. Then select the transmittal from the Description drop-down list. See Create a Transmittal.
- Direct Costs Expense. To associate an item with a transmittal, select this option. Then select the transmittal from the Description drop-down list. See Create an Expense.
- Direct Costs Invoice. To associate an item with a transmittal, select this option. Then select the transmittal from the Description drop-down list. See Create an Invoice.
- Daily Log Tools. To associate an item with an item from one of the daily logs, select the desired daily log from the Type list. Then select the log from the Description drop-down list. See Daily Log.
- If you want to provide any additional clarification about the, enter the needed detail in the Notes box.
- Click + Add. Then repeat the steps above to add other related items if desired.
- When finished, click Save.
Submittal Package
- Navigate the project's Submittals tool.
- Click Packages.
This reveals the Submittal Packages page. - Locate the desired submittal package and click View.
This opens the submittal package in view mode. - Click the Related Items tab.
- Next to the 'Related Items' table, click Edit.
This places the 'Related Items' table into edit mode. - Add the related item to the package as follows:
- Type
Select an item type for the related item from this list. For example, if you want to add a bid sheet, select Bid. The selections available in this list will depend upon which Procore tool's are active tabs on the project. See Set the Active Tabs on a Project. - Description
Select the appropriate item from the list. For example, if you are adding a bid sheet, a list of all the bid sheets for the project is available. - Date
This date populates automatically with the current date. - Notes
Type any details about the related item.
- Type
- Click + Add.
Notes:- If the Add button does not appear on the page, you must go back and select a Type and Description
- You can add one related item per line item.
- You can add as many line items as desired.
- Click Save.
The system places the submittal back into view mode and your new item(s) will be listed the 'Related Items' tab of the submittal package.