Create a Bid Form
Objective
To create a bid form before you add and invite companies to bid.
Background
Bid forms make it easier to break down scope and cost information and help to standardize the responses that are being received from bidders. They can also help you better assess coverage by allowing you to customize how you organize your bidders.
After inviting companies to bid with bid forms, you can compare bids side-by-side with the Bid Leveling feature. See Level Bids for a Bid Form.
Things to Consider
- Required User Permissions:
- 'Admin' level permissions on the project's Bidding tool.
Prerequisites
Video
Steps
Tip
You can also create bid forms with a CSV import. See Import Bid Forms to the Bidding Tool.- Navigate to the project's Bidding tool.
- Open the bid package that you want to add a bid form to.
- Click the Bid Forms button.
- Select from the following options to create a new bid form:
- Select New to create a new bid form.
- Select From CSV to upload a bid form from a CSV file. See Import Bid Forms to the Bidding Tool.
-
In Beta
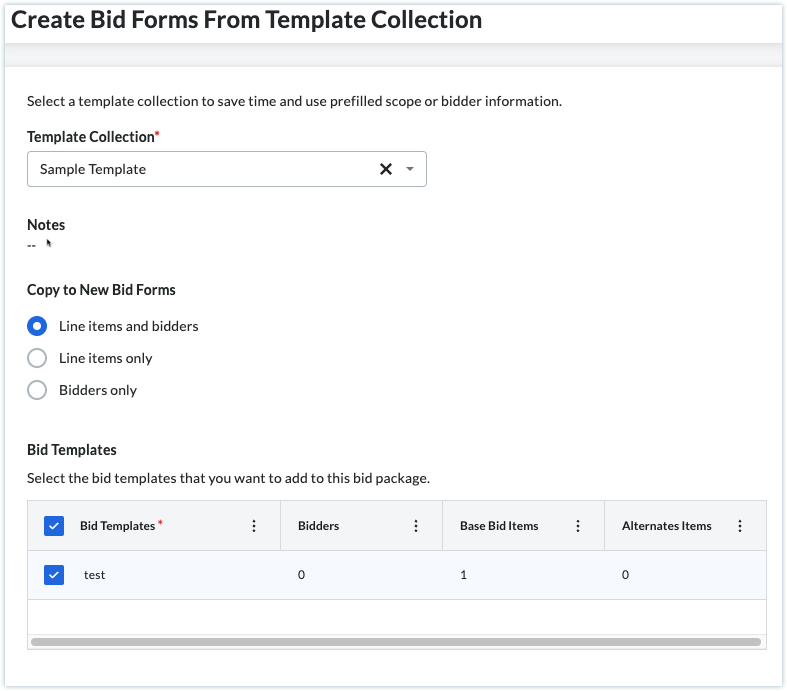
Bid Templates give you the option of creating a Bid Form from a Bid Template created by your company. Bid templates give you the option to quickly add line items and bidders to a bid form.
A new option called 'From Template' becomes available when creating a new Bid Form in a Bid Package. Next, you will choose from your company's list of templates created at the Company Level of Procore.
For more information:
-
- In the 'Bid Form Name' field, enter a name for the bid form.
- Once you begin typing, Procore will automatically suggest a name based on your company's trades and cost codes. If your company has not configured trades, the list will be populated with industry standard trades.
- If you want to save your bid form before adding line items:
- Click Save to save the bid form without adding bidders.
OR - Click Save and Add Bidders to add bidders. See Add Bidders to a Bid Form.
- Click Save to save the bid form without adding bidders.
- Fill out your bid form by adding sections and line items to the Base Bid and Alternates areas as necessary. See the Add Sections and Add Line Items section below.
- Optional: You can adjust the columns on the bid form as needed. See the Adjust Columns section below.
Add Sections
Important
Sections are not available on bid packages that were created prior to this feature being available (January 2024).- Click Add Section.
- Enter a name for the section.
- To add a line item for the section, click the Add Line Item menu or the plus + icon for the section.
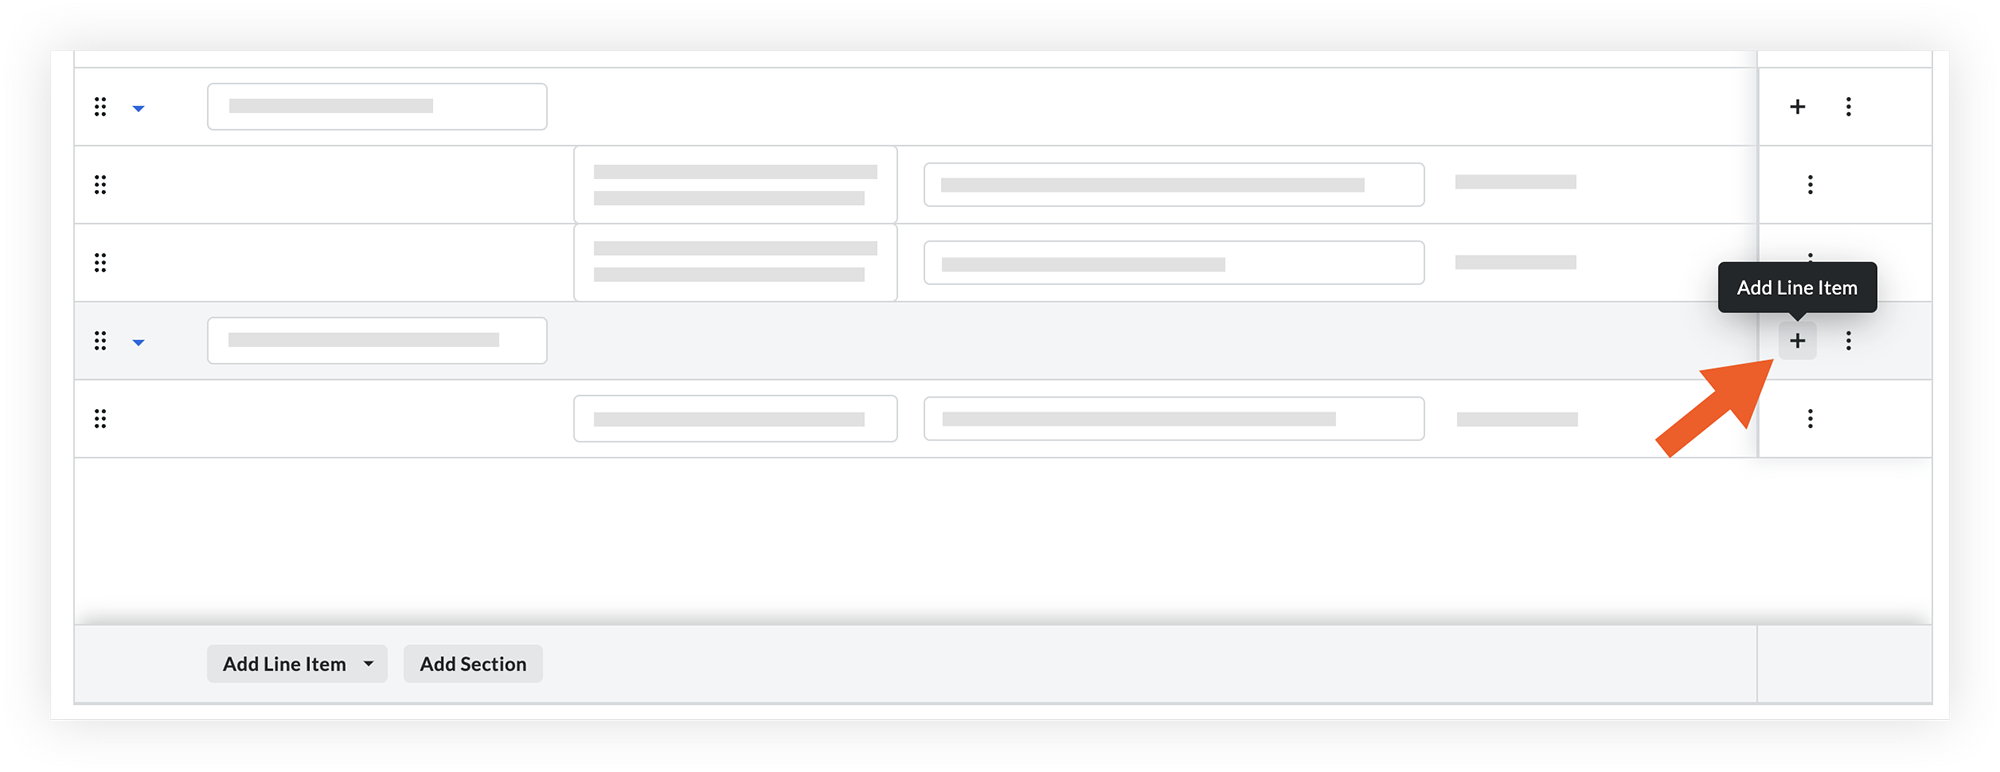
Note: See the steps for Add Line Items below for more detail on adding line items. - Continue adding sections and line items as necessary.
- Optional: To reorder sections or line items, click and drag over the grip
 icon and drop it in a new area.
 - Optional: If you need to delete a section, click the vertical ellipsis
 icon and select Delete. This will delete the section and all of its line items.
Add Line Items
- In the Base Bid section, click the Add Line Item drop-down menu.
- Select one of the following line item types:
- Cost Code: Select if you want to add a line item with a cost code.
- Plain Text: Select if you want to add a general line item without a cost code.
- Fill out fields for the line item:
- Items:
- For a Cost Code line item, click the Select Cost Code drop-down menu and select a cost code.
Tip! Use the Search bar to quickly find a cost code. - For a Plain Text line item, click into the field and enter a name for the item.
- For a Cost Code line item, click the Select Cost Code drop-down menu and select a cost code.
- Description: Enter a description for the line item, if necessary.
- Response Field Type: Select a response type for the line item. The 'Response Field Type' automatically populates based on the previous line item added, but you can change it as needed. For more information on response types, see How do I set the accounting method for bids?
Note: The 'Response Field Type' column is only available for bid packages that were created after the Flexible Response Types feature was released.- Amount: Select if an amount should be entered.
- Unit/Quantity: Select if a unit and quantity should be entered.
- Include/Exclude: Select if this line item should be entered as an inclusion or exclusion for the bid.
Note: The 'Include/Exclude' option is only available to select in the Base Bid section. The Alternates section uses 'Amount' and 'Unit & Quantity'.- Tip! If you want a bid to be submitted as a lump sum instead of having itemized amounts, you can select 'Include/Exclude' as the 'Response Field Type' for all line items. This ensures that bidders specify what is or isn't included in their bid, and allows an amount to be entered in the 'Total' field at the end of the bid. See Submit a Bid on Behalf of a Bidder or Submit a Bid.
- Items:
- To add additional line items, click Add Line Item and repeat the same process.
- If you want to allow bidders to provide alternative options or substitutions, scroll to the Alternates section and add line items as necessary.
- When the bid form is complete:
- Click Save to save the bid form without adding bidders.
OR - Click Save and Add Bidders to add and invite bidders. See Add Bidders to a Bid Form.
- Click Save to save the bid form without adding bidders.
Adjust Columns
- Click the vertical ellipsis icon in the 'Items' or 'Descriptions' column.
- Choose from the following options:
- Pin Column:
- Pin Left: Click if you want to pin the column to the left side of the table.
- Pin Right: Click if you want to pin the column to the right side of the table.
- No Pin: Click if you want to remove the pin from the column.
- Autosize This Column: Click to automatically adjust the size of the selected column.
- Autosize All Columns: Click to automatically adjust the size of both columns.
- Reset Columns: Click if you want to reset the columns to the default setting.
- Pin Column: