Materials User Guide (without Financials)
Table of Contents
- Welcome
- Project Setup
- Importing and Receiving
- Requesting and Issuing
- Adjustments and Transfers
- Manage UOSD Defects
- Reports
Overview
Workflows
Available workflows:
- Order and Receive with Commitments
- Order and Receive without Commitments
- Request and Issue
- Manage UOSD Defects
- Adjustments
- Transfers
Order and Receive with Commitments

Order and Receive without Commitments
.png?revision=7)
Request and Issue
.png?revision=3)
Manage UOSD Defects

Adjustments

Transfers

Considerations
Project Setup
Overview
When managing your materials for a project, you can import a list of the required materials to the Materials tool.
After you import your materials, a needs document is automatically created, and you can create shipments and receipts to track orders placed outside of Procore. When receiving materials, you can immediately issue them for use at a job site, or you can store materials in your inventory to be issued at a later date.
Alternatively, you can create an adjustment to add quantities of the imported materials to your inventory. After materials are in inventory, they can be issued for use on your job site.
Prepare Materials Import
Import Materials
Create a Shipment
Tip
If you uploaded your materials instead of ordering them through the Commitments tool, use this method to create your shipment.- Navigate to the project's Materials tool.
- Add materials that need to be adjusted to your list. See Add Materials to List.
- Click Create and select Receipt.
- Optional: Select a Purchase Order.
Note: Select this option if you ordered materials through the Commitments tool. - Enter the 'Vendor' information.
- Enter the 'Receipt Date'.
- Click in to any field in the 'Route' table to make adjustments based on your shipment information.
- Optional: Enter any notes.
- Under 'Line Items', click the quantity field for each line item and enter the quantity of the material that needs adjustment.

- Click Build Document.
- Optional: On the shipment, update the 'Document Status' to Released if the shipment is in transit.

Create a Receipt
Tip
If you uploaded your materials instead of ordering them through the Commitments tool, use this method to create your receipt.- Navigate to the project's Materials tool.
- Add materials that need to be adjusted to your list. See Add Materials to List.
- Click Create and select Receipt.
- Enter the 'Vendor' information.
- Enter the 'Receipt Date'.
- Select the 'Reference Type' for the receipt.
- Enter the 'Reference Number' for the receipt.
- Select the 'Inspected By Name' for the person who inspected the received materials.
- Select the 'Received By Name' for the person who received the materials.
- Optional: Enter any notes.
- Under 'Line Items', click the quantity field for each line item and enter the quantity of the material that needs adjustment.
- Click Build Document.
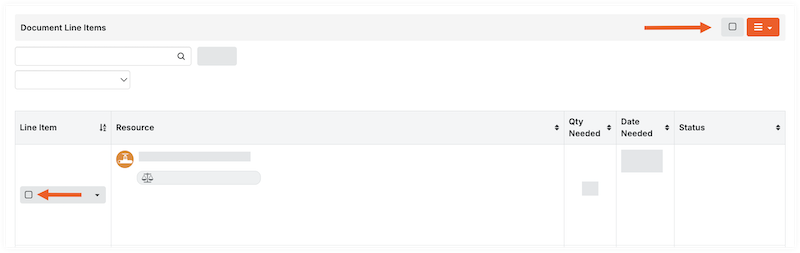
- Under 'Document Line Items', review the line items.
- Review the date received. If you need to make a change, see Update Material Received Date.
- Review the quantity.
- Enter the storage location for each line item:
- Update an individual line item:
- Click the Location field for the item and select the location from the drop-down menu.

- Click the Location field for the item and select the location from the drop-down menu.
- Bulk update line items:
- Mark the checkbox for each line item.
- Under 'Storage Location', select the location from the drop-down menu.

- Click Set Selected to set the location for the selected items.
OR
Click Set All to set the location for all line items.
- Add materials to a container:
- Follow steps to Add Materials to a Container.
- Update an individual line item:
- If materials received are unacceptable, over, short, or damaged (UOSD), follow the steps to Create a UOSD Defect.
- Update the Status of acceptable materials.
- Update an individual line item:
- Click the 'Status' field for the item, and select the Checked > Acceptable from the drop-down menu.

- Click the 'Status' field for the item, and select the Checked > Acceptable from the drop-down menu.
- Bulk update line items:
- Mark the checkbox for each line item.
- Under 'Status/Condition', select the Checked > Acceptable from the drop-down menu.

- Click Set Selected to set the status for the selected items.
OR
Click Set All to set the status for all line items.
- Update an individual line item:
- If a line item is a replacement for a defect, follow steps to Associate Line Items with a Defect.
- Optional: Upload Attachments to Materials.
Optional: Create a UOSD Defect
Objective
To create a defect when you receive materials that are incorrect, damaged, over, or short.
Background
When you receive a shipment, check the materials to ensure all items are acceptable. Occasionally, you may receive materials that are unacceptable, over, short, or damaged (UOSD). If you find issues with the shipment, you can create a defect to track the issue, and resolve it with your vendor.
You can create a defect using the following statuses:
- Damaged
- Overage
- Short
- Unacceptable
Note: This is typically used if the incorrect item was sent.
Things to Consider
- Required User Permissions
- For overages and shorts, the parent receipt line quantity is updated, but the shipment quantity is kept the same. In other scenarios, the shipment quantity is automatically updated to match the receipt quantity when the receipt is posted.
- After the receipt is posted, the UOSD ticket is automatically created after the receipt is posted. See Post a Receipt.
Steps
Create a UOSD for Damaged Materials
- Navigate to the project's Materials tool.
- Click the Control tab.
- Click the Receipts sub tab.
- Click the receipt number.
Tip
Set the storage locations for all items before creating the UOSD/Defect for a line item. The defect line(s) will default to the same storage location. See Create a Receipt.
- For the materials line item, click the 'Status' field and select Checked > Damaged.

Note
This action creates two sub lines, one for the damaged materials (#.2) and one for acceptable materials (#.1). If you have multiple kinds of defects, you can add more sub lines to accurately track the quantity and status. - In the sub line #.2, complete the following information for the damaged materials:
- Enter the quantity of the damaged materials.
- Enter the location where the damaged materials are stored.
- Optional: Enter notes.
- Click Save.
- For the remaining materials, review and enter information in sub line #.1.
- Enter the quantity of materials.
- Select the 'Status/Condition'.
- Enter the location where the materials are stored.
- Optional: Enter notes.
- Optional: Attach photos by following these steps:
- Click the caret icon for the line item and select Photo/Docs.
- Click Add Files and select a file.
OR
Drag and drop files in the attachments modal. - Click Upload.
- Click Save.
- Optional: To create additional sub lines, click the add sub line
 icon. Enter the information for the sub lines, and click Save.
Tip
Click sub line #.1 before adding additional sub lines to ensure the quantity of the new UOSD Defect is split from the acceptable quantity. New sub lines will take quantity from the selected sub line except when creating an overage.
Create a UOSD for an Overage
- Navigate to the project's Materials tool.
- Click the Control tab.
- Click the Receipts sub tab.
- Click the receipt number.
Tip
Set the storage locations for all items before creating the UOSD/Defect for a line item. The defect line(s) will default to the same storage location. See Create a Receipt.
- For the materials line item, click the 'Status' field and select Overage.
Note
This action creates two sub lines, one for the overage quantity of materials (#.1.2) and one for acceptable materials (#.1.1). If you have multiple kinds of defects, you can add more sub lines to accurately track the quantity and status. - In the sub line 1.2, complete the following information for the extra materials:
- Enter the quantity of the extra materials.
- Enter the location where the extra materials are stored.
- Enter notes.
- Click Save.
- For the remaining materials, enter the information in sub line 1.1.
- Enter the quantity of materials.
- Select the 'Status/Condition'.
- Enter the location where the materials are stored.
- Enter notes.
- Click Save.
Create a UOSD for a Short
- Navigate to the project's Materials tool.
- Click the Control tab.
- Click the Receipts sub tab.
- Click the receipt number.
Tip
Set the storage locations for all items before creating the UOSD/Defect for a line item. The defect line(s) will default to the same storage location. See Create a Receipt.
- For the materials line item, click the 'Status' field and select Short.
Note
This action creates two sub lines, one for the quantity short (#.1.2) and one for acceptable materials (#.1.1). If you have multiple kinds of defects, you can add more sub lines to accurately track the quantity and status. - In the sub line 1.2, complete the following information for the short materials:
- Enter the quantity of materials that were expected, but not included in the shipment.
- Enter notes.
- Click Save.
- For the remaining materials, enter the information in sub line 1.1.
Note: The quantity automatically updates to the amount you received, taking into account the short quantity.- Select the 'Status/Condition'.
- Enter the location where the materials are stored.
- Enter notes.
- Click Save.
Create a UOSD for Unacceptable Materials
- Navigate to the project's Materials tool.
- Click the Control tab.
- Click the Receipts sub tab.
- Click the receipt number.
Tip
Set the storage locations for all items before creating the UOSD/Defect for a line item. The defect line(s) will default to the same storage location. See Create a Receipt.
- For the materials line item, click the 'Status' field and select Checked Unacceptable.
- Enter the quantity of materials that are unacceptable.
- Enter the location where the materials are stored.
- Enter any notes.
- Click Save.
- Optional: To create additional sub lines, click the add sub line icon. Enter the information for the sub lines, and click Save.
See Also
Post a Receipt
Objective
To post a receipt for materials that were received for your project.
Background
Imported materials and materials listed in approved orders from the Commitments tool appear in the Materials tool. From the Materials tool, you can create receipts to track the materials you have received. After all materials have been received, post the receipt to indicate that receiving is complete.
For companies with Procore Financials, a draft invoice is automatically created in Procore's Invoicing tool after you post the receipt.
Things to Consider
- Required User Permissions
- After you post the receipt, a draft invoice is automatically created in Procore's Invoicing tool.
Prerequisites
Steps
- Navigate to the project's Materials tool.
- Click the Control tab.
- Click the Receipts sub tab.
- Click the receipt number.
- Locate the 'Document Status'.

- Click Not Posted and select one of the following options:
- Select Post to add the materials to your inventory. In the future, you can issue materials for handover.
- Select Post > Direct Handover to Person to automatically issue and handover the materials.
- Select Post > Direct Handover to Project to automatically issue and handover the materials.
Tip
If you have an open billing period, a draft subcontractor invoice is automatically created in Procore's Invoicing tool after the receipt is posted. However, if a billing period is not open at the time the receipt is posted, a draft invoice will not be created, even if a billing period is opened at a later date.
Procore recommends that you do NOT manually create invoices for materials, as it will create a duplicate. The invoice automatically generated from the receipt cannot be deleted.
Overview
You can request materials to be used on your job site. Materials may already be in inventory, or may need to be ordered to fulfill the request. When materials are available in your inventory, your request can be approved and issued for handover.
Create a Materials Request
Objective
To create a request for materials in your inventory.
Background
You can request materials to be used on your job. Materials may need to be ordered to fulfill the request, or may already be in inventory. When materials are available in your inventory, your request can be approved and issued for handover.
Things to Consider
Prerequisites
Materials must be listed in your inventory by one of the following methods:
Steps
Create a Materials Request from the Create Button
- Navigate to the project's Materials tool.
- Add materials to your active list. See Add Materials to the List.
- Click Create and select Request.
- Optional: Fill out the form:
- Requested By. Enter the name of the requestor.
Note: If left empty, this field will default to the user creating the request. - Required By Date. Enter the date the materials are required.
Note: If left empty, this field will default to the current day. - Instructions. Enter any instructions.
- Work Package. Enter work package information.
- Notes. Enter any notes.
- Requested By. Enter the name of the requestor.
- Under 'Line Items', click the quantity field for each line item and enter the quantity you are requesting.
OR
Under the form, mark the checkbox if you want to Default Line Item Quantity to Available Resource Quantity. - Optional: Mark the checkbox if you want to Clear (Active) List After Building Document.
- Click Build Document.
Create a Materials Request from a Needs Document
- Navigate to the project's Materials tool.
- Click the Control tab.
- Click the Needs sub tab.
- Click the document name you want to create a request for.
- Mark the checkboxes for the individual items in needs document.
OR
Mark the checkbox next to the hamburger menu to select all items in the needs document.
- In the 'Documents Line Items' header, click the hamburger
 menu and select Create Withdrawal Request.

- Optional: Fill out the form:
- Requested By. Enter the name of the requestor.
Note: If left empty, this field will default to the user creating the request. - Instructions. Enter instructions for the request.
- Required By Date. Enter the date the materials are required.
Note: If left empty, this field will default to the current day. - Instructions. Enter any instructions.
- Work Package. Enter work package information.
- Notes. Enter any notes.
- Requested By. Enter the name of the requestor.
- Click Create.
Next Steps
See Also
Approve Materials Request
Issue Materials for Handover
Objective
To issue materials to handover to a person.
Background
When receiving materials, they can be issued and handed over directly to a person or a project. See Post a Receipt. Alternatively, received materials can be stored in your inventory.
When materials move out of inventory, they must be picked from the inventory and issued to a person, project, or location. Materials can also be issued to a third party who is resolving a UOSD defect.
You can issue materials that were requested, using the issue ticket that was automatically created from the request. See Create a Request. Or, you can bypass the request process and issue materials directly by creating an issue ticket.
An issue ticket consists of one or more pick tickets. A pick ticket allows you to assign the picking task to an employee, and filter the line items in the issue ticket by location. The issue ticket is marked as 'Fulfilled' after all line items have been fully picked.
Things to Consider
Prerequisites
- Materials must be available in inventory to be issued.
- If issuing materials from a request, the request must be approved before materials can be issued. See Approve a Materials Request.
Steps
Issue Materials from a Request or UOSD Defect
- Navigate to the project's Materials tool.
- Click the Control tab.
- Click the Issuing sub tab.
- Click the issue ticket number.
- Optional: If materials are at multiple locations, or if you want to assign the picking task to more than one person, you can split the tickets by location:
- Under 'Pick Tickets', click the caret icon for the pick ticket.

- Select one of the following options:
- Split by Inventory Locations to split by exact location.
- Split by Top Inventory Locations to split by the top location in the hierarchy.
- Mark the checkbox for the pick ticket to filter the 'Document Line Items' by location.
- Optional: To assign a pick ticket to an employee, see Assign a Pick Ticket.
- Under 'Pick Tickets', click the caret icon for the pick ticket.
- Under 'Document Line Items', enter the quantity of the line item that has been picked from the inventory.
OR
Click Quantity Picked for the line item to mark the materials picked from inventory. - Under the 'Pick Tickets' section, click the 'Status' and select Handover to Person or Handover to Project.
- Complete the form.
- Click the signature field and write your signature, confirming the handover.
- Click Accept.
Note: After all items have been fully picked, the 'Document Status' for the Issue Ticket is automatically updated to 'Fulfilled'.
Issue Materials Directly
- Navigate to the project's Materials tool.
- Add materials to your active list. See Add Materials to the List.
- Click Build and select Issue.
- Fill out the form:
- Optional: Shipment Number/Name. Enter the shipment number or leave it blank to auto-generate a shipping number.
- Requested By. Enter the name of the requestor.
- Requested By. Enter the name of the requestor.
- Optional: Instructions. Enter any instructions.
- Optional: Work Package. Enter work package information.
- Optional: Notes. Enter any notes.
- Under 'Line Items', click the quantity field for each line item and enter the quantity you are requesting.
- Optional: Mark the checkbox if you want to Clear (Active) List After Building Document.
- Click Build Document.
- Under 'Document Line Items', enter the picked quantity of the line item that has been picked from the inventory.
OR
Click the arrow icon in the 'Picked Quantity' field to mark the full amount of materials picked from inventory. - Under the 'Pick Tickets' heading, locate the 'Status' column.
- Under the 'Pick Tickets' section, click the 'Status' and select Handover to Person or Handover to Project.
- Complete the form.
- Click the signature field and write your signature, confirming the handover.
- Click Accept.
Note: After all items have been fully picked, the 'Document Status' for the Issue Ticket is automatically updated to 'Fulfilled'.
Adjustment Overview
If the available inventory quantities in the Materials tool are inaccurate, you can make a manual correction by creating an adjustment.
Create an Adjustment
- Navigate to the project's Materials tool.
- Add materials that need to be adjusted to your list. See Add Materials to List.
Tip
You can use the Storage sub tab to see items in a certain location to add to your list. See Search and Filter Materials Storage. - Click Create and select Adjustment.
- Optional: Enter the date.
- Select the 'Adjustment Type':
Note: This is the initial status that is applied to all line items. You can modify line items to any adjustment type after you click Build Document.- Add. Increases the available inventory quantity.
- Remove. Decreases the available inventory quantity.
- Scrap. Decreases the available inventory quantity.
- Surplus. Decreases the available inventory quantity, but the material retains a storage location and a special ‘Surplus’ flag. This can be used to mark materials as not required for the project anymore, but may be needed later for other uses.
- Return to Vendor. Decreases the available inventory quantity.
- Return to Stock. Increases the available inventory quantity.
- Optional: Select the 'Adjustment Reason' for your records:
Note: The available Adjustment Reasons are based on the Adjustment Type selected.- True Up. For reconciliation of actual counts.
- Damaged. Items that were damaged beyond repair.
- Found. Items that were missing but have been located.
- Lost. Items that were lost.
- Repaired. Items that were repaired by the vendor.
- Stolen. Items that were stolen.
- Optional: Add any notes.
- Under 'Line Items', click the quantity field for each line item and enter the quantity of the material that needs adjustment.
- Click Build Document.
- Under 'Document Line Items', review the line items and enter the new storage location, if needed.
- Review quantities, date, and status/condition. Click into the field to make an update.
- Enter the storage location for each line item to indicate where you added or removed the materials:
Note: This is especially important if the material is stored in multiple locations.- Update an individual line item:
- Click the To Location and select the location from the drop-down menu.
- Click the From Location field and select the location from the drop-down menu.
- Bulk update line items:
- Mark the checkbox for each line item.
- Under 'Storage Location', select the To Location or From Location from the drop-down menu.
- Click Set Selected to set the location for the selected items.
OR
Click Set All to set the location for all line items.
- Update an individual line item:
- Click Pending next to 'Document Status' and select Post to confirm the adjustment.
See Also
Transfer Overview
If you need to move materials to a new storage location, you can create a materials transfer. If the status of materials changes during the transfer, inventory counts may be impacted.
Example
You have 100 floorboards available in inventory. A transfer is created for 10 floorboards, but there is concern that the floorboards are damaged. The status of the materials in the transfer is updated to 'Unchecked', and material inventory shows 10 less floorboards available.
After the floorboards have been inspected and determined to be acceptable, you create a new transfer. In the transfer, select 'Unchecked' as the 'From Location', select the physical location of the material as the 'To Location', and set the Status for the line item to 'Checked > Acceptable'. The floorboards are again available in your inventory.
Create a Transfer
Overview
When you receive a shipment that has unacceptable, damaged, over, or short materials (UOSD), you can create a UOSD defect and manage the resolution in Procore.
Resolve UOSD Defects
Objective
To resolve a defect for received materials that were incorrect, damaged, over, or short materials.
Background
When you receive a shipment that has unacceptable, damaged, over, or short materials (UOSD), you can create a UOSD defect and manage the resolution in Procore.
Things to Consider
- Required User Permissions
- 'Unresolved' statuses do not impact inventory.
Prerequisites
- Create a Defect
- If you received replacement materials from the vendor, you must first have a receipt associated with the line item. See Associate Line Items with a Defect.
- If you are returning materials to the vendor or working with a third party, you must first Issue Materials for Handover.
Steps
- Navigate to the project's Materials tool.
- Click the Control tab.
- Click the UOSDs sub tab.
- Click the UOSD ticket number.
- Optional: Upload Attachments to Materials
- If receiving or returning materials to the vendor, take the following steps:
- Update the 'Resolution Status'.
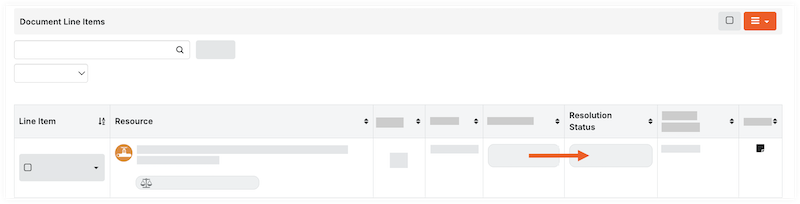
- If managing the UOSD/defect through a third party, take the following steps:
- Click the 'Resolution Status' field for the line item to Transfer and Custody.
Note: This adds the material to inventory so that it can be issued to a third-party for further resolution. - Follow steps to Issue Materials for Handover.
- Click the 'Resolution Status' field for the line item to Transfer and Custody.
- For all other use cases, click the 'Resolution Status' field and update the status for each line item:
- Resolved > Add to Stock. This automatically adds the stock to your inventory and resolves the defect.
- Resolved > Repaired on Site. This automatically adds the stock to your inventory and resolves the defect.
- Resolved > Vendor Provided Credit. This removes the short quantity from your inventory count, and resolves the defect.
- Transfer and Custody. This adds the material to inventory so that it can be issued to a third-party for further resolution.
- If managing the UOSD/defect through a third party, take the following steps:
Receive from Vendor
- Follow steps to associate line items in a receipt with a UOSD/defect.
- Follow steps to Create a Materials Adjustment to remove the damaged/unacceptable materials from inventory.
Note: If you received materials to resolve a short USOD/Defect, do not create an adjustment. The resolution status appropriately adjusts your inventory. - Update the 'Resolution Status' to Resolved > Received from Vendor.
Return to Vendor
- Mark the checkbox for the line item.
- In the 'Documents Line Items' header, click the hamburger icon and select Issue Selected Items to Vendor.
- Enter the information in the form and click Create Issue Ticket.
- Follow steps to Issue Materials for Handover.
- Update the 'Resolution Status' to Resolved > Return to Vendor.
Note: You can only set this status after the materials are returned to the vendor, and the issue ticket is marked 'Complete'.