Award a Winning Bid and Convert it into a Purchase Order
Legacy Content
If your project has been updated to Bid Management Enhanced Experience, see Award a Bid and Convert it to a Subcontract or Purchase Order for updated steps.Objective
To select a winning bid and convert it into a new purchase order.
Background
When you select a winning bid, you have the option to convert it to a purchase order as shown below. After the conversion, you can also send the purchase order by email to the vendor who was awarded the scope of work.
Alternatively, you can also convert a winning bid to a subcontract. For details, see Award a Winning Bid and Convert it into a Subcontract.
Things to Consider
- Required User Permissions:
- 'Admin' level permissions on the project's Bidding tool
AND - 'Admin' level permissions on the project's Commitments tool.
- 'Admin' level permissions on the project's Bidding tool
- For companies using the
 ERP Integrations tool: Show/Hide
- The Convert to Purchase Order button is supported.
- Important! To sync data with your integrated ERP system, you must set the cost code cost type (see Which integrated ERP systems support the 'Cost Type' concept?) on the purchase orders as follows:
- Integration by Procore. Use the default cost code cost type set up for Viewpoint® Spectrum® during the implementation process.
- Integration by Procore. Navigate to the ERP Integrations tool, click Configure Settings
 , and then manually select a default cost code cost type for Vista
 - QuickBooks® Desktop . The cost type for purchase orders should always be set to Other 'O'.
- Sage 100 Contractor®. Navigate to the ERP Integrations tool, click Configure Settings , and then manually select a default cost code cost type for the purchase order
- Sage 300 CRE®. Navigate to the ERP Integrations tool, click Configure Settings , and then manually select a default cost code cost type for the purchase order.
- Xero™. Navigate to the ERP Integrations tool, click Configure Settings , and then manually select a default cost code cost type for the contract.
Prerequisites
- Add the Commitments tool to the project. See Add and Remove Project Tools.
- To award a purchase order to the winning bidder, the following must be true:
- The Bid Sheet must be past its Due Date/Time.
- At least one (1) bid must be submitted from an invited bidder.
Steps
- Navigate to the project's Bidding tool.
- Locate your bid package.
- Click View.
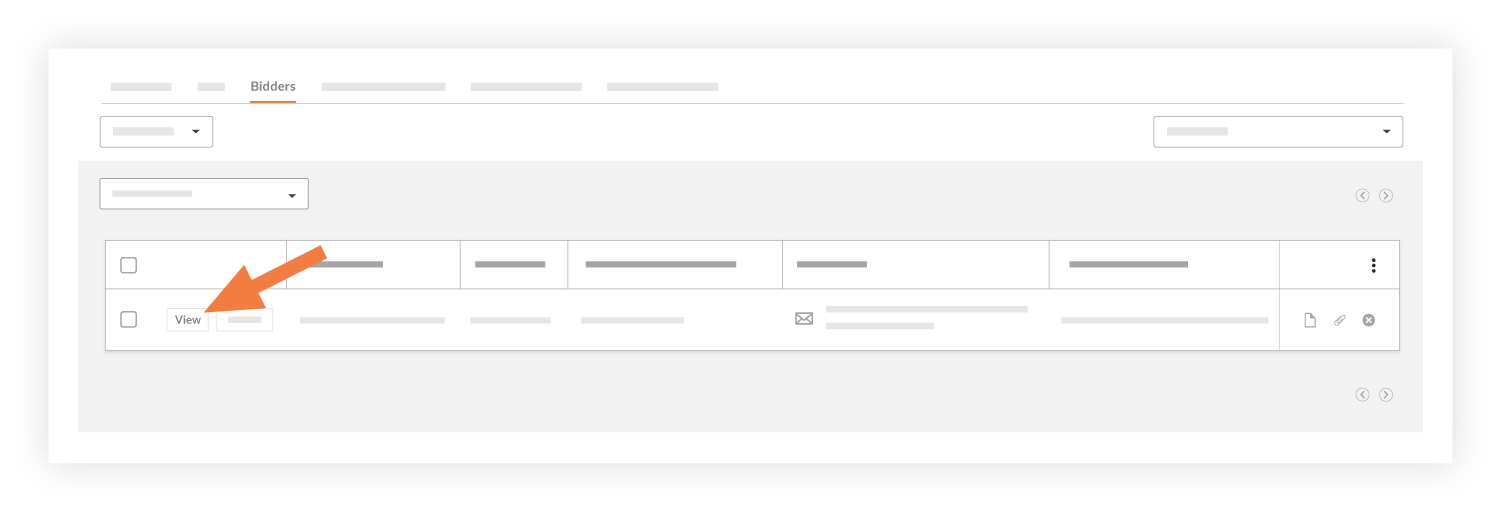
- In the Bidders tab, locate the company with the winning bid.
- Click View.
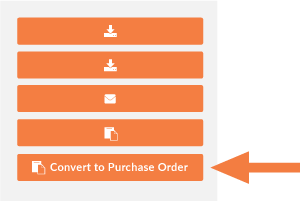
- In the right sidebar, click Convert to Purchase Order.
Notes:- The company with the winning bid is automatically added to the Project Directory in your company's Procore account. Individual users associated with the company are NOT automatically added to the Project Directory.
- If the conversion was successful, a yellow banner appears to confirm it.
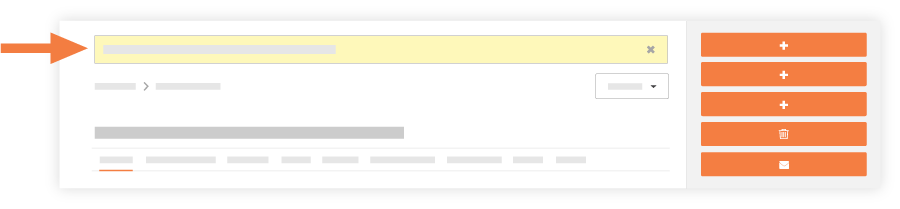
Procore launches the project's Commitments tool and opens the new contract's General tab. The appropriate information from the winning bid is automatically completed in the new contract.
- In the General tab of the contract, click the Schedule of Values tab. To learn more, see Schedule of Values.
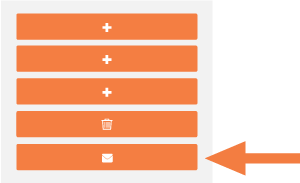
- If you want to notify the company about the winning bid, click Email Contract.
This opens the Emails tab on the contract.
- In the Emails tab, do the following:
- To. Select the names of the desired recipients.
- CC. Select the names of the people who should be carbon-copied on the email.
- Private. Mark the checkbox if you only want the recipients and users with 'Admin' level permission to the Commitments tool to see the email. This is the default setting.
- Attachments. Add one or more files to the email message. If appropriate to your situation, it is recommended that you always add your company's official contract form as an attachment.
- Message. Type the body of your email message. It is recommended that you always provide clear instructions to your recipients (for example, subcontractors/vendors) with regards to how contracts and documents must be signed. Your message should also include a reminder to return the signed contract, which can conveniently be added as an attachment in their email response.
Note: The email message will automatically include the contract details.
- Click Send.
The system sends the contract to the designated recipients.
See Also
If you would like to learn more about Procore's bidding software and how it can help your business, please visit our construction bidding software product page  .
.