Add an Office Location
Objective
To add a list of office locations to your company's Procore account and then associate those offices with a project.
Things to Consider
- Required User Permissions:
- To add a company office location, 'Admin' level permission on the Company level Admin tool.
- To associate a company office location with a project, 'Admin' level permission on the Project level Admin tool.
- Additional Information:
- Offices should be managed from the 'Company Information' section. If that option is not in your account, you will instead manage offices from the 'General Settings' section.
- The information that you enter in the Steps below will appear in Procore's reports and most PDF files that your users export from Procore's project tools.
Steps
Manage Offices from Company Information
- Navigate to the Company level Admin tool.
- Under 'Company Settings', click Company Information.

- In the 'Addresses' section:
- Click +New Address to add a new address.
- Click the
 edit icon next to an existing address to update it.
 - Click the
 vertical ellipsis icon next to an existing address to set it as the primary address or delete it.
- Click Save.
Manage Offices from General Settings
- Navigate to the Company level Admin tool.
- Under 'Company Settings', click General Settings.
- Scroll to 'Office Settings'.

- Click Add Office.
- Do the following:
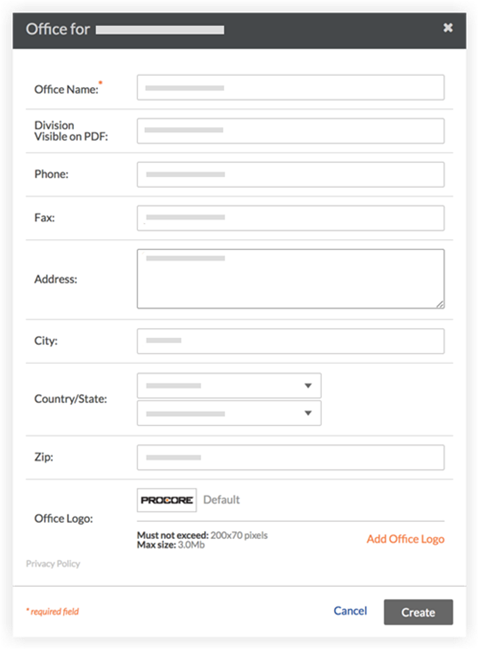
- Click Create.
Note: The office can now be assigned to a Procore project. See Assign an Office Location to a Project. - If your company has multiple office locations, designate the location that serves as your company's headquarters or home office by choosing the appropriate Corporate Office option button.
