Configure Custom Fields for the Procore Analytics Risk Report
Objective
To configure custom fields for the Procore Analytics Risk Report.
Background
The Procore Analytics Risk Report requires a set of custom fields to be configured across Procore tools in a standardized way so that risk items can be managed and pulled into the Risk Report.
Things to Consider
- Required User Permissions:
- 'Admin' level permissions on the Company level Admin tool.
- Additional Information:
- Before configuring these fields, make sure your organization is ready for this change.
- Adding these custom fields and related fieldsets will make them available to anyone who has access to these tools.
- Make sure to consider this and incorporate it into any relevant change management and business processes.
- It is recommended to test these configuration changes with a limited rollout first to make sure everything is configured correctly and your organization is ready for a widespread rollout across tools.
Note: If customers would like Procore to establish this configuration for them, Professional Services Offerings are available to help. Contact your Procore account team for more details.
Steps
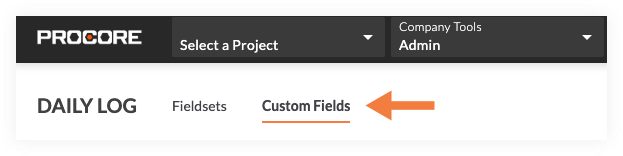
- Navigate to the Company level Admin tool.
- Under 'Tool Settings', click the tool you want to create custom fields for.
- Custom fields will need to be set up at the company level for "Risk Impact", "Risk Probability", "Risk Status", and "Risk Notes". These are used to classify and track details related to a given risk item.
There are two ways to create new custom fields to use on projects. Choose one of the following:
Create Custom Fields for a Configurable Fieldset
There are two ways to create new custom fields to use on projects. Choose one of the following:
- Option 1: To create custom fields that you can add to fieldsets later, see Create Custom Fields from the Custom Fields Tab.
- Option 2: To create custom fields while in a fieldset on the Fieldsets tab, see Create Custom Fields Within a Fieldset.
Note: You will need to identify if you already have existing Fieldsets that you want to add your new custom fields to OR if you will need to create a new Fieldset. See Create New Configurable Fieldsets for help with creating fieldsets. If you are creating new fieldsets, this will need to be done for the following tools:- RFIs
- Submittals
- Correspondence
- Daily Logs (Manpower and Notes)
- Observations
- Incidents
- Inspections
- Punch List
- Prime Contracts
- Commitments
Option 1: create custom fields from the custom fields tab
For Risk Impact and Risk Probability:
- Click the Custom Fields tab.
- Click + Create.
- Enter 'Risk Impact' or 'Risk Probability' for the Field Name.
- Choose Single Select (Dropdown) for the Field Type.
- Under Options, enter each of the following values in its own Name field.
- 1 - Very Low
- 2 - Low
- 3 - Medium
- 4 - High
- 5 - Very High
- Click Create.
- The new field is added to the Custom Fields page.
Note: The field must be added to a fieldset to be applied to a project.
For Risk Status:
- Enter 'Risk Status' for the Field Name.
- Choose Single Select (Dropdown) for the Field Type.
- Under Options, enter each of the following values in its own Name field.
- No Action Needed
- Open
- Remediated
- Click Create.
- The new field is added to the Custom Fields page.
Note: The field must be added to a fieldset to be applied to a project.
For Risk Notes:
- Enter 'Risk Notes' for the Field Name.
- Choose Rich Text (Long) for the Field Type.
- Click Create.
- The new field is added to the Custom Fields page.
Note: The field must be added to a fieldset to be applied to a project.
To add custom fields to an existing configurable fieldset:
Option 2: Create Custom Fields Within a Fieldset
- Click the Fieldsets tab.
- Click Edit next to the fieldset you want to add the custom fields to.
- Scroll toward the bottom of the page and click Add Custom Field.
- Click Choose From Existing.
- Click Add next to the custom field you want to add to the fieldset.
- Click Add to confirm adding the field.
- Click the toggle to the ON
 position to make the custom field visible in the section.
OR
Click the toggle to the OFF position to hide the custom field in the section.
 - Mark the 'Required' checkbox to designate the custom field as required.
OR
Clear the 'Required' checkbox to designate the custom field as optional.
- Click the toggle to the ON
- Optional: Click and drag on the reorder grip
 icon to rearrange the order that the custom fields will appear on a fieldset.
Note: Procore Standard fields cannot be reordered, but remember to keep all other custom fields in the same order across all fieldsets for consistency. - Click Save to save your changes to the configurable fieldset.
- If the fieldset is already applied to one or more projects, click Apply to Existing.
OR
If you have just created a new fieldset, click Assign Projects and begin at step 3 in the Apply a Fieldset with Custom Fields to Projects section below.
Apply a Fieldset to Projects
- Click the Fieldsets tab.
- Click Edit next to the fieldset you want to add the custom fields to.
OR
Click Create New to create a new fieldset. See Create New Configurable Fieldsets. - Scroll toward the bottom of the page and click Add Custom Field.
Tip
Custom fields can be added to custom sections on supported tools. See Create Custom Sections and What are custom sections and which Procore tools support them? Optional: You can add a new section labeled "Risk Management" to the fieldset. Keeping the risk fields organized in a section will create consistency and clarity across your configuration. They should always be configured in the same order for consistency.
- Click Create New.
- Enter 'Risk Impact' for Field Name.
- Choose Single Select (Dropdown) for the Field Type.
- Under Options, enter each of the following values in its own Name field.
- 1 - Very Low
- 2 - Low
- 3 - Medium
- 4 - High
- 5 - Very High
- Click Create.
Note: The field will automatically be added to the bottom of the fieldset. - Click the toggle to the ON position to make the custom field visible in the section.
OR
Click the toggle to the OFF position to hide the custom field in the section. - Mark the 'Required' checkbox to designate the custom field as required.
OR
Clear the 'Required' checkbox to designate the custom field as optional. - Click Save to save your changes to the configurable fieldset.
- If the fieldset is already applied to one or more projects, click Apply to Existing.
OR
If you have just created a new fieldset, click Assign Projects and begin at step 3 of the Apply a Fieldset with Custom Fields to Projects section below. - Optional: Click and drag on the reorder grip icon to rearrange the order that the custom fields will appear on a fieldset.
Note: Procore Standard fields cannot be reordered, but remember to keep all other custom fields in the same order across all fieldsets for consistency. - Repeat steps 1 through 12 to create custom fields for "Risk Probability", "Risk Status", and "Risk Notes".
- Click the Fieldsets tab.
- Click the link in the Assigned Projects column for the fieldset you want to apply to projects.
- Mark the checkboxes next to the projects you want to assign the fieldsets to.
OR
Click Select All to select all projects.

- Click Update.
- Click Confirm to confirm that you want to apply the fieldsets to the selected projects.
Note: Procore's default fieldsets in the selected projects will be replaced with the fieldsets you configured. - Optional: You can set any configurable fieldset as the default for new projects.
If you want to set a fieldset as the default for new projects:- Click the vertical ellipsis
 icon across from the fieldset.
 - Click Set as New Project Default.
- Click the vertical ellipsis