Update the Financials Budget Report Parameters
Objective
To update the parameters for the Procore Analytics Financials Budget Report using Power BI.
Background
This tutorial shows you how to update the parameters in Procore Analytics Financials Budget Report using Power BI.
Steps
- Download a copy of your Financials Budget Report using one of these options:
- Use the Procore Analytics Google Drive link.
OR - Download a copy from Power BI. To learn how, see Download a Report from the Power BI Service to Power BI Desktop.
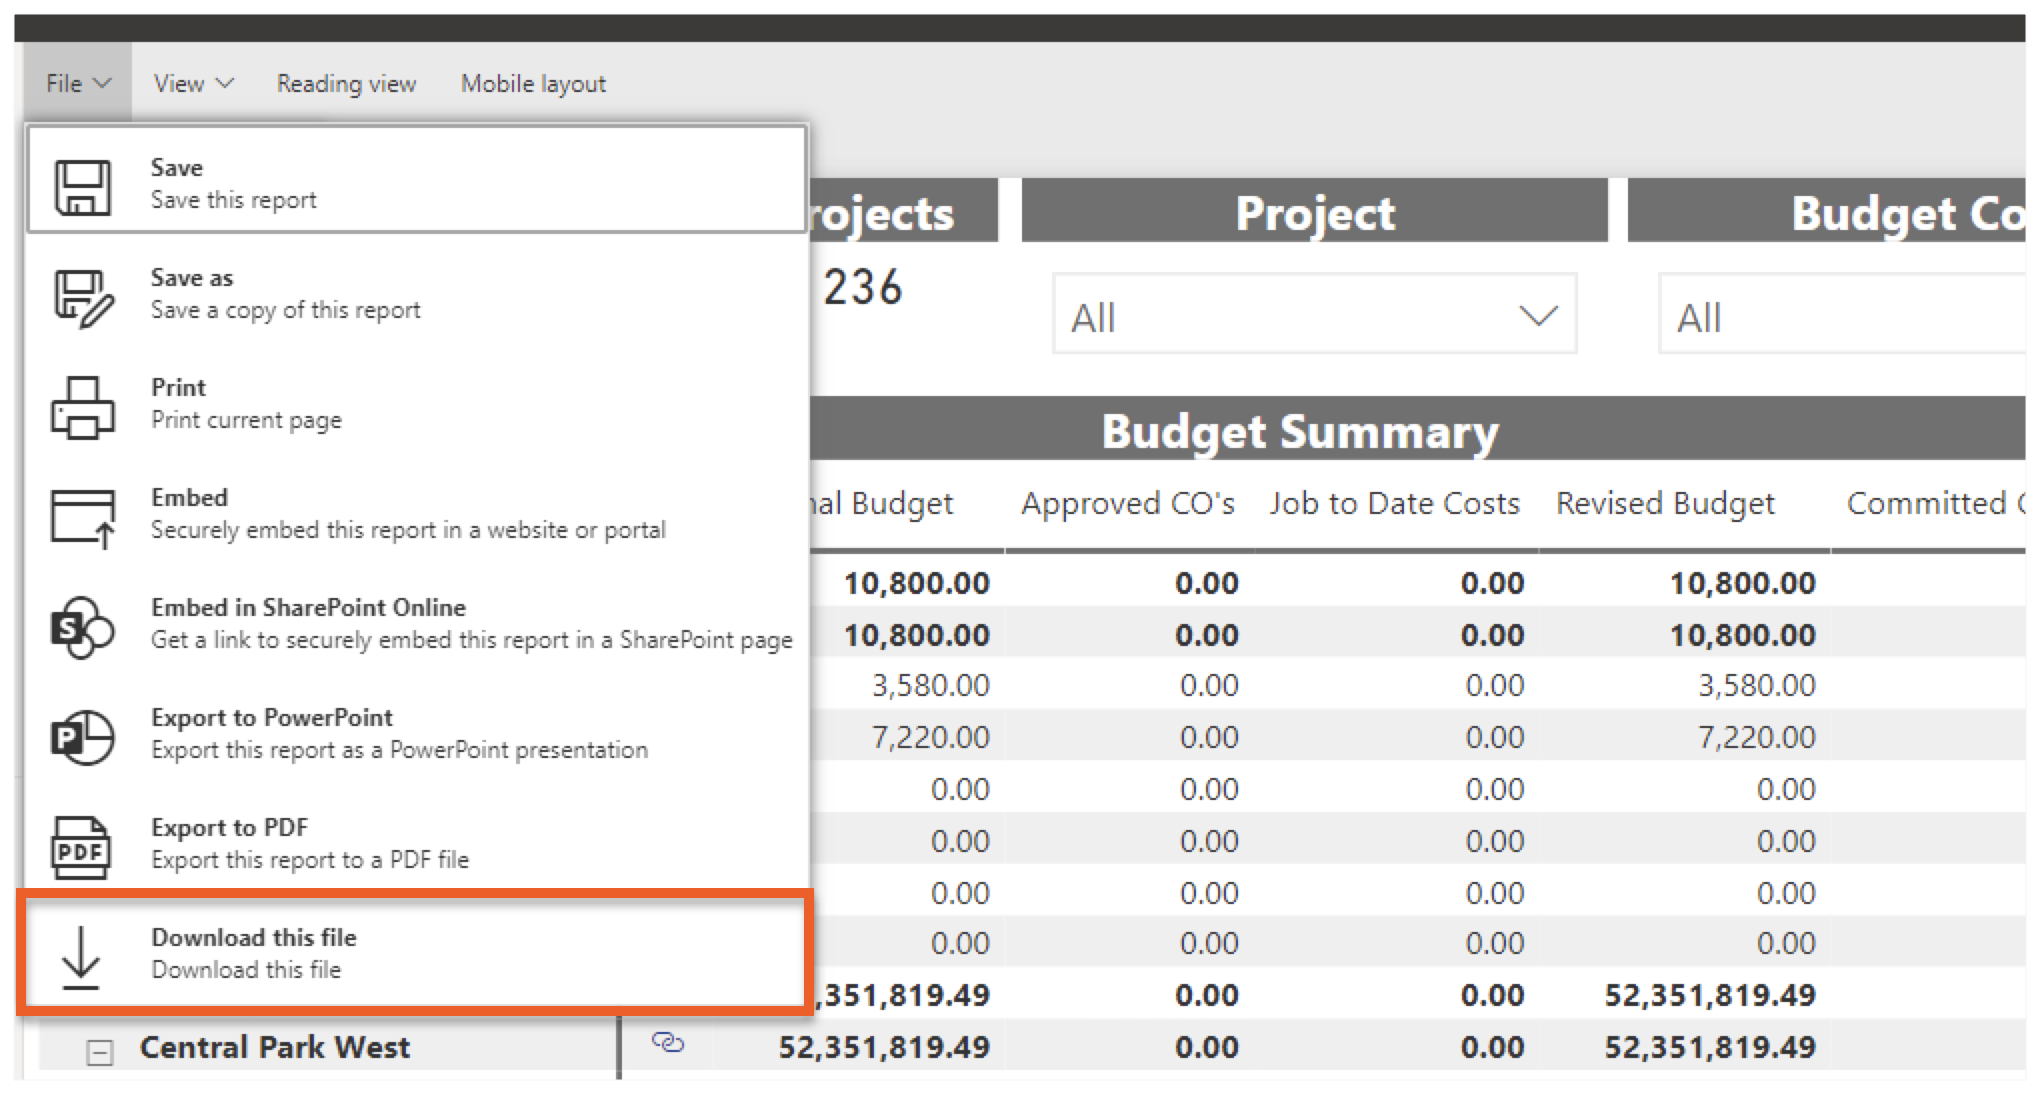
- Use the Procore Analytics Google Drive link.
- Open the file in the Microsoft Power BI Desktop application.
- Click Transform Data and choose Edit Parameters.
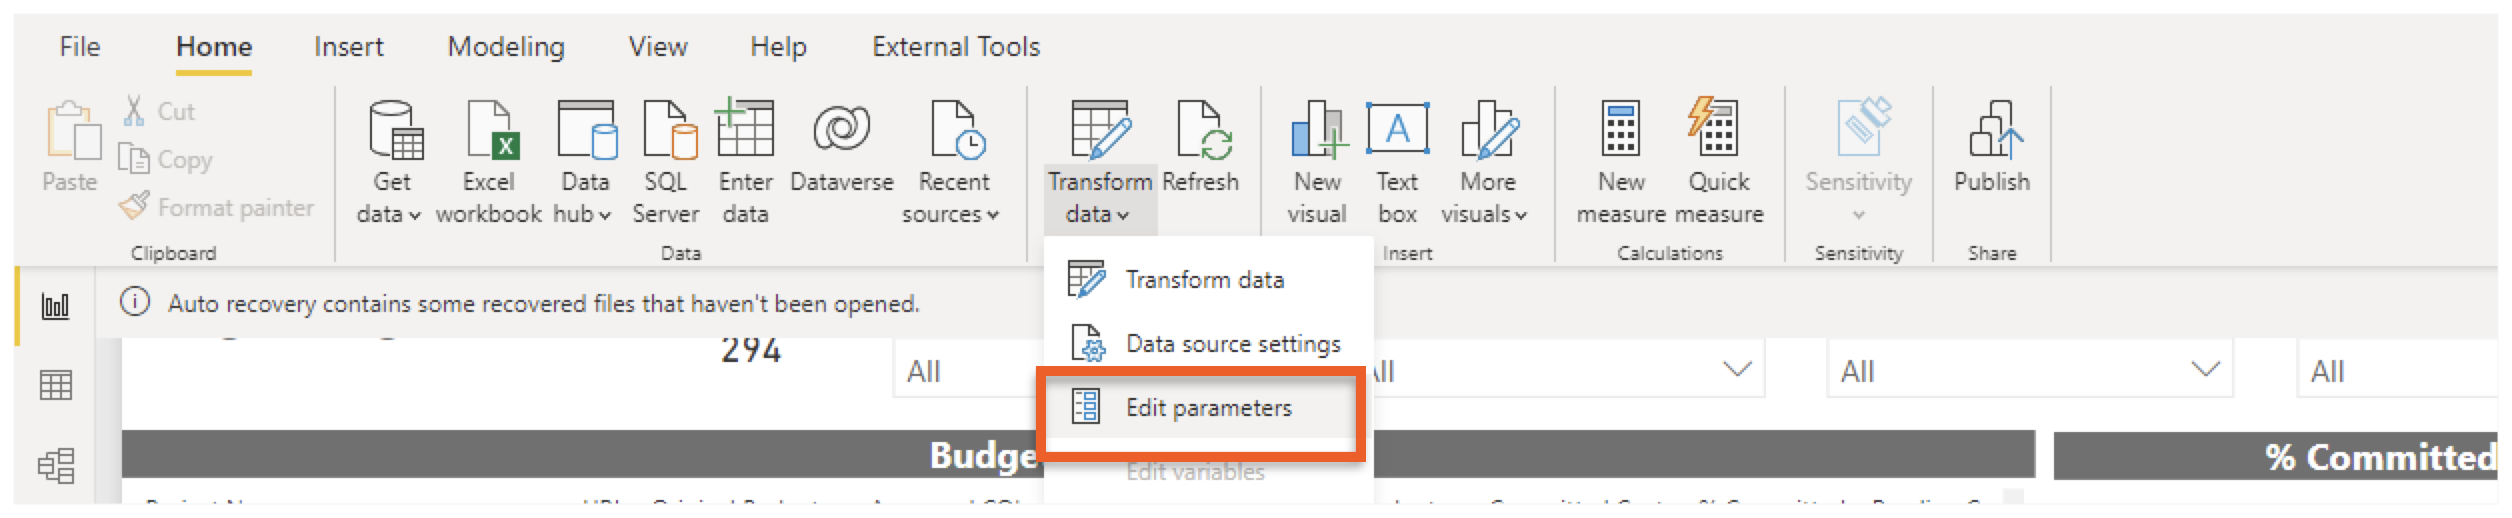
- In the Edit Parameters page, do the following:
- ReportName. Keep the report name specified with the downloaded file. For example: Procore Financials Budget
- Release Version. Keep the version number specified with the downloaded file.
- Budget View Name. Type the name of your company's budget view in this box.
Note
Procore's default budget view is the 'Procore Standard Budget View.' See About the Procore Standard Budget View. Keep in mind that the budget views and columns in your specific budget view may be different.
- To learn about Procore's budget views, see What are Procore's standard budget views? and What are Procore's standard budget views for ERP Integrations?
- Forecast View Name. Type the name of your company's forecasting view in this box.
Note
Procore's default forecasting view is the 'Procore Standard Forecast View.' This is an optional feature that can be turned ON/OFF in Procore projects. To learn more, see About the Procore Standard Forecast View.
- Click Transform Data.

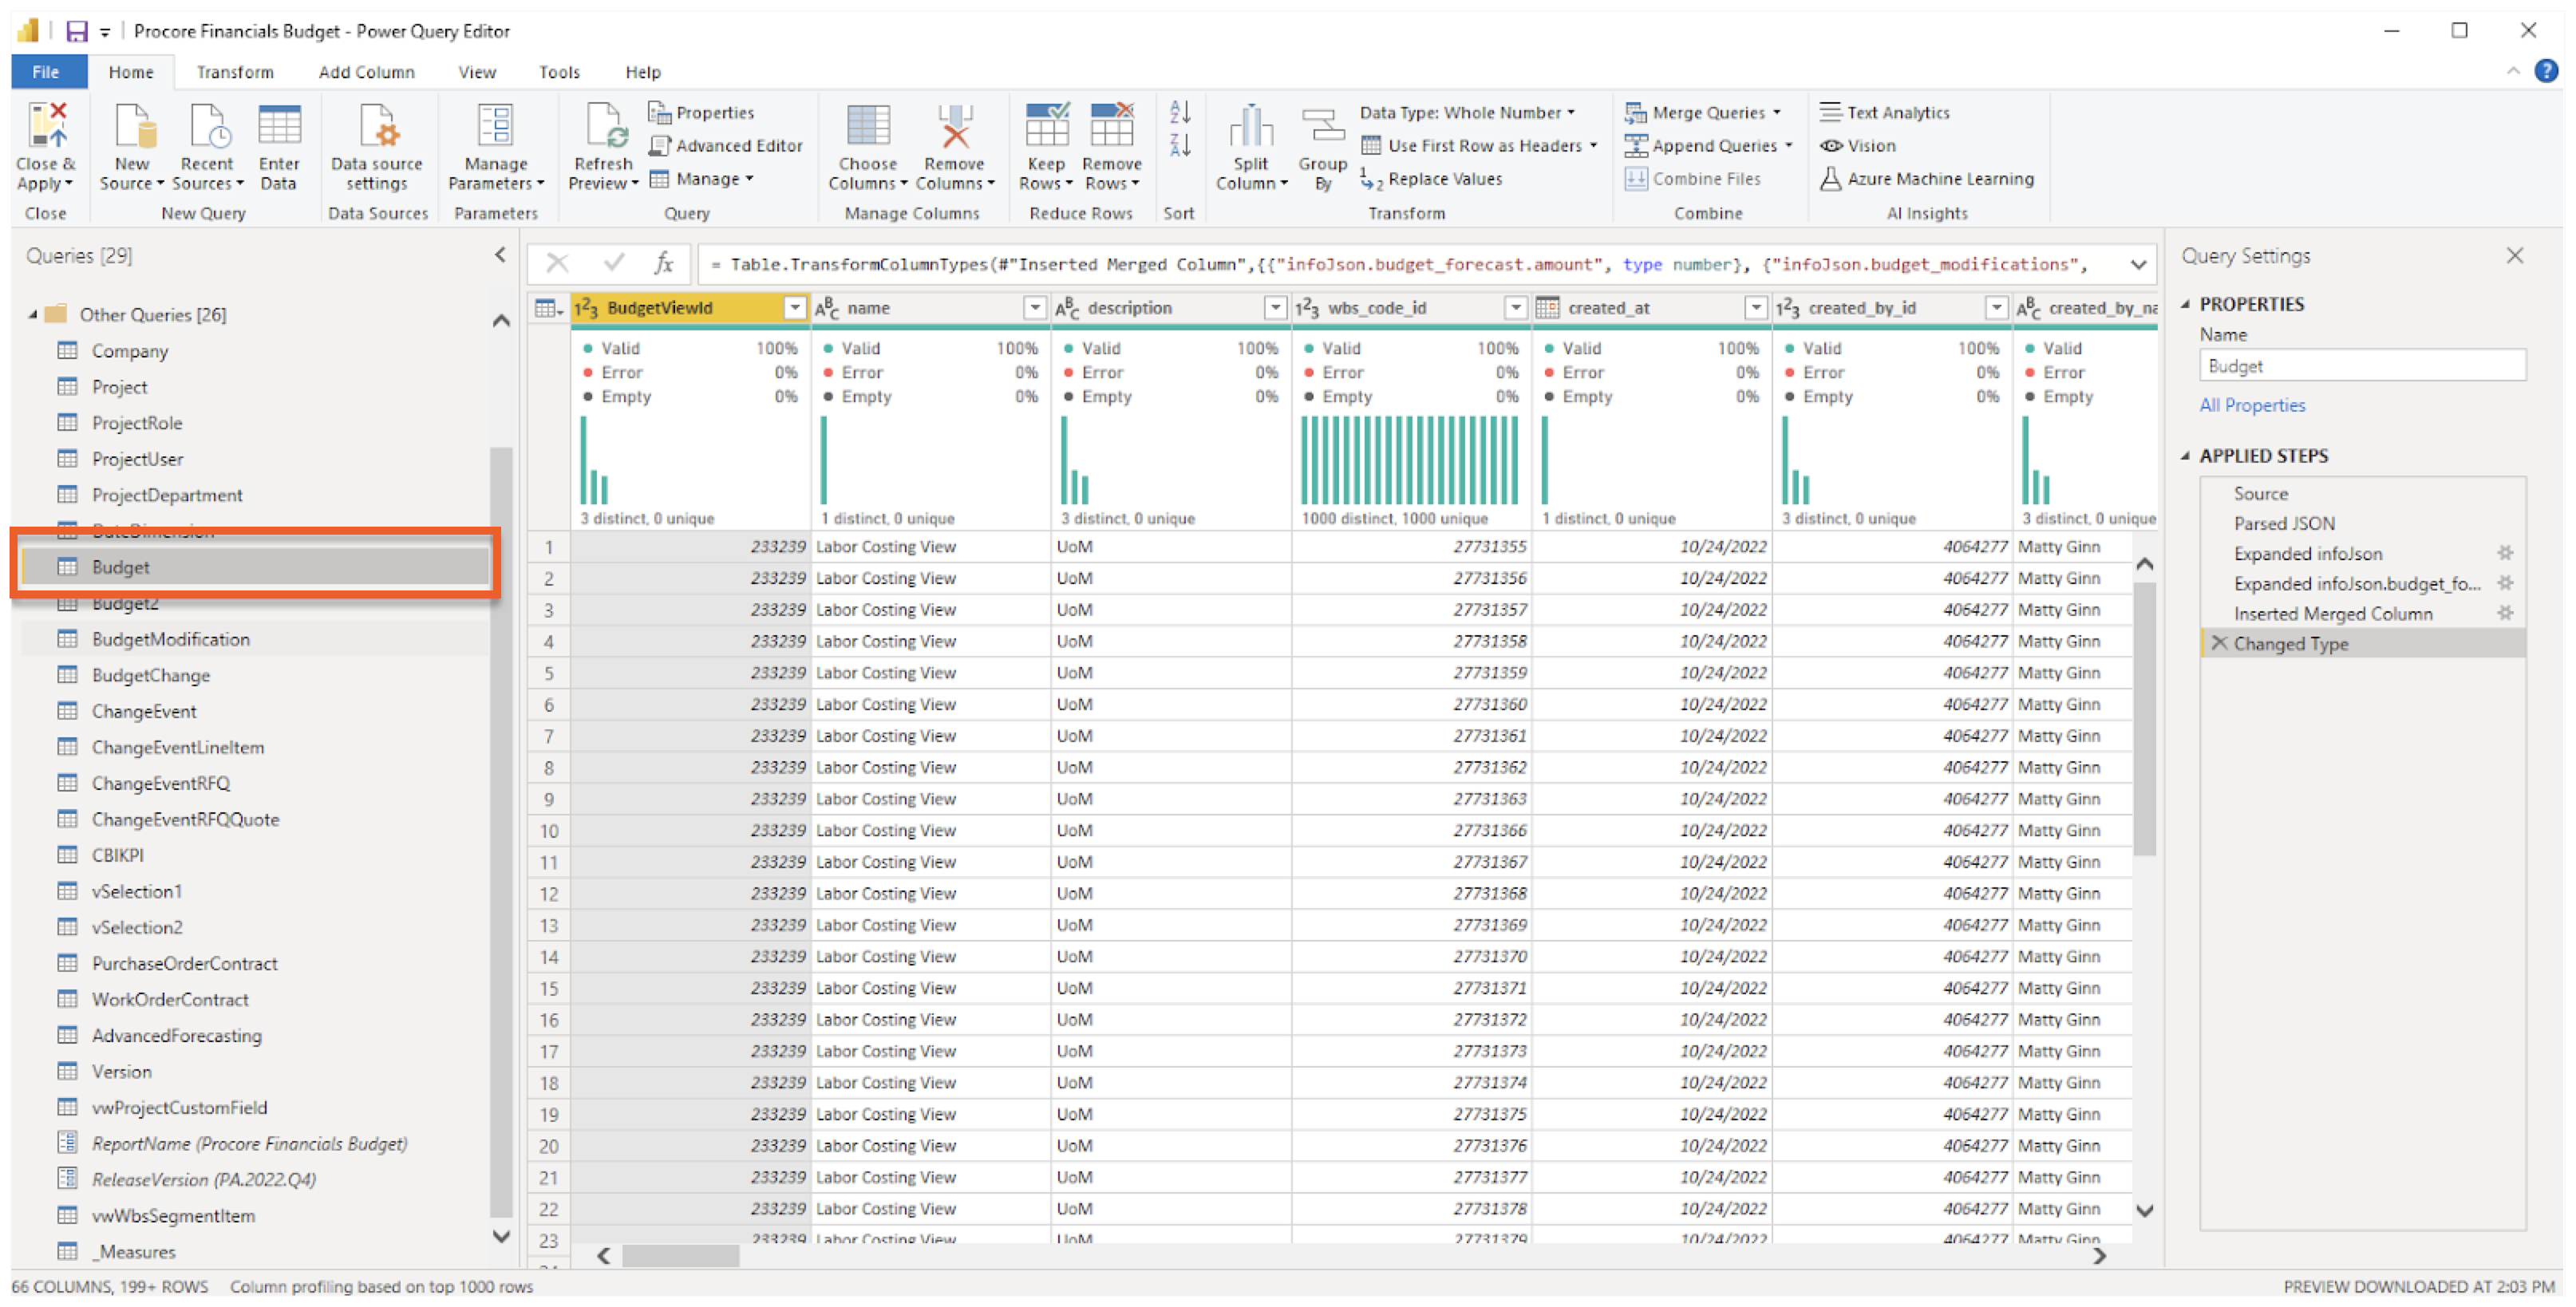
- In the Queries panel, click the Budget table.
Note
- The steps below illustrate changes on the Budget table. However, you must perform these steps on both the Budget and Budget2 queries.
- If your company's projects are using optional Advanced Forecasting feature, you must also perform these steps on the Procore Standard Forecast View. See About the Procore Standard Forecast View.
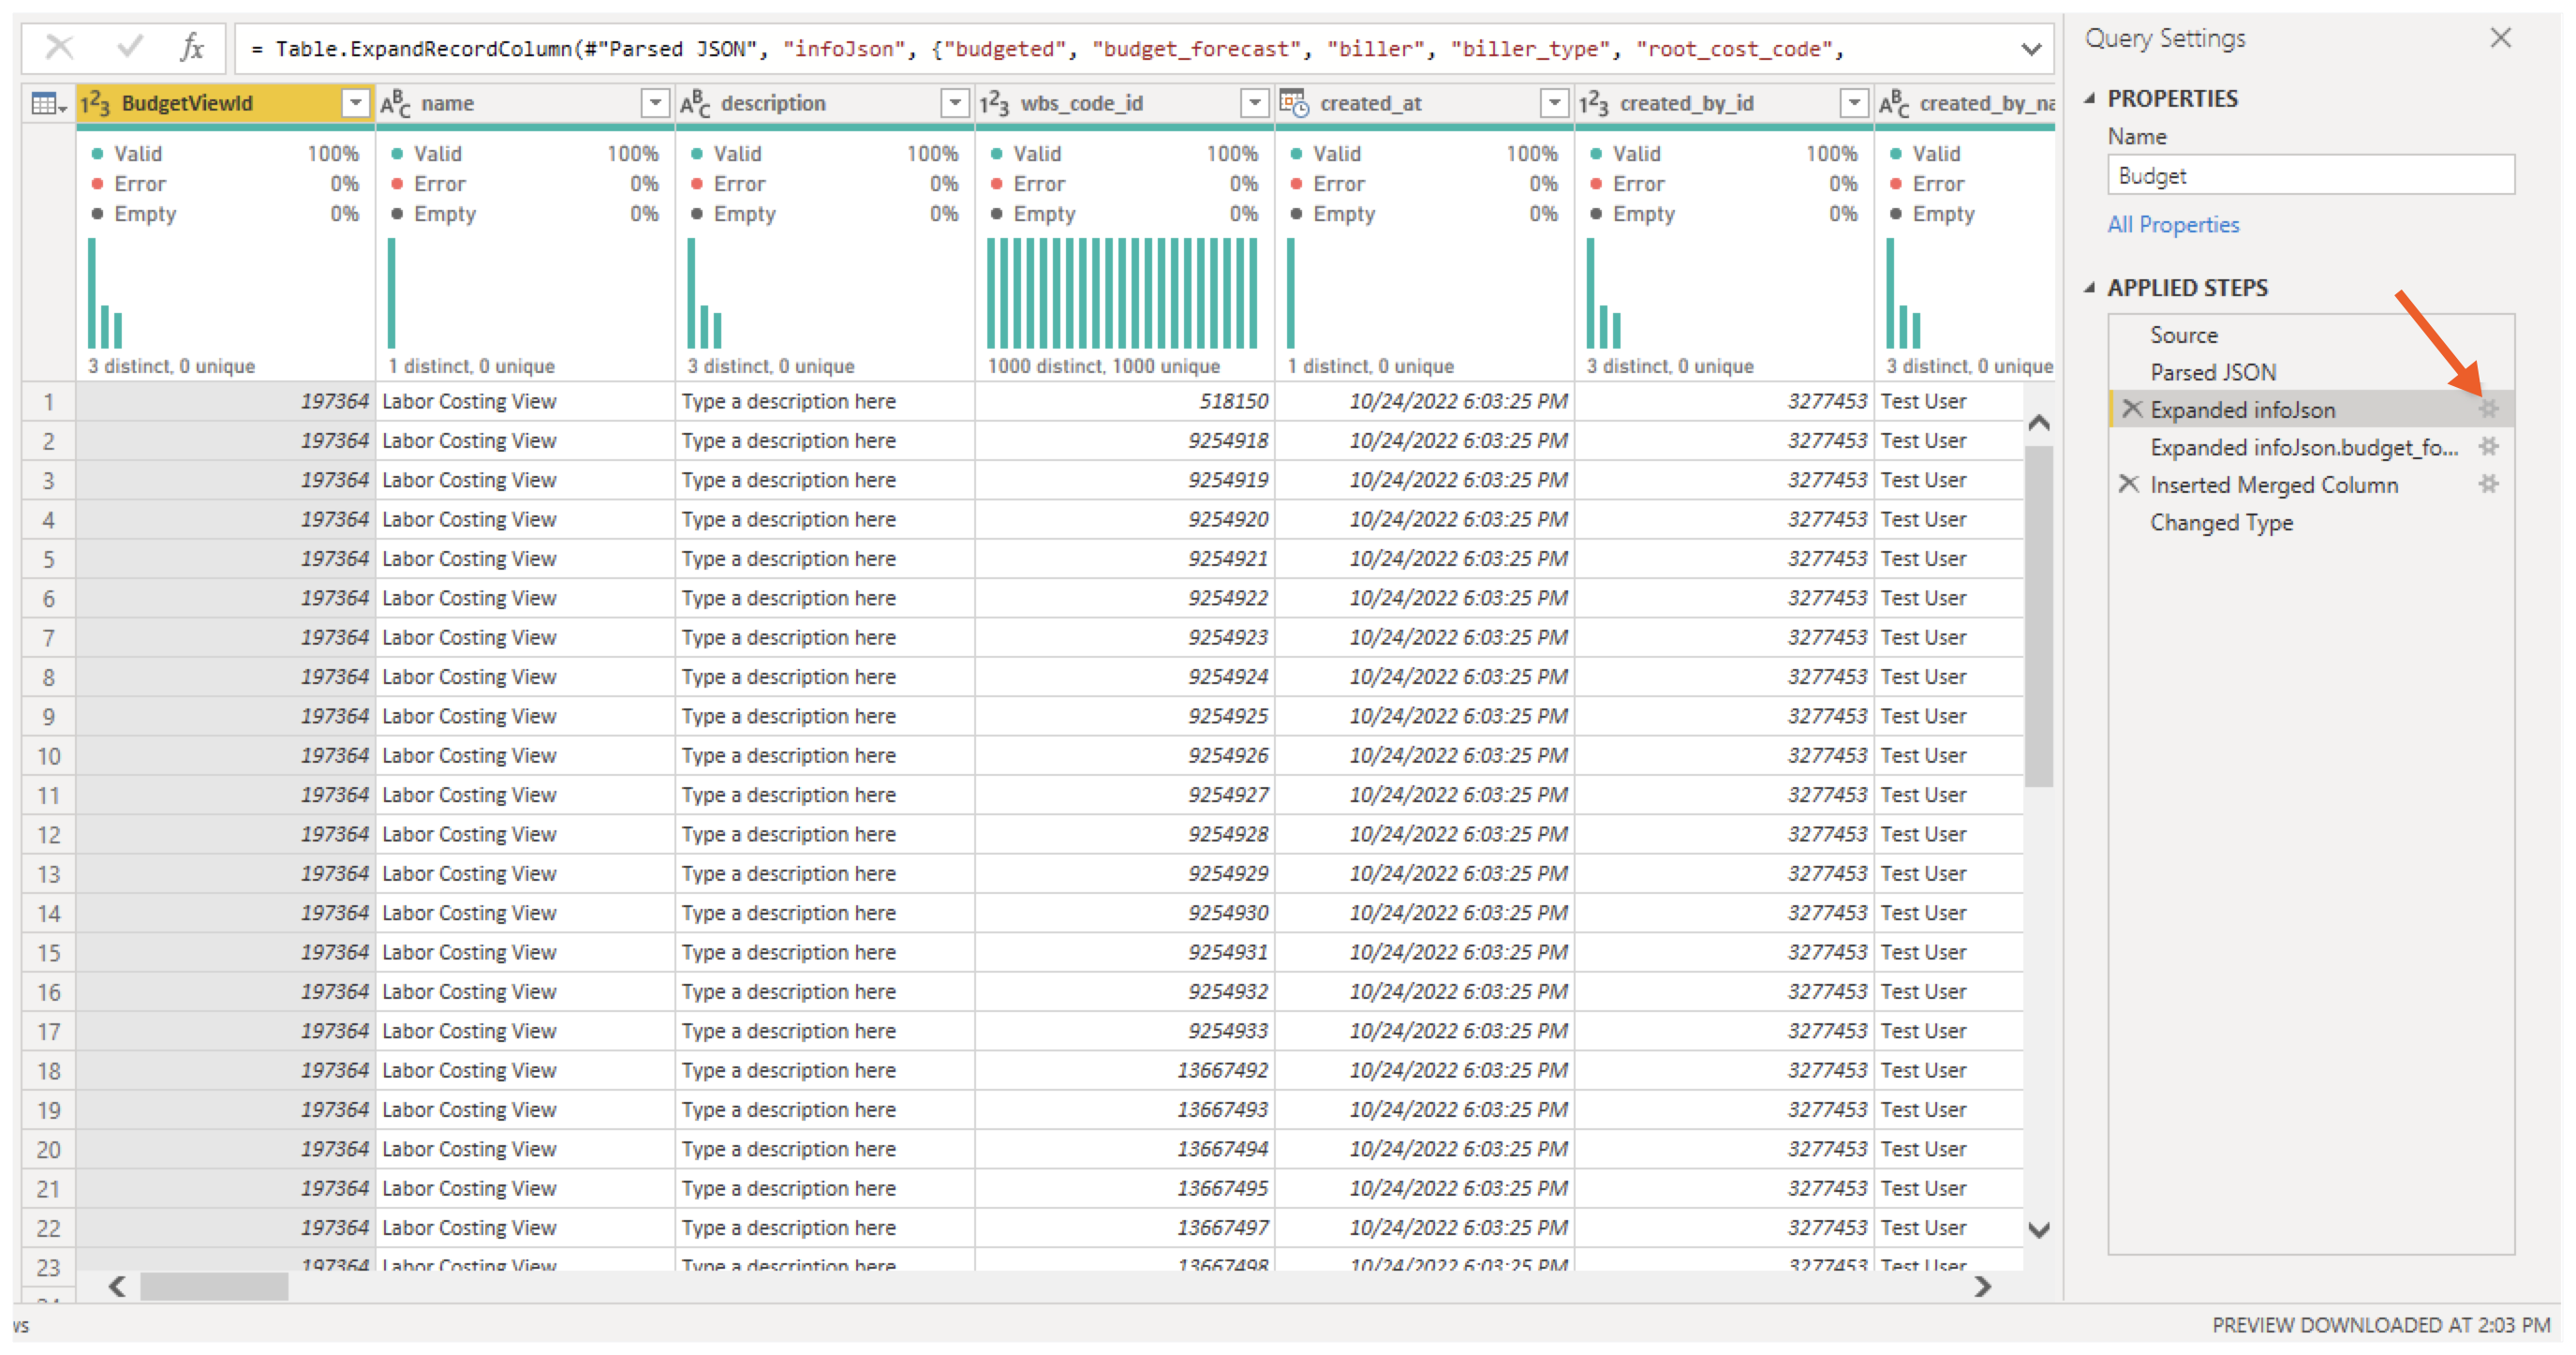
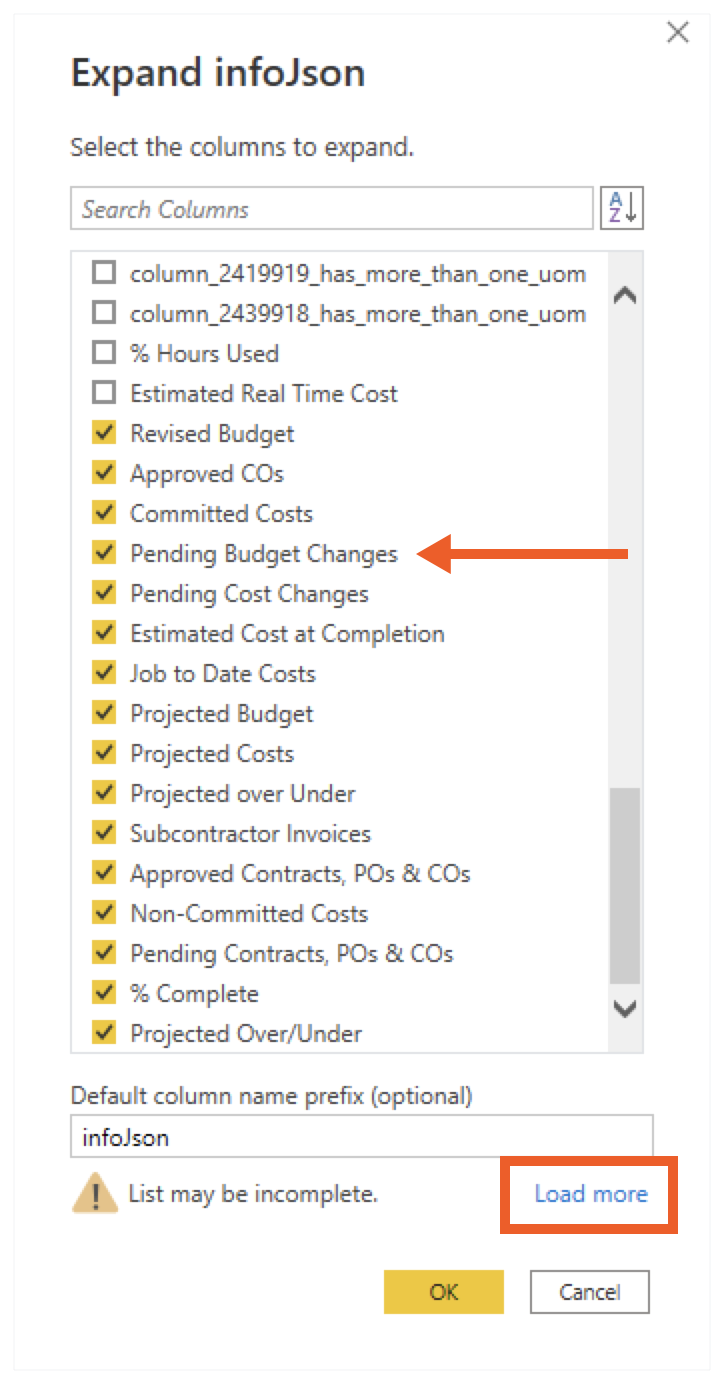
- In the Query Settings pane, under Applied Steps, click the gear icon next to Expanded infoJSon.
- In the Expand infoJson page, you have these options:
- Add the appropriate columns by marking the appropriate checkbox.
- Remove the appropriate budget modification columns by removing the appropriate checkbox.
Important
- If you want to complete or have completed the migration process from budget modifications to budget changes, please read Migrating to Budget Changes from Budget Modifications and Add the Columns for the 'Budget Changes' Feature to a Budget View.
- If you have customized your budget view to include calculated columns, you must update those columns as appropriate. See What are Procore's standard budget views? and What are Procore's standard budget views for ERP Integrations?
- If you do not see a column, click Load More to refresh the contents of the page.
- In the Query Settings pane, under Applied Steps, click the X to remove Changed Type.
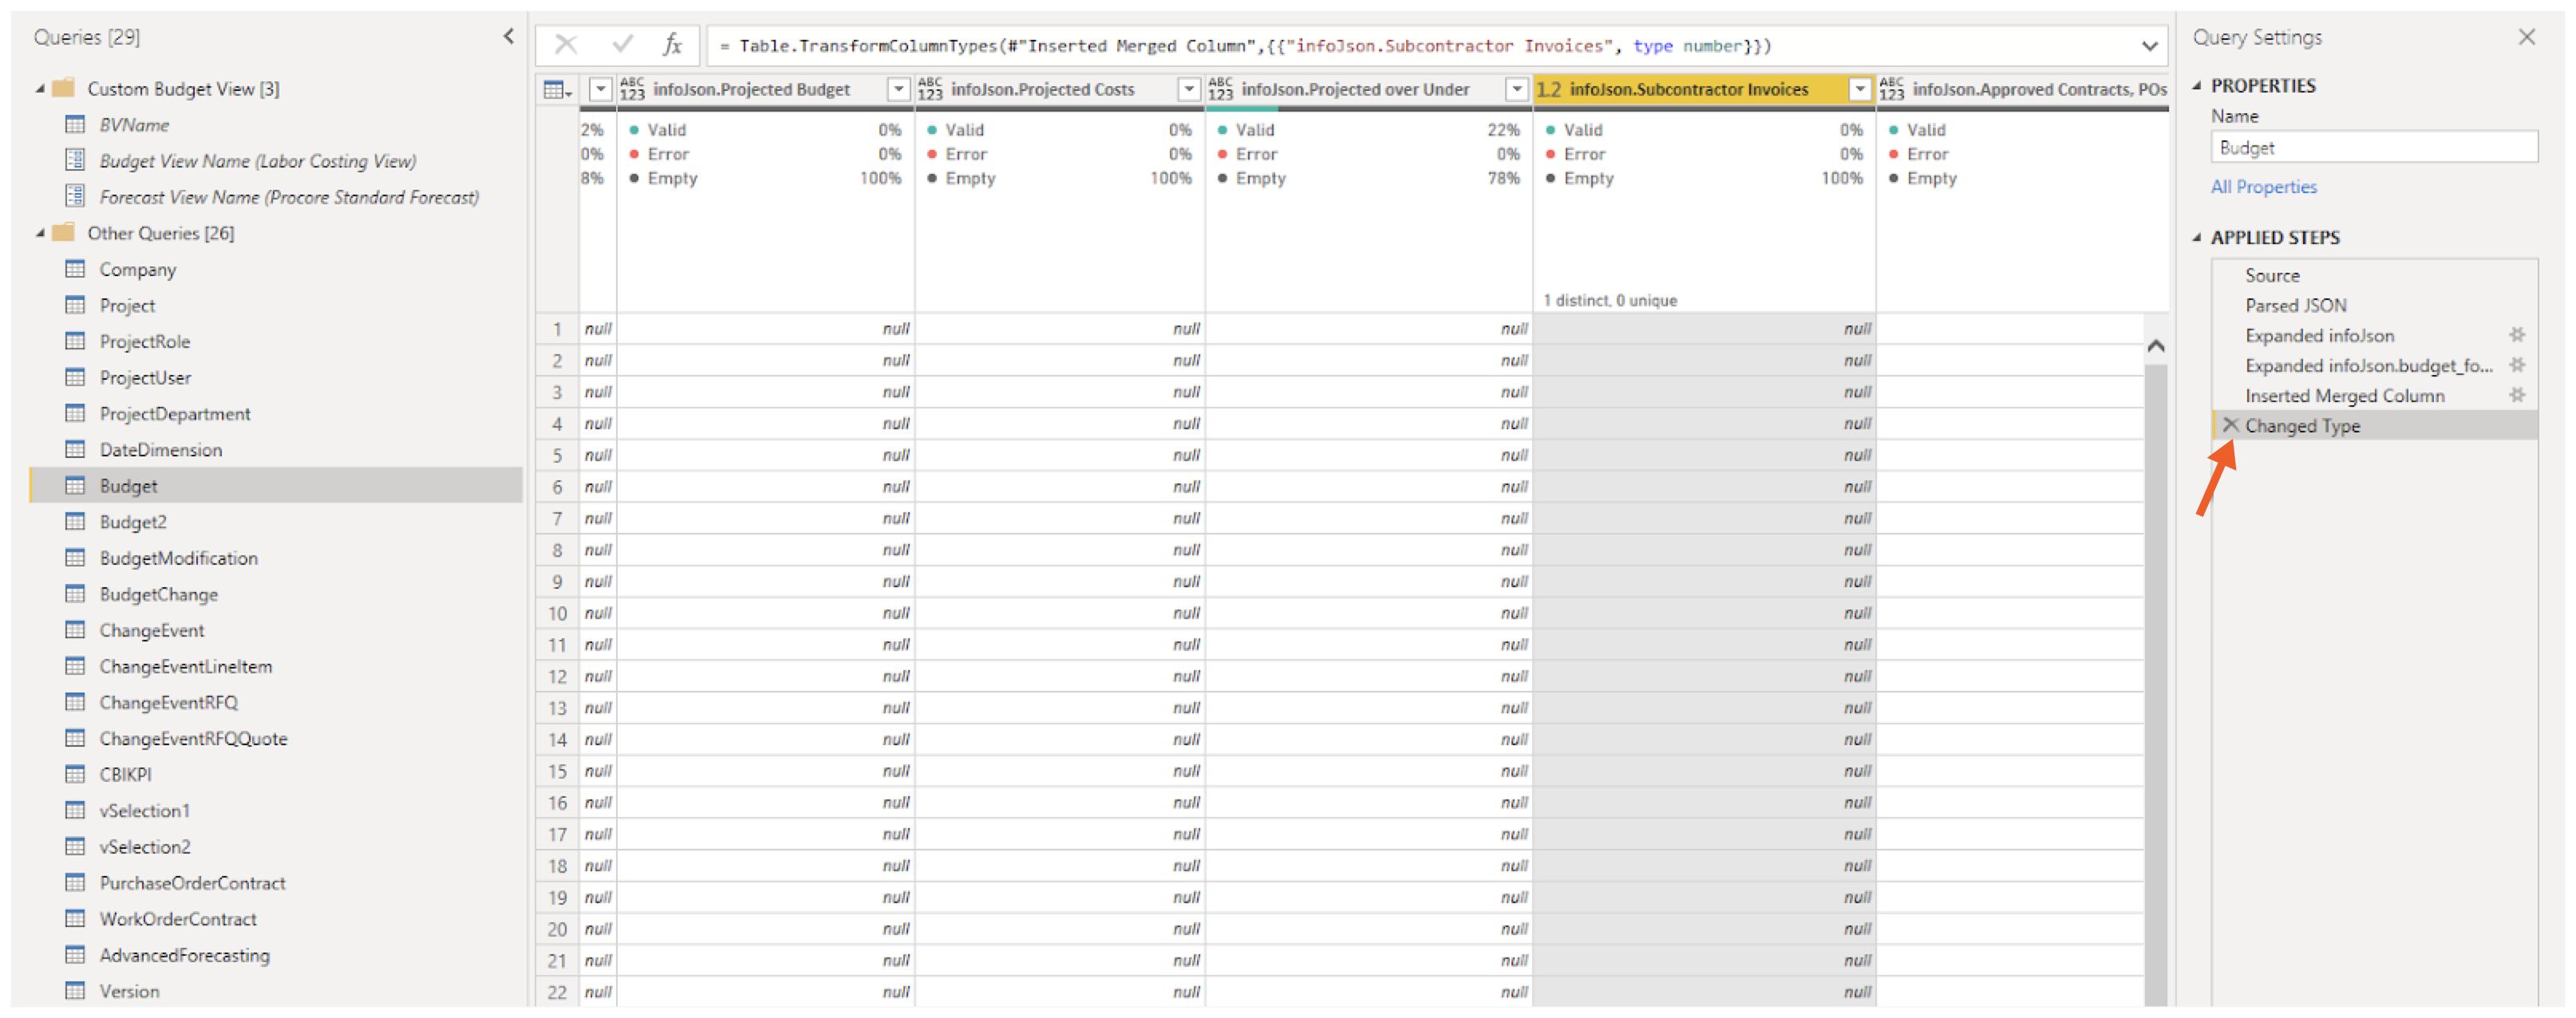
- Scroll through all of the columns and ensure to select the correct data type.
Tip
How do you set the data type on a column? Click the button next to each column header as shown below.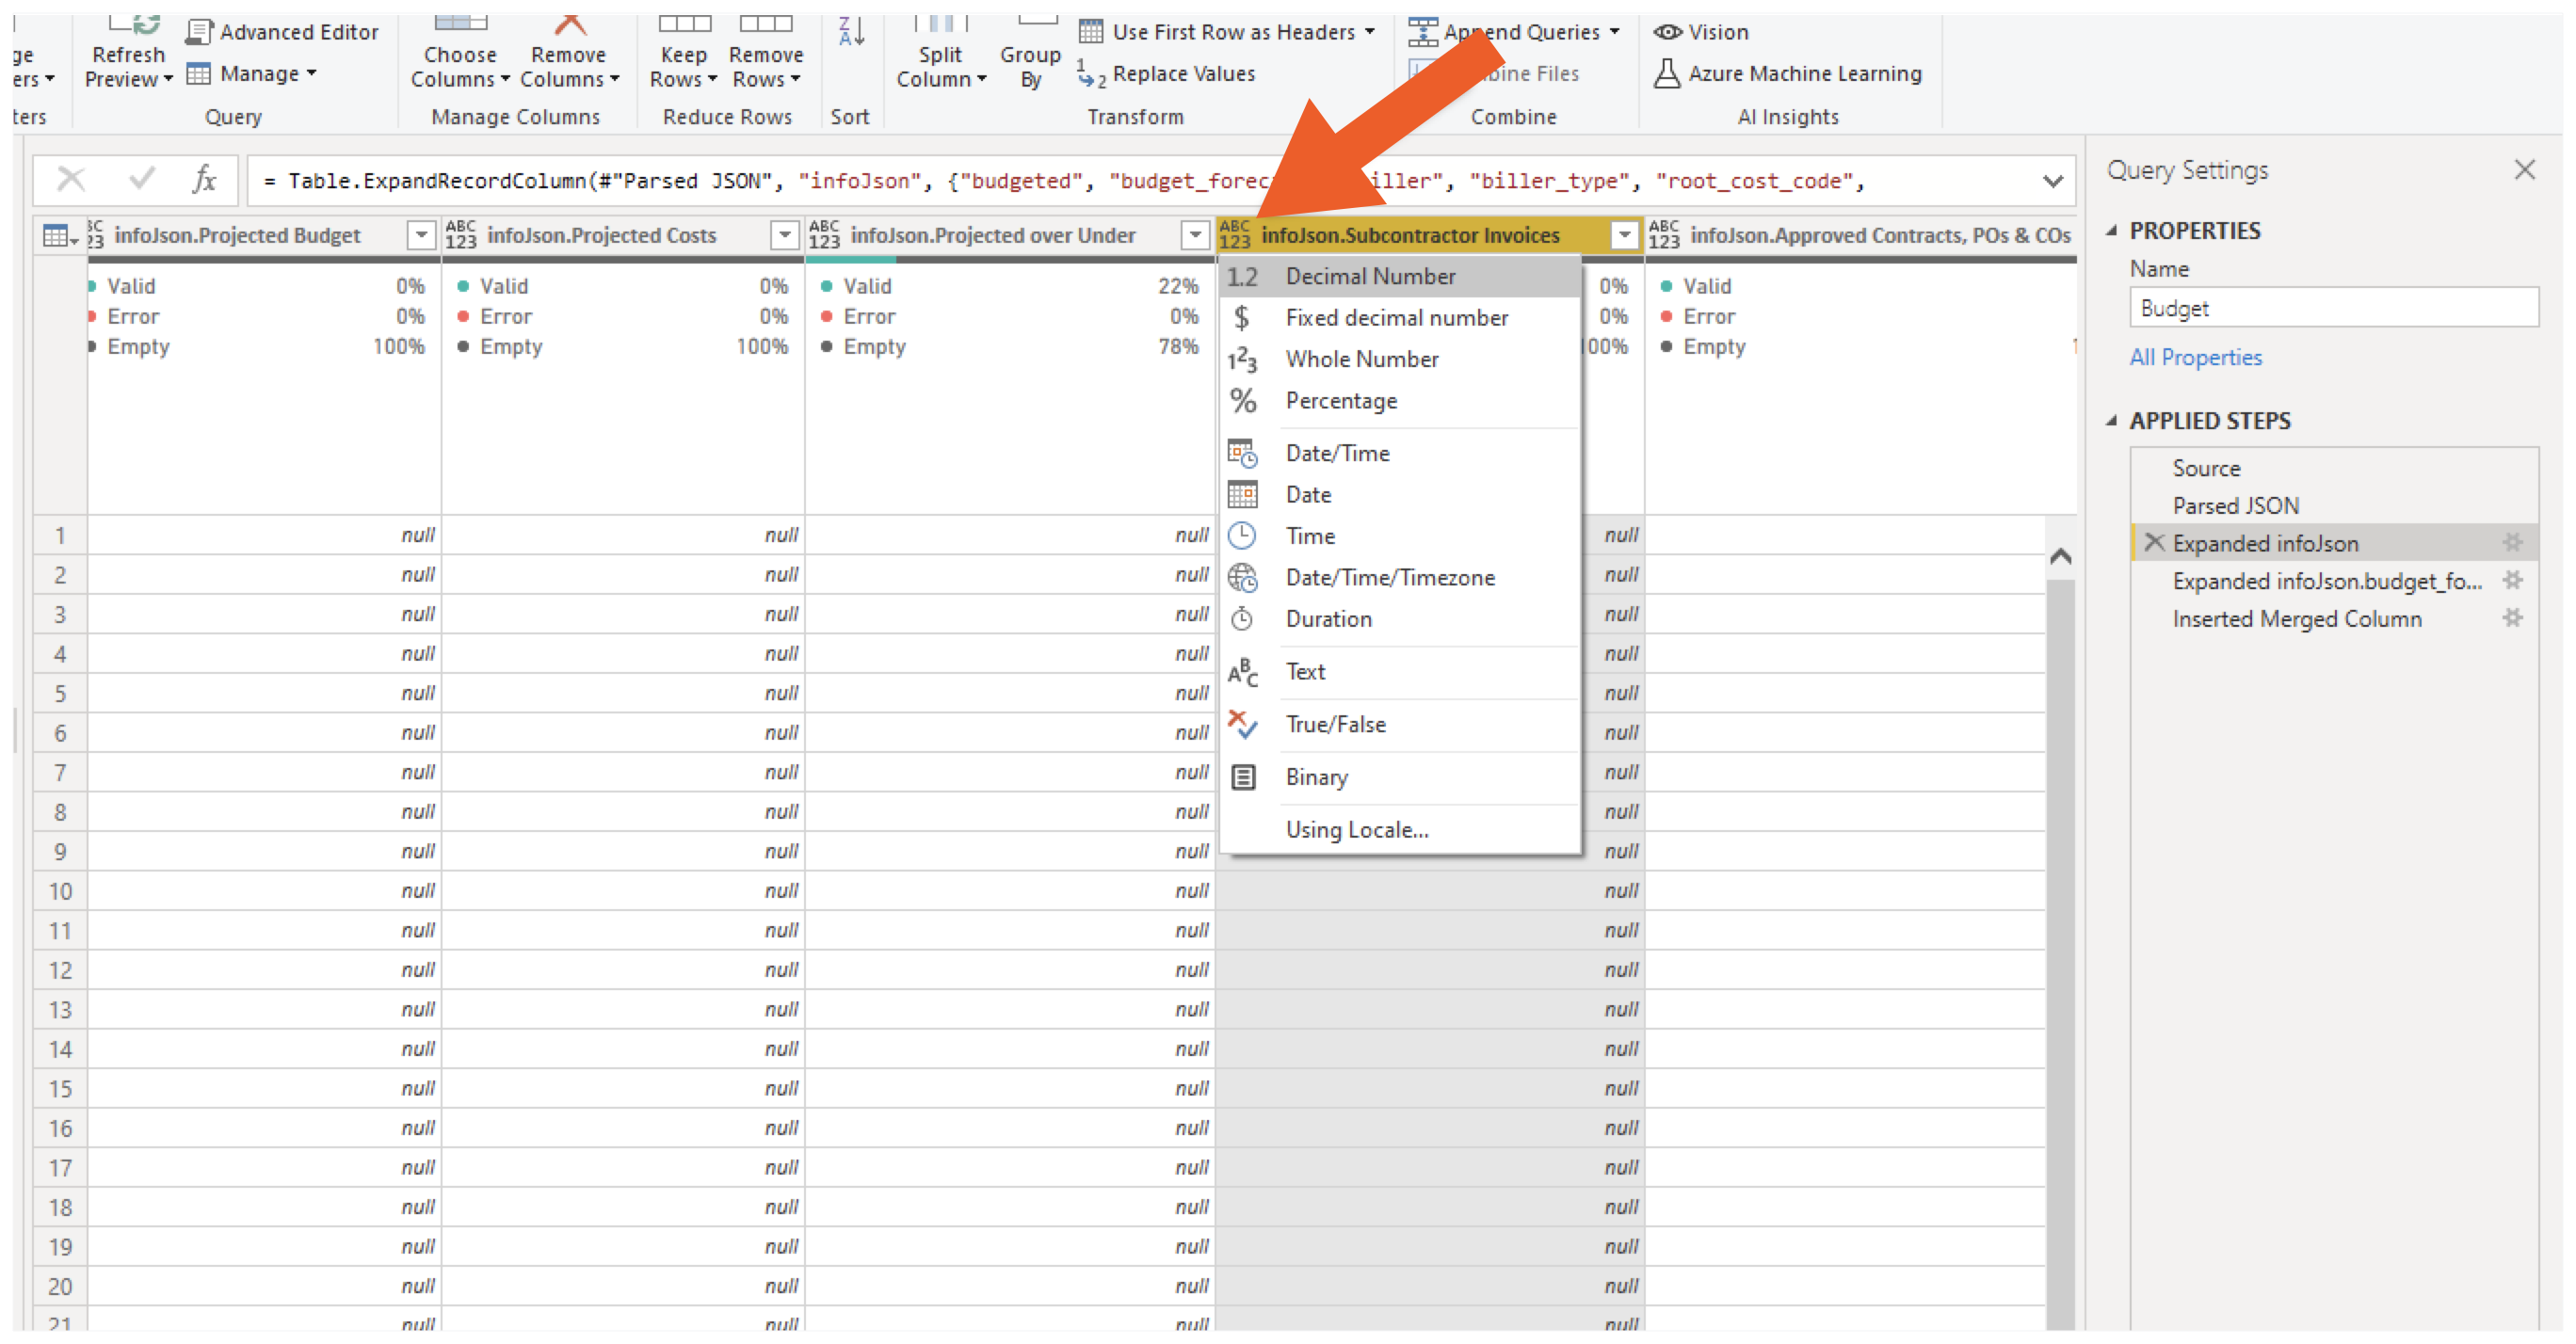
- After updating all the appropriate columns and setting the data type, click Close & Apply.