Operations Manual
Table of Contents ➔
Welcome to the Tucker HiRise Operations Manual 2.0! This resource has been completely redesigned to include all the latest information, forms, templates, and workflows wrapped in to an entirely new user experience. If you notice any incorrect information, broken links, or other issues, kindly email procore@tuckerhirise.com
1.0 Document Control
1.1 Project File Folder Structure
Tucker HiRise uses an intelligent File Management System with consistent Folder Structure across all projects. The Folder Structure matches our Operations Manual Sections, and includes sub folders to house various deliverables and documents we require to effectively manage our projects in line with our Best Practices. Consistency in the the Folders we use ensures everyone on the site knows where to access the information and the information is organized in a clear format. Having a standard folder structure also makes it very easy for Tucker employees to transition between projects as they are familiar with where everything is kept and stored. Additionally, the standard folder structure makes it easy to look back on older projects to find key documents and information as required.
This folder structure has been set up with input from many people to consider the needs of various departments and organizational goals. A number of the processes included in this operations manual require this folder structure to be exactly as shown below, please do not modify or add folders in the main level. The folder structure has also been organized chronologically, and to match the related operations manual section. For Example, Section 3.0 Estimating in the Ops Manual and 03 Estimating in the folder structure. Reach out to your Project Controls Specialist at procore@tuckerhirise.com with any questions.
Included in this Manual is a Document Glossary which identifies key documents and where they are stored.
It is important for the Project Team to maintain and store documents in their required locations as per the Document Glossary.
Here is an overview of a file structure that has been implemented for every project in Procore. There are folders within each of these files that can be customized, but this general hierarchy should not be changed unless approved by Systems and Controls.
Folders with a padlock icon are "Private", meaning they can only be viewed by Tucker employees. It is possible to grant specific external users access to these folders or their subfolders if needed. For example, a client may want access to view schedules or estimates. Please reach out to your Project Controls Specialist with any requests or questions.

01 Design Team Files is a folder that was added for the design team to use as they wish for collaboration amongst themselves (in lieu of using their own dropbox folder or FTP). It is NOT a drop-off box for them to be used in lieu of uploading files to the appropriate tool such as Drawings or Specifications. Project Controls will make a point to mention this during consultant kick of meetings but reminders may be needed. Please contact Project Controls if there are recurring issues.
02 Consultant Reports is where all consultant reports are to be uploaded and stored. This would include geotechnical, acoustical, and similar types of reports. This folder is public for transparency and to allow consultant uploads.
06 Bid Packages is further described in section 6.0 Bid Packages. The folder has to remain public as it is used by the Tendering tool.
Attachment: Sample Document Glossary.pdf
1.2 Drawing and Specification Management
Description:
The Drawing and Specification modules on Procore are used to host various “sets” of drawings and specs. This area of the site is the main hub for all the drawings and specs that are issued either as a tender/IFC set or through change documents.
Purpose:
The purpose of managing the Drawing and Specification modules is to ensure that the most recent drawings are being followed on site. As tender drawings, IFC drawings, and change documents are issued, the Master Drawing and Spec Set needs to be updated accordingly. By keeping a set of up to date drawings and specs, it reduced the risk that things will be built to an older/obsolete set of drawings.
Work Flow:
Drawings Updates - See the tutorial on Uploading Drawing Revisions in the Drawings tool
Specification Update - See the tutorial on Uploading Specification Revisions in the Specifications tool
1.2.1 Drawing and Specification Record Sets
Once the new files are uploaded for both the specs and the drawings, the old files are maintained in folders that are called “Record Sets”. This way all the previous iterations of each drawing are maintained and stored, for future reference or historical data. It is important to keep these old drawing sets accessible by the project team so that the new drawings set through SI’s can be compared to the old ones. This might be needed to review a subcontractor’s quotation for a change or review at what point something on the drawing changed. See below for a snip of what the record sets look like in Procore. Each SI/drawing set that has been uploaded gets its own Drawing Set made so hold the files that have been updated. The current set of drawings is just the most recent file for each drawing, pulled from each of these sets.
1.2.2 Blackline (Suite) Drawings & FINISH DATA SHEETS in Procore
In addition to full construction drawing sheets, the Drawings tool in procore is also used for Blackline Drawings & Finish Data Sheets. Before uploading these drawings and sheets, ensure Drawings by Area is enabled in the drawings tool configuration. If you do not have access, please contact Project Controls (procore@tuckerhirise.com) and we will enable Drawings by Area. Once enabled please follow the following steps:
Create a new drawing area called "Suites"
Upload the drawings as usual and allow procore to process them as necessary.
Once drawings are ready for Review & Publish, please copy the following naming conventions:
| Discipline | Drawing No. | Drawing Title | Set |
|---|---|---|---|
| Level 03 | 301- Blackline | 301 - Blackline | Blacklines |
| Level 03 | 301 - Finish Data | 301 - Finish Data | Finish Data |
Due to the amount of manual entry required, blackline drawings and finish data unfortunately take much longer to review than standard drawing sets. However, the effort up front will make it substantially easier for your trades and site management team to quickly find the information they are looking for, saving time and preventing issues in the long run.
1.3 Request for Information (RFI)
Description:
Requests for Information (RFI’s) are questions or clarifications which can come from Estimating, Project Management, or TLogic, and are directed to an external party (outside of Tucker HiRise). Internal correspondence within Tucker HiRise is to be done through the “Tasks” tool.
Purpose:
The purpose of an RFI is to receive clarification from the Consultants or Owner on an item. This sometimes will involve a subsequent Site Instruction to be issued to capture the direction or change of scope that stemmed from the RFI. Although RFI’s are formal contract documents, any changes to the drawings or specs (contract documents) that come as a result of the RFI response, should always be captured in a Site Instruction (SI), Contemplated Change Notice (CCN) or Change Directive (CD).
Conventional thinking puts all of the responsibility for slow RFI responses entirely on consultants (assignees). While the RFIs tool in Procore can make this process more efficient, what will make this biggest difference is writing really good RFIs. Approach RFI writing with the perspective "How easy can I make it for the consultant to give us the response we want". Complete ALL fields in the RFI, including Location, Drawing and Reference (use this to list related Submittal or SI numbers). Take an extra minute to add attachments or link Related Items so your consultant doesn't need to go searching for them. Always start with a description of the problem or conflict, and finish with exactly what you would like to be done about it (i.e please issue an updated drawing). Although RFI’s are formal contract documents, any changes to the drawings or specs (contract documents) that come as a result of the RFI response, should always be captured in a Site Instruction (SI), Contemplated Change Notice (CCN) or Change Directive (CD).
See Engineering RFIs to get a better understanding of why a bad RFI can add hours or days to the response time, and why its worth taking the extra 5 minutes to write a complete RFI.
Work Flow:
The work flow for RFI’s is as follows:
- Estimating/TLogic/Project Management Team creates an RFI, which would include the question and any relevant attachments that are needed to explain/elaborate on the question. IF the RFI is created by the estimating or TLogic team, it is to be created as a “DRAFT” and assigned to the project management team for review.
- Once the project management team has reviewed the RFI, they will change the status to “Open” and assign it to the appropriate parties (consultants, Owner, subcontractor, etc.)
NOTE: The format of RFI’s on Procore does not currently allow for multiple parties to be included in a linear workflow.
For example: if you assign the RFI to the architect, electrical engineer and mechanical engineer as it requires all of their input, when the architect responds – it is automatically returned to the court of the person who asked the RFI. Then the person who asked the RFI needs to re-assign the RFI back to the electrical engineer and mechanical engineer, once the mechanical engineer response – the person asking the RFI needs to once again assign the RFI back to the electrical engineer to get the 3rd response.
Attachment:
· RFI 18 (input from Structural Engineer then SI required from Architect).pdf
1.4 Change Documents & Site Instructions (SI/CCN/CD)
Purpose:
Changes occur in the construction process as owners make requests for changes to the design, design coordination issues are flagged and revised, and conditions are identified on site. It is important to stay organized as these changes are issued to make sure that the current set of drawings are maintained (see section 9.02 – Drawing and Specification Management), and pricing/schedule impact is received in a timely manor from the affected subcontractors.
There are 3 different types of change documents that can be issued by the consultants as per the CCDC contract, they are as follows:
SI – Site Instruction – This format is the most commonly used change type and is meant to be used to clarify smaller items and provide additional details that may not have been initially present. Items issued in a Site Instruction typically are not contemplated and need to be proceeded on immediately on site unless otherwise noted.
CCN – Contemplated Change Notice – This is the format the consultants use for a change when it is truly contemplated. This format allows the Owner to review pricing from the subcontractors before direction to proceed is provided.
An example of this could be: The Owner wants to change the flooring in a common area from tile to hardwood but they are not sure how much this will cost and only want to proceed with the change if the cost is less than $10,000. A CCN is issued and the flooring subcontractor prices it at $17,000, the owner then cancels the CCN and the subcontractor is to proceed with the original tile scope. If the cost comes in at $8,000 and the owner decides to proceed, a subsequent Change Order is issued to add this to the subcontractor’s contractual scope of work.
CD – Change Directive – This format of a change is more rarely used but it is here for if there is a fairly major scope change that has a cost/schedule impact but we do not have enough time to pursue pricing and review quotes from the subcontractors. A change directive allows the subcontractor to proceed on the work right away, tracking their costs on a time and material basis. These timesheets are signed by Tucker HiRise superintendent and then submitted as part of the final quote once the work has been completed.
The “Instructions” module on Procore is used to host the changes and distribute them to the subcontractors but it is important to maintain tracking logs in excel for both the change documents (see attached “9.04 - King St Change Tracking”) and the potential cost impacts from each subcontractor (see attached “9.04 - King St PCO Log”).
Work Flow:
- The architect (prime consultant) creates a new “Instruction” on Procore. This instruction could include various change documents from the other consultants but this happens behind the scenes. The requirement from Tucker HiRise is that only the architect can upload instructions. This is done to ensure that the Architect gets to see all the documents and has a chance to coordinate them before they are sent to Tucker HiRise. For example, even a purely mechanical change from the mechanical consultant needs to be sent to the architect for them to distribute and make sure that there are no architectural impacts from the mechanical change.
- Once the full coordinated change is issued to Tucker HiRise on the Procore “Instructions” module, the change is tracked on the “9.04 - King St Change Tracking” sheet and a new folder is created on the Procore Documents to hold all correspondence related to that change, see below screenshot of the file structure. Each change gets a unique ID number that is used in the PCO log to keep all the documentation from each PCO organized and sortable.
- The contents are then reviewed in detail. The Tucker HiRise team determines which ongoing tenders or awarded scope that the change impacts.
- If the change impacts an open tender, the Tucker HiRise estimating team is notified and action is taken depending on the complexity of the change and the urgency to award the tender. If awarding the tender is urgent then the change document can either be priced after award or negotiated at the contract award stage. Either way this cost/schedule impact should be tracked on a PCO log, such as this one "9.04 - King St PCO Log".
- If the change impacts scope that has been awarded, add the subcontractor to the distribution list on the "Instruction" and re-distribute to all parties. Put a note in the description to say for example "May 3rd, 2019 update: Formwork Contractor added to the distribution". This helps other people who were already on the distribution understand that the documents didn't change, just an additional trade was added. The next step is to add the trade to a PCO tracking log, such as this one "9.04 - King St PCO Log".
- Regular follow-ups should be completed with the subcontractors to ensure that they have received the changes and are actively working on pricing them or submitting a no cost letter. Any pricing updates should be tracked in the PCO log.
1.5 Submittals
Description:
The Submittal Tool in Procore is used as a place to manage:
- Shop Drawings
- Data Sheets
- Samples
- Layout Drawings
- Product Manuals and Information
- Warranties
- As Builts
- Close out Documents
- Holdback Release Documents
Basically, any required document that is submitted by a subcontractor can be requested and managed in the Submittals Tool, if additional approvals are required (ex: Consultants), the Tool can initiate a workflow to automate required approvals and further submissions.
Purpose:
The purpose of submittals is to ensure that the subcontractors are supplying the correct products and/or equipment and have the correct information, prior to having the materials installed on site. Even if the subcontractor is submitting the same products as in the specifications, it is important that they still provide a submittal, and have it reviewed by the consultants. This clears some liability from Tucker HiRise’s end and provides peace of mind that the contractual terms are being followed.
Work Flow: The workflow for submittals is different than RFI’s as it allows for a linear propagation through each consultant. This means that Tucker HiRise does not need to reassign the submittal to the next party after each consultant review is completed, like we have to do with RFI’s.
Note: If you assign a submittal to multiple people from the same company in the same submittal step, only one of them needs to respond to the submittal to push it along to the next step. See below for an example of this, you will see that only FA and MA responded from each respective company and that is OK.

Attachment:
1.6 Meetings
Meetings are an important part of Construction Management, especially tracking all the deliverables and commitments that stem from the meetings. The meetings module on Procore is especially good at keeping track of these items and making sure that things are kept organized, flagging items for follow up and adding due dates. Open items from previous meetings are carried forward to the next follow-up meeting to ensure that the action items have been completed. Due dates and assignees are revaluated and assigned each meeting based on discussions and agreements made. Please reference The Art of Meeting Minutes for tips and recommendations on taking good meeting minutes, and why it's important to do so. There are a number of “Standard” recurring meetings which can all be created from templates in Procore:
Note: Please include procore@tuckerhirise.com on ALL meeting invitations
| Meeting Name | Minimum Frequency | Meeting Prep / Minutes | Who Runs the Meeting | Attendees |
|---|---|---|---|---|
| Preconstruction | ||||
| [PC-1] Project Name: THR / Owner Name Preconstruction Meeting ~ 1 hr Review status and deliverables of items necessary to begin construction. This meeting to be replaced by [M8] at start of construction. |
Bi-Weekly (Precon) | PC / APM Agenda updated in [M1] |
PM | |
| [PC-2] Project Name: Project Controls Client Setup ~ 1 hr Review reporting, notifications, and best practices for Procore use |
One Time Prior to Start of Construction |
PCS / PCC | PCM | |
| Construction | ||||
| [M1] Project Name: Project Team Meeting ~1 hr Internal staff meeting to review project deliverables and update Agenda for owner meetings such as [M2] or [M8]. |
Weekly | N/A - Agenda to be updated for [M2] or [M8] | PM | SS, CM, PD (optional) |
| [M3] Project Name: Consultant / Design Meeting ~ 1 hr Discuss deliverables and action items from all consultants and the Owner. |
Bi-Weekly | APM / PM | PM | SS, CS, CM, OWN |
| [T1] Project Name: TLogic / Consultant Coordination Meeting ~ 1 hr Coordination and clash review |
Bi-Weekly | DCC | DCC / DMC | |
| [M4] Project Name: Qualification Meeting - Trade Name ~ 1 hr Review quote, agree on scope and price |
2 per week as needed | E | E | |
| [M5] Project Name: Project Controls Internal Setup ~ 1 hr Review current process and best practices for Procore use |
One Time Prior to First Contract in Procore |
PCS / PCC | PCM | |
| [M7] Project Name: Trade Start Up - Trade Name ~ 1 hr On-site meeting with trade PMs and foreman to review safety requirements and items they should be aware of before starting work. This meeting is required with every trade prior to their start date. |
Once following contract execution | SA / ASM | SM | |
| [M8] Project Name: THR / Owner Name Construction Admin Meeting ~ 1 hr Review critical items and approvals required for work to progress as scheduled (PCOs, Contracts, Permits, Design Documents, Items in Consultants' Court, etc.) |
Monthly Offset by 2 weeks from [M9] Monthly Project Report. |
PC / APM Agenda updated in [M1] |
PM | PM, APM, PD, OWN |
| [M9] Project Name: Monthly Project Report w/Internal ~ 2 hrs Draft report due to THR Executive Team by 3rd Monday of the month, prior to client distribution. Executive team reviews all draft reports before presentation to client in this meeting. Monthly report is updated with any items discussed in presentation and distributed to client for record via Procore emails. |
Monthly Finalized MPSR serves as minutes for this meeting. |
PM / APM / PC | PM / APM | PM, APM, CM, PD |
| [M10] Project Name: ProChek Inspection (Internal) ~ 30 mins Review Failed Items |
Monthly | PCS / PCC gathers data prior to meeting |
PCM | |
| [M11] Project Name: Trade Site Meeting ~ 30 mins Discuss safety and site issues or items that are holding up progress |
Weekly | ASM | SM | |
| [M12] Project Name: Joint Health and Safety Committee ~ 30 mins Review site safety with a representative from each subcontractor as required by the MoL for sites with 12+ workers. |
Bi-Weekly | S | S | |
| [M14] Project Name: Monthly Report w/Client Name ~ 60 mins Review mothly report with Client. |
Monthly | PM, APM, CM, PD, OWN, SCH | ||
| [M15] Project Name: Construction Operations Meeting ~ 90 mins Full project update. |
Monthly | PM / APM | SS, CM, PCM, PD, SCH | |
| Closeout | ||||
| [M13] THR / Owner Name Project Closeout Meeting ~ 30 mins Replaces [M8] once closeout milestone has been reached |
Bi-Weekly | PC / ASM | PM | |
| Executive / Other Meetings | ||||
| [E1] Project Name: MPSR Draft Review (Internal) ~ 30 mins Placeholder on 3rd Tuesday or Wednesday of the month for exec team to review MPSRs and call PM/CM if needed |
Monthly | N/A | VP | |
| [E2] All Projects: Critical Item Review (Internal) Critical Items and updates from CMs / Directors ~ 1 hr |
Monthly | CM | VP | |
| [E3] All Projects: Scheduling Meeting (Internal) | Weekly | SCH | SCH | |
| [E4] CM Group Workshop (Internal) | Monthly | PCC / PCS | PCM | |
| [E5] Systems & Controls Update (Internal) | Bi-Weekly | PCC / PCS | PCM | |
| [E6] Quarterly Health & Safety (Internal) | Quarterly | S | S | |
PD - Project Director, PM - Project Manager, APM - Assistant Project Manager, PC - Project Coordinator, PCM - Project Controls Manager, PCS - Project Controls Specialist, PRE - Preconstruction Manager, SM - Site Manager, ASM - Assistant Site Manager SA - Site Administrator, CM - Construction Manager, CE - Chief Estimator, E - Estimator, VP - Vice President, P - President, CA - Contracts Administrator, DOC - Document Control, DM/OR - Development Manager / Owners Representative, C - Consultant, T - Trade, S - Safety Manager, SCH - Scheduling Manager, DCC - Digital Construction Coordinator, DCM - Digital Construction Manager, OWN - Owner.
Sample Project Monthly Meeting Schedule
| Monday | Tuesday | Wedneday | Thursday | Friday | |
|---|---|---|---|---|---|
| Week 1 | 2, 9, 12 | 6, 7 | 1, 8 | 12 | |
| Week 2 | 9, 12 | 5 | 3, 8, 10 | 12, 11 | 4 (GG Projects Only) |
| Week 3 | 2, 9, 12 | 6, 7 | 1, 8 | 12 | |
| Week 4 | 9, 12 | 5 | 8, 10 | 12 |
Important
Zoom Meetings are set to record by default, project teams are responsible for attaching a link to the recording to the Procore meeting page.
1.7 Emails
Desctiption: Email correspondence takes place using Outlook. However, Procore is also used to track and catalog or "tag" email correspondence.
Note that he project email address should be copied on all project correspondence. All emails should be tagged in Procore on a weekly basis bu the site admin or project coordinator.
1.8 Tasks
Description: Procore's project level Tasks tool gives you the ability to track and manage action items during a construction project's lifespan. Specifically, we use tasks to track due dates for items requested from external parties including clients and consultants. The purpose is not to create additional work, but to easily document and track critical items, providing transparency to internal and external stakeholders. The benefits are A) That clients and consultants are easily able to see and complete outstanding items, and B) that we can easily document and reference the request if items are not completed on time, eliminating any back and forth in delay claims. At a minimum, Tasks should be created for the following items:
- Drawing Set Due from Consultant (such as IFC Set, IFT Sets, etc)
- Permit or Municipality Approvals Due from Client (such as building permits, TTC approvals, etc)
- LOR / Tender Award Approval Due from Client
In addition, your project will come pre-set with tasks for many internal items related to project start up and close out. Once the project begins, it is important to set dates for these items based on the preliminary schedule and assign them to the appropriate parties. While some of the tasks may be months (or years in advance) programming these items in from the start will ensure your team does not miss a thing!
Note that you do not need to create Tasks that are otherwise being tracked in Procore such as RFIs or Submittals.
Tucker HiRise policy on tasks is that if these requests are not listed in a task, they may as well not exist.
1.9 Progress Photos
Taking daily construction progress photos is important for a few reasons. First, it allows the construction team to document the progress of the project on a daily basis. This can be useful for tracking the project's progress and identifying any potential problems or delays. Second, it can also be used to create a visual record of the project, which can be useful for referencing in the future if any disputes or issues arise. Additionally, progress photos can be used to communicate with stakeholders and keep them informed about the project's progress.
Progress photos are to be taken by the Site Administrator or Assistant Site Manager every day and uploaded to Procore Photos to the Progress Photos Album on your project. When taking Progress Photos, simply select the Progress Photos album from the drop down list shown below on your Procore app.
Note: if a Progress Photos album does not exist, simply created it by clicking on ![]() Create Album
Create Album
In addition to photos taken for standard purposes, 3-4 photos (or more if finishing) are to be taken from the same location, This is not only for the project teams use, but also for marketing and other purposes to allow a time lapse to be created. During concrete, this should be a photo snap taken from one of the overhead cameras (use the same one every day).
When taking photos, ensure to provide appropriate context by including a detailed photo description and tagging the relevant location when possible, everyone who views your photo should be able to understand what they are looking at.
1.10 Daily Log
Daily logs are the main way field data is captured. As with many of our other daily tasks, the main purpose of the daily log is cataloging what's happening on site so that if and when a conflict arises, all parties can look at the situation more objectively. For example, maintaining accurate daily logs on Procore allows you to generate and access a Manpower Report to visualize trade staffing. In many cases, the information included in the daily log is what resolves conflicts or prevents them from escalating further. Taking accurate and detailed daily logs with this in mind allows all parties to get to the truth more quickly, saving time, money, and headache for you, your project team, your clients, and your trade partners.
The Procore Daily Log has many options for entering details about the Site, at a minimum, we must record the following key elements :
- Manpower (each day)
- Photos (each day)
- Weather (automatic)
- Notes (each day)
- Delays (when applicable)
- Visitors (when applicable)
- Inspections (when applicable)
Daily log entries are to completed in Procore's Daily Log tool every day there are workers, employees, or visitors on site. Any type of delay such as weather, manpower, equipment, materials, and design items are to be added to the daily log for tracking purposes.
The checkbox in the Weather section is used to create weather delays. Once this box is checked, a notification will automatically be sent to owners for the weather delay. Please notify your CM of the weather delay BEFORE checking the weather delay box. More information on automatic weather delay notifications can be found here.
Attachment:
2.0 Consultant Reports
Consultant Reports include and reports generated by consultants prior to or throughout the course of construction. Procore does not have a tool specifically designed to handle reports, so a public folder called 02 Consultant Reports has been created within the Documents tool. This allows consultants to upload reports into this folder and encourages them to properly name and date their uploads. As a backup, the Documents tool also records and displays "Date Created".
3.0 Estimating
3.1 Types of Budget
Depending on the needs of the client, Budgets will be created at various stages of the design development. The more complete the design documents the more accurate the budget will be.
It is common to produce a preliminary budget with little design info. It is important to understand the design intent in these cases and be a part of the Design process to ensure the design does not lead to an increased budget without the Owners knowledge. The design team must be kept informed and the design intent must be respected.
Class “D” estimate or so called “Cost Limit” Estimate is an estimate of the construction cost based on the Owner’s functional requirements to the degree known at the time. Traditionally, information about the project includes project stats and project massing study. The cost estimates are based on historical cost data for similar projects, suitably adjusted for such factors as inflation, location, risk, quality, size and time.
Class “C” estimate or “Order of Magnitude” estimate is an estimate of the Construction cost based on updated Owner requirements, general description of the project, schematic drawings, preliminary site information and existing conditions and takes into consideration market conditions as well as basic implementation logistics.
Class “B” estimate or “Preliminary Budget” estimate is prepared when all site or installation investigations are completed and the design of the major systems and sub-systems of the project (including outline specifications and preliminary drawings and models) are well underway. This budget includes for all actual costs, including costs resulting from the project schedule, cash allowances, contingencies for still undefined items/scope details, and market conditions. Allowances for design escalation, construction and design contingency should be carried in Soft Cost.
The Preliminary budget is usually reviewed and compared with Cost Consultant’s Budget. Prior to the start of the project, a Baseline Budget (or so-called Anchor Budget) should be set based on a mutually agreed Budget between Owner, Cost Consultant and Construction Manager. The Baseline Budget may be altered throughout the duration of the project by Change Orders.
Trade input is critical in this stage to ensure accuracy. The Construction Market is constantly changing, and prices can fluctuate. As much scope as possible should be covered by trade input.
This is the final estimate before tendering the project. This budget includes for all actual costs including costs resulting from the project schedule, cash allowances, contingencies, allowances for design escalation, market conditions and anticipated amendment amounts as applicable.
It is recommended that this Budget serves as a base line budget for Project Market Launch and Sale.
Class “A” estimate or “Construction Budget” is an estimate of the Construction Cost based on the completed Construction Set of documents.
Communication with the design team and owner should be regular and consistent. Timelines for budget development must be communicated clearly also.
3.2 Establishing Parameters for Budget Preparation
During design development it is important to keep Budget in mind. Trade Contractor involvement through this process can flag costly items and these same trades can assist in finding more cost-effective alternatives. Using the knowledge and experience of both the trades and our in-house knowledge, alternative materials and methods can be identified.
The Estimator should keep a list of potential cost saving items and circulate same amongst the Pre-Con team, Design team and Owner. Always be cautious not to stray from the design intent.
3.3 Information Required for Budget Preparation
A list of Information required from the Owner, Design team and Pre-Con team should be circulated and filled out before start of any budget preparation.
Depending on the class of budget that needs to be prepared, there is a minimum information required from the Owner, Design Team and the Pre-Construction team.
The more information provided, the lesser the risk of missing the Proforma / Acquisition budget target.
3.4 ECERs (Estimating Cost Exercise Record)
During design development stage the focus is on developing practical, pragmatic and constructible solutions for the exterior envelope, structure, fenestration, interior systems, MEP systems and so forth. The most critical feature of the DD stage is decision making – decision about products, materials, equipment and systems. That is why at this stage is very important to keep Budget in mind and keep it in line with the Proforma Budget (Acquisition Budget). During DD stage, the estimating department prepares multiple ECERs (Estimating Cost Exercise Record). ECERs are done for portions of the building, for a separate building element such as – various options for cladding, or for various building systems (such as various types of shoring, roofing, finishes). Trade Contractor involvement through this process can flag costly items and these same trades can assist in finding more cost-effective alternatives.
Project Estimator should compile and keep a list of proposed potential changes and circulate same internally amongst the pre-con team and externally between design team and owner.
3.5 Value Engineering
Value Engineering is a creative, team-based approach which allows generation of alternatives to the existing solution.
Although value engineering began as a cost-saving measure, it is becoming a valued project management technique that addresses all aspects of the building lifecycle from the initial construction through the sustainability of sourced materials and utility efficiency of the final project. The project team can bring positive environmental and social impact solutions to the table including methods for reducing the carbon footprint of transportation, building, and operation as well as suggestions that positively affect the safety and wellness of the surrounding community.
Value Engineering is usually introduced in Construction Documents stage when systems, materials, and products have already been selected and details have been developed and the overall Project Budget is exceeding the Proforma (Acquisition) Budget.
The best practice for Value Engineering is thru value engineering workshop. The Workshop involves the project team (project estimator, project manager, site superintendent and trade), who reviews the proposed project or part of project, performs a functional analysis of the systems and materials, obtains the owner’s definition of value and the key criteria for the project, and offers alternative solutions for the project.
Keeping the Budget in mind always be cautious not to stray from the design intent.
The Project Estimator should keep a list of potential cost saving items and circulate same amongst the design team and owner.
3.6 Establishing Anchor Budget
Both the Cost Estimate and Budget are needed in order to determine the project cost performance baseline and the project funding requirements.
Budget is defined as the total sum of money allocated for building a structure.
Anchor Budget, also known as Bank Budget is the project baseline budget, and does not change throughout the course of the project. It represents the total sum of money that the Owner needs to obtain from the Bank and/or its lenders for successfully commencing the construction of the project.
Historically, the Anchor budget has been set at the end of Design Development stage and beginning of the Construction Documents stage. There is great amount of risk for establishing the Anchor Budget this early. The construction documents are not well developed at this stage, project specifications are only in draft, and the Budget at this time is still based on lot of assumptions for materials and systems used.
The Best practice that provides minimal risk to the Owner is to establish the Anchor/Bank Budget after the early works tenders have been received so there is enough information on products, materials and systems as well as a live data based on current market prices is used.
On most of the projects, the Owner requests a Cost Consultant to prepare a budget for the Project that gets compared with the budget prepared by Tucker.
Usually, a review meeting is set between the Cost Consultant and Tucker where costs and project scope are reviewed and reconciled. After this meeting, the Cost Consultant will issue the Project Anchor Budget.
3.7 Create and Maintain Historical Database
Maintaining Historical Database is an important step in forecasting cost of future projects/prospect.
Without historic data construction companies lose their ability to improve designs and productivity, more importantly, they lose the ability to establish accurate costs, budgets, and risk lowering their companies’ profitability.
Keeping historical data helps improve the design, correct design flaws and helps establish construction base estimating data.
It is an estimating data system that uses historical data from actual contract costs, material take-offs, equipment and material costs, and labour man-hours as a tool for preparing budgets for new projects similarly designed.
4.0 Schedule
The Tucker HiRise standard Project template can be found in Procore Documents under folder 04 Schedule.
4.1 Schedule Lifecycle & Updates
The following table lists the minimum updates and required and timing of re-baselines.
|
Stage |
Description |
Frequency |
Resp. |
Notes |
Review By |
|---|---|---|---|---|---|
|
Pre-Con |
Create Baseline Schedule & Set Baseline 1 |
One Time |
PM |
To be used in CCDC 5A |
VP of Operations |
|
Tendering |
Update Task Duration, Start & Finish Dates |
After execution of every subcontract |
PM |
Incorporate dates agreed from executed CCDC 17 |
|
|
Excavation (Project Start) |
Recalibrate Schedule & Set Baseline 2 |
At Start of Stage / Phase |
PM |
Do not overwrite Baseline 1 |
VP of Operations |
|
Progress Updates |
Every Friday |
PM & SM |
Enter Actual Start, Actual Finish, split tasks for delays, Update progress % on gantt bar for long tasks |
|
|
|
In-Depth Review and Detail Development |
Monthly (before monthly report) |
PM & PD |
|
|
|
|
Start of Formwork Schedule |
Recalibrate Schedule & Set Baseline 3 |
At Start of Stage / Phase |
PM |
Do not overwrite Baseline 2 |
VP of Operations |
|
Progress Updates |
Every Friday |
PM & SM |
Enter Actual Start, Actual Finish, split tasks for delays, Update progress % |
|
|
|
In-Depth Review and Detail Development |
Monthly (before monthly report) |
PM & PD |
|
|
|
|
Ground Floor Complete (Podium Start) |
Recalibrate Schedule & Set Baseline 4 |
At Start of Stage / Phase |
PM |
Do not overwrite Baseline 3 |
VP of Operations |
|
Progress Updates |
Every Friday |
PM & SM |
Enter Actual Start, Actual Finish, split tasks for delays, Update progress % |
|
|
|
In-Depth Review and Detail Development |
Monthly (before monthly report) |
PM & PD |
|
|
|
|
Podium Complete (Tower Start)
|
Recalibrate Schedule & Set Baseline 5 |
At Start of Stage / Phase |
PM |
Do not overwrite Baseline 4 |
VP of Operations |
|
Progress Updates |
Every Friday |
PM & SM |
Enter Actual Start, Actual Finish, split tasks for delays, Update progress % |
|
|
|
In-Depth Review and Detail Development |
Monthly (before monthly report) |
PM & PD |
|
|
|
|
Top Off (Tower Complete) |
Recalibrate Schedule & Set Baseline 6 |
At Start of Stage / Phase |
|
Do not overwrite Baseline 5 |
VP of Operations |
|
Progress Updates |
Every Friday |
PM & SM |
Enter Actual Start, Actual Finish, split tasks for delays, Update progress % |
|
|
|
In-Depth Review and Detail Development |
Monthly (before monthly report) |
PM & PD |
|
|
The baseline schedule ensures we are working toward the CCDC 5A timeline agreed to by the client and trade contractors. The recalibrated baseline schedules ensure we are tracking towards the contractual timeline while including for a the contractually accepted changes to the baseline timeline such as weather delays and change orders with schedule impact. All recalibrations (baseline updates) to be communicated to client per CCDC5A requirements.
Schedule related items to review with client:
- Hotel ready expectations
- How they want weather days shown (our recommendation is using working time as noted in section 4.2 below)
- RFI for number of weather days to include.
4.2 Schedule Formatting & Requirements
The Tucker HiRise standard Project template can be found in Procore Documents under folder 04 Schedule. The following table lists the minimum updates and required and timing of re-baselines.
All project schedules need to include the following Milestones (0 day duration) in summary task called Milestones at the top.
- Project Award / Tendering Start
- Mobilization / Project Start
- Formwork Schedule Start
- Crane Erection Complete
- SOG Complete
- Ground Floor Complete
- Podium Complete
- Top of Structure Complete
- Elevator Start
- Dismantling of Tower Crane
- Dismantling of Man & Material Hoist
- Start of Finishes
- Hoist Suites Watertight
- Life Safety & Inspections Complete
- First Occupancy
- Last Occupancy
All project schedules need to include the following columns:
- Task Name
- Duration
- Predecessors (hidden from pdf export)
- Successors (hidden from pdf export)
- Total Slack (hidden from pdf, used to double check sequencing, starting from last task and ensuring CP has 0 slack)
- Task Calendar (hidden from pdf, used to configure which tasks are affected by weather delays)
- Start
- Finish
- Actual Start
- Actual Finish
- Baseline Start (Contract/Anchor Baseline, to be hidden once Baseline 2 is added, etc)
- Baseline Finish (Contract/Anchor Baseline, to be hidden once Baseline 2 is added, etc)
- Start Variance (see item 12 in section 4.3)
- Finish Variance (see item 12 in section 4.3)
4.3 Scheduling Best Practices
- Every Task should have at least one predecessor and at least one successor. Exceptions include:
- The First Task (should not have a predecessor)
- The Last Task (should not have a successor)
- Summary Tasks (should not have predecessors or successors)
- Milestones (do not have successors)
- Use Task Splits to show delays. If desired or helpful, create a new task below the split task for the delay, and align dates with the split created above.
- Schedules should always be in Automatic Schedule mode (not manual). Be sure to check this before creating a schedule to avoid having to change it later.
- Ensure Statutory Holidays are accounted for in the Working Days section of MS Project. Add all holidays for a full year after the project is scheduled to be completed.
- Use Task Calendar column to select which task activities will account for 3 weather days per month. Note that by default, the Working Time Calendar blocks the first 3 Wednesdays of each month as Weather Days.
- All tasks should use a Finish-Start (FS) or Start-Start (SS) relationship. Finish-Finish (FF) or Start-Finish (SF) relationships should generally be avoided as our general goal is to start every task as soon as possible. If two tasks are co-dependent and cannot start or finish without each other, they should be merged into one task.
- Do not utilize negative lag time. If you find yourself adding negative lag time to a Finish-Start (FS) task, switch it to a Start-Start (SS) task and use a positive lag time.
- All tasks should use the constraint type "As Soon As Possible" which is the default setting. All other constraint types should generally be avoided as they do not allow movement relative to predecessors.
- Total Slack is defined as the number of days a task’s completion can be delayed without impacting the project completion date. Following every recalibration, add in the “Total Slack” column, go to the very last task, and work backwards ensuring that all critical path activities have 0 days of slack. Review all non-critical path activities to ensure slack amount is reasonable and makes sense.
- Do not create multiple concurrent versions of the schedule, such as having one for trades and one for the client. Transparency is a core value at Tucker HiRise and having one single source for schedule information will improve your ability to manage the schedule, reduce the amount of time spent doing so, and minimize confusion with external and internal partners. If you feel the need to communicate multiple schedule options such as different entitlement timelines or weighing design changes that impact schedule, this can almost always be done in a single schedule file, often by utilizing multiple working time calendars and changing calendars at a task level. Please consult your Project Controls Specialist at Procore@tuckerhirise.com before creating multiple schedules.
- All schedule updates are to be performed using Procore Drive (ensure you have the Microsoft Project Procore add-in installed) saved to Procore with the date of the update.
- After setting a new baseline, do not forget to update your baseline date for Finish Variance Calculation:

4.4 Tendering & Procurement Schedules
All schedules should include tasks for tendering and procurement activities. The durations in these sections of the schedule are to be developed by the pre-construction team and maintained by the Project Manager when construction commences. The tender schedule should take into consideration the client’s financial requirements, construction start date, and procurement times, and be linked to the start of related procorement or construction tasks (i.e. the window tender and contract award is a predecessor of window shop drawings and lead time, formwork tender execution is a predecessor of formwork construction task). Once tendering and procurement sections are reviewed and approved the schedule should be issued to the client and subsequently the consultants to ensure drawing and specifications are issued in time to maintain the tender schedule.
4.5 Breakout/Suite Finish Schedule
The Site Manager is responsible to develop four week look ahead schedules to compliment the main construction schedule as well as break-out schedules. The breakout/suite finish schedule is used to provide actual detail breakdown based on construction drawings details for execution of these breakout schedules/suite finish schedule.
Breakout Schedules:
- Mechanical Penthouse Breakout Schedule
- Landscape Breakout Schedule
- Parking Garage Breakout Schedule
- Amenities & Lobby (Common Area) Breakout Schedule
- Suite Finish Breakout Schedule
- Suite Finish Matrix
- Crane Suite Matrix Acceleration Schedule
- Hoist Suite Matrix Acceleration Schedule
- Mock-up Suite Finish Matrix
The breakout/suite finish schedule is the responsibility of the Project Manager with input from the Site Management Team. The Project Manager is to update the schedule on a weekly basis and include with the weekly update and monthly management report. Any items falling behind should be reviewed and mitigation plan and formal issuance to client.
All breakout schedules should be prepared and signed off by VP of Construction when the project hit ground floor forming activities. These breakout schedules should be link to project baseline schedule so any delayed impacts can be reviewed based on seasonal items that may be impacted like Landscape.
In the finishing stage, a 5day cycle suite finishing schedule (project dependent) will be produced in conjunction with the construction schedule with consideration of the occupancy requirements. The occupancy schedule is produced during the finishing stage based on the owner occupancy commitments.
Suite Finish Schedules Items to be considered:
- Task Durations Completion (10-12 Suites = 5day duration)
- Task Duration – 5day task to stay consistent even if the actual task takes less time to complete
- Stat Holidays/Weekends – Need to remove from suite finish matrix
- Suite Completion – 120days + 15days for Pre-PDI Inspection Program
- Transfer Floor/Drop Ceilings – Additional time to complete these tasks which the floors to be highlighted in red for visibility
- Dates on Suite Finish Matrix = Completion Dates
- Highlights for Tracking:
- Yellow = Task in Progress
- Green = Task Completed
- Red = Task Behind
The crane/hoist acceleration suite finish matrix schedule to completed in conjunction with suite finish matrix too ensure they line up with owner occupancy commitments.
The mock-up suite finish matrix schedule needs to be 100% completed and signed-off by owner/consultant prior to finishing task from the suite finish matrix.
Attachment:
Breakout/Suite Finish Schedule Work Flow.pdf
MPH Breakout Schedule Sample.pdf
Landscape Breakout Schedule Sample.pdf
Parking Garage Breakout Schedule Sample.pdf
Amenities & Lobby (Common Area) Breakout Schedule Sample.pdf
Suite Finish Matrix Schedule.pdf
Crane Suite Matrix Acceleration Schedule.pdf
4.6 Production Capabilities of Trade Contractors
The Trade Contractors which have heavy shop requirements should be assessed for capability to meet the requirements of the project. Meetings should be held on a monthly basis or as necessary to ensure the progress is on track and a deliveries schedule should be produced for tracking purposes. In particular, Precast, Misc. Metals, Curtainwall/Windowall, Balcony Railings and Millwork Trade Contractors, Building Attendance Unit should also provide for shop visits as needed to provide a level of comfort to the Project Manager.
Shop visits should focus on the following:
- Availability of material
- Production capability
- Available shop space
- Third Party Inspections
4.7 Delay Management
The most critical part of the delay management process is ensuring clients are notified in a timely manner. Contractually we are obligated to notify clients of any delay within 5 days of it's occurrence or we lose the ability to claim the added time to our project schedule.
4.7.2 Weather Delays
Weather delays are created and tracked by checking the "Delay" box in the weather section as further explained in Create Weather Delay Entries. Procore has been configured such that clients will be automatically notified via email once the delay box is checked.
Weather days are projected for in the project schedule using 1 non working day per week for 2-4 weeks per month depending on the project and client. the actual number of weather delays is tracked in procore and variances from the projected number are reported in the monthly report. Differences in actual vs projected days should be discussed with the client monthly and incorporated into the next schedule update.
4.7.3 Trade-side Contractual Delays
For any non- weather delays, the Delay section of the delay log should be used to Create Delay Entries. In most cases, the Client will need to be Notified of the delay at the discretion of the CM / PX following the workflow below.
If the Trade Contractor is the cause of the delay, an official notice should be given out referencing the executed contract section the trade has defaulted. The Project Manager is to investigate the delay and possibility of mitigating the delay event and establish a plan to bring the progress back on track. Project Manager is required to provide a monthly construction schedule update and distributed to client. It is the responsibility of the Trades to mitigate their own delays and lost days due to Trade-side issues such as Operators not showing up, Equipment Malfunction, and shortage of staff. Common mitigation on Trade-side delays and lost days include working extra hours daily, or weekend work.
4.7.4 Strikes and Market Delays
If you have been notified of or anticipating a strike, please take the following actions to protect ourselves during these strike actions:
- Owner Notice – please ensure our owners are put on official notice of the strike action and that there will be a consequential impact on the schedule. The overall schedule impact is unknown at this time, however will be updated regularly during the strike to keep the owner apprised of the situation and ongoing impact to the project.
- Daily tracking of trades – It is essential for us to have an accurate daily log that keeps track of absenteeism due to the strike actions. Keeping the owner informed on trades that are absent on a daily basis is a good practice.
- Schedule Updates – The schedule updates on all projects will need to show the impact of these strikes, so please be prepared to discuss at your project schedule update meeting with myself. These updates need to be shared with the owner to highlight the delays being incurred.
- Non-strike related work – It is imperative that any non-strike impacted work be performed as planned as we do not want to have discussions regarding concurrent delay. This is a favourite out for owners and claims specialists. Please keep the focus on work that can be performed.
- Free Mitigation – You may think that working out of sequence (i.e. changing the plan) during this time is a great way to keep moving forward on your project. Before doing this, contact your CM or myself as we need to analyze these new plans first as they may have negative impacts down the line and may affect our ability to claim schedule delay.
If frequency of updates on any project needs to increase during this time, please reach out to the Scheduling Manager.
4.7.6 Delays in the Schedule
Delay Lines to be added to Variance Report. These variance report totals will be identified in monthly updates and incorporated into milestone recalibrations. Within the project schedule, all (non-weather) delays should be represented by splitting tasks in the construction schedule, and adding a task under the split for the delay duration.
4.8 Staff Scheduling
As part of the Project planning process, a Project Manager must prepare a staffing schedule that is based on project design, project budget and project duration. Ideally, the Staffing Schedule is prepared prior to approval of the General Conditions (GC) budget so that project funds are properly allocated to cover sufficient project salaried staff and forecasted labour force. The purpose of the Staff Schedule is to assist estimators in preparing a Project GC budget forecast, to help a Project Team to manage Project personnel and to provide Company with accurate timing requirements for project teams to ensure effective human resources management across all projects.
Attachment:
4.9 Staffing Rule of Thumb
Staffing Rules of Thumb is a document outlining basic principles of a single tower high rise residential building project staffing, identifying major construction milestones that trigger commencement and termination of various project staff salaried and hourly paid positions. Staffing Rules of Thumb is to be used as a reference guide for Estimators and Project Managers in planning project management teams for effective project execution.
Attachment:
4.10 Requesting Additional Hourly Worker (Local 183) on Site
Please see the attached flowchart for the steps the site is to take to request additional labour.
Attachment:
· Process for Obtaining Additional Labour (Local 183) on Site.pdf
4.11 Hourly Employee Information Sheet
One the new hourly employee’s first day, please fill out the attached form with them and submit it to the accounting/payroll department, as noted in the flow chart in the previous section.
Attachment:
4.12 Process for Relocating Existing Hourly Worker (Local 183) on Site
Please see the attached flowchart for the steps the site is to take when an hourly worker is no longer needed on site.
Attachment:
· Process for Relocating Existing Hourly Worker (Local 183) on Site.pdf
5.0 Tendering
In order to begin the Tendering Process, the following steps must be followed:
- Systems Controls department is advised by Chief Estimator that a new Project is to be set up in Procore
- Systems Controls department is notified by Estimating to set up the Project in Procore with the established File Structure
- Contracts Specialist ensures that all Tender sub-folders and documents are added into the tender documents folder for that Discipline (i.e. Master Appendices A through I and sometimes J along with the ITB and project schedule).
- Estimators to inform Document Controller of upcoming Tenders.
- Document Control to organize Tenders in accordance to the Date Tender is to be sent
- Document Controller (or estimator if no DCC is present) to create the Tender Call List & Tender Sign off Sheets
- Once there filled in and complete, they get forwarded to the Chief Estimator & VP of Procurement for approval and then to the Contracts Specialist to send via Docusign.
- Once the Tender Call List is fully executed, Document Controller ensures names are inputted into Procore’s Directory.
- Estimator or Document Controller gathers specific information to commence filling in the Tender Documents (this information is provided by either the Project Manager, Project Executive, Chief Estimator, or Estimator):
-
Date of Tender
-
Closing Date
-
Information for ITB
-
Headers & Footers on all Appendices (A-I) to have Project Name, Discipline and Date
-
Appendix C (list of all documents that are to be included in the Tender)
-
Estimator is to communicate which documents he/she wants included in the Tender (i.e. Dwgs, Specs & Report) so that Document Controller can include in the Appendix C accordingly!
-
Construction Schedule
-
Project safety plan (PSP)
-
- Estimator, PM, and Project Executive to work cohesively on finalizing Appendix B, G & H. Estimator/PM to ensure the following documents are included in the tender:
- ITB (Invitation to Bid)
- Appendix A - Supplementary Conditions
- Appendix B - Scope of Work
- Appendix C - List of Tender Documents
- Appendix D - Schedule
- Logistics Plan
- Appendix E - Occupational Health & Safety
- COVID-19 - 1 Page Document
- Appendix F - Bid Determination Form
- Appendix G - Tender Breakdown
- Appendix H - Unit Prices, Separate Prices, Alternate Prices
- Appendix I - Tender Form
- Once the Estimator confirms that all Tenders Documents are finalized, Document Controller PDF’s the Tender Documents & ITB and saves into the Tender Package Folder
- Once the package is finalized, it is to be sent to Chief Estimator, Project Executive, CM, and client (when applicable) for approval.
- Once the Tender Package is ready, the Estimator is ready to send the Tender Pkg out thru Procore.
The following chart provides a quick reference for the various steps of the tender process and who is responsible for each. Further information on each step can be found below.
5.1 Understanding Client Requirements
Clients will have different needs related to tendering. Discussions need to take place to identify any specific requirements the client may require.
Most of the Clients as part of their financial requirements would like to have tendered and awarded trade scope in excess of 50% of the project hard construction value prior to construction start. Typically, that encompasses the early works scopes in Divisions 2 and 3 (Shoring, Excavation, Forming, Concrete and Rebar Supply), as well as the MEP Scope, Elevators, and Drywall.
Great care is taken to create scopes of work that are complete and compliment the invited bidders. This will result in best pricing and higher quality submissions.
5.2 Creating and Updating Tender Schedules
Developing the Tender schedules is the responsibility of the Project Manager (or Preconstruction Project Manager if no PM yet engaged) with input from the Estimating Department.
Tender Schedule identifies the critical path for tenders based on the project schedule. Consideration is given for all large tenders to have ample time for qualification period, tender reviews and award meetings.
Updating of the Tender Schedule is to be done monthly. Monthly updates on timing of certain tenders should be reviewed with the Chief Estimator and VP of Procurement.
5.3 Establishing Project Specific Templates for Tender Package
The development of the tender packages is responsibility of the Estimator.
Once a Tender Schedule has been established and approved, The Project Manager must ensure that the information required for preparation of the trade tender packages is available and the tender deadlines are met by all participants.
Before starting any Tendering, Chief Estimator to acquire finalized Contract Documents for the Project.
Contract Admin Manager to create and save the Master Project Template Tender Documents within the corresponding folder in Procore.
It is the Project Manager’s responsibility to ensure that the Owner’s requirements set in CCDC5a Contract are reflected in the CCDC17 Supplementary Conditions and the Tender Template Documents have been modified accordingly. For greater clarity, the timeline in the tender schedule and baseline construction schedule cannot be greater than the CCDC 5A schedule.
Attachment:
5.4 Bidders List / Number of Bidders
The Estimating Department is to produce the Bidders List for all tender scopes prior to first tender in cooperation with the VP of Construction/Project Executive and VP of Procurement. It is also a good practice to call bidders before hand to ensure they are willing to bid the job.
Once a list is developed it is to be circulated to the Project Manager for review and any adjustments to the lists is to be approved by the VP of Procurement prior to being distributed to GG / 3rd party Owners or cost consultant and used for tendering purposes.
The bidder’s lists are to be uploaded to the internal file management system and Procore.
Depending on the trade and size of the package, the number of bidders will vary. Use the following as a guideline:
- Package Value under $5,000 – minimum of 2 bidders
- Package Value over $5,000 but under $100,000 – minimum of 3 bidders.
- Package Value over $100,000 – minimum of 3 to 4 bidders
- Specialty items may not have enough bidders to meet the intent above. If there is a problem finding enough bidders contact the VP of Procurement to discuss.
Attachment:
5.5 Information Required for Tender Preparation
Sequential tendering is used to accelerate the Project Delivery Schedule. Sequential Tendering (or also known as Serial Tendering) involves preparation of tenders based on typical or non-complete set of project documents. Tender preparation process is becoming increasingly complex, frequently requiring numerous attachments and explanation of information missing from the current documents.
To minimize risk of project cost overruns, Tucker has developed a list of Information Required for preparation of the major tender scopes.
Attachment:
5.6 Development of Trade Specific Tender Packages
The Tender process involves collaboration between the Project Management and the Estimating Department (please refer to section 6.0 Bid Packages for a list of documents to be included in each package as well as the preparation of each individual tender document – appendices).
The Project Manager is accountable for maintaining the tender schedule and for the completeness of information & scope of each tender package and the correct current set of bidding documents. When writing scopes the PM should request the master scope template from the Contracts Administrator, then add project specific item, review relevant sections of the lessons learned and finally send for review.
All project specific scopes of work are to be developed by the Project Manager with input from the Site Management, reviewed by the VP of Construction/Project Executive and approved by the Chief Estimator and VP of Procurement. Templates of standard scopes of work are to be obtained from the Chief Estimator for reference
Once the Tender package is complete, the Project Manager is to distribute to the Project Executive and Chief Estimator for review and sign-off.
Attachment:
· Tucker Standard Tender Form.pdf
· Tender Package Sign-off Form.pdf
5.7 Tender period
The distribution of the project tenders is the responsibility of the Project Estimator. All questions received during the tender process, will be directed to the Project Manager to manage and answer accordingly. Upon response to the questions, the Project Manager will issue the appropriate addendum/bulletin to all bidders as required.
Establishment of the tender period duration is critical to receiving the desired positive response. To establish the tender period the following items should be considered:
- Size of Package
- Complexity of Scope
- Is a Pre-tender Meeting Required?
- Is a Site Meeting Required?
- Check with trades and assess how many other jobs are closing in the same timeframe.
- Are addendums/bulletins anticipated?
Once Bid Packages have been distributed to the trades through Procore, the software generates email reminder to trades few days before the Tender Submission deadline.
It is a good practice to have the Project Management Team call the bidders 2 days after the packages go out to ensure all documents have been received and call 2 to 3 days before the closing date to ensure bids will be received.
Any questions or correspondence regarding the tenders are to be uploaded to Procore system.
5.8 Closing
The Closing Date and time must be clear in the Instruction to Bidders.
Bids should be received/submitted thru Procore. If trade submits their bid thru email, submission should be logged in Procore.
The Project Estimator is to collect the bid submissions and prepare the BidSnapshot for the internal distribution to the VP of Procurement, Chief Estimator, Project Manager and VP of Construction/Project Executive and externally (Great Gulf Development Managers and /or Owner’s Representatives for 3rd party projects).
All Trade Contractor bids are to be scanned and uploaded to Procore.
5.9 Opening of Bids
Unless requested by the Owner, no special requirements are set for opening of the Bids. Trades to submit their Bids through Procore and all trade submissions to be completed on Tender documents provided in the Bid Package. Submissions on Trade letterhead and/or Trades typical forms will not be accepted.
Depending on the type of Tender, special treatment to opening of the Bids may be set for a design build/design assist scope.
Tender scopes set as Lump Sum Guaranteed Max Price (GMP) tender submissions require different treatment. Those Bids are usually submitted in sealed envelopes and must be opened no later than 2 working days after the close. The Owner and VP of Procurement must all be made aware of the opening place and time and be given the opportunity to attend.
A record of the opening should be produced and signed by all attendees. This record will include the name of all bidders, the value of the bid received and any other relevant information. If possible, a copy of this record should be circulated at the end of the meeting.
Bid Snapshots Document contains the information of Bids Submitted by trade. It keeps record of the name of trade, the value of the trade package, the date submitted and compares it with Anchor Budget.
5.10 Post Tender Addendums/Bulletins
Post Tender Addendums/Bulletins should be avoided if possible. It is preferred to extend the closing date to accommodate the issuance of an addendum/bulletin.
If a Post Tender Addendum/Bulletin is required, the VP of Procurement and the Chief Estimator are to be notified. The Post Tender submission procedure is the same as Tender Submission.
Prior to creating a Post Tender addendum, please review Communicating Changes to Trades to confirm it is the appropriate step. All post tender addendums/bulletins to be uploaded to the internal file management system.
Here is a guide for communicating changes with trades in various scenarios. Note that this does not account for every possible scenario, so if you encounter a situation not described below please let me know. As discussed, the purpose is risk mitigation, specifically to ensure team members can always find relevant information to an issue whether or not they are familiar with the project. While this emphasis on organization may take more time on the front end, it makes the project and its partners run more efficiently.
- Verbal direction on an RFI:
- Add a response to the RFI noting date, time, relevant persons, and what the response was.
- For all Tenderers / Tender Packages affected, proceed to step 3, then return to step 2 once you receive updated drawings.
- For all Awarded / Under Contract trades affected, they should have been added to the RFI distribution list at the time the RFI was created, and will automatically receive an email noting your response. If you wish to send the RFI to additional people, use the Email button within the RFI tool.
- Updated Drawings in an RFI (or SI):
- Once the RFI is resolved, consultant must create and upload the SI to the Instructions tool (that they do not need to upload the drawings to the RFI as long as their response says “Updated drawings included in SI #05”
- Consultant also uploads to drawing sheets, specs, reports, etc to appropriate tools (Drawings tool, Specs, Tool, Documents)
- IF affected trade is awarded/under contract – Use the “Email” button in the Instruction to send the SI to affected trades. If you anticipate cost or schedule impacts associated with the change, create a Change Event and RFQ.
- IF affected trade is still tendering, proceed to step 3.
- Inform Tenderers of a change
- If you are informing tender Download new documents received in an SI to your desktop (if applicable)
- Create a Bid Addendum Folder (named for the Addendum or Post Tender Addendum) in the Bid packages folder in Documents tool within the tender package folder (if applicable)
- In the Tendering tool, select the affected Tender package, go to the Files tab, and check the box next to the new Bid Addendum folder you created in 3B.
- Go to the Correspondence tab of the tender package, add comments as needed (either the verbal direction from step 1A or a note directing them to download and review the new bid addendum files added in step 3C).
5.11 Bid Snapshots
Creating and maintaining the Bid Snapshot is a responsibility of the Project Estimator. Bid Snapshots provides valuable information to the Owner, Cost Consultants and the Project Management team on:
- The number of tenders closed
- % of closed/awarded tenders
- % of tenders out
- Cost overrun/underrun based on tenders submitted to date
5.12 Analysis of Bids
The First Analysis/Draft Tender Analysis of the bids is the responsibility of the Project Estimator. The scope of work is to be broken down and listed based on all components which form the required work that is to be included in the trade contract.
A Trade Contractors bid should never be accepted without first becoming thoroughly familiar with the project scope and specifications to ensure all areas are incorporated in the contract.
The Project Manager must complete a full review of the Trade Contractors scope by requesting a marked-up scope of work from the trade before the qualification meeting or create a qualification sheet and send it to the trade for review and comments. The recap of the bids for each trade section must be reviewed for:
- Compare scope to the plans, specs and Tucker’s scope checklist
- Scope gaps or duplication
- Trade contractors’ specific exclusions
- Discuss payment terms
- Compare warranty terms Note: There may be some cases where the specifications call for a more extensive warranty than the standard Tarion requirements. In this scenario, the specifications take precedence. It is important to ensure the trade contractors have priced the warranties as per the specifications. In cases where an extended warranty cannot be provided as per specs, the project management team needs to flag this to the consultants and owner during the tendering stage.
- Compare the low bidder’s scope and or quantities with the other bidders
- Review any proposed alternates to ensure each bid is equal to the others
- Review Site Management Plan, Schedule and CCDC17 Supplementary Conditions
Upon completion of the tender analysis by the Project Manager, the analysis is to be distributed to the Estimating Department, Chief Estimator and the VP of Procurement for review.
Upon review, the Project manager is to prepare the Letter of Recommendation (LOR) for the Owner (for GG and 3rd party projects) for distribution.
All tender analysis sheets are to be uploaded to Procore system.
Attachment:
5.13 Items to be Addressed Prior to Award
The Project Manager must thoroughly understand the project’s construction plan, site specific logistics, schedule, and the details of the Trade Contractors scope of work prior to discussions on the award of Trade Contracts. This is when any duplications or gaps in scope coverage must be identified, which will potentially lead to cost savings.
Qualification Meeting Minutes Template in Procore provides guidelines on topics required to be discussed on the Trade Qualification/Award meeting.
5.14 Qualification Meetings
The scheduling and facilitation of the qualification meetings is the responsibility of the Project Manager. The Owner, VP of Procurement and the VP of Construction/ Project Executive must all be made aware of the qualification meeting and be given the opportunity to attend. Project Estimator needs to attend all the qualification meetings.
Senior members of each of the proposed Trade Contractors to be present for the qualification meetings.
The qualification meetings serve to clarify any ambiguities and provide the opportunity to confirm the Trade Contractors bid, such as the scope of work, exclusions, unit prices and alternates included.
Items may include but are not limited to:
- Tarion Construction Performance Guidelines (Warranties)
- When discussing alternates in award meeting, get a copy of redlined specs and include in contracts and have ready for closeout.
These meetings need to be minuted and distributed to all parties by the Project Manager within 48 hours of Qualification Meeting. Responses from the Trade Contractors to be in writing.
The meeting minutes from the qualification meetings are to be uploaded to Procore system.
5.15 Letter of Recommendation
The Project Manager will complete the final analysis based on the additional clarification received from the qualification meetings and distribute the analysis to the Estimating Department, VP of Procurement and the VP of Construction/Project Executive for review.
Once the bids have been analyzed and discussed with the VP of Procurement, a formal recommendation will be created by the Project Manager and submitted for Internal sign -off by VP of Procurement and send to the owner (for GG and 3rd part projects) for approval.
The award recommendations are to be uploaded to Procore system.
Attachment:
5.16 Award Meeting
The scheduling and facilitation of the award meeting is the responsibility of the Project Manager.
The Owner, VP of Procurement, VP of Construction, Project Executive and Chief Estimator must all be made aware of the award meeting and be given the opportunity to attend.
The award meeting serves to ensure that any ambiguities and bid confirmations with the Trade Contractors raised in the qualification meeting are resolved such as the scope of work, exclusions, unit prices and alternate prices. There needs to be an adequate amount of description of all work to avoid issues with the contract down the road.
The Trade Contractors commitment to the project schedule, quality expectations, manpower availability, equipment and material lead times must be obtained prior to award. Bonding and Insurance requirements, payment terms, warranty issues must be resolved prior to award and should be included in the trade contract agreement.
All Supplementary Conditions to be reviewed with the trade and approved prior to Award meeting.
All commitments must be agreed upon and written into the trade contract agreement.
The intent is to have a draft of the trade contract ready for the award meeting.
Contracts to be prepared and handed over at Award meeting to successful trade.
The final meeting minutes from the award meeting are to be uploaded to Procore system.
Unsuccessful bidders will be notified upon award by the Project Estimator.
Attachment:
5.17 Tender and Contract Tracking
There are constantly new tenders opening and contracts being awarded to successful bidders. Because of this, it is very important to keep track of the status of each contract and tender. A tracking sheet has been developed for both tender and contract tracking. This sheet will show upcoming tenders, the status of each open tender, tenders that have been closed and then it will continue to track the contract signing process all the way through to a fully executed contract.
Attachment:
5.18 Tender Variance & Contingency
After a subcontract is signed, and commitments have been made for all known or projected costs within a budget line, any remaining dollars should be moved to line 20-001 Tender Variance. This line acts as a construction contingency from which unanticipated costs can be drawn from, while also showing the current Tender Variance. Transfers to and from this line should be included within budget modification requests and approved by the owner prior.
This consolidates variance from individual lines into a single bucket which also makes it easier to track budget performance on individual lines. Should you need to reference how much was initially saved in a specific line item, you can check the budget modifications report.
5.20.1 Tucker Standard Template (CCDC 17) - OUTDATED
In order for the Trade Contract Process to commence, the Project Team must be in possession of a fully Executed Letter of Recommendation (LOR) (Refer to section 5.16 for more information on LOR’s).
CLICK HERE FOR A STEP BY STEP WORKFLOW OF THE TRADE CONTRACT PROCESS
Step by step details are as follows:
Once you are in possession of the fully Executed LOR
- An Award Folder is opened (Electronically) and the LOR is saved in the Awards Folder
The assembly of the Trade Contract is a combined effort between Project Manager & Estimating Team with accountability for the content being that of the Project Manager.
All Trade Contracts must be issued using the standard Tucker Trade Contract Agreement, printed double sided and the Cover to be printed in colour.
All stipulations, Qualification Minutes, scope confirmations, exclusions, unit prices, separate prices and alternate prices if accepted during the award meeting are to be incorporated into the Trade Contract.
The Project Estimator creates a Draft Appendix B – Scope of Work, Appendix G – Breakdown of Contract Price and Appendix H – Unit Rates, Separate Prices and Alternate Prices. The Project Manager then reviews with the Project Executive & the Estimating Team.
The Project Estimator Creates a Draft Contract using the CCDC 17 Standard Template and pulls all Appendices together to form the full Trade Contract.
The complete Trade Contract is to be reviewed by the Project Manager, Project Executive and Estimating Team (for that Project) prior to issuing to the Trade Contractor for signature.
The intent is to have the contracts ready for distribution to the trades at the award meeting. This process has helped in reducing the amount of time the contract stays with the trade for signature and effectively helps Tucker HiRise get a fully executed contract in hand sooner. Three (3) copies of the CCDC17 Contract, (inclusive of a CCDC17 Sticker which is to be placed on the front of each Contract) and one (1) Project Safety Plan (PSP) are to be hand delivered to the Trade Contractor at the Award Meeting or sent via courier for signature. (Refer to A5.1.17 – Award Meeting in Tender Process). Sending any type of contract out electronically is NOT acceptable (CCDC17, small works, or unit rate). 3 hard copies are always required, along with a transmittal. This section is to be updated: DOCU-sign, one copy is sent through docu-sign.
Executive Assistant, Estimating & Construction creates Transmittal directing Trade to sign where tabbed, and initial each page, bottom right corner. (any changes must be initialed by both Trade & Owner)
Upon signature of the Contracts from the Trade Contractor:
- The Trade keeps the Project Safety Plan and sends all three (3) copies of the Contract back to the Project Manager or Estimating Team
- After review and approval by the Project Manager, Executive and Estimating Team, The Estimating Team sends the three (3) original Contracts to the Owner for review and signature
- Once the Owner has signed the three (3) contracts, the Owner sends back to the Project Manager or Estimating Team for review
Upon completion of a final review of the fully executed Contracts by the Project Manager, Executive & Estimating Team, the Executive Assistant Estimating & Construction tabs the Project Safety Plan Declaration pages for signature by the Safety Manager.
Once the Safety Manager has signed all 3 Contracts and the Executive Assistant Estimating & Construction has witnessed, the Contracts are sealed, and a Transmittal is created (in the Internal File Management System).
Docusign Distribution is as follows:
- Owner
- Trade
- Constracts Manager
- Estimator
- Site Team
A copy of the Transmittal and the Contract are saved in the Project Award Folder.
Once the Executed Contract packages are ready to be distributed, the Contract is to be uploaded to the Internal File Management System, the Project Manager logs a scanned copy of the Contract in their Contract Log and the Executive Assistant Estimating & Construction logs in the Master Contract Log.
If the Project is in Procore, a copy of the scanned Executed Contract is saved in the Commitment Tool by the Executive Assistant, Estimating & Construction.
Executive Assistant, Estimating & Construction to change the Status in the Commitment Tool from “Out for Signature” to Approved and in the Executed Column change “No” to “Yes”.
5.20.2 Tucker CCDC 17 Stipulated Price Trade Contract Agreement
This agreement is to be used for all trade contracts with a value over $100,000 and that are included in the permanent works of the project. All CCDC 17 Stipulated Price Trade Contracts are to have a Project Safety Plan Acknowledgement Signing Page attached and a full Project Safety Plan.
The following documents must be included within the Tucker CCDC 17 Stipulated Price Trade Contract Agreement, same as used during Tender period but includes revisions made during the qualification/award meeting:
- Tucker HiRise Contract & Project Welcome Package
- CCDC 17 Front End
- Appendix A – Supplementary Conditions
- Appendix B – Scope of Work
- Appendix C – Contract Documents List
- Appendix D – Project Schedule
- Logistics Plan
- Appendix E – OH&S Trade Contractor Agreement
- COVID-19 – 1 Page Document
- Appendix F – Certificate of Independent Bid
- Appendix G – Breakdown of Contract Price (Should include a line item for closeout docs)
- Appendix H – Unit Rates, Separate Prices and Alternate Prices
- Appendix J – Newstar - Suite Door In Breakdown (project dependent*)
- Project Safety Plan (PSP) Acknowledgement and Declaration Signing Page
- Project Safety Plan (PSP)
The required documents are to be updated with information agreed upon during the qualification and award meeting. Note: There are a number of changes that need to be made to the tender forms.
The package is then to be sent through DocuSign following the workflow below:
Commitments Workflow
5.20.3 Tucker Small Works Contract Agreement
This agreement is to be used for Supply and or Rental Equipment. The OH&S Trade Contractor Agreement is to be attached to the trade contract agreement. A request to use the Small Works Contract must be made and approved by the Project Executive. (in the absence of an Executive, approved by the Vice President Construction or Senior Vice President). All Small Works Contracts are to have a Project Safety Plan Acknowledgement Signing Page attached and a full Project Safety Plan.
The following documents must be included within the Tucker Small Works Contract Agreement, same as used during tender period but includes revisions made during the qualification/award meeting:
- Small Works Contract Front End
- Appendix A – Supplementary Conditions
- Appendix B – Scope of Work
- Appendix C – Contract Documents List
- Appendix D – Project Schedule
- Logistics Plan
- Appendix E – OH&S Trade Contractor Agreement
- COVID-19 – 1 Page Document
- Appendix F – Certificate of Independent Bid
- Appendix G – Breakdown of Contract Price (Should include a line item for closeout docs)
- Appendix H – Unit Rates, Separate Prices and Alternate Prices
- Appendix J – Newstar - Suite Door In Breakdown (project dependent*)
- Project Safety Plan (PSP) Acknowledgement and Declaration Signing Page
- Project Safety Plan (PSP)
5.20.4 Tucker Unit Rate Trade Contractor Agreement
This agreement is to be used for purchasing materials & goods only. The OH&S Trade Contractor Agreement is to be attached to the trade contract agreement. If labour is included, this trade contract agreement cannot be used. All Unit Rate Trade Contracts are to have a Project Safety Plan Acknowledgement Signing Page attached and a full Project Safety Plan.
As monthly actual costs are invoiced, Commitment Change Orders (CCOs) are needed to update the contract value. When creating CCOs (from PCOs and CEs) for unit rate or "additive" contracts, be sure the Scope field is set to In Scope. This will ensure the PCOs and CEs associated with these change do not modify the budget. These CCOs do not require owner signature and should be approved by the Project Manager. For this reason, CCOs for unit rate or "additive" contracts should generally never be in the Pending status -Once the invoice is received from the trade, the PM can create and execute the CCO, then process the invoice. No other approvals are required.
The only exception is if actual costs exceed the current line item budget. At this point an In Scope PCO will be needed to match the exact budget amount and then an Out of Scope PCO will be used for all costs in excess of the current budget. This Out of Scope PCO and any following it will require owner signature and approval, as it will now be modifying the budget.
The following documents must be included within the Tucker Unit Rate Contract Agreement, same as used during tender period but includes revisions made during the qualification/award meeting:
- Unit Rate Front End
- Appendix A – Supplementary Conditions
- Appendix B – Scope of Work
- Appendix C – Contract Documents List
- Appendix D – Project Schedule
- Logistics Plan
- Appendix E – OH&S Trade Contractor Agreement
- COVID-19 – 1 Page Document
- Appendix F – Certificate of Independent Bid
- Appendix G – Breakdown of Contract Price (Should include a line item for closeout docs)
- Appendix H – Unit Rates, Separate Prices and Alternate Prices
- Appendix J – Newstar - Suite Door In Breakdown (project dependent*)
- Project Safety Plan (PSP) Acknowledgement and Declaration Signing Page
- Project Safety Plan (PSP)
5.20.5 Letter of Intent (LOI)
An LOI is to be used only for special circumstances where time is of the essence. Approval must be received from the Project Executive prior to deciding to use a Letter of Intent. A Trade Contract should follow within one week from issuing a Letter of Intent.
Attachment:
- Tucker CCDC 17 Stipulated Price Trade Contract Agreement Template.pdf
- Tucker Small Works Trade Contractor Agreement Template.docx
- Tucker Unit Rate Trade Contractor Agreement Template.docx
- Letter of Intent Template (LOI).docx
5.20.6 Mark Ups by Trade Contractors
The review of the signed trade contract by the Trade Contractor is the responsibility of the Project Manager. The entire trade contract must be reviewed to ensure no markups have been made by the Trade Contractor. If markups have been made, the revisions are to be reviewed with the Project Executive, Chief Estimator & Project Estimator. ANY revisions to the contract after the first time it distributed to the trade need to be tracked. This means striking out line items or words that have been removed and bolding any verbiage that has been added.
All changes are to be initialed by both parties.
5.20.7 Transfer of Ownership Agreement
In the event that a piece of equipment or material is required to be paid for in advance to receiving the equipment/material on site, the transfer of ownership agreement must be made. With this agreement, the Trade Contractor must store the equipment/material in a safe and secure location until it is delivered to the project site. The agreement for stored material, transfers equitable and legal title in the Property to the Owner. The payment for the property referred to in the agreement will be included in the monthly application for payment and will be subject to all the terms and conditions of the contract documents. This payment is being made from the current contract value and does not constitute additional compensation in any way.
6.0 Bid Packages
Before being pulled into a Tender package in Procore's Tendering Tool, the tender documents are compiled in a specific folder within the Documents tool > 06 Bid Packages. This is done for ease of organization and Tender package files linking, but also to serve as a backup of the documents included in a bid package in the event that the link to Procore's Tendering tool is broken due to unforseen issues. This folder is to be modified only by the department or team managing that tender, as it is important to maintain the integrity of the folder structure and historical data as a defense against future claims.
The Bid or Tender Packages are to be assembled by the Project Manager; Project Estimator to obtain approvals and sign-offs and issue the Trade Packages through Procore complete with the Tucker Instructions to Bidders Package.
The following documents must be included within the Tender Documents:
- Appendix A – Supplementary Conditions
- Appendix B – Scope of Work
- Appendix C – Tender/Contract Documents
- Appendix D – Project Schedule
- Appendix E – OH&S Trade Contractor Agreement
- Appendix F – Certificate of Independent Bid
- Appendix G – Breakdown of Contract Price (Should include a line item for closeout docs)
- Appendix H – Unit Rates, Itemized Prices, Separate Prices and Alternate Prices
- Appendix I – Tender Form
- Appendix J – NewStar Suite Door - In Breakdown (where applicable)
- Any Addendums Issued by Design Team.
All project specific templates need to be reviewed by and approved by the VP of Construction, Project Executive and Chief Estimator prior to being used for tendering.
- Appendix A – Supplementary Conditions
VP of Estimating and Cost Control to obtain the required information, Contract Administrator to create Project Master Tender Template Documents (refer to 5.1.3)
- Appendix B – Scope of Work
Project Estimator shall compile the material and systems information and include it in the Appendix B – Scope of Work – General Scope and Trade Specific Scope.
Project Manager with an input from the Site Manager shall develop the Project Scope Specific Notes of the Appendix B of the tender; ensure that all bid packages, including the general & trade scopes are project specific, and cover off all out of ordinary site conditions, neighbouring conditions, time delivery restraints, staging and phasing restraints, obstructions, etc…
- Appendix C – List of tender/Contract Documents
As long as the Consultants are uploading the project Documents thru the Drawing and Specification module in Procore, a List of Current Documents can be generated thru Procore and can be attached as part of Appendix C
- Appendix D – Project Schedule
Project Manager to maintain Baseline Project Schedule. For the purposes of Tendering, The PM to advise the project Estimator on the Current Schedule (Baseline / Recalibrated Schedule) that needs to be a part of the Specific Trade Scope Tender Documents. Project Manager to ensure timelines in Baseline Schedule are no greater than timelines identified in the CCDC 5A Contract
- Appendix E - OH&S Trade Contractor Agreement
- Appendix F - Certificate of Independent Bid
- Appendix G – Breakdown of Tender/Contract Price
Project Estimator to Create Trade Specific Breakdown of Tender/Contract Price based on Historical data
- Appendix H – Unit Rates, Itemized Prices, Separate Prices and Alternate PriceProject Estimator to Create Trade Specific Unit Rates, Itemized Prices, Separate Prices, Alternate Prices List based on Historical data
- Appendix I – Tender Form
Project Estimator to Create Trade Specific Tender Form based on Historical data
- Appendix J – Newstar Suite Door - In Breakdown (where applicable)
In addition to the standard scope items, any Newstar requirements that are required for the breakout of the suite door in portion should be included in Appendix “J” (project dependent). A breakdown of the suite door in items should be requested during the tender period based on the specific tender package. The trade specific tender packages are to be uploaded to the internal file management system and Procore.
Process:
- Review the contents of the package, and confirm that they have been published to the appropriate tools such as Drawings or Specifications. If not, please contact the Project Coordinator, Preconstruction Manager, or Project Controls Specialist to have the upload reviewed and published.
- Within Procore Documents > 06 Bid Packages > create a folder with the exact name of the Bid Package following this format [XXXX Bid Package Name]
- Upload the required Bid Package documents
- Make sure Appendix C reflects the current documents, Appendix C must be in PDF format.
- Head over to the Tendering Tool > Create Tender Package > Title your package accordingly in this format [XXXX Bid Package Name] and fill other required fields/information.
- In the next step, link all required Drawings, Documents, and Specs. Documents should be linked from the folder created in Step #2 in 06 Bid Packages.
- Add Tenderers by selecting the companies/contacts you are tendering to then send out tendering invites.
- Download the Bid Package files by clicking the
 icon from the top right corner in the Tendering Tool and clicking Download Tender Documents.
 - Upload the downloaded zip folder into 05 Tendering > [XXXX Tender Package Name] > Tender Documents > Tender Package Archive (Create this folder if it does not exist).
Here's a video detailing how to create a new Bid Package on Procore:
6.1 Addendums & Bulletins
The facilitation of addendums/bulletins is the responsibility of the Project Manager while the Project Estimator is responsible for its distribution.
The directive of what Information to be included in the Addendums/Bulletins must come from the Project Manager.
Addendums may be issued during the tender process for the following reasons:
- To distribute new/coordinated information from the consultants
- To make the bidders aware of additional information
- To make the bidders aware of Site Instructions Issued
- To answer any questions during the tender
Bulletins may be issued during the tender process for the following reasons:
- To distribute a change from the owner.
- To revise/amend the scope of work.
- To extend the closing date.
- To answer any questions during the tender
No bulletins should be issued within 24 hours of the closing time. The tender bulletins are to be uploaded to Procore.
Required Documents:
- A write up explaining or narrative that explains what changes were made to the building after the tender was issued.
- Sis, RFIs etc (if needed)
- Drawings (if needed)
- Specs (if needed)
- Reports (if needed)
- Current Appendix C with the updated drawings, specs and/or reports (if needed)
Process:
- Download the Addendum and associated documents from the Instructions tool.
- Review the contents of the package, and confirm that they have been published to the appropriate tools such as Drawings or Specifications. If not, please contact the Project Coordinator, Preconstruction Manager, or Project Controls Specialist to have the upload reviewed and published.
- Within Procore Documents > 05 Tendering - Contracts > 0501 Current Tenders > [XXXX Tender Package Name] > Addenda, create a folder with the exact name of the addenum or bulletin as displayed in the Instructions tool, for example Mechanical ADD-M-06.
- Make sure Appendix C reflects the current documents, then PDF Appendix C.`
- Upload the Addendum PDF and the Appendix C PDF into the Addendum # folder, created in step 2.
- Copy the Addendum # folder, inclusive of new PDFs, into Procore Documents > 06 Bid Packages > [XXXX Tender Package Name]. Do not include the Word version of Appendix C.
- From Procore Tendering > [Tender Package Name] > Files Tab > Edit > Documents > 06 Bid Packages > [XXXX Tender Package Name], check the box next to the the newly created Addendum Folder. In the same window, any drawing sets and specification sets, and reports associated with the addendum from their respective tabs then click Update.
- In Procore Tendering > [Tender Package Name] > Correspondence Tab, send a message to the affected trades and ask them to look at the addendum from the Instructions tool Procore or re-download the tender documents (note that this will download the entire tender package, not just the newly added documents).
- Download the Tender Package files by clicking the icon from the top right corner in the Tendering Tool and clicking Download Tender Documents.
- Upload the downloaded zip folder into 05 Tendering > [XXXX Tender Package Name] > Tender Documents > Addenda Archive (Create this folder if it does not exist).
The Document Controls Administrator can assist in compiling the Addendum documents when time permits but it is the PM who must send out the addendum through correspondence.
A video of this process can be found below:
Sending an updated Tender Package or PTA:
Attachment:
7.0 BIM
BIM (Building Information Modelling) should be understood as a process of collaboration that is facilitated by the latest digital technology. By providing a holistic approach to construction that unifies design, building and documentation across a project's lifespan, BIM has caused considerable positive disruption to the construction industry in recent years. The key difference between BIM and 2D CAD / drawings is that a BIM file is much more information-rich, and includes details of performance characteristics, specifications, and other non-physical data embedded in a shared 3D digital model of the project.
BIM is a technologically enabled process of collaborative design and production that allows architects, engineers, clients, and contractors to collaboratively work together in a single model — both simultaneously and in sequence. Using a shared computer-generated model and database, decisions can be made and problems defined and solved prior to the project "breaking ground". Clash detection and coordination across trades can be resolved in coordination meetings prior to construction — avoiding delays and issues in the field. This saves time and money as well as reducing environmental impact. BIM also allows for more complex and ambitious 3D design to be realized successfully and safely.
7.1 Data-Rich Model
A BIM model is a digital model of the project that includes all functional systems and aesthetics, such as electrical wiring, air conditioning, doors, windows, concrete, rebar, forming, etc., as well as dimensional and volumetric features. It is a shared multi-disciplinary resource allowing all those working on a project to share information and working processes in order to achieve maximum efficiency and effectiveness. BIM encourages and facilitates communication and collaboration by using the latest digital technology. The design-to-construction workflow is significantly overhauled as a result, and the BIM model will remain in place once construction is completed, as a vital one-stop reference tool that can be continually updated as required.
Aesthetic, structural and/or thermal performance requirements can also be included. A BIM representation can be considered a smart object or parametric model that changes in all views if any one input is updated.
7.2 TLogic
The TLogic Team leverages best practices in BIM and Virtual Design Construction (VDC) to work throughout the project with various stakeholders to improve the quality of Constructible Data which tells us how to build.
The Tlogic Team can assist with:
- Interference Management and Coordination
- Converting Trade Drawings to 3D (critical zones / items)
- As Built Documentation
- Coordination Issues / RFIs
- Coordinate and Review Site Instructions
- 3D Views and Illustrations
- 4D Project Schedule Simulation
- Quantity Takeoff
- Site Logistics (crane and hoist studies)
- Conflict Resolution, Fact Checking, Forensic Analysis
TLogic Standard Process
- TLOGIC prepares the initial clash report by using the 3D contents (NavisWorks automated report from the models).
- The initial report will be review by Tlogic and PMT, and only for the items considered "Hard Clash" we check the 2D drawing.
- Tlogic issues the coordination report to the consultant's BIM Coordinators before the VDC meeting.
- Tlogic and PMT discuss the issues in the VDC Coordination meeting with the consultant's BIM team.
- Tlogic issues the RFI for the items requiring drawing updates or more than two disciplines involved in the coordination.
- The Consultants BIM coordinators' responsibility is to communicate and resolve these issues from their end with PNg and Architect.
- PMT will close the RFI once the design team update the model/DWGs
8.0 Permits, Agreements and Utility Connections
The Project Management Team and the Site Management Team are responsible for identifying and tracking the numerous permits, agreements, and utility connections that may be required. The Permit Tracking Log must be filled out to identify who is responsible for obtaining these permits and when they are required by.
The Permit Tracking Log should be saved in Procore Documents > 08 Permits - Inspections, along with scanned copies of all permits and inspections.
- Project Team should gather PUCCs and ensure sign-off from all parties is complete
- Complete Daylighting of utilities in proximity of Property Line
- Disconnect all existing services service at main once owner has provided confirmation to do so
- Request agreements from owner at the beginning of the project and review for accuracy and restrictions
- Track renewal dates of permits on the permit tracking log to keep team updated
- Insurance certificates are required for most permit applications.
- Cheque requests should be well in advance and coordinated with owner requirements
- Ensure a copy of the building permits are posted in the site office.
Below is a general list of various construction permits required outside of Zoning, Site Plan Approvals, and Building Permits (permit requirements will vary slightly by project and should be carefully reviewed by both the Project Manager and the Site Manager).
8.1 Permits
- MOE Waste Audits and Waste Reduction Work Plans are required if the construction project is larger than 2,000 m2. A copy of both the waste audit and waste reduction work plans are to be kept onsite in the event o fan MOE request.
- Hoarding Permits are required for sidewalk and roadway enclosures to facilitate the project construction access. A traffic management plan is to be acquired by Owner’s Traffic Consultant. The traffic management plan must account for hoist layout and site logistics, concrete pouring, and wash out bins. It is recommended to set up a meeting with the City Traffic Coordinator to review and understand options prior to the application submissions.
- Street Occupancy Permits are required to temporarily occupy a sidewalk or roadway on the public right of way for durations under 30 days. Allow 2 to 3 weeks for City processing for boulevard and sidewalk occupancy applications and allow a minimum of 2 months for roadway occupancy.
- Encroachment Agreements may include crane swing rights, tie-back agreements, and canopy encroachment agreements with public and private ownership. The Project Manager and Site Manager are to ensure all construction requirements are incorporated into these agreements. It is the responsibility of the owner to ensure these agreements are in place prior to construction mobilization to site.
- Crane Swing Permits are required if the project crane swing extends beyond the property limits. Application is submitted to Transportation Services. NAV CAN and Transport Canada permits need to accompany the crane swing permit application.
- NAV Canada Permits are required when erecting a project crane. NAV CAN requirements can be found on the NAV Canada website. For erecting a tower crane, the “Land Use Proposal Submission Form” is to be submitted along with required backup documentation below. As a general rule, this permit application should be submitted 4 months before the anticipated crane erection date.
- Land Use Proposal Submission Form (downloaded from the NAV Canada website)
- Topographical map of site
- Site logistics plan - Crane location drawing showing location on site and swing
- Crane Spec sheet
- Transport Canada Permits are required when erecting a project crane. Transport Canada requirements and forms can be found on the Transport Canada website. As a general rule, this permit application should be submitted 4 months before the anticipated crane erection date. For erecting a tower crane, the following documentation is to be submitted with permit applications:
- Aeronautical Assessment Form for Obstacle notice and assessment (downloaded from the Transport Canada website)
- Topographical map of site
- Site logistics plan - Crane location drawing showing location on site and swing
- Crane Spec sheet
- TTC and Hydro Poles, Street Lighting Relocation may be required for hoarding enclosures or part of the site plan approval. If required, call TTC or Toronto Hydro for a site visit to review the proposal.
- City of Toronto permits are required when erecting a project crane. NAV Canada, Transportation Canada, and other applicable permits need to be obtained prior to submitting a permit application to the City of Toronto. Once both of these permits are obtained, then you submit to (David Zhang - David.Zhang@toronto.ca), and include the following backup documentation:
- Site logistics plan - Crane location drawing showing location on site and swing
- COI (wrap up policy)
- Both the NAV Canada and Transport Canada Permits
- All neighbouring crane swing agreements (if the boom goes over/will be swinging over other properties)
- Record of Site Condition is required to summarize the environmental condition of the property based on the completion of environmental site assessments. If contaminates are present within the site, upon remediation, a record of removal or RSC is required. The record of site condition should be started once excavation has reached 50% complete.
- Permit to Take Water is required for the discharge of groundwater to a City Storm or Sanitary combined sewer. The application process includes having the proposed discharged water tested. Once approved water samples will be taken on a regular basis and a flowmeter (City of Toronto requirement) will keep track of the total volume of water discharged. It is important to note that there are limits to the amount of water that can be discharged in a given time duration. The ownership team applies for and obtains this permit and the application should be submitted to the city prior to Tucker HiRise mobilizing to site. The processing time for these permits can be up to 6 months and an approved permit is absolutely required for when excavation begins.
- Temporary Power is required for the project until the permanent power has been connected to the building. Typically, a site will have a temporary low voltage feed(120V) and a high voltage feed(600V) installed. The low voltage feed is usually installed first as the installation process is fairly simple and requires minimal engineering approvals. A substation is brought to site by the electrical contractor and then connected to a feed, normally from a nearby hydro pole. This will provide enough power to operate power tools, small pumps, heaters and other miscellaneous powered items. This low voltage feed does not provide enough power to run a tower crane or any other heavy machinery. Therefore, a high voltage feed is required to be up and running by the time the tower crane is installed. In order to have the high voltage substation installed, the electrical contractor needs to submit their shop drawings for the equipment to Toronto Hydro so that a connection can be engineered. Approvals and engineering through Toronto Hydro take some time so it is important to apply for a temporary power connection 6 months before it is required.
- Permanent Water and Sewer Connections are required to be made in person at the Toronto Water Office. Completed application form is to be submitted along with the required site services drawings for tendering purposes. The City tendering period is between 6 to 8 weeks at which time the connection costs will be determined.
- Offer to Connect is required for the connection process of permanent power to the building. Allow 12 months for the owner to execute the agreement.
- Streetscaping Permits are required if any landscaping work within the public right of way (the area beyond your property line) is required. Permit lead times are 8 to 12 months upon submission. Permit is broken into minor and major landscaping with different application requirements. The PUCC Utility Sign-off Sheets must be distributed to the local utility companies for sign-off.
9.0 Safety
Tucker HiRise Construction Inc believes in providing a healthy and safe working environment for all our employees, trade contractors, and everyone involved. To fulfill our obligation, we have set workplace standards for health and safety based on the following philosophies:
- The health and safety of our employees, trade contractors, and the environment is an important element in the success of our business
- Our ‘health and safety program’ will be used to ensure that workplace incidents and their severity are minimized
- Management, employees, and trade contractors must all be proactive in workplace health and safety
Furthermore, through the implementation and maintenance of our health and safety program, we will ensure the:
- Establishment of workplace standards that meet and or exceed the minimum requirements established in the Occupational Health & Safety Act and the relevant Regulations (construction, industrial, WMIS, etc) which pertain to our workplace(s)
- Monitoring, compliance with established and legislated safe operating procedures through workplace inspections and follow up of unsafe conditions or work practices
- Control of loss through investigation and analysis of workplace incidents and implementation of corrective measure to prevent recurrence
- Evaluation of supervisors and trade contractors in their ability to ensure health and safety standards are maintained in accordance with the site policies and or legislative requirements
All Tucker employees are responsible for safety. Prior to the start of any project an internal safety meeting will be held and a Safety – Job Startup Form will be completed by the team.
The front line of enforcement will be conducted by Site Management. Project Management will also enforce Safety. Tucker’s Safety Manager will make regular visits to all sites in order to ensure that our safety policy is in place and enforced. A copy of the OHSA regulations and Tucker’s safety program will be readily available for review on site and enforced.
Site Management is to collect and review all safety policies from all Trade Contractors. Safety guidelines must comply with OHSA, Tucker policy, and Trade Contractor policy. In all cases, the most stringent policy will apply. All Trade Contractors are to comply and sign off on the Tucker Safety Policy and Program.
Refer to the Tucker HiRise Occupational Health & Safety Guidelines for further details.
9.1 Safety Inspections
Each team member below is to complete the safety inspections assigned to them over the course of a month. Inspections should be performed using Procore’s Inspections tool on your mobile device. Available Inspection templates and their schedule specific to each role and are available as follows:
9.1.1 Site Manager
To complete Site Manager Inspections 1 to 4, once a week, every month.
9.1.2 Assistant Site Manager
To complete Site Manager Inspections 1 to 4, once a week, every month.
9.1.3 Project Manager
To complete Project Manager Inspection once a month.
9.1.4 Safety Rep. Inspection - Site Admin to enter safety rep inspection results in procore if safety rep does not complete via iPad.
To be completed once a month.
9.2 TRH Reports
The TRH Group is a 3rd Party Safety Consultant used on Tucker Projects to conduct additional inspections to ensure we are exceeding compliance in Site Safety. TRH inspections occur weekly with a Tucker site staff member and TRH will produce an Inspection Report. The Inspection Report will be emailed to the site team, and the Site Administrator will upload the report into the Procore documents tool under 06 Health & Safety Inspection Reports folder. The Health & Safety Manager, Construction Manager, and VP of Operations are to be notified on the uploading of this report.
When required, the Site Administrator is to create the appropriate Observation in Procore and assign it to the responsible contact, notifying the Site Manager, Assistant Site Manager, Project Manager, Trade on site, and their Head Office. Once the Trade has resolved the Observation, the Site Manager will review the resolution and either approve or decline the resolution. Should it be approved, the Site Manager will attach a photo and close the Observation, closing the issue. Should it not be accepted, the Site Manager will reassign it back to the responsible party until the resolution is accepted and closed.
Attachment:
· Health and Safety Incident and TRH Report Flow.pdf
9.3 Incidents
When an incident occurs on site, the Site Manager is responsible for ensuring
- The injured party is attended to
- The scene is made safe & secure (taking photos when possible)
- The Health & Safety Manager is notified immediately
The Health & Safety Manager will decide whether to contact the MoL or any other parties having jurisdiction. Other parties may include the Construction Manager, Tucker Executives, the Project Director, Project Manager, VP of Operations, the Developer, Legal, and/ or Insurance. If an incident has taken place on your project, please use the following workflow:
Critical Incidents (by legal definition)
If the MoL is contacted, the H&S Manager may attend the site to meet with the MoL Inspector or wait with the site team, advising further actions. Only once the MoL has conducted their investigation and released the scene can the Tucker Site Staff commence their own internal investigation, while also completing the MoL’s directives. TRH will also complete the Section 51/ 52/ 53 Report and forward to the H&S Manager for review before it is emailed to the MoL Inspector and logged into the Procore Documents Tool.
Non-critical Incidents
Tucker’s investigation begins immediately with the selection of either the Near Miss | Minor Incident or Injury report or the Site Manager’s Incident report (for major injuries or property damage). The Site Manager will collect the information from the trades and notes from their own investigation and enter it into Tucker’s Incident Report and logging it into Procore. The H&S Manager, Construction Manager, and the VP of Operations are to be notified. Finally, the H&S Manager will log the incident into the Master Incident & Accident log.
Attachment:
· Health and Safety Incident and TRH Report Flow.pdf
Repeat Incidents
For recurring issues, the Repeat Incident Mitigation Plan is put into action. Once the incident report is completed, including the Actions Taken to Prevent Recurrence, the H&S Manager will review the proposed Actions and determine if they are adequate. If additional steps are required, the Manager will advise the Site Manager, who is to collect the information from the Trade and investigate further. Should the actions be adequate, the Site Manager will verify the Mitigation Requirements with the External Parties. Once the Responsible Parties meet the obligations, the Site Manager is notified of Completion and can close the issue.
9.4 Incidents Involving Tucker or Sahara Staff
Should the injured party be either a Tucker Manager or Sahara Labourer, the process involves a few more steps due to the involvement of the WSIB. Please see the workflow in section 9.3 Incidents for quick steps.
If the injured party is a Sahara Labourer, the H&S Manager will notify HR Payroll who in turn will complete the necessary WSIB Form 7. If the injured party is a Tucker Manager, HR will also be notified. The injured worker will also receive a Form 6 from the WSIB.
If the injured worker requires medical attention, the Site Manager will give an FAF (Functional Abilities Form) – available in our H&S Manual or online – to the injured party to bring to the medical practitioner to complete. The information contained in this form will allow the H&S Manger to manage the worker’s injury while bringing them back to work in Tucker’s Early and Safe Return to Work (ESRTW) program. The worker may also bring a Form 8 in lieu of an FAF.
Ideally the FAF/ Form 8 will allow the worker to return to his/ her regular duties.
If the FAF/ Form 8 allows the worker to return to Modified Work or Hours, the H&S Manager will work with the site to manage the worker until medical clearance from a doctor can be received and full duties are resumed.
Should the worker require medically prescribed recovery time away from work, the H&S Manger - along with the TRH WSIB Case Manager - will create an ESRTW plan to limit the time away from work (LTI = lost time injury) which is financially preferable for both parties.
9.5 Quarterly Meetings
The purpose of these meetings is to ensure that Tucker’s safety culture is present through all levels of the company and Executives are made aware of issues on each of the projects. It is also an opportunity for planning and developing Tucker’s Corporate Safety Program, core values, and philosophy.
The meetings are scheduled in advance every three months by an Executive Assistant.
The Meeting is to be chaired by the H&S Manager and regularly attended by the President, Executive VP, Senior VP, VP, Construction Operations VP, Construction Manager, and Project Directors. Other attendees may include Pre-Construction Services VP, Estimating & Cost Controls VP, Managers of TLogic, Systems and Controls, and HR. An Executive Assistant shall be the recording secretary.
Attachment:
· Health and Safety Meeting Agenda.pdf
9.6 Emergency Response Measures
9.6.1 Dealing with Viruses or Influenza on Site
Please refer to “THR COVID-19 Prevention Plan- Update #18.pdf for steps to take on site to ensure that everyone works safe and goes home safe.
9.6.2 Project Site Shutdown Planning
In the event that a site needs to be shut down for any reason, there are a number of steps that need to be taken to secure and make the site safe to sit idle for an extended period of time. Please see the attachments noted at the end of this section for an example of a site shutdown plan for 3 different projects at different stages of construction. When securing a site safety for both the workers and the public is the number on concern. Please refer to your site-specific plan but use these attachments as guidelines.
Attachment:
· Yonge + Rich Emergency Shutdown Plan (formwork and finishing stage).pdf
· Ravine Emergency Shutdown Plan (shoring/excavation stage).pdf
9.7 High Wind Preparation and Bracing
Please complete the High Wind Safety Checklist in Procore Inspections whenever wind conditions are present.
10.0 Cost Control
10.1 Budget
Prior to the start of the project, a construction an Anchor Budget will be produced by the Client after engaging their Cost Consultant and Bank. The Anchor Budget is a Benchmark Budget and not to be changed. Modifications to the Anchor Budget are done based on Commitments, Approved Change Orders and Purchase Orders. The Current Budget may be altered throughout the duration of the project by many factors, including design changes, schedule delays and unforeseen circumstances. This is all facilitated via Change Orders, Purchase Orders, Project Site Instructions, Potential Change Orders, and Budget Modifications.
It is essential that the budget forecasting is completed to ensure that the exposure to additional costs is understood for design changes, unforeseen closed tender circumstances and schedule delays for work which have not yet been approved. It is imperative that alignment of costs to date are coordinated with the Owner and the Cost Consultant monthly. It is understood that costs to date information from the Owner/Cost Consultant may be 30 to 60 days behind the reporting period.
All Procore projects include 2 views: Budget Detail and Budget Summary.
Budget Summary
- This is a simplified view that closely resembles budgets used by cost consultants, and is used for reporting purposes only.
- It should be used as the primary report for clients, and all other external reporting purposes.
- Financial department cost reports can be created from the Budget Summary view
Budget Detail
- This is our internal working view and includes additional columns to provide project teams and finance with greater insight into their project budget.
- It should be used by Tucker employees when viewing the budget and exploring details, commitments, costs, etc.
- The Budget Detail view will no longer be provided to clients unless they specifically request additional detail.
The following table explains the columns included in the Budget Detail view.
| # | Column Name | Includes | Notes |
|---|---|---|---|
| 1 | Anchor Budget | The original budget amount for each line item. | |
| 2 | Budget Modifications | Total of all budget modifications for the budget line item | |
| 3 | Approved Change Orders | Potential Change Orders (PCOs) marked as Out of Scope with status Approved. | PCOs marked as In Scope or TBD will not modify the budget. Most PCOs generated from SIs and associated Change Events will be Out of Scope. However, for situations such as dewatering where an initial contract is written and change orders are added to reconcile actual costs monthly, we do not want the change orders to modify the budget as the commitment change orders are still within our budget total for that line. If actual costs exceed the current dewatering budget, you would then set the PCO as Out of Scope* |
| 4 | Current Budget (1+2+3) |
1 Original Budget plus 2 Budget Modifications plus 3 Approved COs: Out of Scope | |
| 5 | Subontract Total | Value of all Subcontracts with the status Approved or Out for Signature | |
| 6 | PO Total | Total of all Purchase Orders with status Approved, Closed, Processing, Submitted, Received, or Partially Received | |
| 7 | In-Scope CCOs | Total of all In-Scope Commitment Change Orders (for both POs and Subcontracts) with status Approved | In-Scope CCOs are used for PO reconciliations and other items. Due to limitations within procore, they can now be shown separately for POs vs Subcontracts and are therefore shown in their own column. |
| 8 | Direct Costs | Direct Costs in the Pending, Revise and Resubmit, and Approved status | |
| 9 | Committed Costs (3+5+6+7+8) |
3 Approved Change Orders plus 5 Subcontract Total plus 6 PO Total plus 7 In-Scopee CCOs plus 8 Direct Costs | |
| 10 | Invoices | Total of all Invoices received against Subcontracts and POs | |
| 11 | Completed to Date (8+10) | 8 Direct Costs plus 10 Invoices | |
| 12 | Committed Cost to Complete (9-11) |
9 Committed Costs minus 10 Cost to Date. | This represents the dollar value of existing commitments that has not yet been completed. |
| 13 | Uncommitted Cost (4-9) |
4 Current Budget minus 9 Committed Costs | This shows the value "to be spent" or the difference between the current budget and committed costs. |
| 14 | Cost to Complete (4-11) |
4 Current Budget minus 10 Cost to Date | This shows the amount left to be invoiced based on the current budget. |
| 15 | Approx. PCOs (Out of Scope) |
Total of all Change Events (CEs) marked as Out of Scope with status Pending | CEs marked In Scope or TBD will NOT modify this column or committed costs. Most CEs generated from SIs will be Out of Scope. For situations such as dewatering where an initial contract is written and change orders are added to reconcile actual costs monthly, we do not want the change orders to modify the budget as the commitment change orders are still within our budget total for that line. If actual costs exceed the current dewatering budget, you would then set the CE as Out of Scope. |
| 16 | Pending PCOs (Out of Scope) |
Total of all PCOs marked as Out of Scope with status Pending | PCOs marked as In Scope or TBD will not modify this column. |
| 17 | Forecast to Complete (4+15+16-11) |
16 Forecasted Cost at Completion plus 15 Approx. PCOs plus 16 Pending PCOs minus 11 Completed to Date | This visible column shows the amount left to be invoiced based on the projected budget total. |
| 18 | Projected Cost at Completion (11+17) |
11 Completed to Date plus 17 Forecast to Complete | This shows the projected total cost of the project based on known approximate and pending changes to the budget |
| 19 | Projected Over from Current (18-4) |
18 Projected Cost at Completion minus 4 Current Budget | This shows the difference between Projected Costs and the current budget. |
*The In Scope / Out of Scope modifier and provides flexibility for different types of trade contracts such as "additive" contracts like dewatering for which CCOs are signed by Tucker, vs standard subcontracts which require owners to sign CCOs. Utilizing this in conjunction with PCOs to represent budget side changes and CCOs for cost side changes standardizes financial operations across multiple owner contract types such as CCDC-5A and CCDC-5B with GMP.
For more detailed information on how CEs, PCOs, and CCOs affect the budget, please click here.
10.2 Trade Contracts
The Project Manager use the CCDC 17 Contract for Subcontracted work being performed. The Project Manager must be aware of the cost commitments represented in the trade contract and ensure that the proper control mechanisms are in place to manage these significant project expenditures.
Trade contracts are initially written for an agreed scope of work and for an agreed amount, as defined in the trade contract documents. It is the Project Managers responsibility for the facilitation, monitoring, accuracy and execution of the trade contracts. Trade contractor Change Orders are written to reflect approved changes in scope for design changes and other unforeseen circumstances. Trade contracts should be reviewed by the Owner.
The Project Manager is to ensure that the trade contract breakdown, or Schedule of Values, is suitable for the schedule of work being performed. Upfront contract loading is to be avoided and proper allocation for the schedule of work is to be attained. The suite door-in value might be broken out in the schedule of values as per the Owner requirement.
10.3 Purchase Orders (POs)
Purchase Orders (PO) are to only be issued for project equipment rentals and material purchases. Purchase Orders cannot be used for any work that has labour involved. In these cases a trade contract must be issued.
Material purchases on the large scape which form part of the permanent building, including concrete and steel supply are to be issued using the Tucker Short Form Unit Rate Trade Contractor Agreement.
Invoices against POs are typically sent by vendors/trades to the project's invoicing email (ProjectName_invoicing@tuckerhirise.com) then processed into Procore by the Site Administrator to collect necessary approvals from the Site Manager and Project Manager as shown in the Typical Purchase Order (PO) Workflow.
10.3.1 Reconciling POs
During the monthly invoice approval, the Project Manager is to reconcile all POs to ensure committed costs are correct and projections are accurate. Please follow the process below to reconcile a purchase order.
First, navigate to the purchase order you would like to reconcile. POs with remaining value can be easily identified using the MPSR - PO Summary Report.
A. If an invoice has not yet been added, and there will only be one invoice for this PO:
- Select the Schedule of Values tab and select Edit. and update cost codes or values on SOV line items to match the invoice received from the vendor
- Upload the invoice per instructions for Invoicing - Purchase Orders
B. If one or more invoices have already been added and approved:
- The commitment value needs to be adjusted to match the actual cost. To do this, create a new Change Event with the title [Commitment #] Reconciliation, for example PO-123 Reconciliation.
- Set the Scope as In-Scope. It is very important the Scope is set to In-Scope otherwise the change event and subsequent change order will be shown in the budget's Approved Change Orders column.
- Set the Type to Transfer and the Change Reason to Correction
- Add one budget line for each Purchase Order SOV line that needs to be adjusted. Enter the vendor and contract in both lines, and the value to be added to or removed from each line to equal the actual cost as invoiced.
- Click Save, then proceed with steps for Creating a Commitment Change Order (CCO) from a Change Event. You may have to create a PCO first, and then create a CCO from the PCO.
- Once the CCO has been created and reviewed by the PM, set the CCO status to Approved and set the Change Event status to Closed.
- Go back to the PO Summary Report and refresh the page to confirm the Remaining Amount is now zero.
10.3.2 Concrete and Rebar Purchase Orders
Purchase orders for rebar and concrete need to be done daily as the materials are ordered. Both of these suppliers are provided with a negotiated unit rate contract type, ensuring the unit costs are established ahead of time. Predetermined/fixed unit rates allows the person ordering the materials to know exactly what the order will cost. The purchase order is to be used as the order form for concrete and rebar and is made the day of the order.
Once the materials are delivered to site, along with a bill of landing, the material quantities are reviewed vs. the original PO. There may be some small adjustments made for delivery fees or certain concrete additives, but the delivery should exactly match the original purchase order. Upon acceptance of the delivery by the Site Admin or Site Superintendent, the PO is “approved” by the Project Coordinator or Project Manager.
Lastly, the signed purchase order (by Tucker Site Manager and Project Manager) is attached to the bill of landing/concrete ticket and then sent with the weekly courier to the head office.
10.4 Change Management (CEs, PCOs, CCOs)
Please refer to the following steps and workflow for an overview of the Change Management process in Procore.
CCDC 5A (CM)
- Change event happens > PM Creates Change Event (cost side) in Draft Status
- Trade pricing gets finalized > Change Event pricing is updated > Add/Create PCO > Switch Change Event status to Closed.
- PCO is approved (verbally or via email) > Switch PCO status to Approved
- PM creates Commitment Change Orders from Change Events and sends to owner for signature via Docusign.
- Once signed, status and attachments are updated automatically.
Note that the above workflow applies only to CCDC 5A contracts. For CCDC 5B contracts, the steps are as follows:
CCDC 5B (GMP)
- Change event happens > PM Creates Change Event (cost side) and Prime PCO (budget side), both in Draft Status
- Trade pricing gets finalized > Change Event pricing is updated > Prime PCO values update automatically > Prime PCO is flipped to pending status
- Prime PCO is approved (verbally or via email) > Change Event is switched to Approved / Closed
- PM creates Prime Change Order and sends to owner for signature
- PM creates and approves Commitment Change Orders
10.4.1 Change Events (CEs)
The Change Events (CE) module is used for tracking multiple functions including cost control, budget control and document control, and are also 2 of the 3 steps in the Change Order process. The review and facilitation of the CE and PCO process is the responsibility of the Project Manager.
Change Events are the first step in the change management process and handle the Cost Control function. They incorporate tracking, capturing, forecasting of additional costs which can be a result of design changes, SIs, RFIs, Owner changes, and contemplated change notice and any other unforeseen changes and should allow for the costs as a result of schedule implications. When a Change Event takes place, a CE is to be created to forecast the cost and time implications of the associated changes for each affected trade contractor and to request pricing via an RFQ (Request for Quote) within the newly created Change Event.
10.4.2 Request for Quote (RFQ)
An RFQ is to be issued by the Project Management team for any additional pricing requests to the trade contractors. Whether the changes are formally requested or required for additional work, Procore utilized to distribute documentation, track pricing, contract documents being priced, the description of the work included, and any specific additional items required.
The following information must be included on every Request for Pricing:
- Project Name
- Owner Name
- Trade Contractor/Representative Name
- Description of work required
- Specific directions for additional work
- List of contract documents included
- All contract documents to accompany the pricing
- PCO number to be referenced in the pricing
Once the pricing is received from the trade contractor, pricing is to be reviewed by the THR Project Manager and sent to the Owner and Consultants (if required) for approval via a Prime PCO.
PCOs are the second step of the change management process and handle the Budget Control function with owner approval. In other words, PCOs modify the budget as a result of change events. The Estimated Cost at Completion (projected budget) will represent the forecasting of any CEs or PCOs marked as Out of Scope with a status of Pending in the project budget. The current budget will be adjusted either via an approved PCO marked as Out of Scope or a Budget Modification. An approved PCO does the budget side of a change, and an associated Commitment Change Order (CCO) is created to modify the trade contract (cost).
The Document Control function is present in CEs, PCOs, and CCOs, allowing for any documents that accompany the changes to be easily accessible within. Any corresponding documents are to be pulled in when the Change Event is created. This will automatically pull those documents through into PCOs and CCOs.
For more detailed information on how CEs, PCOs, and CCOs affect the budget, please click here.
10.4.3 Cost/Schedule Claims from the Contractor Against the Contract Documents
Contractors who are not impacted/not yet impacted (we have not received an email or delay letter from them yet) DO NOT need to be reported. Two Tracking sheets are to be maintained:
- Tracking sheet #1 – with ONLY the FORMAL delay claims. This sheet should be in a condition to be sent directly to the Owner so should only contain complete claims with adequate information and justification.
- Tracking sheet #2 – with the formal claims AND a record or any informal/incomplete claims sent by the trades. This sheet should be used as a reminder/tracker on what trades we are expecting formal claims from but since we don’t have all the information yet, we don’t want to send these to the Owner yet.
Every Friday Morning the Project Manager sends only the updated log along with a copy of any new official notice and/or non-official notice from the past week to the Project Director. The contents are reviewed between the PM and the Director before the end of Day on Friday and a final copy is distributed to Daniel and Margaret. Margaret is responsible to send the Official Notice log along with the new notices to the client.
The log to be grouped by categories
- Trades
- Vendors
- Consultants
- City/Utilities
Please see below for standardized course of action for when a delay claim is received from a contractor:
- Review the content of the claim, does it capture all the following requirements?
- pdf format on a company letterhead with the following information:
- Reference to the contract between the Owner and Subcontractor including the date it was executed
- Reference reason for delay or cost impact
- Reference to what operations/activities are being impacted and what that impact is
- Reference to the specific paragraphs in the contract that the claim is being made against (Please review: 6.5.2, 6.5.3, 6.5.4 and 6.6 of the CCDC17 General Conditions)
- delivered by hand and registered mail, along with an email to the Owner and Tucker HiRise Construction.
- IF the claim captures all these requirements, proceed to step 3. IF the claim DOES NOT capture all these requirements or was sent informally via email, respond to the contract with the following message:
Please note that if your intent is to provide a formal notice of cost or schedule delay claim, the documentation provided to date is insufficient and will not be considered. You must follow the process outline in the contract document to submit a formal notice of cost or schedule delay claim. Specifically any cost or schedule delay claim are required to be submitted in a pdf format on a company letterhead with the following information:
- Reference to the contract between the Owner and Subcontractor including the date it was executed
- Reference reason for delay or cost impact
- Reference to what operations/activities are being impacted and what that impact is
- Reference to the specific paragraphs in the contract that the claim is being made against (Please review: 6.5.2, 6.5.3, 6.5.4 and 6.6 of the CCDC17 General Conditions)
- Notices must be delivered by hand and registered mail, along with an email to the Owner and Tucker HiRise Construction.
This matter is considered closed unless you chose to submit a formal notice as per the terms in the Contract Agreement.
Regards,
Project Manager
After the response is sent to the trade, requesting additional information/a more complete claim – the responses and history are logged in tracking sheet #2(formal and informal claims). Use the description section of the sheet to describe that is outstanding or any history that would help someone from Tucker HiRise understand the status.
- Processing the formal claim:
- Log the claim in tracking sheet #1(formal claims only) and file all associated documentation on Procore Documents (in the COVID-19 folder)
- Create a PCO for each trade to submit a formal notice and input SWAG on Procore.
10.4.4 Potential Change Orders (PCOs)
Once pricing and/or schedule impact is finalized for a given Change Event, a Potential Change Order (PCO) can be created, and the Change Event can be closed. A PCO is expected to contain all the documentation needed for a third party such as the owner to understand the change as well as its impact on the budget and schedule. Most of these items will have automatically pulled through from the Change Event or RFQ in procore, but it's important to ensure all documentation associated with the change is attached to the PCO, as it will be included in the subsequent Commitment Change Order (CCO) that follows. PCO backup should include:
- Change Documents such as associated RFIs, SIs, PTAs, email direction
- Legal notices from a trade such as strikes, manufacturing delays, etc
- Quotes and backup such as estimates, takeoffs, etc
- Emails or any other supporting documentation
Once a PCO has all necessary attachments, and is ready to send to the owner, the status can be updated to Pending, and the PCO can be sent to the owner. On many projects, owners prefer to review PCOs monthly as well. If a PCO is approved, proceed to creation of a CCO as noted below.
If a PCO is rejected by the owner, please discuss with your CM / Project Director / VP as the trade will need to be notified and the claim dealt with appropriately.
10.4.5 Commitment Change Orders (CCOs)
The distribution and facilitation of the Commitment Change Order (CCO) process is the responsibility of the Project Manager. Submitted extras are to be verified by the Project Manager for accuracy and compliance with the proposed changes and Trade Contract scope of work. The CCO describes the changes to the trade contract scope of work and the adjustments to the project financial commitments. Refer to A8.7a for details on the Change Order process and approval prior to issuing your first CCO to the Owner/Consultant for approval.
In most cases, CCOs are created for Out of Scope (extra work) items originating from RFIs and SIs, and were not part of the contemplated budget. Because the owner holds these subcontracts, associated CCOs are signed by the owner. Once approved, the budget is then updated accordingly based on how the Change was configured in Procore.
For more detailed information on how CEs, PCOs, and CCOs affect the budget, please click here.
Currently, a Commitment Change Order (marked as Out of Scope) modifies both the project budget and the commitment value. We will use the Prime Contracts tool and Prime Contract Change Orders to modify the budget, while Commitment Change Orders will be used only to change the commitment value (cost). PCOs will now be created and managed within Prime Contracts instead of Commitments as they are currently.
10.5.1 Unit Rate or "Additive" Contract Change Orders
The following applies to special contract situations such as Unit Rate Contracts, or contracts that invoice actual costs on a monthly basis such as de-watering. As monthly actual costs are invoiced, Commitment Change Orders (CCOs) are needed to update the contract value. When creating CCOs (from PCOs and CEs) for unit rate or "additive" contracts, be sure the Scope field is set to In Scope. This will ensure the PCOs and CEs associated with these change do not modify the budget. These CCOs do not require owner signature and should be approved by the Project Manager. For this reason, CCOs for unit rate or "additive" contracts should generally never be in the Pending status -Once the invoice is received from the trade, the PM can create and execute the CCO, then process the invoice. No other approvals are required.
The only exception is if actual costs exceed the current line item budget. At this point an In Scope PCO will be needed to match the exact budget amount and then an Out of Scope PCO will be used for all costs in excess of the current budget. This Out of Scope PCO and any following it will require owner signature and approval, as it will now be modifying the budget.
10.6 Cost Moves & SOV Corrections
Commitments frequently get added to the wrong budget line, and often the error isn't discovered until after the commitment has been invoiced Some possible scenarios, and steps to correct them are as follows:
Wrong Cost Code or Cost Type

Navigate to the commitment(s) needing correction. It bay be easier to identify them by opening the Budget tool and click on the dollar value in the commitments column of the incorrect line. Then follow the steps below based on
A. If there are no invoices in the Commitment:
- Select the Schedule of Values tab and select Edit. and update cost codes or values on SOV line items accordingly.
- Go back to the Budget tool and refresh the page. It may take 2 refreshes to display updates.
B. If there is only one invoice in the Commitment and that invoice has not yet been included in a draw package (Invoice was added in the current billing period):
- Download the invoice and attachments, then delete the invoice record from Procore
- In the commitment Schedule of Values tab and select Edit. Then update cost codes or values on SOV line items accordingly.
- Go back to the Budget tool and refresh the page. It may take 2 refreshes to display updates.
C. If there are multiple invoices in the Commitment:
- First, we need to reallocate the Commitment to the correct cost codes. To do this, create a new Change Event with the title [Commitment #] Cost Correction, for example PO-123 Cost Correction.
- Set the Scope as In-Scope. It is very important the Scope is set to In-Scope otherwise the change event and subsequent order will be shown in the budget's Approved Change Orders column.
- Set the Type to Transfer and the Change Reason to Correction
- Add one budget line for the incorrect cost code, and enter the value of that line item as a negative number. Then, add a second line for the correct cost code and put the value in that line as a positive number. The total value of the change event should be zero. Enter the vendor and contract in both lines. Using the example of Concrete Materials: Commitment above, here's how it should look:

- Click Save, then proceed with steps for Creating a Commitment Change Order (CCO) from a Change Event. You may have to create a PCO first, and then create a CCO from the PCO.
- Once the CCO has been created and reviewed by the PM, set the CCO status to Approved and set the Change Event status to Closed.
- Go back to the Budget tool and refresh the page to confirm the commitment has been moved to the appropriate cost code. It may take 2 refreshes to display updates.
- Next, we have to reallocate invoices to the correct cost codes. To do this, navigate to the Commitment and select Create an Invoice. Select the most current billing period and enter the billing date as today's date. In the Schedule of Values section, locate the newly created line items and set the Total Progress % to the Previous Progress % for both items. The invoice total should always be $0. Note that for POs, the Previous Progress % will often (but not always) be 100%.

- Send the invoice for approval using your project's invoice approval workflow. Note that owner's do not need to review and approve these items, but the invoice record should be printed and included in the month's draw package so they are aware costs from a previous billing period have been moved to different cost codes.
- Once approved, go back to the Budget tool and refresh the page to confirm the invoice is now showing in the correct cost code.. It may take 2 refreshes to display updates.
None: None Budget Line
While unused budget codes are removed from the available list at budget import, it is still sometimes possible to create commitment SOV line items for cost codes not used in the budget.

1. Review the Contract Total, PO Total, Direct Costs values. If one has a dollar value associated, select that dollar value to find the associated commitment. If they all have $0.00 dollar value, check each one to find the commitment(s) made with no cost code. One of these categories will show something like this:
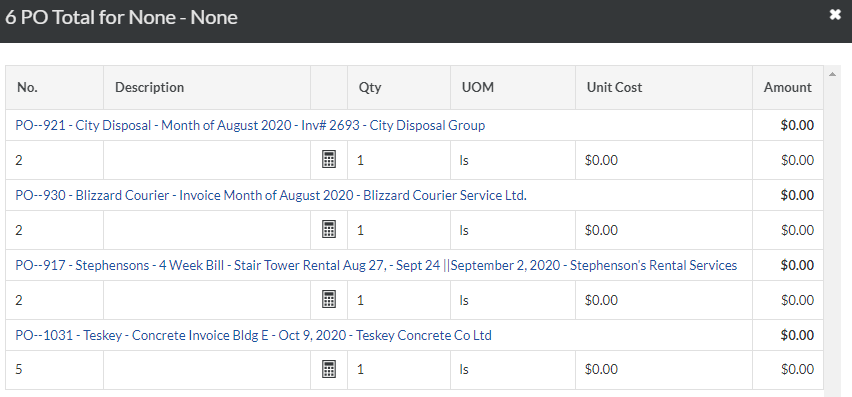
2. Open each commitment shown, select the Schedule of Values tab
- If no invoices have been posted against the commitment,
- select Edit, and remove any lines with $0.00 value.
- If invoices have been posted against the commitment you will see this error:

- Ask your Project Accountant to unpost all invoices. They must download each invoice attachment, then delete the invoices from Procore.
- Once the invoice has been removed, go to the Schedule of Values tab, select Edit, and remove any lines with $0.00 value.
- Inform your Project Accountant to re-post all invoices.
3. Go back to the Budget tool and refresh the page. It may take 2 refreshes to display updates.
10.7 Monthly Billing Process
The Monthly Billing Process is used to manage the effective submission, approval, and payment of Project Invoices. Supplier Invoices must be matched against Purchase Orders logged on the Project. Subcontractor Invoices must be matched against their Subcontract Schedule of Values or Subcontract Change Order Schedule of Values.
It is important that this process is managed effectively as Trades on site will require timely payment to continue to ensure their work on the project progresses smoothly. There are also payment terms set up in the Construction Lien Act which require us to ensure payments are produced.
Progress billing invoices are to be submitted directly to procore by the responsible trade. Purchase order invoices and associated information are collected in the project's invoicing email by the Site Administrator for processing, organization, and entry into procore. This Invoice Package is then submitted to both Site and Project Managers, and sometimes Cost Consultants for approval. Revisions required are sent back to the Trade or Supplier to revise and resubmit. Approved Invoice Packages are then sent to the Head Office for review by the Finance Department, who will review accuracy of information and ensure the packages are compliant in all aspects before being sent to the Client for final signoff and payment. The following workflow explains this process in further detail, along with suggested timelines to ensure prompt payment in compliance with the Construction Lien Act
10.7.1 Invoicing - Trade Contracts
All invoices against trade contracts are to be submitted by the trade through Procore as follows:
- Automatic billing periods are to be set up at the start of each project
- Billing Period Start: 1st Day of Month (unless agreed otherwise with Owner)
- Billing Period End: Last Day of Month (unless agreed otherwise with Owner)
- Billing Due Date: 20th of Month
- Invitations to bill email must be configured and sent via Procore by the Project Manager on the 15th of the current month.
- Invoices received prior to the 20th of the month will be entered the current draw period.
- Any invoice received after the 20th of the month will be entered the subsequent draw period.
- The following documents are to be included:
- Application and Certificate for Payment
- Statutory Declaration for the 2nd and each progress billing thereafter, within 3 business days after receipt of payment (use CCDC 9A 2018)
- Current WSIB certificate indicating Contractor’s legal name, address, classification, and validity period
- General Liability Insurance certificate, per contractual requirements
- Contractor HST number must be clearly indicated on the invoice, and the entity on the invoice should be consistent with the HST registration.
- The Project Manager will review, confirm allocated cost codes and approve the general invoices before the end of the month for further complication and transmission by Project Accountant.
In the event that a contract invoice is to be held for the next month’s draw upon the Project Manager’s request, the Project Manager must notify the corresponding Trade Contractor and Project Director of the hold and change the billing period in procore to the subsequent period. The invoice should have a notation of the hold and given to the accounting department for next month’s draw.
10.7.2 Invoicing - Purchase Orders
General invoices are generated from Purchase Orders, Field Purchase Orders and distribution services such as Toronto Hydro, Enbridge, Water etc. General invoices are for material or rental supply items only and are not to be used for labour included services. All invoices, documentation, packing slips/delivery slips are to be scanned and uploaded to the invoice record in Procore under the corresponding Purchase Order.
- Purchase order invoices must be submitted to project invoicing email address.
- The Site Administrator is responsible for collecting all invoices, packing slips or delivery slips, as well as required insurance documents on a weekly basis.
- The Site Administrator will collect and review all invoices, then the Site Manager Project Manager will individuallt review, confirm (or adjust) cost codes and provide their approval before the project manager forwards the invoice package to the Cost Consultant (if applicable) and finally the Project Accountant.
- The Project Accountant will enter the general invoices into Procore, notifying the trade of any missing items.
The Project Manager is also responsible for reconciling and closing Purchase Orders prior to finalization of the monthly report.
10.7.3 Invoice Approval Workflow
The invoice approval process has been streamlined and relies on a digital workflow that happens directly in Procore as described below:
- For Subcontracts, trades are to submit their own invoices and fill out their own invoice SOV via procore. Proceed to step 3.
- For Purchase Orders (General Invoices), vendors will email these to the project invoicing email address. In procore, the Site Admin creates a new invoice against that purchase order, attaches the following documents, and clicks submit:
- Invoice (received via email)
- Backup such as timesheets, photos, etc (may be received via email)
- PDF of original Purchase Order from Procore
- Cost Code
- Each project has it's specific approval workflow set up in Procore which requires designated persons to review every invoice individually following the steps below. You will receive an email when it's your turn to review an invoice:
- Click the “Take Action in Procore” button in the email sent to you.
- Review the invoice details, attachments and invoice line item percent complete or amount. If you are not the first person in the invoice workflow, there may be green check marks or red x's next to each line item.
- If you have comments to add to an individual line item, hit Edit in the SOV section and click the X to add comments:

- When reviewing and approving or rejecting line items in the invoice SOV, remember to hit the save button just below the SOV screen before hitting the approve button:

- If you wish to include additional attachments, scroll to the bottom of the invoice view and add them where other invoice backup is attached. Do not attach them in the workflow window.
-
If there are no issues with the invoice, click "Approve" in the bottom right corner. If there are issued with line items or backup, hit “Return” or “Reject” in the bottom right corner to send the invoice back to the trade or invoice creator for revisions. Note that depending on your projects workflow, some owners / cost consultants want to review all invoices before returning them to the trade for revisions.
-
In the workflow screen that follows, simply click “Submit” and you are done. You only need to add comments in the next window if you are rejecting the invoice and need revisions or additional documents from the vendor:

- Once the Project Team and owner have completed their review, the Project Accountant must review and approve the invoice following the same steps above. If internal corrections (such as correcting an invoice number or typo) are needed at this time, hitting the Return button will allow you to make changes. If the invoice needs to go back to trade or vendor, hit Reject.
- Once all invoices have been approved, the Project Accountant will export them to create and send the monthly draw package using the steps below:
- Go into each the invoice, hit Export, reorder attachments as needed, export to zip, and save in Procore documents folder for that month's draw.
- Perform monthly financial reporting and save reports in the draw packages folder.
- Once the draw package is completed, email the draw package folder to the owner via Procore.
10.7.4 Invoicing - Direct Costs
Invoices that are not associated with a trade or vendor commitment are considered Direct Costs, and are entered into Procore using the Direct Costs tool. Direct Cost entries in Procore effectively create a commitment and an invoice at the same time. They will show up both in the committed cost column, as well as in the invoiced to date column. The primary items entered into the Direct Costs tool are as follows:
- Invoices: Create a direct cost for a paper invoice from a non-contracted vendor for items such as printer ink, computer paper, or postage.
- Expenses: Create a direct cost expenses might include computer equipment, telephones, or internal equipment rentals.
- Payroll: Create a direct cost for monthly payroll costs classified by cost code, so that payroll amounts reflect each month on the budget.
The finance department and project accountant are responsible for entering Direct Costs, attaching backup, and ensuring the accuracy of all information entered. Once the status of a Direct Cost is changed from Draft to either Pending, Revise and Resubmit, or Approved, the project's Budget tool automatically displays the amount of the direct cost in the 'Direct Costs' column on its corresponding budget line item.
Once all direct costs for a month have been entered, the finance departmenr and project accountant are responsible for compiling them into the draw package as noted below.
10.7.5 Monthly Draw Package
Once all invoices have been compiled, reviewed, and approved by the project team (and cost consultant if applicable), the Project Accountant performs the following steps to generate the Monthly Draw Package:
- Confirm all invoices and direct costs for current month have been received, approved, and entered into Procore.
- Export Procore Budget to CSV. Subtract previous month's Cost to Date from current Cost to Date to get Cost This Period and enter into Cost Report spreadsheet
- Run Draw Summary Report (shows all invoices from current billing period) and Direct Cost Report from Procore. Ensure totals match Cost this Period from Cost Report in step 2.
- Once all issues are addressed, notify Project Team that the month is closed.
- Create budget snapshots titled Monthly Close: yyyy-mm-dd in both available budget views.
- If required by client, manually create invoice line items by cost code report in excel.
- Send the complete draw package to the owner (cc PM, CM, Project Controls Manager). Draw Package must include the following:
- Trade Contractor Invoices and accompanying documents as noted in 10.7.1
- PO Invoices and accompanying documents as noted in 10.7.2
- Direct Cost & General Invoices and accompanying documents as noted 10.7.4
- Draw Summary Report (shows all invoices from current billing period) PDF
- Draw Summary Report (shows all invoices from current billing period) CSV
- Cost Report PDF
- Cost Report CSV
10.8 GC Projections
Please see the steps below as well as the General Conditions Forecast Template for a walkthrough of how General Conditions are calculated and forecasted at the start of the project and how they are maintained and updated as the project progresses.
- An anchor schedule is prepared for the new project with an estimated date assigned for the start date (best guess it used) but set/contractual durations for each activity in the schedule.
- An anchor budget is set based on the anchor schedule and the Tucker Rule of Thumb guideline document(this does not need to be 100% followed, it is to serve as a guideline).
- Handover happens to Project Manager who then prepares an initial cash flow projection for the project (for the GC’s only).
- Applies the same durations for each activity from the anchor schedule but uses the actual dates the project is anticipated to start. This new schedule is normally called Baseline1.
- The anchor budget and schedule will have budget allocations for each bucket but the Project Manager needs to slot in the dates for when certain things like the hoist will be installed(this will not be done on the initial cash flow from estimating department normally).
- Rule of thumb is applied on the new schedule to forecast labour and salaried staff’s durations on the project. This should almost exactly match the forecast, as they are both based on the same Rule of Thumb. Anything that falls outside of the original budget needs to be addressed and approved immediately.
- Each month the GC’s are reviewed
- If you are over on spending for a specific budget, you will need to justify this and submit a change order/budget adjustment to request more funds. DO NOT take fund allocations for future months to cover these costs unless you are certain that they will not be needed, this leads to a lack of funds at the end of the project and it is always better to flag a shortage of money in a budget early on in the project vs. at the end. There are some exceptions to this, however. For example, if you exceed the concrete budget because your estimate is wrong, you wait for your next calibration to request more funds. If you add a floor then you will do a budget adjustment right away, depends on the scenario.
- If you are under, the remainder in that budget for that month can be held for reallocation at the next milestone recalibration (step 5 below).
- Always completely Re-calibrate GC’s with the latest revised schedule approved budget adjustments at the following milestones:
- Formwork Contractual Schedule Start (75-100% SOG completion)
- Ground Floor Formwork completed
- Podium Formwork completed
- Tower Formwork completion
During a GC recalibration, the steps a-c in 3. will need to be re-done, as if it is a new project. Each of these subsequent recalibrations will create new baselines in the schedule and should be named accordingly (Baseline2, Baseline3, Baseline4, etc.). When the GC’s are being recalibrated, always be sure to be using the most up to date schedule and include any extras(SI, CCN, CD’s) or unforeseen conditions (sabotage/damage).
10.9 Budget Modifications
Note: Budget Revision Request Forms should be submitted to Systems & Controls at least 24 HOURS before they are required to be completed.
To make changes to the budget which are not associated with an Out of Scope or Prime Contract Change Order, Tucker HiRise utilizes Budget Modifications following the steps below. Note that in order to initiate a budget modification, we must have some form of owner approval and signature acknowledging the change from anchor budget (or current). Approval requirements depend on the division
- For changes to Division 1 as a result of initial GC approval or recalibrations, we need owner signature on the Budget Revision Request Form.
- For changes to Division 2-16 as a result of tender variance or line item transfers following contract awards, we need owner signature on the subcontract. When requesting a budget modification to adjust for tender variance, owner signature is not required on the Budget Revision Request Form, as long as there are signatures on commitments reflecting the associated changes.
For updates to Division 1 (GC Updates & Schedule Recalibrations)
- Project team fills out Budget Revision Request Form and submits it for owner approval / signature via email, copying Procore@tuckerhirise.com.
- Budget Revision Form is signed by the Owner and returned via email.
- Systems & Controls Department creates a new line item under Division 17 and completes the budget modification as follows:
- Funds are added via budget modification for the total amount of the budget revision request form. Anchor budget remains unchanged.
- Amounts are transferred from the newly created budget line item to the appropriate cost codes in Division 1 as noted in the Budget Revision Request Form.

- The total amount shown in the newly created budget line item will be $0, but the details of that budget revision and line item transfer amounts will be visible by clicking on the $0.00 amount in the budget mod column, or by clicking on Budget Modifications within the Budget Reports section of the Procore sidebar::

For updates to Divisions 2-16
- Project team fills out Budget Revision Request Form then submits it to the Systems & Controls Department by emailing Procore@tuckerhirise.com
- Systems & Controls Department creates a new line item under Division 17 and completes the budget modification as follows:
- Funds are added via budget modification for the total amount of the budget revision request form. Anchor budget remains unchanged.
- Amounts are transferred from the newly created budget line item to the appropriate cost codes as noted in the Budget Revision Request Form.
- The total amount shown in the newly created budget line item will be $0, but the details of that budget revision and line item transfer amounts will be visible by clicking on the $0.00 amount in the budget mod column, or by clicking on Budget Modifications within the Budget Reports section of the Procore sidebar:
10.10 Budget Snapshots
As noted in the workflow in section 10.7, once the monthly billing is closed and GC Projections, forecasting, and budget modifications have been completed, the project manager must take snapshots in both available budget views called MPSR: yyyy-mm-dd. These are the snapshots that are to be included in your monthly project status report.
11.0 Project Reporting
11.1 Weekly Project Status Report Requirements
Weekly Project Status Reports are due no later than Monday at 5:00 pm.
The weekly report can be distributed via e-mail to the President, all Vice-Presidents, Project Director, copying the Executive Assistant and the Construction Admin Assistant. For some projects, we also need to add the Client Representative. Please confirm this with your Project Executive if Client Rep should be on the distribution list. Also, Weekly reports should be saved in Procore > Documents > 11 Project Reporting.
Weekly report should include:
- Weekly Report Template
- Four Week Lookahead schedule
- Tender & Contract Tracking Log
- Procore Automated Reports
- Delay Log (Weather and Trade Relates Lost Days as entered into Daily Log) from previous week
- Critical RFI Summary - Update Critical RFIs to show ones that are impacting the work on site in the next 4 weeks
- Critical Submittal Summary - Update Critical Submittals to show ones that are impacting the work on site in the next 4 weeks
- PCO Log
11.2 Monthly Project Status Report Requirements
Monthly Project Status Reports are to be distributed digitally. No hard copies or paper binders required.
-
Monthly Reports are completed accurately and as per Monthly Report Template
-
Sections are Tabbed/Bookmarked to make the PDF easier to navigate
-
A single consolidated PDF report is to be uploaded to the 11 Project Reporting / Monthly Reports Folder (subfolders at your discretion).
-
This report is to then be emailed from the Procore Documents Tool (easiest way to transfer such a large file) to the following contacts
-
Your Project’s Development Manager
-
Chris Mallinos
-
Elaine DeFilipis
-
Andrew Cook
-
Construction Manager and/or Project Executive
-
Ron Weinstock (GG Projects)
-
*some projects are also sending directly to other GG Executives, please confirm with your Project Executive if they wish you to include additional contacts*
-
These Reports, as before, must be submitted to no later than the 15th of each month. If any other date is requested by the owner this should be reviewed and approved by Project Executive. The reports are to be current up to the time of creation with the exception of the cost to date which will be as of the previous month. In Procore, store the consolidated Monthly Report PDF in the 08 Reports Folder under Project Management / Monthly Reports.
The following information must be included in every Monthly Project Report:
-
Current Average Manpower
-
If any trade is constantly under staff, please make a note in front of that trade. Also, please mention what actions have been taken to address the manpower shortage, if any.
-
-
Safety Summary
-
Please add safety issues which have occurred during the month. Also, please make a note on future risks / safety issues need to be dealt with.
-
-
Schedules
-
Notable project activities
-
Current project milestones - please highlight activities that are behind compared to recalibrated baseline in red. The current project milestones will change depending on what stage of construction the site is in. Please see below for the list of milestones to be used, depending on the current stage of the project:
-
Start of project:
-
Demolition start
-
Demolition Completion
-
Shoring / excavation start
-
Temp power connection
-
Crane installation
-
Shoring / Excavation Complete
-
Formwork contractual start date
-
SOG completion
-
Occupancy Start
-
-
SOG Update:
-
SOG completion
-
GR floor completion
-
Podium structure completion
-
Podium Floor envelop start
-
Hoist installation
-
Window installation start
-
Mock-up suite completion
-
Occupancy Start
-
-
GR Floor Update:
-
GR floor completion
-
Podium structure completion
-
Podium Floor envelop start
-
Hoist installation
-
Window installation start
-
Mock-up suite completion
-
Lobby start
-
Project top-off
-
Amenities start
-
Typical floors finishes start
-
Occupancy Start
-
-
Top-off update:
-
GR floor completion
-
Podium structure completion
-
Podium Floor envelop start
-
Hoist installation
-
Window installation start
-
Mock-up suite completion
-
Lobby start
-
Project top-off
-
Amenities start
-
Typical floors finishes start
-
-
Lost days (Weather and trade related days) - Please make a note how we are doing for actual weather days so far compared to original assumption of three days per months. Also, please advise what is being done to make up for contractual weather days
-
Mitigation plans (if any) - Mitigation plans should be any measurable actions we take to mitigate any activities that are behind schedule
-
-
Project Challenges, Risks and Opportunities
-
Financial Status
-
Budget Snapshot (taken in Procore) & Exports of Budget Summary view. See 10.10 Budget Snapshot for information on when to take these snapshots
-
Brief description for major variances, if required. Please mention any potential CO and claims that received after month financial close. This will be on next month report, but we want to make owners aware of these costs asap
-
-
Tender Summary
-
Items in Owner’s Court Please make sure any item in the list below includes the date we issued it to the owner. Also, please make a note if there are any items above that will impact the schedule if not dealt with within a due date
-
Outstanding LOR’s
-
Outstanding Budget Revisions / PCO
-
Outstanding Contracts
-
-
Critical Outstanding RFIs/Submittals/SIs In the critical section, only mention outstanding RFI’s, submittals or SI’s that impact the schedule if not dealt with right away. Also, RFI status should be up to the date when the report is being issued
-
Extras In this section, please make a note of outstanding extras in the Client’s court for approval with the date that the extras were issued
-
Approved extras.
-
Pending extras.
-
-
Permit Status
-
Utility Connections Status
In the Appendices please include the following. Note that you need to review this list with your clients. Some clients will require additions or subtractions to the list above and/or a change in format:
|
Project Statistics |
This will be project basic information including number of floors, number of units, amenity information, etc |
|
Construction Status |
|
|
Financial Status |
|
|
GC Projections |
|
|
Tender / Contract Status |
Tender and contract tracking logs should be separate but if you are tracking your project with one log, just update and include for that log. (Refer to section 5.18) |
|
Change Order (CO) Log |
Automatically Generated by Procore. Please remove all closed COs from this log. The log should only include “Approved” CO’s. |
|
Potential Change Order (PCO) Log |
Automatically Generated by Procore. Please organize the list based on draft (meaning has been issued to owner for review) , acknowledged (meaning owner has reviewed and approved the PCO) and finally verified (meaning the approved PCO is with THR to issue CO). |
|
Purchase Order Summary |
Automatically Generated by Procore. Please remove all void POs from this log. The log should only include “Approved” PO’s |
| Subcontract Summary | Automatically Generated by Procore. |
|
Request for Information (RFI) Logs |
Automatically Generated by Procore. The RFI logs should be updated to the date that the report is being issued, not to the last day of month prior |
|
Submittals Log |
Automatically Generated by Procore. The Submittal Log should be updated to the date that the report is being issued, not to the last day of month prior |
| Invoice Summary | Automatically Generated by Procore. |
|
Permits Log |
Please create a column to illustrate which permits are closed and which ones are still open |
|
Health and Safety Status |
|
| Photos |
11.3 Concrete & Rebar Tracking
Description:
All projects must track concrete and reinforcing steel being delivered and placed on site, this tracking should be compared against the quantities and unit rates carried in the approved anchor budget. The tracking information required is identified in Attachment: Concrete and Reinforcing Steel Tracking Log Template. The tracking sheet will be setup by the Estimator assigned to the project who will ensure the projected quantities and unit rates from the approved anchor budget are included in the initial tracking sheet setup. The Project Team shall track and report back to the Estimating Team, the Project Executive Team, and subsequently the Client once reviewed by the Project Executive team.
The Project Team shall ensure the tracking is reconciled every month which should coincide with the monthly reporting and the issuance of the concrete and reinforcing steel placing purchase orders. All monthly Concrete and Reinforcing Steel Tracking logs are to be uploaded to Procore's Documents tool under 11 Project Reporting > Site Management > Monthly Concrete/Rebar

Purpose:
Assurance that the volumes and unit rates of the concrete and reinforcing steel being placed on site aligns with the quantities identified in the approved anchor budget. Increasing effectiveness and accuracy of estimating quantities for future projects.
Best Practices:
- Concrete and reinforcing steel quantities to be confirmed using suppliers invoicing or bill of lading summaries for that reporting period and subsequently reconciled with project financial tracking.
- Notify the Project Executive team of any variances as soon as identified. 3.
- If variances are found updated projections may be required. This would include updated quantities from structural consultants and reinforcing steel detailers.
- Actuals and updated projections based on revised documents to be issued to client at all milestone recalibrations.
- Project Team to track quantities and unit rates pre floor (horizontal and vertical).
Attachment:
12.0 Quality & Site Administration
The purpose behind doing a quality control plans is to make sure that a consistent process is being followed and short cuts are not being taken during construction. These details and procedures become especially important for construction activities that overlap with one another (façade tie-ins, elevator shafts, etc.). It helps mitigate, flag or catch issues in the early stages before the problem becomes costly and time consuming. It is always better to build something correctly the first time, rather than having to go back a second time to fix it. A quality control plan specific to each scope of work is essential to ensuring that work is done properly, and the correct installation procedure is followed. Each contractor doing work on site is to submit a quality control plan that they have developed. This plan should be site and task specific so that a Tucker Hirise superintendent could print out a copy and bring it with them to review in the field. The plan should get into specific installation details and should be in the form of a checklist that can be easily reviewed and followed in the field and proceed as follows, using Quality Control Items.xlsx:
- Contractor submits a job specific Quality Control Plan after contract award along with WSIB, Form 1000, COI and other pre-mobilization documents.
- Tucker Hirise Project Manager/Superintendent reviews the quality plan and advises if any changes are required or if it is accepted as is.
- Once accepted by Tucker Hirise, the quality plan should be sent back to the contractor’s office. It is then expected that this quality plan is distributed to the contractor’s foreman on site so that it can be followed.
- If a new task is added through a change, the contractor is to revise or add to the quality plan and re-submit it to Tucker HiRise for re-approval.
Please see attached for a matrix that outlines the main items that need to be reviewed for each division. This attachment is to serve as a guideline and is not an all-encompassing list of all quality control items to check for in each division
12.1 ProCheck: Construction Action Plans & Checklists
Tucker's ProCheck program is a critical component of our construction company's operations, ensuring that all projects meet the necessary quality standards. The ProCheck Program is designed to help our project teams stay on top of their projects by helping them identify and resolve any missed items before they become an issue. It relies on two main components, Action Plans and Inspections. Action Plans are designed to provide a clear plans for every project phase, while the inspections gives our executive team greater insights into ongoing projects which helps them better support projects.
First, let's talk about Action Plans. Throughout the course of a project, there are hundreds of critical items that, when completed in a timely manner, have been proven to lead to successful project delivery. A complete list of these operational deliverables has been carefully assembled based on over a hundred years of combined construction experience of Tucker HiRise employees and leaders. By reviewing these items at project milestones, we can ensure that nothing is missed, preventing issues, saving time, and reducing cost.
Procore's Action Plans tool is designed specifically to track progress and completion of these items. Such items have been split into 11 categories or Construction Operations Checklists, each of which has its own template pre-loaded into your project's Action Plans Tool in Procore. Before diving in to how we leverage this powerful tool, its important to understand the tool itself by reviewing How to Perform an Action Plan. Note that training for this tool may not have been included in your Procore Certification Courses, so this required learning is crucial to successful use of the tool.
During the internal project kickoff meeting, calendar invitations will be created to review action plans at critical milestones based on the project schedule. In these meetings, the project team, site team, CM, VP, and Project Controls will create an action plan for the upcoming phase and review completion of the previous action plan if applicable.
Action Plan Setup Meeting
- Takes place at scheduled intervals.
- Review previous action plan and ensure completion
- Facilitated By CM
- Inital setup of dates and assignees entered by Project Controls
- Ongoing management of plan (including updating assignment, due dates, and completion) is the responsibility of the CM and Project Team.
Creating an Action Plan
1. In Procore, create a new Action Plan from an existing Construction Operations Checklist Template and designate roles as follows:
-
Name: Remove "COPY: " from the title but otherwise leave as is
-
Plan Manager: Construction Manager
-
Location: N/A (Leave Blank)
-
Action Plan Approver: Construction Manager, VP
-
Completed Action Plan Receivers: All Project Team Members, Estimator and Chief Estimator (for Preconstruction Only), CM, VP, Project Controls Manager, Project Controls Specialist, CTO
2. Review each item of the next stage's action plan in detail, add an assignee as the team member who will be responsible for that item's completion (set "Blocking Functionality" to NONE), set a due date, and ensure that person knows where to find applicable resources, templates, etc (see list below).
3. Once an assignee and due date have been added to each item, Publish the Action Plan. The Action Plan MUST be published prior to the start of the phase it represents.
4. The team will then complete steps 1-3 for the next phase, as many items need to be initiated in advance of the start of the phase they take place in.
Completing Action Plans and Action Plan Items
Ongoing management of plan (including updating assignment, due dates, and completion) is the responsibility of the CM and Project Team.
As items are completed, it is the assignee's responsibility to go into the Action Plan and sign off on each item they complete, adding attachments where required. Automatic reports will be generate by Procore and sent to the Plan Manager and Plan Approver on a weekly basis, showing outstanding and overdue items for easy monitoring of the team's progress.
Detailed information on all items referenced in the action plans, in addition to the typical workflow, can be found below:

12.1.1 Preconstruction
| Item # | Title | File / Form / Template Location | Responsible Party | Notes |
|---|---|---|---|---|
| 1.1 | Go / No Go Budget | Save to: Procore Documents > 03 Estimating > Program Budget (GNG) | Chief Estimator | |
| 1.2 | Class D Budget | Save to: Procore Documents > 03 Estimating > Class D | Chief Estimator | |
| 1.3 | Scope of work Reviews | Chief Estimator | ||
| 1.4 | Class C Budget | Save to: Procore Documents > 03 Estimating > Class C | Chief Estimator | |
| 1.5 | Scope of work Reviews | Chief Estimator | ||
| 1.6 | Class B Budget | Save to: Procore Documents > 03 Estimating > Class B | Chief Estimator | |
| 1.7 | Scope of work Reviews | Chief Estimator | ||
| 1.8 | Class A Budget | Save to: Procore Documents > 03 Estimating > Class A | Chief Estimator | |
| 1.9 | Preliminary Project Schedule | Save to: Procore Documents > 04 Schedules > 01 Project (Master) | Scheduling Manager | |
| 1.10 | GC Budgets & Cashflow - Based on Rule of Thumb | Save to: Procore Documents > 03 Estimating > GC Budget | Chief Estimator | |
| 1.11 | GC Forecasting | GC Forecasting Template Save to: Procore Documents > 10 Financials > Forecasting |
Construction Manager | |
| 2.1 | Site Plan | T Logic | ||
| 2.2 | Crane and Hoist Study | T Logic | ||
| 2.3 | Site Logistics | T Logic | ||
| 2.4 | Constructability Studies | T Logic | ||
| 2.5 | Model Health Review | T Logic | ||
| 2.6 | Design Review | T Logic | ||
| 3.1 | RFI for Project Info (Owner Name, Project Name, Legal Entity, Billing Address, Change Order Workflow) | Include Contracts Manager in Distribution List | Precon Manager | |
| 3.2 | Project Safety Program (PSP) | PSP Sample Save to: Procore Documents > 09 Health - Safety > Project Safety Program (PSP) |
Safety Manager | |
| 3.3 | RFI for Supplemental Conditions - CCDC 17 Appendix A | Include Contracts Manager in Distribution List | Precon Manager | |
| 3.4 | Contract Documents - CCDC 17 Appendix C | Save to: Procore Documents > 05 Tendering > 0505 Master Tender Documents List | Estimator | |
| 4.1 | Tender Call List (Internal Approval) | Tender Call List - Sign Off [Tender Name] Save to: Procore Documents > 05 Tendering > 0501 Current Tenders > [ appropriate subfolder] |
Estimator | |
| 4.1 | Tender Call List (External Approval) | Save to: Procore Documents > 05 Tendering > 0501 Current Tenders > [ appropriate subfolder] | Estimator | |
| 4.3 | Tender Tracking Log | Tender & Contract Tracking Log Save to: Procore Documents > 05 Tendering |
Estimator | |
| 4.4 | Estimating Handoff Review | N/A | Chief Estimator | |
| 5.1 | Schedule Operations Checklist Review Meetings - Calendar Invites | N/A | Project Controls Manager | |
| 5.2 | Notice of Project | Notice of Project Web Form Save to: Procore Documents > 09 Health-Safety > Notice of Project |
Construction Manager | |
| 5.3 | Permit to Discharge / Treat Water (PTDW / PTTW) - Short Term | Precon Manager | ||
| 5.4 | Permit To Discharge / Treat Water (PTDW / PTTW) - Long Term | Owner | ||
| 5.5 | Team Review of GCs | See Item 1.11 Save to: Procore Documents > 10 Financials > Forecasting |
Internal Team (Incl. SM and CM) | |
| 5.6 | Coordinate Crane Lift Capacity with equipment sizes - Through specs and consultants | N/A | Precon Manager | |
| 5.7 | Utility Disconnect Planning & Approval | Precon Manager | ||
| 5.8 | Project Controls Internal Kickoff | Procore Meetings Template | Project Controls Manager | |
| 5.9 | Project Controls Owner Kickoff | Procore Meetings Template | Project Controls Manager | |
| 6.1 | Set Up Permit Tracking Log | Permit Tracking Log Save to: Procore Documents > 08 Permits - Inspections |
Precon Manager | See Section 8.0 Permits, Agreements, Utility Connections |
| 6.2 | Crane Permit | Save to: Procore Documents > 08 Permits - Inspections > City Permits | Precon Manager | |
| 6.3 | NAV Canada Permits | Save to: Procore Documents > 08 Permits - Inspections > Nav Canada | Precon Manager | |
| 6.4 | Transport Canada Permits | Save to: Procore Documents > 08 Permits - Inspections > Transport Canada | Precon Manager | |
| 6.5 | Temporary Street Occupancy Permits | Save to: Procore Documents > 08 Permits - Inspections > Transport Canada | Precon Manager | |
| 6.6 | Other PUCC Items | Save to: Procore Documents > 08 Permits - Inspections > [appropriate folder] | Precon Manager |
12.1.2 Site Preparation & Mobilization
| Item # | Title | File / Form / Template Location | Responsible Party | Notes |
|---|---|---|---|---|
| 1.1 | All Phase Review Meeting | CM | ||
| 1.2 | Site Survey Prep - 4 Weeks | SM | ||
| 1.3 | Review of Precondition Survey Requirements | CM, PM, SM | ||
| 1.4 | Safety Board | Site Administrator | ||
| 1.5 | Small Tools & Equipment Log - Incl. Monthly Signoff | Tool & Equipment Rental Log Save to: Procore Documents > 12 Quality - Site Administration |
Site Administrator | |
| 1.6 | Site Stake Out | SM | ||
| 1.7 | Review & Understand Neighbour Agreements | Save to: Procore Documents > 15 Legal - Insurance > Owner Agreements > Neighbours | CM, PM, SM | |
| 1.8 | Locates - By Tucker | SM | ||
| 1.9 | Daylighting & Exploratory Works At Neighbouring Properties | SM | ||
| 1.10 | Locates (From Trades) | SM | ||
| 1.11 | Tie-Back Agreement | Save to: Procore Documents > 15 Legal - Insurance > Owner Agreements > Neighbours | SM, Owner | |
| 1.12 | Water Source for Tie Back Machine | SM | ||
| 1.13 | Vibration Control Form and ZOI | SM, PM | ||
| 1.14 | Shoring Monitoring Contract | PM | ||
| 1.15 | Hydro Line Protection / Line Removal | SM | ||
| 1.16 | MOE Waste Management Plan | Save to: Procore Documents > 12 Quality - Site Administration | SM | |
| 1.17 | Security / Traffic Control Contract | PM | ||
| 1.18 | MOL Safety Documentation | Save to: Procore Documents > 09 Health-Safety | SM | |
| 1.19 | Submittal Log Setup in Procore with due dates | Save to: Procore Submittals | APM | Use Procore Submittal Builder See Submittal Best Practices |
| 1.20 | Long Lead Tracking & Procurement | In Project Master Schedule | Scheduling Manager | |
| 1.21 | Silt Fence / Witch Hats | Site Admin | ||
| 1.22 | Soil Import Tracking Log - Testing of Fill Material | Soil Import Tracking Log Save to: Procore Documents > 12 Quality - Site Administration > Soil Import Tracking |
Site Admin | |
| 1.23 | Temp Gas Connection | SM | ||
| 1.24 | Temp Power Connection | SM | ||
| 1.25 | Utility Disconnect Shutoff | SM | ||
| 1.26 | Utility Cut & Cap | SM | ||
| 1.27 | OLS Review and Approval | SM | ||
| 1.28 | Site Signage (Identification and Safety) | Job Site Signage | SM | |
| 1.29 | Hoarding / Safety Fence Install | SM | ||
| 1.30 | Shoring Platform Preparation | SM | ||
| 1.31 | Parking | PM | ||
| 1.32 | Site Sanitary Facilities | ASM | ||
| 1.33 | Trailer | PM | ||
| 1.34 | Sanitary & Site Office Supply Companies - Establish Line of Credit | PM | ||
| 1.35 | Dewatering Setup & Tracking | Get Tracking Log from City | Site Admin | |
| 1.36 | Vendor Agreements In Place - Stephensons, Proline, National, IHL, etc. | |||
| 1.37 | Review Permit Tracking Log | Save to: Procore Documents > 08 Permits - Inspections | See Section 8.0 Permits, Agreements, Utility Connections |
12.1.3 Vertical Drilling, Excavation, Shoring
| Item # | Title | File / Form / Template Location | Responsibile Party | Notes |
|---|---|---|---|---|
| 1.1 | Schedule Recalibration & Baseline, Logistics Review | Save to: Procore Documents > 04 Schedules > 01 Project (Master) | Scheduling Manager, CM, PM, SM | Incl Tucker Plan & review with excavating and shoring contractors |
| 1.2 | Production Tracking | APM, PC | ||
| 2.1 | Soil Contamination Tracking | See 12.1.2 Item 1.22 Save to: Procore Documents > 12 Quality - Site Administration > Soil Import Tracking |
Site Administrator | |
| 2.2 | Survey and Control QC/QA | SM | ||
| 2.3 | Confirm De-Stressing Requirements | SM | ||
| 2.4 | Sign off of Drilling Pad | Consultant | ||
| 2.5 | Check Tieback Elevation to avoid conflict with slabs or wailers | SM | ||
| 2.6 | Check Corner Bracing Removal | SM | ||
| 2.7 | Coordinate Final Long Reach Location and Wailer | SM | ||
| 2.8 | Guardrail / Bumpline coordination at top of Pile | SM | ||
| 2.9 | Shoring face tolerance | SM | ||
| 2.10 | Coordinate Location of Incoming Services on Shoring Walls | PM, SM | ||
| 2.11 | Winter Protection on Shoring Walls | PM, SM | ||
| 2.12 | Final Shoring As Built | Save to: Procore Submittals | APM | See 14.3 Contract Close Out for details on Close Out Document Administration |
| 2.13 | Crane Pad Detail Approved | SM, PM |
12.1.4 Below Grade Structure
| Item # | Title | File / Form / Template Location | Responsible Party | Notes |
|---|---|---|---|---|
| 1.1 | Schedule Recalibration & Baseline, Logistics Review | Save to: Procore Documents > 04 Schedules > 01 Project (Master) | Scheduling Manager, CM, PM, SM | Include Trades in Review Meeting |
| 1.2 | Production Tracking | ASM | ||
| 2.1 | Pour Break Approval | APM | ||
| 2.2 | Set up Concrete and Rebar Tracking Log | Concrete & Rebar Tracking Log Procore Documents > 12 Quality - Site Administration > Concrete - Rebar Tracking |
Site Admin | |
| 2.3 | Commence Rebar Detailing | APM | ||
| 2.4 | Consultant Sign Off - Shoring | APM | ||
| 2.5 | Consultant Sign Off - Structural | APM | ||
| 2.6 | Waterproofing Coordination - Shotcrete / Bathub | SM, PM | ||
| 2.7 | Pre Pour Checklist | Procore Forms > Pre-Pour Checklist | SM | |
| 2.8 | Tower Crane Binder - Digital | APM | ||
| 2.9 | Tower Crane Erection Coordination | SM | ||
| 2.10 | Re-Survey/Layout at Bottom of Hole | SM | ||
| 2.11 | Coordination of divider beam embeds | SM | ||
| 2.12 | Below Grade Mechanical coordination of vertical services | SM, PM | Interference Drawings | |
| 2.13 | Below Grade Electrical coordination of vertical services | SM, PM | Interference Drawings | |
| 2.14 | Waterproofing QC/QA | SM, PM | ||
| 2.15 | Concrete QC/QA Mix Design Confirmed | SM, PM | ||
| 2.16 | Concrete QC/QA Tolerances Confirmed | SM, PM | ||
| 2.17 | Apply for Permanent Power | PM, APM | ||
| 2.18 | Apply for Permanent Gas | PM, APM | ||
| 2.19 | Coordination of elevator openings and divider beam locations | SM, PM, APM | ||
| 2.20 | Recalibrate sleeving drawings for mech/electrical (inclusive of blacklines) | SM, PM, APM | ||
| 2.21 | Electrical Equipment Procurement Update (Place Equipment Prior to Forming if possible) | Scheduling Manager, PM, APM | ||
| 2.22 | Survey Ground Floor (Benchmark for Vertical / Horizontal) | SM, ASM | ||
| 2.23 | Elevator Shaft Survey Setup | Elevator Shaft Survey Template Save to: Procore Documents > 12 Quality - Site Administration > Elevator Shaft Survey |
Site Admin | |
| 2.24 | Stud Rail Procurement | SM, APM, Site Admin | ||
| 2.25 | Review Occupancy Plan with Owner | SM, PM | ||
| 2.26 | Coordination Study with Toronto Hydro | |||
| 3.1 | Recalibrate Concrete and Rebar at Ground Floor | PM, Site Admin |
12.1.5 Above Grade Structure
| Item # | Title | File / Form / Template Location | Responsibile Party | Notes |
|---|---|---|---|---|
| 1.1 | Schedule Recalibration & Baseline, Logistics Review | Letter Template Save to: Procore Documents > 04 Schedules > 01 Project (Master) |
Scheduling Manager, PM, SM, | Include Trades in Review Meeting. Send Letter to Owner. |
| 1.2 | Assign Responsibility for Production Tracking / Actuals in Project Schedule | Template | ASM | |
| 2.1 | Assign Responsibility for Pre-Pour Checklist | Procore Forms > Pre-Pour Checklist | SM | |
| 2.2 | Tower Crane Removal Plan 2 Months before Crane Removal |
PM, SM | ||
| 2.3 | Overhead Protection Review Meeting 2 Months before Crane Removal |
SM | ||
| 2.4 | Approved sleeving drawings for mech/electrical - For Podium Before Start of Podium |
SM, PM, APM | ||
| 2.5 | Hoist Coordination - loading dock, hoist suite closures, embeds | SM, ASM | ||
| 2.6 | Recalibrate Concrete and Rebar at top of Podium | SM, PM, Site Admin | ||
| 2.7 | Approved sleeving drawings for mech/electrical - For Typical Floors Before start of typical floors |
SM, ASM | ||
| 2.8 | Coordination of stationary pump openings and all temp services At start of Podium |
SM, ASM | ||
| 2.9 | Slab edge drawing review & approval due | SM, ASM | In Procore Submittals | |
| 2.10 | Coordination of Embeds for window washing equipment | SM, ASM | ||
| 2.11 | Coordination of Embeds for Window Wall | SN, ASM | ||
| 2.12 | Coordination of details for Window Wall | SM, ASM, PM, APM | ||
| 2.13 | Coordination of Embeds for Railings | SM, ASM, PM, APM | ||
| 2.14 | Floor Level / Flatness / Deflection Survey | SM, ASM | ||
| 2.15 | Mechanical Coordination of Vertical Services | SM, ASM, PM, APM | ||
| 2.16 | Electrical Coordination of Vertical Services | SM, ASM, PM, APM | ||
| 2.17 | QC/QA of Exterior Facade Mock-ups | SM, ASPM, PM, APM | ||
| 2.18 | Concrete QC/QA Tolerances Confirmed | SM, ASM, PM, APM | ||
| 2.19 | Recalibrate Concrete and Rebar at top of structure | SM, PM, Site Admin | ||
| 2.20 | Temp Heat & Temp Water | SM, Site Admin | ||
| 2.21 | Mechanical Penthouse Coordination | |||
| 3.1 | Lane Closure Permit for Equipment Hoisting | APM | ||
| 4.1 | Set Up Holdback Release Tracking Log | Save to: Procore Documents > 14 Close Out > Holdback Release Tracking | PM, APM | See 14.5 Holdback Release for details |
| 4.2 | Close Out Document Setup & Programming via Procore Submittals | Submittal Closeout Master Template | Project Controls, APM | See 14.3 Contract Close Out for details on Close Out Document Administration |
| 4.3 | Request Trade Closeout Documentation & Release Holdback (where applicable) | Holdback Tracking Log Save holdback forms to: Procore Documents > 14 Close Out > [Contract #] - [Trade] |
PM, APM | See 14.3 Contract Close Out for details on Close Out Document Administration |
| 4.4 | Schedule Recalibration & Baseline, Logistics Review (at Top Off) | Save to: Procore Documents > 04 Schedules > 01 Project (Master) | Scheduling Manager, CM, PM, SM | Include Trades in Review Meeting |
12.1.6 Envelope
| Item # | Title | File / Form / Template Location | Responsible Party | Notes |
|---|---|---|---|---|
| 1.1 | Schedule Recalibration & Logistics Review | Save to: Procore Documents > 04 Schedules > 01 Project (Master) | Scheduling Manager, CM, PM, SM | Include Trades in Review Meeting |
| 2.1 | Site Office Relocation & Temp Facilities Planning | |||
| 2.2 | Shop Visits for Colour Approval and Production - Windows | |||
| 2.3 | Shop Visits for Colour Approval and Production - Metal Panel | |||
| 2.4 | Shop Visits for Colour Approval and Production - Precast | |||
| 2.5 | Façade Trade Coordination - Insulation, Lapping, Transitions, Flashing | |||
| 2.6 | Mockup and Approval Log | Compare to Specs | ||
| 2.7 | QA/QC Approval for Façade and R.O.s | |||
| 2.8 | Leak Detection, Flood Test | |||
| 2.9 | Temp Hoist Suite Closure | |||
| 2.10 | Temp Heating Plan | |||
| 3.1 | Request Trade Closeout Documentation & Release Holdback (where applicable) | Holdback Tracking Log Save holdback forms to: Procore Documents > 14 Close Out > Holdback > [Contract #] - [Trade] |
See 14.3 Contract Close Out for details on Close Out Document Administration |
12.1.7 Elevators
| Item # | Title | File / Form / Template Location | Responsible Party | Notes |
|---|---|---|---|---|
| 1.1 | Review shop drawings and manufacturing schedule durations and update Procurement section of Project Schedule. | Scheduling Manager, SM, PM, CM | ||
| 1.2 | Elevator Machine Room Schedule Detailing | Scheduling Manager, SM, PM, CM | ||
| 1.3 | Confirm Rough Opening requirements | SM, ASM, PM | ||
| 1.4 | Ensure elevator survey (12.1.4.2.23) is being shared with Forming trade so they can address deficiencies and avoid delays once elevator crew mobilizes | Save to: Procore Documents > 12 Quality - Site Administration > Elevator Shaft Survey | Site Admin | |
| 1.5 | Confirm if hoist beams are required at the top of the shaft and if intermediate beams are required at tall floors | SM, ASM | ||
| 1.6 | Determine storage location for elevator equipment | SM, ASM, PM | Determine what work needs to be carried out in the area where this material will be stored…and plan on doing it before or ensure there is a plan for doing it much later when most of the material is gone; paint, perhaps traffic topping, etc.) | |
| 1.7 | Determine means of installing, specifically from what level will the elevator contractor feed the hoist way. | SM, ASM, PM | Determine what work will be left behind until you are able to complete following elevators…usually post door frame install. Usually this affects an underground elevator lobby. In extreme cases main lobby or a typical floor….this has a significant impact on schedules which is often overlooked. | |
| 1.8 | Determine when door frames will be installed on floors and tie into finishing schedule of corridors | SM, ASM, FS, PDI Manager | Ideally, elevator contractor will install frames early allowing corridor program to commence and keep pace with suites | |
| 1.9 | Co-ordinate sleeving from pits to machine rooms for below grade shuttle cars prior to concrete. | SM, ASM, PM, APM | Often sleeving is undersized or in wrong location | |
| 2.1 | Review counter weight guarding scope, placement of counter weights (side mount vs back mount) and ensure it's included in trade contract. | SM, ASM | ||
| 2.2 | Confirm crash decks and waterproofing of decks is included | SM, ASM | ||
| 2.3 | Ensure extra sleeving pocket infill work is included in scope. | PM, APM | ||
| 2.4 | Ensure all piping is oversized beyond what is stated on the electrical drawings, specifically for machine room home runs or CACF rooms. | SM, PM, APM, ASM | Owner additions will require more wire to be pulled which may have to be surfaced mounted and potentially shafted | |
| 3.1 | Ensure all elevator contractors have qualified a number of working “early or unofficial” weeks in the hoist way prior to start. If not, agree on number. | SM, PM, APM | This is often overlooked in tendering | |
| 3.2 | Determine floor level for working deck and crash deck and confirm if multiple jumps are needed based on early start requirements | SM, PM | If elevator crew runs out of work they are more than likely pulled off site and time lost is used against us. | |
| 3.3 | Determine pre-permanent power Electrical requirements for early start works and ensure this electrical work is contracted. | SM, ASM | if due to subsequent jumps location of temp power will have to be moved up as well (was required in YR) | |
| 3.4 | Determine if any hoistway sleeving is required for crash/working decks and on what floors. | SM, ASM | ||
| 4.1 | Confirm all divider beams are installed/welded | SM, ASM | ||
| 4.2 | Watertight hoist ways | SM, ASM | ||
| 4.3 | Confirm and review safety screening / barricades requirements | SM, ASM | ||
| 4.4 | Temp electrical requirements: 120v and 600v with disconnects for each in the machine room, GFI and very bright lights in pits. | Procore Inspections > Hardwood Flooring QA/QC Inspection | SM, ASM | |
| 4.5 | Coordinate the placement of sprinklers in the pits and top of shaft as required. | SM, ASM | ||
| 5.1 | Installation of divider beams and screens/barricades on floors above crash decks to be completed before next jump | SM, ASM | Installation of divider beams may not be possible unless the use of a swing stage due to clearance restrictions | |
| 5.2 | Elevator cab parked at top floor when not in use. | SM, ASM |
12.1.8 Mechanical Penthouse & Commissioning
| Item # | Title | File / Form / Template Location | Responsible Party | Notes |
|---|---|---|---|---|
| 1.1 | Schedule, Logistics, Equipment Procurement & Delivery Review | Save to: Procore Documents > 04 Schedules > 01 Project (Master) | Scheduling Manager, CM, PM, SM | Include Trades in Review Meeting |
| 1.2 | Mechanical Penthouse Schedule Detailing | |||
| 2.1 | Detailed System Planning (By Trade) & Associated Schedule Detailing, including Detailed M&E Production Tracking By Floor | |||
| 2.2 | Establish Mechanical Testing Schedule Relative to Occupancy | |||
| 2.3 | Fan Coil Unit Commissioning Traunches | |||
| 2.4 | CACF Room Early Turnover | |||
| 2.5 | Commissioning & Training Plan Final Review | |||
| 2.6 | Ensure Owner schedules TSSA Inspections (Boiler, Generator, etc.) | Owner | TSSA is becoming more strict about process. OWNER must schedule TSSA inspections for items such as boilers. TSSA Certificate of inspection is required for commissioning, but has to be organized specifically by Owner. Other TSSA inspections are organized and completed by trade. | |
| 2.7 | Acoustical Floor Review for Each Mechanical Room |
12.1.9 Finishes
| Item # | Title | File / Form / Template Location | Responsible Party | Notes |
|---|---|---|---|---|
| 1.1 | Schedule Recalibration & Logistics Review | Save to: Procore Documents > 04 Schedules > 01 Project (Master) | Scheduling Manager, SM, PM, CM | |
| 2.1 | Basement / Lobby / Amenities Schedule Detailing and Review | Scheduling Manager, SM, PM, CM | ||
| 2.2 | QR Codes for Locations | ASM, Site Admin, Project Controls | ||
| 2.3 | Deficiencies Tracking Training and Template Setup | SM, ASM, APM, Project Controls | See Procore Tool Configuration | |
| 2.4 | Trade Site Office Relocation & Temp Facilities Planning | SM, ASM | ||
| 2.5 | Assign Responsibility for Material Acceptance Tracking and Signoff - Hardware & Appliances | Site Admin | ||
| 2.6 | Wall Layouts Confirmed - Lobbies & Amenities | FS | ||
| 2.7 | Wall Layouts Confirmed - Typical Floors | FS | ||
| 2.8 | Wall Layouts Confirmed - Penthouses | FS | ||
| 2.9 | Colour Charts / Finish Selections / Blacklines / Upgrade Lists - Confirmed (post in suites once received) | Owner (via PM / APM) | FS to post in suites | |
| 2.10 | Access Panel Coordination | SM, ASM | ||
| 2.11 | Access door for suite metering | SM, ASM | ||
| 2.12 | Above ceiling / Bulkhead M/E Coordination | SM, ASM, FS | ||
| 2.13 | In Wall M&E Coordination | SM, ASM, FS | ||
| 2.14 | Consultant Reviews - B19, M&E (Pre-Board) | SM, PM | ||
| 2.15 | Assign Responsibility for Pre Board Checklists - Suites, Corridors, Exterior | ASM, FS | Complete 1 of each type per floor | |
| 2.16 | Kitchen & Vanity Layout Approval | FS | ||
| 2.17 | Assign Responsibility for Hardwood Q/A Inspections | Procore Inspections > Hardwood Flooring QA/QC Inspection | FS | Complete 1 per floor |
| 2.18 | Finish Protection Planning (and contract if applicable) | PM, FS | ||
| 2.19 | Suite Lockout / Keyrunner (and contract if applicable) | PM, FS | ||
| 2.20 | Water Mitigation Plan | PM, SM, APM | Complete before commissioning | |
| 2.21 | Elevators to be parked on top floor at end of day From Start of Cab Assembly through Commissioning |
SM | ||
| 2.23 | PPDI Coordination Meeting (Internal Deficiencies & Customer Care Meeting / Coordination) 12 weeks before first suite turnover |
SM, ASM, FS, PDI Manager | Review deficiency types | |
| 3.1 | Suite Mockup Schedule & Procurement | |||
| 3.2 | Suite Mockup Review & Signoff | Procore Inspections > Suite Mockups | See 12.2.4 Suite Mockup & Corridor Mockup Checklists | |
| 3.3 | Corridor Mockup Schedule & Procurement | |||
| 3.4 | Corridor Mockup Review & Signoff | Procore Inspections > Corridor Mockups | See 12.2.4 Suite Mockup & Corridor Mockup Checklists | |
| 4.1 | Lobbies | |||
| 4.2 | Amenities | |||
| 4.3 | Pool Loading and Testing | SM | ||
| 5.1 | Request Trade Closeout Documentation & Release Holdback (where applicable) | Holdback Tracking Log Save holdback forms to: Procore Documents > 14 Close Out > Holdback > [Contract #] - [Trade] |
APM | See 14.3 Contract Close Out for details on Close Out Document Administration |
12.1.10 Occupancy & Closeout
When completing this checklist, work backwards from scheduled First Occupancy date.
| Item # | Title | File / Form / Template Location | Responsibility | When / Notes |
|---|---|---|---|---|
| 1.1 | Occupancy Checklist Team Review Meeting | THR Occupancy Checklist | APM | |
| 1.2 | Establish Occupancy Schedule 2 Months Prior to Top Off |
Suite Turnover Checklist / Tracking | CM, Scheduling Manager, PM, SM | 4 Occupancies Per Day Include occupancy milestones (Pre-PDI-PDI, etc) per occupancy group Done in conjunction with Owner, Architect and Consultants, Trades Dates to be circulated to the Owner for notices to be issued to the Purchasers to notify them of their tentative occupancy date. 2 hard copies must be printed |
| 1.3 | Develop Commissioning and Maintenance Training Plan & Schedule Training Should Take Place 1+ Month before First Occupancy |
PM, APM, SM | ||
| 1.4 | Coordinate Trade and Resident Logistics and Construction Access Plan | PM, APM, SM, CM | ||
| 1.5 | Confirm Proposed Occupancy Inspection & Occupancy Dates with Consultants and Owner | PM, SM | ||
| 1.6 | Obtain Trades' Occupancy Documentation 2+ Weeks Before Distribution to Consultants |
See Occupancy Checklist from Item 12.1.9.1.1 | APM, PC | THR Occupancy Checklist is to be used as a guideline and to assist with tracking missing or submitted documentation. Due dates should also be populated ahead of time based on the construction schedule and all Trades to be notified on when such documentation must be submitted to the Project Manager for review. |
| 1.7 | Distribute Trades Occupancy Documentation to Consultants & Schedule Walkthroughs for Final Reports 2+ Weeks Before Consultant Walkthroughs |
APM, PC | Walkthrough to be scheduled by THR. See schedule for dates final reports are needed by. | |
| 1.8 | Consultant Walkthroughs & Deficiency Reports (Using Procore Deficiencies) 2+ Weeks Before Consultant Sign Off Letters |
Have them add occupancy related deficiencies to Procore in real time for easy distribution to trades | ||
| 1.9 | Consultant Deficiency Corrections By Trades 2+ Weeks Before Consultant Sign Off Letters |
FS, SM, ASM, APM | Coordinate completion of all Consultants deficiency items | |
| 1.10 | Authority to Occupy (AO) Application for First Occupancy - 4 Weeks Before Desired First Occupancy Date | AO Application Form (City of Toronto) Can also be downloaded or obtained from the City having jurisdiction. Code / Life Safety deficiency items must be completed before submitting AO Form, or specific suites to be excluded from occupancy areas. |
PM | Must include the proposed areas, floors and suites to be occupied as phased and agreed upon. The notation must match the permit set of drawings and the fire safety plan Once form is completed by THR, make arrangements with owner for submission and payment. Once submitted and paid, the City will issue an AO Number. THR to provide a copy of the approved AO Application to Architect / Consultants / relevant Trades in preparation for their occupancy documentation and final sign-off letters. |
| 1.11 | Receive Consultant Sign Off Letters - Structural, Architectural, Mechanical, Electrical, Geotech, Survey, etc. 1+ Weeks Before Submitting Consultant and Trade Occupancy Documentation |
Consultant Sign-off Letter | APM, PC | Sign-off Letters must be addressed to the Chief Building Official (CBO) of the City having Jurisdiction and must include the relevant Permit Numbers, AO Number and the areas to be occupied as shown in the AO application. The letter should also reference the project name and address. If there are non-critical areas that are not ready at time of Occupancy Inspection, the sign-off letters can exclude such areas. The Project Manager to ensure the excluded areas are added in the following AO Application for the next phased occupancy. Refer to previously prepared Occupancy Checklist for details |
| 1.12 | Submit Consultant and Trade Occupancy Documentation to City Inspectors 1+ Weeks Before Submitting AO Application |
City of Toronto Occupancy Checklist | PM | Coordinate with Inspectors if adjustments need to be made |
| 1.13 | Perform Tucker HiRise Occupancy Inspection Readiness Check & Schedule Building Inspection 1+ Weeks before Building Inspection |
SM, ASM, PM | Ensure all areas to be occupied are ready for inspections and all testing and verifications have been completed by the Trades. | |
| 1.14 | Ensure Trade has Scheduled Plumbing Inspection 2+ Weeks before First Occupancy Date |
PM | Obtain Deficiency List if Applicable | |
| 1.15 | Ensure Trade has Scheduled HVAC Inspection 2+ Weeks before First Occupancy Date |
PM | Obtain Deficiency List if Applicable | |
| 1.16 | Ensure Trade has Scheduled Electrical Inspection 2+ Weeks before First Occupancy Date |
PM | Obtain Deficiency List if Applicable | |
| 1.17 | Complete Building Inspection and Obtain Verbal Sign Off 2+ Weeks before First Occupancy Date. Allow 2+ Days for First Occupancy |
PM | If Building Inspector is satisfied following the inspection and testing and both HVAC and Plumbing Inspectors have signed-off on the AO Number, see Step #14. If Building Inspector is not satisfied following the inspection and testing and/or if HVAC and Plumbing Inspectors have not signed-off on the AO Number, Site Manager and Project Manager is to coordinate Trades to rectify all noted deficiencies for re-inspection For site review, inspections and testing as necessary to grant the occupancy permit. Ensure relevant Trades are present to facilitate the required testing (ie. Elevator, Plumbing, HVAC, Electrical, Sprinkler, CACF Panel Operator). |
|
| 1.18 | Pay Outstanding Fees | PM | If there are outstanding inspection fees to be paid, arrange with Owner to make outstanding payment immediately as City will not release the Occupancy Permit until all outstanding fees under the AO Number have been paid. Allow for 1-2 days following final payment for issuance of the Occupancy Permit. | |
| 1.19 | Receive 1st Occupancy Permit | Occupancy Permit Sample | PM | |
| 1.20 | Authority to Occupy (AO) Application for Subsequent Occupancies 2 Weeks Before Each Desired Subsequent Occupancy Occupancy Date |
AO Application Form (City of Toronto) Can also be downloaded or obtained from the City having jurisdiction. Code / Life Safety deficiency items must be completed before submitting AO Form, or specific suites to be excluded from occupancy areas. |
PM | Must include the proposed areas, floors and suites to be occupied as phased and agreed upon. The notation must match the permit set of drawings and the fire safety plan Once form is completed by THR, make arrangements with owner for submission and payment. Once submitted and paid, the City will issue an AO Number. THR to provide a copy of the approved AO Application to Architect / Consultants / relevant Trades in preparation for their occupancy documentation and final sign-off letters. |
| 1.21 | Receive Consultant Sign Off Letters - Structural, Architectural, Mechanical, Electrical, Geotech, Survey, etc. 1+ Weeks Before Submitting Consultant and Trade Occupancy Documentation |
Consultant Sign-off Letter | APM, PC | Sign-off Letters must be addressed to the Chief Building Official (CBO) of the City having Jurisdiction and must include the relevant Permit Numbers, AO Number and the areas to be occupied as shown in the AO application. The letter should also reference the project name and address. If there are non-critical areas that are not ready at time of Occupancy Inspection, the sign-off letters can exclude such areas. The Project Manager to ensure the excluded areas are added in the following AO Application for the next phased occupancy. Refer to previously prepared Occupancy Checklist for details |
| 1.22 | Receive Subsequent Occupancy Permits | Occupancy Permit Sample | PM | |
| 1.23 | Certificate of Final Completion | PM, APM | ||
| 1.24 | Closeout Trade Contracts | Holdback Tracking Log Save to: Procore Documents > 14 Close Out > Holdback > [Contract #] - [Trade] |
APM, PC | |
| 1.25 | Release Holdback | Holdback Release Approval Form |
PM, Accounting | See 14.5 Holdback Release for details in addition to owner requirements |
| 1.26 | Send Trade Closeout Package to Owner | APM | Via Procore Documents |
12.2 ProCheck: Inspections
As part of the ProCheck program, the Systems & Controls Manager is responsible for completing the Project Health Inspection on Procore once a month per project. The Systems & Controls Manager works with the Project Team to review each item on the inspection, marking it as a pass or fail. At the end of the inspection, the project team receives a copy of the completed inspection, with a list of failed items, which are converted to ProCheck Observations in Procore. The Project Manager is then responsible for assigning each failed item to one of their team members to resolve accordingly.
At the end of the month, a summary of the inspection, along with a list of open failed items, is sent to the Project Team, Construction Manager, and Tucker executives. This ensures that all stakeholders are kept informed of any issues and that corrective actions are taken promptly to address any identified problems.
A sample copy of the inspection and the workflow can be found below:

12.3 QA / QC Checklists & Insepctions
Tucker's QA / QC utilized a number of tools to ensure all items are checked at the appropriate times. Similar to the Constructions Operations Checklists from section 12.1, we use the Action Plans tool in Procore to assign responsibility for each item.
As with all our action plans, the main goal of the QA / QC Action Plan is to facilitate a conversation within the project team about who is responsible for that item and how it’s being tracked. The QA/QC Action Plan contains items from concrete pours all the way through finishing so it should be reviewed and updated as a team any time project staffing changes or responsibility needs to be re-assigned.
| Item # | Title | File / Form / Template Location | Responsibility | When / Notes |
|---|---|---|---|---|
| Concrete | ||||
| 1.1 | Pre-Pour Checklist | Procore Forms | The concrete pre-pour checklist must be completed and signed off by appropriate parties prior to every slab or vertical pour. | |
| 1.2 | Mix Design Confirmation | |||
| 1.3 | Mix Tolerances Confirmation | |||
| Shop Visits | ||||
| 2.1 | Windows | Colour Approval and Production | ||
| 2.2 | Metal Panels | Colour Approval and Production | ||
| 2.3 | Precast | Colour Approval and Production | ||
| Work Acceptance | ||||
| 3.1 | Exterior Façade & Window Readiness | Procore Inspection | ||
| 3.2 | Floor Leveling | Procore Inspection | ||
| 3.3 | Pre-Board Checklists | Procore Inspection | Pre-board checklists for Demising & Corridor Walls, Interior Walls & Ceilings, and Exterior Walls. One of each inspection is to be completed for each floor of your building (or buildings) prior to boarding or closing walls. | |
| 3.4 | Hardwood Flooring | Procore Inspection | Tucker projects often end up with as much as $300,000 in floor repairs following installation. Completed inspections per suite can drastically reduce these costs, as can well installed floor protection. One inspection is to be completed per suite prior to floor protection | |
| Mockups | ||||
| 4.1 | Suite Mockups | Procore Inspection | See 12.2.1 | |
| 4.2 | Corridor Mockups | Procore Inspection | See 12.2.1 | |
| 4.3 | Amenity Mockups | |||
| 4.4 | Exterior / Facade Mockups | |||
| Material Delivery & Acceptance | ||||
| 5.1 | Appliances | Appliances Tracking Log Save to: Procore Documents > 12 Quality - Site Administration |
Site Admin | |
| 5.2 | Hardware | Hardware Tracking Log Save to: Procore Documents > 12 Quality - Site Administration |
Site Admin | |
| Finish Protection | ||||
| 6.1 | Flooring Protection | |||
| 6.2 | Appliance Protection | |||
| Suite Entry Surround Protection | ||||
| Fixture Protection | ||||
| Leak Mitigation | ||||
| 7.1 | Roofing - Leak Detection & Flood Test | |||
| PPDI & Suite Turnover | ||||
| 8.1 | Coming Soon! | |||
Incorporating lessons learned from past projects, two new checklists have been developed for Suite and Corridor mockups (previews attached). These checklists can be found within Procore’s Inspections tool and include a complete list of items which should be considered or coordinated for smooth and successful delivery of mockups.
Here’s how to use these templates:
- Prior to the start of mockups, the designated team member will open one new inspection per mockup (one per suite type, one per corridor type if multiple exist)
- Project team reviews items included in the checklist
- Each time an item is completed, check that item off in the inspection (note that the inspection is intended to stay open for the duration of the mockup process and is not a one time check at the end).
- Once all items are completed and the mockup is accepted by the owner, the inspection can be closed.
12.4 Construction Best Practices
12.4.1 Surveying
Standard Surveying Scope for THR Projects
- Establish jobsite targets including property lines/elevations (so they can be found later and established if needed).
- Survey as built conditions as required by site: duct banks, gas, comms, existing footings) and elevations per forming contractors request.
- Provide Survey/locate on all shoring piles. Line targets or offsets to be established on every pile as well as batter boards as per site staff request.
- Parking Garage (Check at bottom and then every 3 floors going up)
- Provide 4 gridlines in the parking garage (2 in each direction)
- Check elevation of top of slab in each elevator lobby
- Survey of each elevator shaft’s inside corners (first footing, as-built of elevator pit)
- Provide 2 benchmark elevations visible from elevator lobby
- Survey 2 columns and 2 shear walls at random or as per Site Managers request
- Review drive aisle widths to ensure 6m is maintained
- Ground Floor
- Survey the as-built corners of the building, CoT requirement: Ground Floor Certification Letter (normally part of the building locations survey. To be flagged and reviewed for CoT handover.)
- Provide 4 gridlines (2 in each direction)
- Check elevation of top of slab in each elevator lobby and also 8-12 other locations over the project’s floorplate
- Survey of each elevator shaft’s inside corners
- Provide 2 benchmark elevations, visible from elevator lobby
- Hoist Pad layout – Provide gridlines on-top of the hoist pad after it has been poured.
- 2nd Floor and Above (Check at 2nd floor and then every 3 floors going up)
- Provide 4 gridlines (2 in each direction)
- Check elevation of top of slab in each elevator lobby, at 2 points inside the suites close to the slab edge and at 4 points on the balconies to check for deflection
- Survey of each elevator shaft’s inside corners
- Provide a benchmark elevation, visible from elevator lobby
- Spot check widths of concrete shear walls from suite-to-suite
- At the top floor: provide gridlines for curbs, amenities and landscaping
- Slab deflection check (optional) – at 1st typical floor. Design modifications may be required depending on the results of the initial test. Testing to be repeated immediately, until the desired results are achieved.
- Survey elevations of deck prior to concrete pour
- Survey elevations of top of slab next day following slab pour
- Survey elevations of top of slab following removal of reshoring
- Establish gridlines for precast/window (and sometimes: railing subtrade, depending on complexity)
12.4.2 Windows
If we are doing customer cleanup, make use of Sylvonna and her team. Have them do a walk and a preliminary inspection of windows/railings/balconies(pre pre-pdi) instead of the finishing superintendent. Get this information entered into the deficiency management system (Procore, Newstar, Bridgit etc. dependent on the project). This is to be completed well in advance of the suit finishing trades entering the areas (damaging things). This was done at Massey and Monde and it brings pre-pdi numbers down ahead of time.
- If we are NOT doing customer care, it is up to the finishing superintendent to track all window deficiencies in Procore, Newstar, Bridgit etc.
- nside and outside inspections to be completed, complete inspection/list of all damages and scratches prior to pre-pdi.
- Do the pre pre-pdi it as early as possible (even if the work is partially completed, it is good to start), start on windows but also if we have waterproofing on floors or stucco soffits this should be reviewed.
- In addition to this, the site team is to review the windows as they are being installed(on a floor by floor basis) and input deficiencies into the deficiency management system, holdback 10% of the progress payment for each floor - bill the next 10% once the deficiencies are rectified.
12.4.3 Waterproofing
Anytime any work in damp areas is ongoing (below grade foundation, traffic topping, balconies, soffits), always get tests done as work progresses by both the manufacturer (should come in the form of a sign off letter) and consultants. It is recommended that the manufacturer is present during the B19 consultant walks, to ensure that both parties have reviewed approved the installation.
Proper pinch pockets required, detail required, and inception needed. The biggest challenge is installing them correctly so this needs to be closely reviewed on site in the early stages.
12.4.4 Bathtubbing (Bathtub WaterproofinG)
Optimize Shoring Design
- Avoid the use of internal whalers, these are difficult to waterproof around and require specific details, sequencing and installation of the waterproofing.
- Use a wall grinder attachment instead of a claw to grind the caisson wall to ensure there is a flat surface for the waterproofing to adhere to.
- Identify surface prep locations to ensure everyone is aware as to how their work impacts the trades that follow.
Raft Slab Coordination
- Simplify the construction of the raft slab – aim to reduce or eliminate the number of steps in the slab. Even though removing the steps in the slab will increase the volume of concrete required, this will actually save time and money because these steps are very difficult to waterproof properly and the process is time consuming.
- Investigate use of pre-tied rebar, having some of the cages already fabricated will save time from the critical path.
- Use a high slag mixture for increased strength, reduced permeability, and to inhibit rebar corrosion. For Mass concrete applications there needs to be limitations on the temperature differential between the surface and center of the concrete to guard against thermal cracking. Slag cement reduces the rate of heat rise in proportion to its quantity in a mixture.
Waterproofing Review
- Review capping details including rebar. Any areas where there are protruding elements (tiebacks, rebar, existing conditions) will need a specific detail capping detail.
- Complete in-situ mockups and first installation reviews with both the manufacturer and consultants there to review and sign off on the installations.
- Review if second elevator pit is also to be bathtub waterproofed. If it does, review the impact this has on the elevator pit width, length and depth due to the waterproofing build up.
Dewatering
If possible, us an eductor dewatering system. The system works by circulating high pressure water (from a tank and supply pumps at ground level) down the well to a small-diameter nozzle, generating a vaccum effect. This vacuum draws groundwater into the well from where it is piped back to ground level via a return riser pipe and then through the reservoir tank back to the supply pump for recirculation.
The next best option is using a well point system. In appropriate ground conditions a wellpoint system can be installed quickly. A wellpoint system consists of a series of small diameters wells (known as wellpoints) connected via a header pipe, to the suction side of a pump. The pump creates a vacuum in the header pipe, drawing water up out of the ground. Wellpoints are typically installed in lines or rings around the excavation, and are pumped by diesel or electrically powered pumps, with associated header mains, water discharge pipes, power supply generators, electrical controls and monitoring systems.
13.0 Client Services
Description:
Construction Quality Assurance is a proactive measure used to anticipate and eliminate challenges or potential delays while delivering a defect-free home. Dedicated to the needs of our clients, the Client Services Department strives to provide a level consistent with the workmanship and quality standards designed to, at minimum, meet and exceed Tarion’s Customer Service Standard (CSS). The link below allows you to download an up-to-date copy of Tarion’s Construction Performance Guidelines: https://www.tarion.com/resources/construction-performance-guidelines
Purpose:
To achieve a standard of performance by maintaining a positive professional demeanour with all internal and external customers, we are able to ensure that all concerns are managed through the appropriate setting of expectations and reasonable actions for resolution.
Allocation of Tasks
Pre-PDI:
Pre-Pdi inspection involves a thorough review of all standard and upgrade selections for completeness and accuracy. Areas include walls, ceiling finish, cabinetry, windows, balcony and railing finish, etc. Please refer to the step-by-step process (an appendix to this section) on the roles and responsibilities involved during the Pre-Pdi and Pdi stages of construction.
The QA Coordinator will begin their inspection at least one week prior to the homeowner orientation (Pdi). This involves the reverification of all Pre-Pdi deficiencies previously outlined. Any newly identified items are to be entered into the Software and remedied by Construction. The QA Coordinator will then return and re-evaluate the suite 24-48 hours prior to the scheduled Pdi to ensure the unit is clean and deficiency free.
One week prior to interim suite closing, the (2nd) QA Coordinator reinspects suites to ensure completion of all trade and handyman related items identified at the Pdi. Once complete, a walkthrough is arranged with the client representative for signoff.
Technical Audit
In efforts of mitigating the number of items reported on the Performance Audit, a Pre-Audit list is created between the Client, Property Management and Construction at the time of turnover. Trades are then scheduled to complete said deficiencies under Constructions’ supervision. All areas will be re-walked and a formal sign-off of acceptance is to be obtained once completed.
At the one-year anniversary of the Building Registration, the Performance Audit is then submitted. This is when the Technical Audit Coordinator will begin scheduling consultants, trades and site staff for completion of all warrantable audit items. Daily updates are to be made on the Performance Audit Tracking Report to track progress and completion of work. The Technical Audit Coordinator will also assist in walkthroughs to elicit signoff of all completed Performance Audit items with the Condo Board Representative (Property Manager / Consultants).
All Audit items are to be complete prior to their respective due dates as outlined by Tarion’s Common Element Claims Process, included as an appendix to this section.
Critical Meetings
We continuously strive to align the project team in achieving project objectives, articulating clearly achievable goals and realizing efficient and economical solutions. Bi-weekly site meetings are to be held between Construction, Project Management and the Client Service Department. These meetings will be strategically scheduled to off-set trade meetings. Senior team members will also attend, become active participants and provide consultation services as needed.
Attachment:
14.0 Closeout & Occupancy
Please reference Operations Checklist 12.1.11 Occupancy & Closeout for a breakdown of all steps in the closeout process, including templates and timelines.
Permit closeout is to be coordinated through the building inspector of the city having jurisdiction. The inspector will typically request all occupancy related documentation as well as signoffs from the respected field of inspectors (Plumbing, ESA, TSSA, Landscape, Building). The PM/PC shall communicate with the building inspector when the work is competed, some permits will require occupancy to be obtained, however many permits can be closed during the course of construction (ex. Underground Drainage can often be closed shortly after the foundation slab has been poured). The permit must be closed when work is competed. Foundation, underground drains, and shoring permits must be closed when all underground work and foundation work is complete and not when occupancy is obtained. The balance of permits to be closed out upon the completion of reviews by the inspectors and issuance of signoffs from trades and consultants.
The following are the list of permits that needs to be closed:
- Shoring
- Excavation
- Demolition
- Underground drains
- Foundation and below grade structural
- Building permit
- Any conditional above grade permit
- Plumbing
- HVAC
- Electrical
- Streetscape
- Any other special permits issued for the project
14.2 Occupancy
The occupancy permit is a document issued by a local building department certifying a building or part of the building is in compliance with applicable building codes and other laws and indicating it to be in a condition suitable for occupancy. The general workflow to obtain occupancy can be found in Operations Checklist 12.1.11 Occupancy & Closeout
14.3 Contract Closeout
The closeout process includes the process of holdback release, completion of all scope items, finalization of change orders and back charges, deficiency remediation, final payment to the trade contractor/supplier, and obtaining all the required closeout documentation to the satisfaction of the owner once approved by the EOR consultants.
When the trade is substantially completed (not when the project is substantially complete), request that the trade submit Form 9 for the owner’s signature. Note that for early trades such as underground drainage, the contract should be closed out shortly after that trade is complete. The project does not need to be close to ending to request these documents from trades. Refer to your project schedule for when you can request trade closeout documents. The PM should review and confirm that the trade is substantially completed. The Project Manger to fill out THR hold back release checklist. The checklist must be signed and approved by a THR VP and CM.
When the checklist is approved, the Project Manager can send the Form 9 to the owner. When the owner signs the form, the PM/PC to log in the date on the attached project closeout tracker. The trade contractor will then publish the form and the submit the required Form 5 and hold back release invoice for payment. The payment will be due within 45 days from the date the trade contractor was substantially completed as shown on Form 5 and accepted by the owner.
THR, the owner, and the trade contractor shall finalize any pending scope or change orders prior to the release of holdback. The trade contractor can only submit the final payment when the scope of work is 100% complete, and the deficiencies noted in all consultant reports that pertain to the trade are rectified.
When final payment is made and accepted and the hold back release is completed, the contract is considered closed.
The Project Coordinator (PC) and the Project Manager (PM) are to review the contract documents and facilitate collection of all closeout documents within the required timeline. There may be some cases where the specifications call for a more extensive warranty than the standard Tarion requirements. In this scenario, the specifications take precedence, so these extended warranties need to be tracked and properly identified in the warranty letter from the trade contractor.
The PM/PC to collect the documents as listed immediately when the trade scope is substantially completed. PM/PC to ensure that closeout documentation complies with the contract requirements and the supplementary conditions which is part of the trade contractor’s CCDC 17 contract. If a closeout document does not comply with the requirements of the contract. The PM/PC to require a revision and resubmission of the document.
Example: Warranties to start from the date the condominium is registered instead of substantial completion or as-built drawings in AutoCAD format instead of red marked drawings. Any comments from the consultants on the as-built drawings to be returned to the trade contractor for revision and resubmission.
Final payment shall not become due until all required documents such as guarantees, warrantees, maintenance manuals and as-built/record drawings have been delivered and acceptable to the owner.
PM/PC to transmit the closeout documents to the Owner for their record and use as necessary. Those documents to be transmitted by the owner to the condominium 30 days after the initial turnover meeting.
Collecting Trade Closeout Documents
- Project Manager / APM / PC must fill out the first tab of Closeout Documents - Submittal Import Template with all contracts for which closeout documents are required, and email the completed spreadsheet to procore@tuckerhirise.com. Note that Contract Number, Contract Company, Contract Title, Spec Section, and Spec Section Name must be an EXACT MATCH to those found in Procore.
- Project Controls Department will generate submittals and submittal packages in Draft status using the completed template from Step 1.
Note for Project Controls: in the Do Not Touch tab, Copy all data and paste as hard values, then Delete the other tabs before uploading via Procore Imports - To view Closeout Document packages, go to Submittals and then to the Packages tab, select Add Filter > Type > Closeout Documents.
- If you used the Submittal Builder to generate submittals at the beginning of the project, some submittals may have been generated for closeout documents that were specifically required in the project Specifications. Review any existing draft submittals that were created from specifications for O&M Manuals, Warranties, etc, update their Type to Closeout Documents, and move those into the closeout package for the associated company.
- Once draft submittals have been added to all packages From the Packages view, check the box next to the package you’d like to initiate closeout for, then select Bulk Actions > Apply Workflow. Do not change the status or send submittals to the trades at this time.

- Select the trade contact, set them as Submitter, and select a due date, then hit Apply
- Now that general templates have been set up, review and refine the documents being requested from each trade. Go into the Package and delete any individual submittals for documents not required in that trade’s closeout. If any additional workflow steps are needed for an individual item (such as Consultant review of As-Builts), update that workflow accordingly. Also, if you want to upload any documents or forms for trade use do so in this step.
- Send the package to the trade to request their closeout documents.
- Call trades individually to follow up. Procore will send automated emails after the due date.

11. Once you have collected and completed the closeout packages, contact your Project Controls Coordinator for assistance with the export process. Submittal documents will be exported via the Procore Exports app and uploaded to the Closeout folder of Procore Documents for distribution to owners.
12. If you are having trouble obtaining a specific document from a trade, mark the submittal as "Critical". This will notify your CM so they can assist further.
If for some reason, the process above will not work for your project, it is possible to manage Contract Closeout using Procore Documents instead of Submittals.
14.4 Deficiencies
Important
ALL DEFICIENCIES, PUNCHLIST ITEMS, ETC. ARE TO BE CREATED VIA THE PROCORE MOBILE APP.
CLICK HERE FOR DEFICEINCIES TUTORIAL (includes Mobile & Web)
The fastest way to create multiple deficiencies for the same location such as a specific suite, is to use the Locations Tool on the Mobile App, Scan a QR Code or Select a Location, then create a deficiency. Once the deficiency has been created, you'll be taken back to the same location and can create another deficiency for that location.
In this section the word deficiency will mean defective, failed to meet the standard/intended use, the requirement of the contract, Tarion guidelines, or incomplete trade’s scope of work. Deficiencies can become a large issue later in the project if they are not fixed in a timely manor. This issue becomes especially prevalent when contractors are asked to come back to site to fix work they have already been paid to complete. Therefore, it is important to holdback %5-10 (dependant on trade and scope of work, %10 should always be held for windows) from each progress payment as a “deficiency holdback”. This holdback amount will be released upon correction of all deficiencies on that level, ideally on the next progress billing. Also - hoist unit windows not billed for until the end so this will also naturally withhold a small portion of the contract value on each floor.
Deficiencies can be identified by any or all of the following:
- Owners
- Architect
- All consultants
- Project Manger
- Building envelope consultant
- B-19 consultants
- Building inspectors
- Customer services in their Pre PDI’s inspections
- Purchasers at PDIs
- Any third-party inspections
Common area deficiencies to be identified by the THR, the owner, and/or the property management company. Balcony inspection to be performed at time of Pre-PDI’s and PDI’s even though they are considered public area common elements.
14.5 Holdback Release
Please use the Holdback Release Approval Form In conjunction with workflow and written steps below:
Release of Basic Holdback Process
- Trade Contractor provides an executed Form 9 to the PM who forwards it to the Owner/Owner Rep (the “Owner”) for review
- Owner reviews Form 9 to ensure accuracy and completeness. If accurate and complete, Owner executes
- Owner forwards executed Form 9 to PM who sends to Contractor.
- Trade Contractor submits dually executed Form 9 to the DCN for publication
- Trade Contractor Publishes to the DCN (this triggers 60 day period for Trade Contractor to lien property)
- Trade Contract obtains a certificate of publication from DCN
- Trade Contractor provides the following to site inbox for PM/Owner approval:
- Reconciliation of amounts detailing all amounts paid to date and the holdback amount for release
- Current WSIB certificate
- Current Commercial GL Insurance certificate
- Dually Executed Form 9 (Certificate of Substantial Performance of Contract)
- Proof of Certificate of Publication
- CCDC 9A Statutory Declaration for release of holdback
- IF AN INVOICE IS PROVIDED AT THIS STAGE FROM A CONTRACTOR, PM ISSUES NOTICE OF NON-PAYMENT FORM 1.1 – WITH REASON: LIEN PERIOD HAS NOT EXPIRED PURSUANT TO THE CONSTRUCTION ACT, R.S.O. 1990, c.30
- If Trade Contractor has not provided an invoice, they will need to provide an accurate invoice for release of holdback amount
- On day 61 or beyond, Owner checks Title to ensure it is clear and no lien(s)
- Owner creates reconciliation of payments to Trade Contractor (as indicated in New Star) showing all payments made to Trade Contractor during course of contract and it reconciles with Trade Contractor’s reconciliation, then, if all reconciliation is approved and a proper invoice is received,
- PM forwards approved complete application for release of holdback - including approved Tucker HB form - to GG’s AP for processing and payment
Tucker-specific Holdback Process for “Deemed Completion”/ Final payment pursuant to contract
- Trade Contractor provides an executed Form 7 to the PM who forwards it to the Owner for review
- Owner & PM review Form 7 to ensure accuracy and completeness
- Trade Contractor provides the following to site inbox for PM/Owner approval:
- Reconciliation of amounts detailing all amounts paid to date and the holdback amount for release
- Current WSIB certificate
- Current Commercial GL Insurance certificate
- CCDC 9A Statutory Declaration for release of holdback
- IF AN INVOICE IS PROVIDED AT THIS STAGE FROM A CONTRACTOR, PM ISSUES NOTICE OF NON-PAYMENT FORM 1.1 – WITH REASON: LIEN PERIOD HAS NOT EXPIRED PURSUANT TO THE CONSTRUCTION ACT, R.S.O. 1990, c.30
- If Trade Contractor has not provided an invoice, an Invoice will be required at this time from the Trade Contractor for release of holdback amount
- Owner checks Title to ensure it is clear and no lien(s) on day 61
- Owner creates reconciliation of payments to Trade Contractor showing all payments made to Trade Contractor during course of contract and it reconciles with Trade Contractor’s reconciliation, then, if all reconciliation is approved and a proper invoice is received,
- PM forwards approved complete application for release of holdback - including approved Tucker HB form - to AP for processing and payment
16.0 Roles and Responsibilities
16.1 Department Descriptions
16.1.1 Construction Operations
The Construction Operations Team consists of Vice Presidents of Construction Operations, Project Executives, and Construction Managers. All Project Teams report up to this group as they oversee progress on site and are accountable to Tucker Executive Leadership Team.
The Construction Operations Team manages Project Review Meetings with their Site and Project Management Teams and leads contact and relationship management with Clients.
16.1.2 Health and Safety
Tucker HiRise Construction Inc is committed to continual improvements within our management system to enhance the safety, quality, and efficiency of each construction project.
The objective of the Health and Safety Department is to provide the procedures and standards necessary to reduce the potential for incidents, accidents, and all loss-causing situations which may occur during the construction of our projects. These procedures will not hinder or restrict our operations but rather will increase our quality and efficiency through the control of loss and assurance of due diligence.
The department is also responsible to ensure our projects are in accordance with relevant Workplace Safety Laws in the construction sector and Ontario Construction Health and Safety Program.
16.1.3 Systems & Controls
The Systems and Controls Department functions largely to support the processes, execution, consistency, and efficiency of all Tucker Staff. The Department defines processes designed to provide reasonable assurance of the achievement of objectives in the following categories:
- Effectiveness and Efficiency of Operations
- Reliability of Reporting
- Compliance with Operational Procedures
The following 5 components work to support the achievement of Tucker’s mission, strategies, andbusiness objectives:
- Control Environments
- The platforms, software, and hardware used by Tucker staff to complete their work, such as Procore, Prolog, MS Office, and other tools across departments
- Risk Assessment
- Identifying potential risk in Company-wide objectives and processes when Control Environments are engaged
- Managing Change through effective Implementation Management and rollout
- Control Activities
- Policies and Procedure Identification
- Ensuring business continuity across departments and projects
- Employee Engagement (workshops, training, 1 on 1’s)
- Information and Communication
- Quality Control
- Managing Effectiveness
- Monitoring
- Ongoing Monitoring of company practice
- Evaluations
- Reporting / Visualization of Company Performance
These components work to establish the foundation for sound internal control within the company through directed leadership, shared values, and a culture that emphasizes accountability for control. The various risks facing the company are identified and assessed routinely at all levels and within all functions in the organization. Control activities and other mechanisms are proactively designed to address and mitigate significant risks. Information critical to identifying risks and meeting business objectives is communicated through established channels up, down and across the company. The entire system of internal control is monitored continuously, and problems are addressed in a timely manner.
1.1.4 TLogic
TLogic serves as Tucker’s Building Information Modelling (BIM) and Virtual Design Construction (VDC) Department. The department is engaged throughout Preconstruction, Estimating, as well as Construction phases of a project and is responsible for:
- Site Planning and Logistics
- Quality Control over provided Designs and Details (Drawings and Models)
- Interference Management and Clash Detection
- upporting Project Management Teams by providing visualization of designs and issues
- upporting Site Management Teams with layout, dimensions, and volumes
- Verifying accuracy of As Built conditions
16.1.5 Pre-Construction Services
The primary Role of Preconstruction is to work in conjunction with project stakeholders to assist them from the initial feasibility study of a potential site all the way through to start of construction. Our team is comprised of Project Managers, Estimators and virtual design and construction coordinators.
General Pre-Construction Scope of Work
Owner and Consultant Agreements and Contracts
- Develop Consultant RFP with owner
- Review Consultant Proposals and provide scope recommendations to owner
- Make recommendations to the owner with regards to selection of consultants
- Attend consultant qualification meetings
Design
- Attend Consultant coordination meetings
- Participate in Detailed Team Review (DTR) meetings with GG
- Provide historical lessons learned and recommendations for incorporation into the DTR
- Review constructability and material selection and provide feedback to owner
- Coordinate and review the data drop process to ensure timely and complete delivery of consultant content at specific milestones
Design-Assist
- Arrange and lead meetings with trade contractors
- Coordinate trade contractor requirements with owner/consultants
- Identify budgetary and design risk areas based on trade contractor requirements
Site Investigations
- Conduct site walk-throughs with consultants, regulatory agencies, and trade contractors, and neighbors with Owner
- Coordinate onsite test pit work, scanning, surveying, etc. on owner’s behalf
- Investigate existing site conditions
- Procure trade contractors/vendors to conduct site investigations and oversee the work
- Provide health and safety recommendations for preconstruction site activities on site and/or with neighboring properties
Applications and Permits
- Assist the owner in procuring permits including temporary road closure, permits to cut, traffic management road occupancies, etc.
- Assist the owner in applications for temporary and permanent utility services, Tarion, insurance, etc.
Entitlements & Agreements
- Work alongside Development manager to assist as required
- Work alongside Development manager to review agreements with adjacent landowners for crane swings and encroachments
Budget
- Provide Owner with criteria for budget classes for specific milestones
- Review all project data
- Develop the various budget classes as requested.
- Provide Owner cost comparisons for budgetary purposes
Tender & Contract
- Develop and manage tender schedules
- Oversee the management of the bid process with trade contractors
- Create and customize bid packages including shoring, excavation, Elevators, windows, formwork, Mechanical, Electrical, HVAC, etc
- Lead qualification meetings
- Provide Letters of Recommendation to the Owner
- Upon award to a trade contractor, create and customize trade contracts
- Manage and oversee the negotiation and execution of trade contracts
Right of Way Permits (ROW)
- PUCC investigations and documentation process
- Coordinate and manage daylighting as required for ROW
- Coordinate and manage daylighting within existing buildings.
- Review Construction Management Plan prepared by the Traffic consultant
Construction Site Logistics Planning and Phasing
- Analyze crane and hoist locations and provide recommendation for locations, quantities, type, etc
- Engage trade contractors and consultants as may be applicable to further the design
- Analyze and provide recommendations on phasing of preconstruction elements including, demolition, retention systems, etc
Construction Schedule Development
- Preliminary Construction schedules
- Set base line Construction Schedule
- Design schedules for activities during pre-construction including design milestone data drops, budgets, etc
Site Services & Utilities
- Coordinate with regulatory agencies and trade contractors the site service relocations/removals to accommodate shoring and structure
- Coordination of Temp Construction services
- Coordination of site furniture including removal and or relocation of poles, overhead wires, fire hydrants, bike ranks, signage, etc
16.1.6 Estimating and Cost Control
Estimating involvement in the project life cycle is from the inception of the project until its completion and turn over to final user. Estimator role is a key component to achieving Tucker’s vision for continual and profitable growth in the future.
The primary role of the department is to provide guidance to various stakeholders within the company to stay within the pre-established financial riverbanks of the project cost.
- During Project Design Stage assisting the development team to establish project financial feasibility studies
- During Pre-Construction Stage providing budgets checks at each stage of document development and assisting in bring the project cost back on track
- During Construction Stage providing strong support to project site team with managing construction cost overruns and bringing it back to budget
General Estimating Scope of Work
- Manage the production of Conceptual, Schematic, DD and GMP estimates for our clients throughout the life cycle of their projects
- Evaluate potential risk factors and review with senior management
- Prepare and analyze cost models (ECERs – Estimating Cost Exercise Records) during the Conceptual and Schematic Design Development stage.
- Develop and maintain conceptual estimating database to support the faster creation of accurate conceptual cost estimates in a timelier manner in order to meet our client’s needs.
- Monitor Design progress for compliance with defined cost, schedule and quality criteria
- Provide budget updates and Project design analysis during pre-construction period.
- Compare, Analyze and Reconcile Anchor Budgets with the Cost Consultants
- Analyze alternate means and methods to determine the most economical alternative
- Identify risk issues and their order of magnitude.
- Prepare and price project general conditions based on schedule, site logistics, project phasing, hoisting plans, as prepared by Operations.
- Prepare Cash Flow Schedule for Site Staff and Labour
- Provide project comparisons based on Historic database
- Provide constructability review services, value engineering, and creative re-design to manage to our client’s expectations around cost, schedule, quality and feasibility
General Tendering Scope of Work
- Control Tender Process from Design Development Stage through to award of trade contractor.
- Update and Maintain Tender Scope Database per each trade tender package
- Customize Trade Tender Packages for each individual Project based on the various Site Condition Requirements
- Create, maintain and enforce consistent Trade Tender Breakdown
- Create and maintain Tender Scope based on Project Schedule of Values
- Prepare Instructions to bidders, Tender Form, and other bid/tender solicitation information as required.
- Manage preparation of Tender and Proposal documents, including assessment of adequacy of the documents and recommendations for enhancement of same.
- Create and maintain current Bid Snapshots to provide the Ownership with trade submission transparency
- Enforce proper Project Document Control and keep the information current
- Create and maintain current database of Tender Scope Analysis
16.1.7 Accounting
The Accounting Department provides accounting services and financial support to Tucker HiRise. The department is engaged in :
- Tracking accounts payable and receivable both within Tucker HQ and when it relates to Project Invoice Management
- Inventory and fixed assets
- Payroll
- Ensuring Tucker is in good standing with the Canada Revenue Agency (CRA)
16.1.8 Human Resources
The role of the Human Resources Department is to actively lead, implement and support all Human Resources initiatives. The HR department assists the business area in providing guidance, coaching and seeks to develop integrated solutions to business objectives. The Human Resources department counsels and assists employees regarding company policies, procedures, and programs. The department provides support and guidance to Senior Management of the Company with respect to day-to-day HR strategic direction of the organization and office management of the Company. The human resources department is responsible for:
- Managing job recruitment, selection, and promotion
- Developing and overseeing employee benefits and wellness programs
- Developing, promoting, and enforcing personnel policies
- Promoting employee career development and job training
- Providing orientation programs for new hires
- Providing guidance regarding disciplinary actions
- Serving as a primary contact for work-site injuries or accidents
- Managing the employee separation process: When an employee parts way with Tucker, the HR Team is responsible to ensure a smooth transition, including managing access to company resources such as the collection of keys, badges, computers, or sensitive materials from the employee.
- Improving morale: The HR team encourages employees to do their best, which contributes to the overall success of the company. Their work often involves rewarding employees for good performance and creating a positive work environment.
Human resource management is about:
Addressing current employee concerns: Unlike company managers who oversee the day-to-day work of employees, HR departments deal with employee concerns such as benefits, pay, and training. Their work may also include settling conflicts between employees or between employees and their managers.
Acquiring new employees: The HR Team recruits potential employees, oversees the hiring process, and provides new employee orientation.
Managing the employee separation process: When an employee parts ways with Tucker, the HR Team is responsible to ensure a smooth transition, including managing access to company resources such as the collection of keys, badges, computers, or sensitive materials from the employee.
Improving morale: The HR team encourages employees to do their best, which contributes to the overall success of the company. Their work often involves rewarding employees for good performance and creating a positive work environment.
16.2 Job Descriptions
16.2.1 Site Administrator
Report to: Site Manager
Position Summary: The Site Administrator is responsible for coordinating and executing daily administrative and site-related tasks. The Site Administrator manages the relationship with head office and construction trades; issuing various documents, handling plans, sending out schedules, filing, organizing and any other administrative assistance required within the site.
Primary Responsibilities:
- Set-up meetings, confirm attendance of meetings, and prepare documents for distribution at meetings. Attend and take minutes of meetings. Type draft copy of minutes for review. Distribute minutes upon acceptance by supervisor.
- File correspondence, cards, invoices, receipts, and other records in alphabetical or numerical order or according to the Tucker HiRise filing system. Locate and remove material from file when requested.
- Assign and record or stamp identification numbers or codes in order to index materials for filing.
- Find and retrieve information from files in response to requests from authorized users.
- Perform periodic inspections of materials or files in order to ensure correct placement, legibility, and proper condition.
- Scan or read incoming materials in order to determine how and where they should be classified, distributed or filed.
- Sort or classify information according to guidelines such as content, purpose, user criteria, or chronological, alphabetical, or numerical order.
- Track materials removed from files in order to ensure that borrowed files are returned.
- Perform general office duties such as typing, operating office machines, or sorting mail.
- Participate in human resources initiatives such as after-hours training, internal courses, and other personal development classes.
- Track all suite Owner changes and suite finishes in an acceptable manner and circulate as directed.
- Excellent computer skills in Word, Excel, and Outlook are mandatory.
- Process and prepare submittals for incoming and outgoing documents, shop drawings, and samples. Track all submittals.
- Prepare all close out documentation, including binder preparation, warranty preparation, certificates of release and Indemnity, Final Change Orders, and the like.
- Track all TARION documentation and distribute same.
- Unsure all inspection reports, toolbox talks, and accident reports to be received, distributed and filed accordingly.
- Maintain all contact lists (email, phone, etc.) to ensure they are current.
- Perform office duties under the direction of site office personnel.
- Maintain and accurate concrete and re-bar ledger on a daily basis and ensure that the same is sent to Project Management and Estimating on a monthly basis. This task will involve gathering delivery tickets and checking quantities so that an accurate summary including all delivery tickets will go to the Head Office.
- Complete purchase orders in a diligent manner with the assistance of the site staff ensuring that all purchase orders are legible and complete.
- Certified safety boots to be warn at all times. A hardhat is to be donned when outside of the trailer and includes entering and exiting the site.
- Working hours are according to site office hours and may be subject to change. Currently, they are from 7am to 4:30pm, Monday to Friday.
- Any other duties as assigned by your Supervisor.
- Ensure trade policies (including violence and harassment) are available and current
- Upload TRH reports to SharePoint and forward to H&S manager and subcontractor management
- Track inquiry reports to ensure they are submitted to H&S manager in a timely manner
- Ensure MSDS/SDS are up to date, maintain binder
- Ensure defibrillator is in working order
- Create and maintain trade binders (collect trade safety documents)
- Maintain H&S board
- Forward worker RoT’s to H&S Manager
- Responsible for first aid kits and eye wash stations – appropriately stocked and logs maintained
- Collect toolbox talks from trades and record in weekly logs
- Arrange foremen orientation with TRH
- Schedule and scan safety orientations
16.2.2 Assistant Site Manager
Report to: Site Manager
Position Summary
The Assistant Site Manager provides support to the Site Manager in managing the work on-site to ensure the compliance of construction with drawings and specifications. Enforce company and project policies and ensures project is constructed in accordance with design, budget and schedule.
Primary Responsibilities
- Assist the Site Manager in supervising all construction activities.
- Review and verify all project documentation.
- Review and check coordination of Architectural, Structural, Mechanical and Electrical, and other related drawings.
- Check and verify all contracts / scopes of work.
- Check on status of all permits.
- Attend pre-construction meetings, schedule and budget meetings, if required.
- Prepare construction plan logistics.
- Set-up and outfit construction office on site.
- Outline and assist in implementing the construction plan to site construction staff on a daily basis.
- Co-ordinate and contact all sub-contractors as relating to their respective start dates, their phase duration, and all expected completion dates.
- Co-ordinate and implement all sub-contractors’ work sequencing, critical deadlines, and interfacing with other sub-contractors.
- Prepare checklist of products and all required product items. Incorporate into this list the required arrival dates and necessary lead time required for ordering. List all suppliers.
- Prepare checklist of all equipment, order dates, arrival dates and suppliers.
- Arrange all on-site inspections by selected testing authority, consultants, and municipality / utility inspections.
- Take responsibility for all aspects of on-site safety and initiate formation of the Construction Safety Committee.
- Ensure safety representatives have been elected and are properly trained.
- Take responsibility for all aspects of quality control and make frequent inspections.
- Upon finding errors, omissions, or uncoordinated items, contact Site Manager.
- Instruct construction staff as to their respective responsibilities, duties and required operations they should supervise.
- Take responsibility for all daily operations, deliveries, arrivals, and activities such that the construction site operates efficiently, and all interdependent activities are done in an orderly and workmanlike manner. This is a prime responsibility under direction of the Site Manager.
- Co-ordinate initial layout with legal surveyor and site layout personnel.
- Instruct and ensure that surveyor complete a legal survey of structure after completion.
- Have full control and take charge of all aspects of the erection of the superstructure and / or framing.
- Attend all construction site meetings with the Construction Site Manager and other site personnel and ensure all trade foremen and supervisors are present as directed by the Site Manager.
- Prepare Agendas for meetings, if required.
- Foresee and plan for any condition, such as rain, storms, winter conditions, summer conditions, strikes or lockouts, which may affect construction.
- Inform Project Manager of all on-site disputes, contractual disputes, and help to resolve as directed by the Site Manager.
- Monitor progress of all trades and document same.
- Record any delays, deficiencies, shortage of manpower, scheduling problems and report to Site Manager.
- Maintain a daily log of construction activity, manpower, scheduling problems and report to Project Manager.
- Maintain a daily log of construction activity, manpower, production and performance related to the construction schedule.
- Assist Site Manager with percentage completion certificates and / or drawings.
- Examine and certify by verification, all invoices, progress draws and / or payments.
- Co-ordinate all inspections, especially final inspections with sub-contractors and applicable inspecting authority. Attend and document all such inspections as directed by Site Manager.
- Assist in obtaining all final acceptances of the project by municipal, fire and local authorities. Document all acceptances.
- Make records of all inspections available to all concerned parties.
- Assist in obtaining all turnover documentation.
- Maintain good working relationships with municipal inspectors, building inspectors, fire inspectors and all consultants.
- Take any action, at any time, deemed necessary to prevent any situation which could endanger any worker, person, or jeopardize the construction project in any manager whatsoever.
- Attend to owner’s needs, if required.
- Generate and follow-up on site required RFI’s, as directed by Site Manager.
- Receive and implement site inspections, as directed by Site Manager.
- Co-ordinate all inspections with local authority and make corrective measure, if any, as directed by Site Manager.
- Responsible for management of site documentation, as directed by Site Manager.
- Any other duties, as assigned by your Supervisor.
16.2.3 Site Manager
Report to: Construction Manager
Position Summary: The Site Manager manages all on-site construction activities, coordination, scheduling, site inspections, as well as adhering to budget requirements. In addition to working on the job site, the Site Manager will take an active role in supervising all on-site personnel, monitoring the job performance, providing feedback, taking corrective action when necessary and complying with all health and safety obligations. This individual works closely with the Project Manager and fulfills an essential role on the project.
Primary Responsibilities
- Take responsibility for and supervise all construction activities.
- Review, and verify all project documentation.
- Review and check co-ordination of Architectural, Structural, Mechanical, Electrical, and other related drawings.
- Check and verify all contracts / scopes of work.
- Check on status of all permits.
- If required, attend pre-construction meetings.
- Prepare construction plan, logistics.
- Set up and organize construction office.
- Outline the construction plan to site construction staff on daily basis.
- Co-ordinate and contact all sub-contractors as regards to their respective start dates their phase duration and all expected completion dates.
- Co-ordinate and implement all sub-contractors work sequencing, critical deadlines and interfacing with other sub-contractors.
- Prepare checklist of products and all required product items; incorporate into list the required arrival dates and necessary lead time required for ordering. List all supplies.
- Prepare checklist of all equipment order dates, arrival dates and suppliers.
- Arrange all on-site inspections by selecting testing authority, consultants, and municipality / utility inspections.
- Take responsibility for an all aspects of on-site safety and set up of the Construction Safety Committee.
- Ensure safety representatives have been elected and are properly trained.
- Take responsibility for all aspects of quality control and make frequent inspections.
- Upon finding errors omissions or uncoordinated items, contact Project Manager.
- Instruct construction staff as to their respective responsibilities duties and required operations they should supervise.
- Take responsibility for all daily operations, deliveries, arrivals and activities such that they construction site operates efficiently and all independent activities are done in an orderly workmanlike manner.
- Co-ordinate initial layout with legal surveyor and site layout personnel.
- Have the surveyor do a legal survey of structure after completion.
- Be in complete contact and take charge of all aspects of the erection of the superstructure and / or framing.
- Attend all construction meetings with Project Construction Managers and ensure all consultants, trade, foremen and supervisors are present.
- Prepare agendas for meetings if required.
- Foresee and plan for any condition, such as rain, storms, winter conditions, summer conditions, strikes or lockouts, which may affect construction.
- Inform Project Manager of all on-site disputes: contractual disputes, and help to resolve them.
- Monitor progress of all trades and document same.
- Record any delays, deficiencies, shortage of manpower, scheduling problems, and report them to the Project Manager.
- Maintains a daily log of construction activity, manpower, scheduling problems, and report them to the Project Manager.
- Maintain a daily log of construction activity, manpower, production and performance related to the construction schedule.
- Assist Project Manager with percentage completion certificates and / or drawings.
- Examine and certify by verification, all invoices, progress draws, and / or payments.
- Co-ordinate all inspections, especially finally inspections, with sub-contractors and applicable inspecting authority. Attend and document all such inspections.
- Assist in obtaining all final acceptances of the project by municipal, fire and local authorities, document acceptances.
- Make records of all inspections available to all concerned parties.
- Assist in obtaining all turnover documentation.
- Maintain good working relationships with municipal inspectors, building inspectors, fire inspectors, and all consultants.
- Take any action, at any time, deemed necessary to prevent any situation which could endanger any worker, person, or jeopardize the construction project in any manager whatsoever.
- Attend to owner’s needs if required.
- Generate and follow up on site required RFI’s
- Receive and implement site instructions.
- Any other duties as assigned by your Supervisor.
16.2.4 Project Coordinator
Report to: Project Manager
Position Summary: The Project Coordinator will support the project manager in controlling the full construction project cycle which includes monitoring budgets & schedules, subcontractor selection and issuing various construction documents.
Primary Responsibilities
- Assist in developing project plans and associated communication documents.
- Assist in estimating the resources and participants needed to achieve project goals.
- Process and prepare submittals for incoming and outgoing documents, shop drawings and samples.
- Prepare closeout documents including binder preparations for partial and full occupancy, warranty preparation, certificate of release and indemnity and final change orders.
- Maintain files/binders with all trade documentation (Health and Safety), Form 1000, insurance and liability.
- Assist in drafting and submit budget proposals and recommend subsequent budget changes where necessary (suite-door in) and special project.
- Prepare contracts for Project Manager and Owner review.
- Plan and schedule project timelines and milestones using appropriate tools.
- Track project milestones and deliverables.
- Provide assistance and support to immediate supervisor in all facets/areas of the project.
- Coordinate all documentation for occupancy registration.
- Assist in developing content of status reports from the project team, analyze results, and troubleshoot problem areas.
- Track all Tarion documentation and distribute same.
- Participate in Owners, Directors and Consultant meetings and update meeting minutes as required.
- Take meeting minutes, input in Prolog and distribute to Project Team.
- Assist as required in contract change management and contract closure.
- Establish and maintain regular written and in-person communications with Senior Management, and end users regarding pertinent contract activities.
- Provide appropriate contract and subcontract information to the accounting department.
- Maintain and update of all site drawings via myplans room.
- Assist with orientations on site in the absence of H&S manager.
- Fill permit applications and provide necessary documentations to obtain permits.
- Develop CCDC17 and contract documents for execution.
- Track of extras, inclusive of PCO’s, PO’s and CO’s.
- Assist in maintaining project systems applications i.e. Axonex, OneDrive, SharePoint, Prolog and Newstar.
- Utilize Newstar to create PO’s, change orders, vendor contracts.
- Process and submit RFI’s.
- General filing and administrations applicable to project needs.
- Other duties as assigned by Project Manager.
16.2.5 Assistant Project Manager
Report to: Project Manager
Position Summary: The Assistant Project Manager will work closely with the Project Director and Site Manager to oversee project progress, scheduling, coordination, management and execution. The Assistant Project Manager will support the project manager with trade and owner relationship as well as stakeholders to ensure successful project delivery.
Primary Responsibilities
- Assist the Project Manager on project scope, goals and deliverables that support business goals in collaboration with senior management.
- Assist in estimating the resources and participants needed to achieve project goals.
- Assist the Project Manager in determining and assessing need for additional staff and/or consultants and make the appropriate recruitments if necessary during project cycle.
- Assist Project Manager in identifying and resolve issues and conflicts within the project team.
- Assist Project Manager in identifying and managing project dependencies and critical path.
- Assist in determining the frequency and content of status reports from the project team, analyze results, and troubleshoot problem areas.
- Assist Project Manager to proactively manage changes in project scope, identify potential crises, and devise contingency plans.
- Assist the Project Manager in developing best practices and tools for project execution and management.
- Prepare and manage product and service contracts from beginning to end.
- Assist the Project Manager to develop, and deliver techniques, practices, and procedures for contract formation and administration in a manner to best protect company interests.
- Assist the Project Manager as required in contract change management and contract closure.
- Assist the Project Manager to establish and maintain regular written and in-person communications with Senior Management, and end users regarding pertinent contract activities.
- Assist the Project Manager, where necessary, by providing appropriate contract and subcontract information to accounting department.
- Assist Project Manager and analyze trends in contractual agreements in order to make recommendations for the future, and to identify areas for possible savings.
- Any other duties, as assigned by the Project Manager.
16.2.6 Project Manager
Report to: Project Director
Position Summary: The role of the Project Manager is to plan, execute, and finalize projects according to strict deadlines and within budget. This includes acquiring resources and coordinating the efforts of team members and third-party contractors or consultants in order to deliver projects according to plan. In addition, you will support, manage and administer contracts for services and products across various projects.
Primary Responsibilities
- Define project scope, goals and deliverables that support business goals in collaboration with senior management.
- Develop project plans and associated communications documents.
- Effectively communicate project expectations to team members in a timely and clear fashion.
- Estimate the resources and participants needed to achieve project goals.
- Draft and submit budget proposals, and recommend subsequent budget changes where necessary (suite-door in) and special projects.
- Where required, liaise with other department managers for the acquisition of required personnel from within and/or outside the company.
- Determine and assess need for additional staff and/or consultants and make the appropriate recruitments if necessary during project cycle.
- Set and continually manage project expectations with team members.
- Delegate tasks and responsibilities to appropriate personnel.
- Identify and resolve issues and conflicts within the project team.
- Identify and manage project dependencies and critical path.
- Plan and schedule project timelines and milestones using appropriate tools.
- Track project milestones and deliverables.
- Determine the frequency and content of status reports from the project team, analyze results, and troubleshoot problem areas.
- Proactively manage changes in project scope, identify potential crises, and devise contingency plans.
- Conduct project post mortems and create a recommendations report in order to identify successful and unsuccessful project elements.
- Develop best practices and tools for project execution and management.
- Prepare and manage product and service contracts from beginning to end.
- Conceive, develop, and deliver techniques, practices, and procedures for contract formation and administration in a manner to best protect company interests.
- Define contract recommendations that support business goals, in collaboration with senior management.
- Monitor contact performance for compliance with organizational needs and requirements, including follow-up checks for corrective action (special projects).
- Develop and deliver bid proposals, requirements documentation, and tender documents.
- Assist as required in contract change management and contract closure.
- Establish and maintain regular written and in-person communications with Senior Management, and end users regarding pertinent contract activities.
- Where necessary, provide appropriate contract and subcontract information to accounting department.
- Monitor and analyze trends in contractual agreements in order to make recommendations for the future, and to identify areas for possible savings.
- Analyze trends and market conditions for the present and future contract requirements of goods, services, and third-party agents.
- Any other duties, as assigned by your Supervisor.