Install a Custom App
Objective
To install a custom App in a company.
Background
As a company administrator, you have the ability to add install a custom App in a company in Procore.
Things to Consider
- Required User Permissions
- 'Admin' level permissions on the Company level Directory tool.
Steps
Install an App
- Navigate to the Company level Admin tool.
- Under 'Company Settings', click App Management.
- Click Install App and choose Install Custom App.

- Enter the 36-character 'App Version ID' provided to you by the custom App developer.
- Click Install.
- Click Install again to confirm the installation.
- If you want to create an App configuration now for this App and apply it to one or more projects, or configure it globally, continue with the steps outlined below. Otherwise, click Skip.
- Use the Projects dropdown to select the projects you want to apply the App configuration to. You can choose Select All if you want to apply the configuration to all projects in the company.
- Note: If you want to configure the App globally with the same configuration settings across all projects in your company, click Add to Active and Future Projects.
- Enter a Title for the new App configuration.
- Enter values for any required or optional 'Configurable Fields'.
- Click Create.
- Use the Projects dropdown to select the projects you want to apply the App configuration to. You can choose Select All if you want to apply the configuration to all projects in the company.
To learn more about App configurations, see What are App Configurations and how do I work with them?
Configure Permissions for a Data Connection App
If the app you're installing is listed as a Data Connection app, continue with the steps below.
To enable permissions for the app on some projects
- After installing the app, navigate to the App Management tool from the Select an App menu in Procore.
- Click View next to the app you're configuring.
- Click the Permissions tab.
- Select the project(s) the app will be available in from the Permitted Projects drop-down menu.
- Click Add.
to enable permissions for the app on all current and future projects
- Once the integration is installed, go to the Company Level Permissions tool.
- Click the Projects Permissions Template tab.
- Create a Global permission template that provides the permissions the app lists as required. See Create Permission Template for detailed instructions.
Note: It's best to name the permission template with the app's name to easily identify it. - Go to the Company level Directory.
- Search for the app name to locate its "user" account in the Directory.
- Click Edit next to the user account.

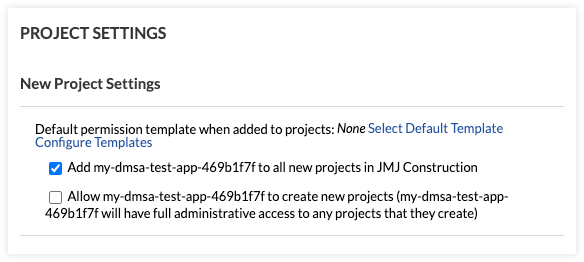
- In the permissions area of the user record, click the Select Default Permission Template option.
- Choose the template you've set up for the app, then click Apply.
Note: Do NOT manually adjust permissions for the app's user account in the permissions grid in the Company Directory tool. A permission template must be applied. - Next, mark the checkbox for Add [app-user-name] to all new projects.
This setting will add the ‘App User’ to all new Procore projects moving forward.
- To add the ‘App User’ to existing projects, click Add All next to Projects this user does not belong to.
- Click Save.