Configure Procore for IdP-Initated Okta SSO
Note
If your organization is using the Portfolio Financials and Capital Planning products in Procore, you will need to reach out to your Procore point of contact or the Support team to set up your Okta SSO.
Objective
To configure IdP-initiated SSO for Okta (SAML 2.0).
Background
If your company wants to configure Single Sign-On with Okta, you can leverage one of Procore's supported SSO solutions:
- Identity Provider Initiated (IdP-initiated) SSO. With this option, your end users must log into your Identity Provider's SSO page (for example, Azure AD or Okta) and then click an icon to log into and open the Procore web application. To configure this solution, see the Steps below.
OR - Service Provider Initiated (SP-initiated) SSO. Referred to as Procore-initiated SSO, this option gives your end users the ability to sign into the Procore Login page and then sends an authorization request to the IdP. Once the IdP authenticates the user's identify, the user is logged into Procore. To configure this solution with Okta, see Configure Procore-Initiated SSO for Okta.
Things to Consider
- Required Permissions:
- Administrator permissions to Okta
AND - 'Admin' level permissions to Procore's Company level Admin tool.
- Administrator permissions to Okta
- Supported Authentication Protocol:
- Security Assertion Markup Language (SAML 2.0)
- Limitations:
- Just In Time (JIT) provisioning is NOT supported.
Optional - Unique Entity ID
When configuring SSO for a single Procore instance, you should NOT check this box.
If your company licenses more than one Procore instance, and you want to configure unique Procore enterprise applications within your IdP tenant for each instance, you can by enabling Unique Entity ID. If enabled, you are still limited to one (1) enterprise application per Procore company instance.
Important: SSO for Procore targets users by email domain. An email domain can only be targeted once in all of Procore, so if you're considering setting up SSO with Unique Entity IDs across multiple Procore instances, remember that you can only target an email domain once, in a single instance.
To generate a Unique Entity ID for an enterprise application, check the Enable Unique Entity ID box in the Procore Admin tool's SSO configuration page for the Procore instance you want to specify on an enterprise application. Checking this box will generate a unique Entity ID URL in the field below, which you will then copy and paste into the appropriate Entity ID field in your IdP's configuration page.
Notes: You must save your configuration with the box checked to generate the Unique Entity ID. Enabling this feature does not impact user membership or access to a given instance. Access to a company in Procore is determined by a user's presence in the Directory tool, and their configured permissions within Procore. Auto-provisioning with SSO is not supported at this time.

Steps
Step 1: Add the Procore Application to Okta
- Log in to Okta as an Administrator.
- Click Admin.

- Choose Applications > Applications.

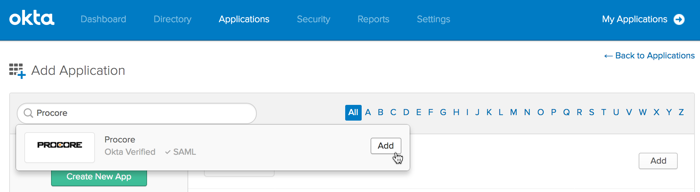
- Click Add Application.

- In the Search for an Application box, search for Procore. When Procore's Okta-Verified SAML app appears, click Add.
- Under General Settings, do the following:
- Application Label. Type a name for the new application. For example, type: Procore
- Application Visibility. Leave both of these checkboxes blank. This will allow the Procore icon to appear in Okta and on the Okta login page. If you place a checkmark in this box, the logo with NOT appear.
- Browser Plugin Auto-Submit. Ensure a checkmark appears in this box.
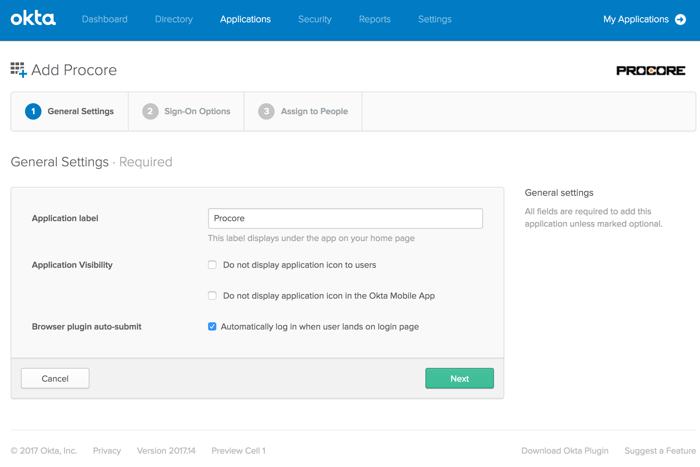
- Click Next.
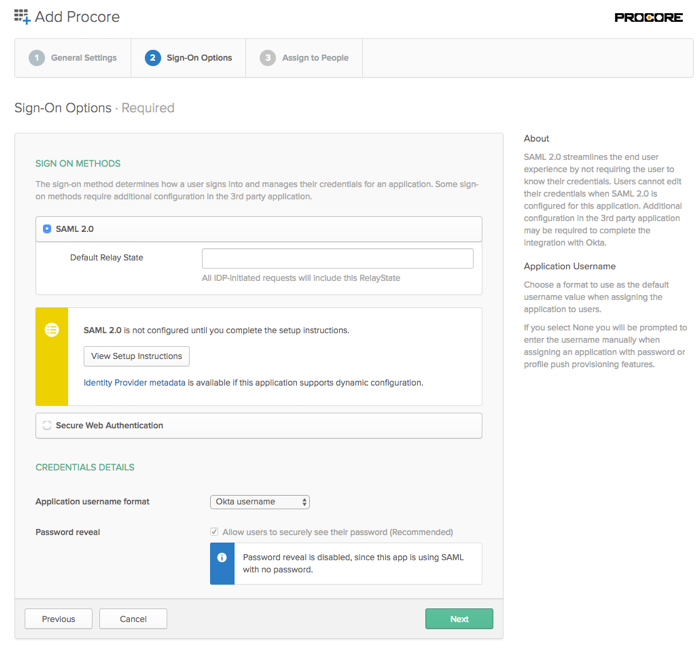
- Click View Setup Instructions.
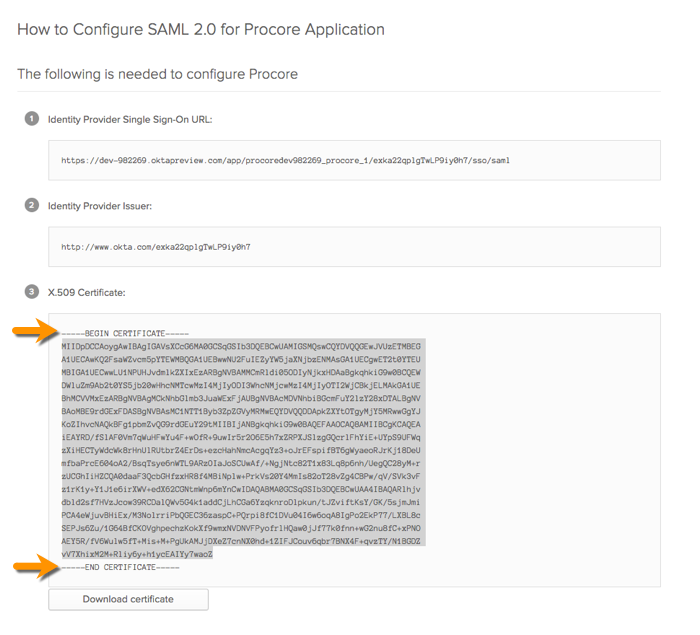
This opens the Setup SSO page in a new web browser tab. Leave this page open in your browser. Later, you will need to copy information in this page when you configure the Okta SSO settings in the Procore web application.
Important! When copying the X.509 Certificate string, do NOT copy the "------------BEGIN CERTIFICATE------------" and "------------END CERTIFICATE------------" markers. Only copy the text that resides between these markers.
- Return to your open browser tab with Okta's Sign On page, as shown below. Then ensure that Okta Username is selected in the Application Username Format list.
- Click Next.
- Place a checkmark next to the name of your organization's Procore users in the People list.
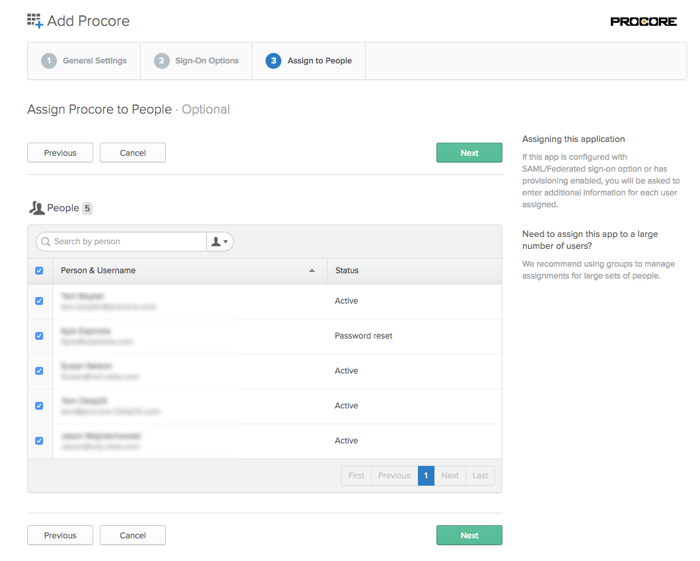
- Click Next.
- Verify that the attribute settings are correct for all of your Procore users. This Otka username is an email address. This is the address that you Procore users will use to log in to your Procore + Okta SSO Integration.
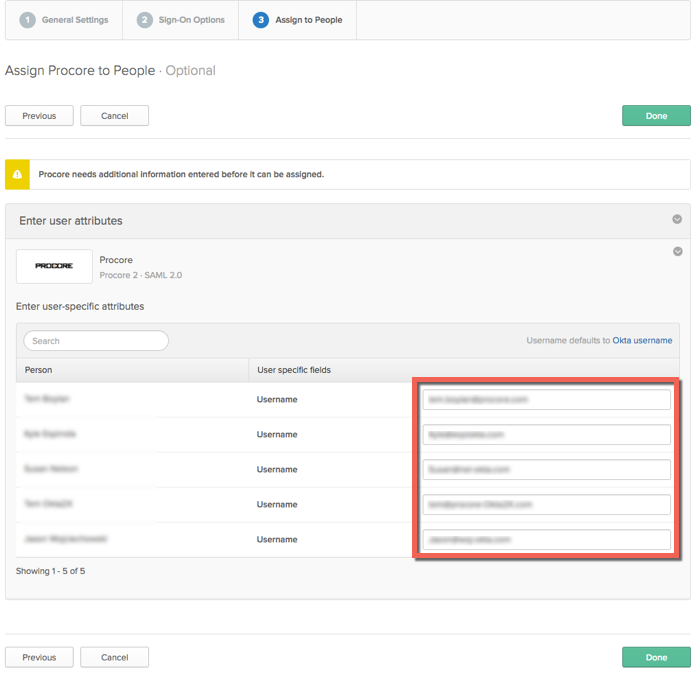
- Click Done.
- Continue with the next procedure.
Step 2: Configure the Okta Settings in Procore
-
Login into the Procore web application.
Note: You must log in using an account that has 'Admin' permission to the company's Admin tool. - Navigate to the company's Admin tool.
- Under Administrative Settings, click Single Sign On Configuration.
- Enter the following information:
- Single Sign On Issuer URL
Paste the 'Identity Provider Single Sign-On URL' that you copied from Okta into this field. - Single Sign On Target URL.
Leave this field blank. - Single Sign On x509
Paste the 'X509 Certificate' that you copied from Okta into this field.
Important: When copying the certificate information from Okta, do NOT copy the "------------BEGIN CERTIFICATE------------" and "------------END CERTIFICATE------------" markers. You only want to copy the text that resides between these markers.

- Single Sign On Issuer URL
- Click Save Changes.
- Next, reach out to your company's Procore point of contact or contact Procore Support to request that they enter the domains you want to target for authentication via SSO. Procore must enter these domains on your behalf.
- Once the domain(s) have been entered by Procore, take the final steps to enable SSO for your company:
- Mark the Enable Single Sign On box in Procore's SSO configuration settings.
- Select Allow Password Login to enable an IdP-initiated flow.
- Click Save.
Authentication via the configured SSO method will become active immediately after saving the final completed configuration.
Note
Customers who license Procore Pay may require additional support enabling MFA for Payments when SSO is configured for their company. If you license Procore Pay and want to enable SSO, contact Procore support.PROCORE SUPPORT: INTERNAL NOTE
Perform the steps below when notified by the Procore Administrator that the SSO configuration is complete:
- When notified by the Procore Administrator that the SSO configuration is complete, please be sure that the following fields are filled out:
- Single Sign On Issuer URL
- Single Sign On Target URL
- Single Sign On x509 Certificate
- Once confirmed, the domain(s) will need to be filled out by one of the following:
- A TC or PSE in the #cs-sso-questions Slack channel
- In the event the above people aren't available, reach out in Slack via #squad-identity.
- Once done, the client will be able to check the box for 'Enable Single Sign On'. When they do, they will see the following two options: ' Allow Password Login' (refers to IdP-Initiated) and 'Service Provider Forward' (refers to SP-initiated). We typically recommend they try 'Allow Password Login' first to test the connection.