Configure Settings: Document Management
Background
Important settings for the Document Management tool are managed on the Configure Settings page, such as: creating and managing permission groups, customizing permission settings for documents, and standardizing fields for document metadata.
Things to Consider
-
Required User Permissions:
-
'Admin' level permissions to the project's Document Management tool.
-
Steps
Note
Settings for the Document Management tool can also be managed in the project's Admin tool. See Configure Document Management Settings in the Admin Tool.-
Navigate to the project's Document Management tool.
-
Click the Configure Settings
 icon.
icon. -
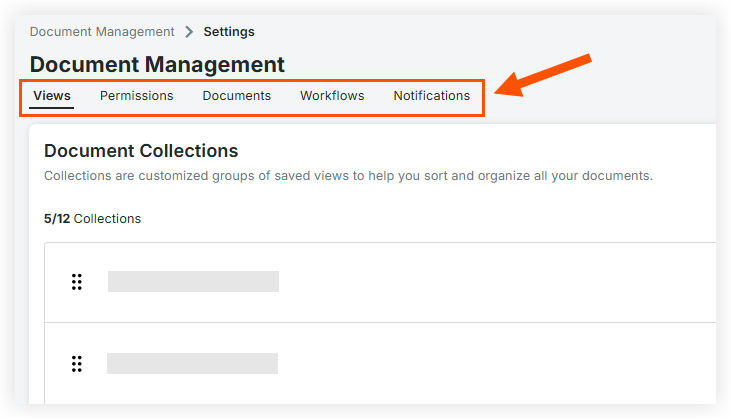
Click the tab of the tool area you want to view or modify. See additional directions for each area below:
-
Views Tab
-
Collections
-
-
Permissions Tab
-
Permission Group
-
Document Permissions
-
Workflow Permissions
-
-
Documents Tab
-
Upload Requirements
-
Naming Standards
-
Document Fields
-
Document Rules
-
-
Workflows Tab
-
Document Workflows
-
-
Notifications
-
Document Upload
-
Document Submission
-
Placeholder Notifications
-
-

Views Tab
Click the Views tab to create Collections for the project. Collections help filter and organize documents so users can quickly find the revisions they need. See the following articles related to Collections:
Permissions Tab
Click the Permissions tab to access the following settings:
Permission Groups
In the Permission Groups section, you can create and manage permission groups to control access to documents in the project. See the following tutorials related to permission groups:
Document Permissions
In the Document Permissions section, you can customize the actions that people and groups can perform on documents. See View and Manage Settings for Document Permissions.
Workflow Permissions
Permissions selected in this section are specific to documents in a workflow. Any permissions set here will override normal permissions set from the Document Permissions above. See View and Manage Workflow Permissions in the Document Management Tool.
Documents Tab
Click the Documents tab to access the following settings:
Upload Requirements
In the Upload Requirements section, you can select naming standards and required fields for document uploads. See Edit the Upload Requirements for Documents.
Naming Standards
In the Naming Standards section, you can build naming standards that automatically apply to uploaded documents. See Edit the Naming Standard for Documents.
Document Fields
In the Document Fields section, you can view document metadata fields, mark certain fields as inactive or active, and edit field option descriptions.
To edit the description of a field option, follow these steps from within the 'Document Fields' section:
Note: Changes made here only apply to the current project.
-
Click the name of a field that gives users options via a drop-down menu, such as 'Status' or 'Discipline'.
-
Click the Edit Field button.
-
Find the option you want to edit and click on its text in the 'Description' column to change it.
-
Click the Save button.
Note: Your changes only affect the current project.
For field changes at the company level, see Manage Custom and Default Fields and Fieldsets for the Document Management Tool.
Document Rules
-
Scroll to the Document Rules section.
-
Select one of the following:
-
Allow multiple versions of the document to go through the workflow simultaneously
Note: To maintain legacy behavior, existing projects will continue to allow multiple revisions of a document to have active workflows simultaneously; however, all net new projects going forward will default to Prevent to ensure a more streamlined process. -
Prevent multiple documents going through workflow: Restricts a document to one active workflow at a time.
-
-
Click Save.
Note: If you select Prevent and existing documents are already in conflicting workflows, a modal will appear. Click Confirm to view and resolve these conflicts in the Action Required view.
Workflows Tab
Click the Workflows tab to access the following settings:
Note: You will only see the Workflows tab if your organization is using the Workflows tool in Procore.
Document Workflows
If one or more workflows have been assigned to the project, you can view and configure workflows in this section.
Bulk Edit Workflow Assignees
To edit a workflow template's Assignees or Workflow Manager, follow these steps:
-
Find the template you want to modify and click the people icon in the 'Roles' column.
-
Select whether you want your changes to apply to the workflow template and workflows in progress or just the workflow template for documents that use the template in the future.
Note: If you choose to include in-progress workflows, once you click 'Save' those workflows reflect your changes and any removed Assignees cannot respond to current or upcoming workflow steps. However, any responses already made in previous steps are preserved. -
Modify the assignees as needed. Click in the field to add a new name, or click the x next to a name to remove it.
-
Click Save.
Project Admin can change additional workflow functionality:
-
If certain types of document errors arise, resolve them in the 'Action Required' saved view.
-
Restrict workflow template access for different teams. This reduces the chance of a team accidentally choosing a template that doesn't fit their needs.
-
For more workflow template configuration options, see About Workflows in the Document Management Tool or Configure a Custom Workflow Template on a Project.
Notifications
In the Notifications tab, select which users you want notified when a document is uploaded or submitted in the Document Management tool. View detailed instructions below, or see Workflow if you're curious about notifications that alert users to their turn in a document approval process.
Document Upload
Notify selected companies, distribution groups, or individual users when a new document is uploaded to the Document Management tool. The notification is an email with links to all relevant saved views and a .csv file listing all the updated documents.
-
Click the + Add Recipients button in the 'Recipients' column.
Note: If you're adding or modifying an existing recipients list, this is a link instead of a button. -
Click in the Companies, Distribution Groups, or Users field to select or search for the group or user you want to add.
-
Click Update.
-
Make sure the 'Active' toggle is set to your preference of on or off.
Note
The number listed in the Recipients column may be lower than expected because Procore only counts each user once. For example, if you add a new group of 3 users, but two of them were already in a different group that already gets notified in this same way, the total recipient count only increases by 1.
Document Submission
Notify selected users or distribution groups when a new document that matches the filter criteria of a saved view is submitted to the Document Management tool. The notification is an email with links to all relevant documents and a .csv file listing them.
-
Click the + Add Recipients button in the 'Recipients' column of the saved view you want to align notifications with.
Note: If you're adding or modifying an existing recipients list, this is a link instead of a button. -
Click in the Companies, Distribution Groups, or Users field to select or search for the group or user you want notified when a new document is submitted into this saved view.
-
Click Update.
Placeholder Notifications
Notify selected users, companies, or distribution groups about important events happening with placeholders in a project. The notification aggregates daily into a single email digest sent at 4:00 PM local project time zone with links to all relevant saved views and an option to download a .csv file summary.
You can configure notifications for five distinct placeholder event types:
-
Placeholders Assigned: Sent when one or more placeholders are assigned to users. Like other notifications, this is sent to configured users rather than the actual assignees.
-
Due Tomorrow: Sent when a placeholder's submission deadline expires the next day.
-
Overdue: Sent daily for placeholders with past deadlines within the last 90 days.
-
File Uploaded: Sent when a file is uploaded into a placeholder.
-
Submitted: Sent when a placeholder is submitted as a revision.
To configure placeholder recipients, follow these steps:
-
Click the + Add Recipients button (or link) in the Recipients column next to the event type you want to configure.
-
Click in the Companies, Distribution Groups, or Users field to select or search for the groups or individual users you want notified.
-
Click Update.
-
Make sure the Active toggle is set to your preference of on or off.
Note: The number listed in the Recipients column may be lower than expected because Document Management only counts each user once.
See What are Placeholders in the Document Management Tool? and how to Create and Manage Placeholders in the Document Management Tool.