

View the Change Events Line Items View
Background
The Line Items tab in the Change Events tool displays a high-level summary of all of your project's change events. This article outlines how to configure, group, and manage views for Change Events line items, which can be accessed directly from this main list view interface. Within this tab, you can group, filter, search, and edit change events to suit your needs, as well as display or hide columns based on predefined views or your own customized configuration.
Things to Consider
-
Required User Permissions:
-
'Read Only' level permissions or higher on the Change Events tool to view change event information.
-
'Standard' level permissions or higher on the Change Events tool to view and edit change events you created.
-
'Admin level permissions on the Change Events tool to view and edit all change events.
-
-
Additional Information:
-
The custom view only appears once an edit has been made within one of the predefined views. The custom view always displays the most recent edit you have made and is unique to each individual user and project.
-
Prerequisites
Steps
-
Navigate to the project's Change Events tool.
-
Click the Line Items tab.
Open linked items from other Procore tools in a new tab
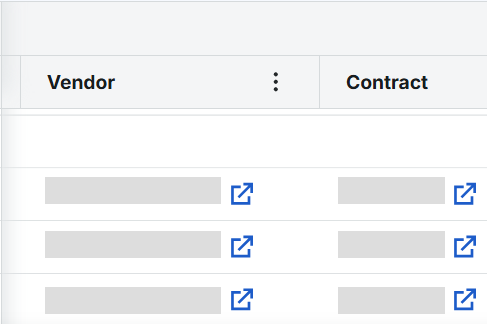
When items from other Procore tools are linked to a change event, users can click the  icon to open that item in a new browser tab. This ensures users maintain their current place within the tool.
Use predefined views to display change events
Select a predefined view from the first of the following drop-down menus, or use the second drop-down menu to update how change event information is grouped.

|
Classic Detail |
This view shows columns related to individual change event line item details such as line description, vendor, contract, Unit of Measure. |
|
Classic Summary |
This view shows columns with change event summary information such as status, title, scope, type, reason and origin. |
|
Complete View |
This view allows you to see all change event information displayed together. |
|
Owners View |
This view should be used by Owner customers and removes revenue columns from the list. |
|
Progress View |
This view allows you to monitor and focus your attention on the most pressing Line Items by showing how long the line has existed, the stage, for example, ROM, RFQ, PCO, CCO, how many days it has been in that stage, the status, and when it entered the status. |
|
Scope View |
This view is automatically grouped by scope and sorted to help users easily identify where Prime Contract Change Orders are missing for out of scope change - flagging potential exposure. |
|
Temporary View |
Making modifications to the predefined views will switch you to the temporary view automatically. |
Using the Temporary view
The custom view activates when you make an edit to one of the predefined views. Switching back to one of the predefined views after using the custom view will revert the table back to the predefined configurations and saves your modifications to the custom view. The custom view always displays the most recent edit you have made and is unique to each individual user and project.
Using the Add To Menu to Create Items from Change Events
Change event line items can be linked to other items in Procore's financial management tools.
-
Place a checkmark next to the change event line item(s) that you want to link to another item.
-
Optional: Click Send Requests for Quote to open the Send RFQs page:
Note: Line items must exist within the same change event to be included together in an RFQ.
Complete the Send RFQ page as follows:-
GENERAL INFORMATON:
-
Title. Shows the title of the change event. Type over the title as needed.
-
Date. Shows the due date of the change event. Change this date as needed.
-
Distribution. Select the person to whom you are sending the RFQ.
-
Request Details. Shows the change event title. You can add any details to the request as needed.
-
Attachments. Click Attach Files or use a drag-and-drop operation to add any file attachments to the RFQ email.
-
-
Commitment Select. Shows the commitment(s) associated with the RFQ. Any information from the commitment automatically displays in the RFQ Scope Description, Contract Company, Contract #, and Assignee columns.
-
-
Click Create and Send RFQs to send the RFQ by email to the person named in the Distribution field.
-
Read the Create and Send RFQs message, click Continue.
-
Place a checkmark next to the change event line item(s) that you want to link to another item. Click Add to and choose one of these options:
-
Commitment
-
New Purchase Order
-
New Subcontract
-
Link to existing Commitment
-
-
Commitment Change Order/Potential Change Order
-
New Commitment Change Order/Potential Change Order
-
Link to existing Commitment Change Order/Potential Change Order
-
-
Prime Contract Change Order/Potential Change Order
-
New Prime Change Order/Potential Change Order
-
Link to existing Prime Change Order/Potential Change Order
-
-
Budget Changes
-
New Budget Change
-
Link to existing Budget Change
-
-
Edit Change Events
To update a change event from the Line Items list view in the Change Events tool:
-
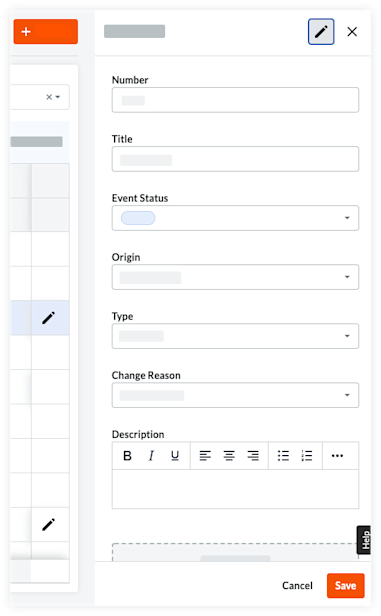
Click the Edit icon
 next to the change event line item for the change event you want to update.
 -
Update or review the information for the change event as desired.
-
Click Save when finished or Cancel to discard any changes.
Configure Columns
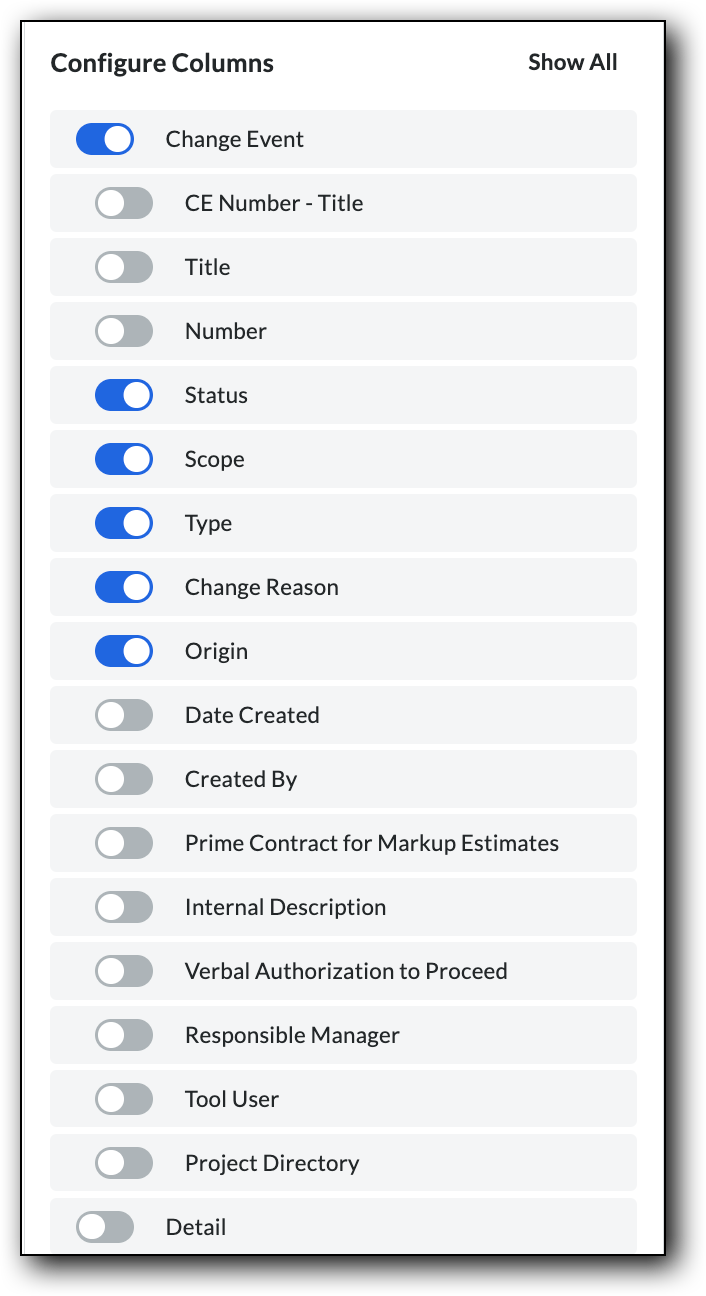
Click the Table Settings icon to open the menu for row height and column configurations.
-
Row Height:
-
Choose between small, medium, and large row height for the change events list view.
-
-
Configure Columns:
-
Use the toggle switch to determine which columns will be displayed or hidden from the change events list-view.
-
Clicking Reset To Default will set all columns to display.
-
Filter the Line Items View
-
Click the Filters button next to the search bar at the top of the change events table.

-
Select from the following filters. Choose your desired criteria from the available dropdowns:
Note
* Filter options marked with an asterisk (*) allow you to set parameters as number values.
The following parameters can be set:
-
Is Between
-
Is Greater Than
-
Is Greater Than or Equal To
-
Is Equal To
-
Is Less Than
-
Is Less Than or Equal To
-
No Value
-
Change Event
-
CE Number - Title
-
Number
-
Status
-
Scope
-
Type
-
Change Reason
-
Origin
-
Date Created
-
Created By
-
-
Detail
-
Budget Code
-
Vendor
-
Contract
-
-
Revenue
-
Unit Cost
-
Revenue ROM*
-
Client PCO*
-
Client PCO Title
-
Stage
-
Days in Stage
-
Stage Status
-
In Status Since
-
Latest Price
-
Client PCO Status
-
-
Cost
-
Unit Cost
-
Cost ROM
-
Request for Quote
-
RFQ Title
-
Request for Quote Status
-
Commitment
-
Commitment Title
-
Commitment Status
-
Stage
-
Days in Stage
-
Stage Status
-
In Status Since
-
Latest Cost
-
-
Over/Under
-
Budget
-
Unit Cost
-
Budget ROM
-
Budget Change
-
Stage
-
Days in Stage
-
Stage Status
-
In Status Since
-
Latest Budget Impact
-
-
Budget Code Segments
-
Cost Code
-
Cost Coder Tier 1
-
Cost Coder Tier 2
-
Cost Type
-
-
-
Apply the Filter.
Group Columns
Column grouping allows you to better organize the Change Events line items table. Specify which columns you would like to group and items within that group will roll-up underneath.
Example
You may choose to group change events by scope. In this example, the scope column has been moved to the left side of the table and individual change event line items have been placed within the groups of their respective scopes.
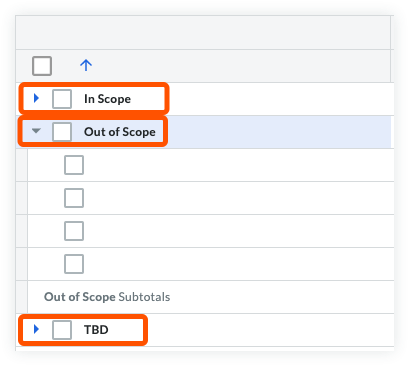
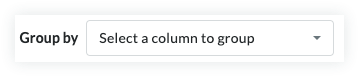
To group columns, click the Group By selector at the top of the change events table and select the columns you want to group together.
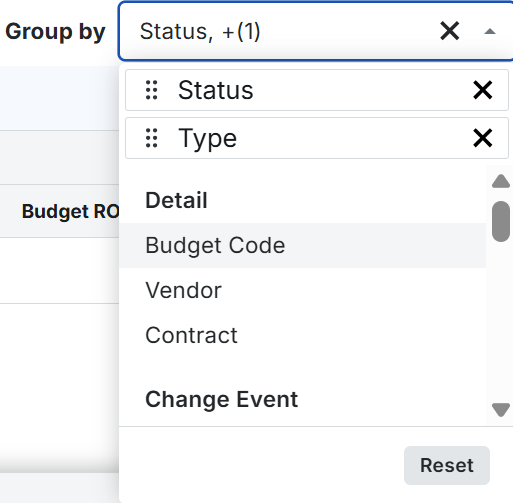
If more than one grouping is selected, they can be rearranged within the 'Group By' Selector by clicking and dragging them into the preferred order. A group can be deleted by clicking the 'x' on the right side of the group.
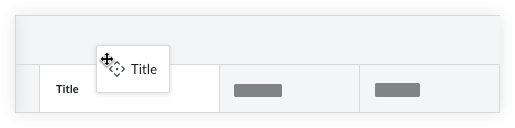
Rearrange Columns
Click and drag column titles to move their position in the table to the left or right.
Click the vertical ellipsis  when hovering over a column header/title to open additional column settings:
Group By
-
Pin Column
-
Pin Left
-
Pin Right
-
No Pin
-
-
Autosize This Column
-
Autosize All Columns
-
Hide Column
-
Sort By This Column
-
Sort Column Ascending
-
Sort Column Descending
-
Column Not Sorted
-
-
Reset Columns
View Line Items
The Line Items card on an individual change event lets you perform different viewing and editing functions. To learn about your options, see (Beta) View the Change Events Line Items View.
Change Event Data Columns
Change Event General Information
- CE Number - Title - Shows the change event number and the title combined that was assigned at creation.
- Title - Shows the title of the change event.
- CE Number Title - Number - The change event number.
- Status - Show the current status of the change event. To learn about Procore's default statuses, see What are the default statuses for change events in Procore?
- Scope - Shows the following scope options: In Scope, Out of Scope, or TBD. See What are the default scope options for change events in Procore?
- Type - Shows the type associated with the change event: TBD, Allowance, Contingency, Owner Change, or Transfer to indicate the type of cost you are preparing for. See Set the Default Change Management Configurations.
- Change Reason - Shows the reason associated with the change. See Set the Default Change Management Configurations.
- Origin - Shows a link to the item in a Procore project tool from which the change event originated. See Which Procore tools can I use to create a change event?
- Date Created - The date the change event was created.
- Created By - The name of the user who created the change event.
- Prime Contract for Markup Estimates - The original prime contract associated with markup estimates linked to each change event.
Detail
- Item Type - Shows the type associated with the line item: Line Item, or Markup
- Budget Codes - Select a budget code or click Create Budget Code. See What is a budget code in Procore's WBS?
- Description - Enter a description for the line item.
- Vendor. Select the vendor's company name from the drop-down menu. See Add a Company to the Project Directory.
- Contract - Select the impacted purchase order or subcontract from the drop-down menu. See Create a Purchase Order or Create a Subcontract.
- Unit of Measure - The unit of measure selected for the change event line item. See Which units of measure are included on Procore's master list?
Revenue
- Quantity - The number of the chosen units of measure associated with the revenue of the change event line item.
- Unit Cost - The value assigned to each unit associated with the revenue of change event line item.
- Revenue ROM - The rough order of magnitude (ROM) is the preliminary revenue value assigned to the change event line item.
- Prime/Prime PCO - The value of the prime change order SOV line item connected to the change event line item.
- Prime PCO Title - The title of the change order or potential change order connected to the change event line item.
- Stage - The current status in the change event workflow.
- Stage Status - The completion state of the active stage.
- In Status Since - The date the current status took effect.
- Latest Price - The most up to date value associated with the revenue of the change event line item.
Cost
- Quantity - The number of the chosen units of measure associated with the cost of the line item.
- Unit Cost - The value assigned to each unit associated with the cost change event line item.
- Cost ROM - The rough order of magnitude (ROM) is the preliminary cost value assigned to the change event line item.
- Request for Quote - The value of a returned RFQ associated with the change event line item.
- RFQ Title - The title of an RFQ associated with the change event line item.
- Request for Quote Status - The current state of vendor pricing requests.
- Commitment/Commitment CO/PCO - The value of the commitment or commitment change order SOV line item connected to the change event line item.
- Commitment Title - The title of the of the contract or change order connected to the change event line item.
- Commitment Status - The current lifecycle state such as Draft, Out for Bid, Pending Approval, or Approved of the purchase order or subcontract associated with the change event line item.
- Stage - The specific workflow phase such as In Review, Issued, or Executed of the commitment tied to the change event.
- Days in Stage - Tracks the total number of consecutive days remained in its current workflow phase.
- Stage Status - The completion state of the active stage.
- In Status Since - The date the current status took effect.
- Latest Cost - The most up to date value associated with the cost of the change event line item.
Over/Under
Over/Under - The difference between the 'Latest Price' and the 'Latest Cost'.
Production
- Unit of Measure - The unit of measure selected for the measurable amount of work installed on the project that is associated with the change event line item.
- Quantity - The number of the chosen units of measure associated with the measurable amount of work installed on the project that is associated with the change event line item.
Budget
- Quantity - The number of the chosen units of measure associated with the budget of the change event line item.
- Unit Cost - The value assigned to each unit associated with the budget of the change event line item.
- Budget ROM - The rough order of magnitude (ROM) is the preliminary value assigned to a budget change connected to the change event line item.
- Budget Change - The value of the budget change connected to the change event line item.
- Stage - Stage reflects the current approval or lifecycle status (such as Draft, Under Review, or Approved) of the budget adjustment tied to the change event.
- Days in Stage - Tracks the total number of consecutive days remained in its current workflow phase.
- Stage Status - The completion state of the active stage.
- In Status Since - The date the current status took effect.
- Latest Budget Impact - The most up to date value for the budget impact of the change event line item. The value will match the Budget ROM column or the Budget Change column if there is a value.
- Budget Code Segments - Displays the broken-down components of the budget code such as Cost Code, Cost Type, or Sub Job assigned to the change event line item.