Create a Prime PCO from a Change Event
Objective
To create a potential change order for a prime contract from a change event.
Background
If your company has configured your project to use a two (2) tier change order structure, the change event process requires you to create a potential change order. Then, you will create the PCCO from the Prime Contract tool. When you create a PCO, the Schedule of Values (SOV) will populate with the Latest Price values.
Things to Consider
- Required User Permissions:
- 'Standard' level permissions or higher on the project's Change Events tool.
AND - 'Standard' level permissions on the project's Prime Contracts tool and the 'Allow Standard Level Users to Create PCOs' configuration setting must be enabled on the Prime Contracts tool. See Configure Settings: Prime Contracts.
- 'Standard' level permissions or higher on the project's Change Events tool.
- Additional Information:
- Depending on the change order tier configuration setting configured for the Prime Contracts tool, potential change orders can be transitioned into one (1) of the following items:
- For two (2) tier change orders, a prime contract change order.
- For three (3) tier change orders, a change order request.
- To learn more see, What are the different change order tier settings in Project Financials?
- Depending on the change order tier configuration setting configured for the Prime Contracts tool, potential change orders can be transitioned into one (1) of the following items:
Prerequisites
- The Change Events tool must be turned ON on the project. See Add and Remove Project Tools.
- The two (2) tier change order configuration settings must be turned ON the Prime Contracts tool. See Configure the Number of Prime Contract Change Order Tiers.
- The project's prime contract must be in the 'Approved' status. See Approve a Prime Contract.
Steps
- Navigate to the project's Change Events tool.
- In the table, mark the checkboxes for one (1) or more change event line item(s) to include in the new potential change order.
Note
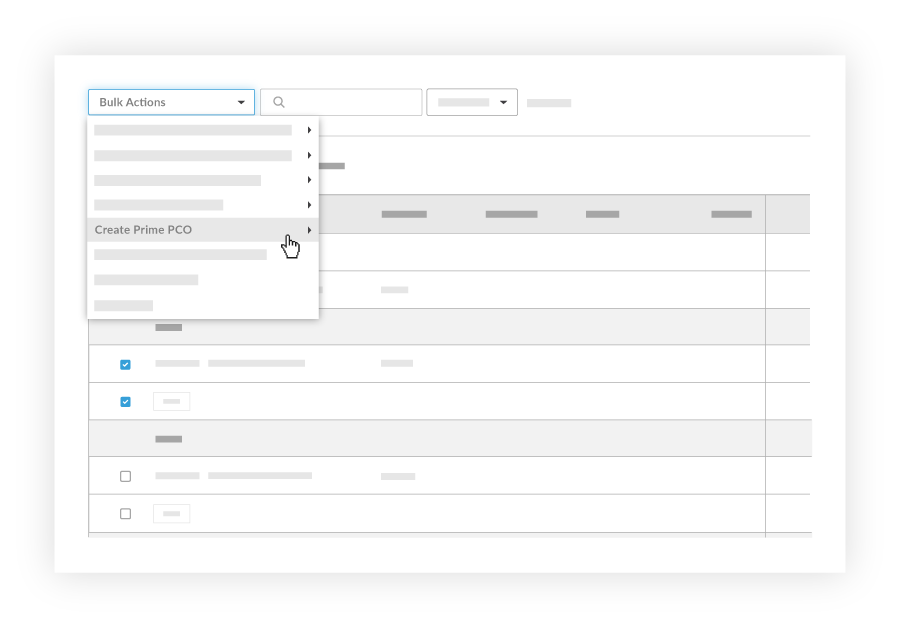
Procore creates the potential change order's Schedule of Values (SOV) using the selected change event line item(s). - Click the Bulk Actions menu and choose the Create Prime PCO option. Then choose the appropriate contract option from the sub menu.
- In the 'New Potential Change Order' page, complete the following data entry:
-
Note
If the Request for Quote (RFQ) feature is turned ON, you can configure the Change Events tool to include any attachments added to a reviewer's RFQ response. For instructions, see Configure Settings: Change Events.
- Click Create.
Notes
- The Associated Line Item drop-down list only appears if your company's Procore account is integrated with an integrated ERP system and the Prime Contracts tool is active on the project.
- When adding line items to the change order's schedule of values, you must select an Associated Line Item for each new line item. You can designate one (1) associated line item or use the same associated line item for multiple line items. Choosing to create a new line item to associate will automatically create a new zero (0) dollar line item on the contract's original SOV.
If you would like to learn more about Procore's change events management software and how it can help your business, please visit our construction change order product page  .
.