Workflows User Guide
- Last updated
- Save as PDF
Table of Contents
Getting Started
|
|
This user guide provides Procore users with information about how to use Procore's Workflows tool to build and employ workflows from start to finish. Some of the things you'll learn in this guide include: |
|
|
Workflows
Welcome to the Company level Workflows tool. With Workflows, users have the ability to create their own approval paths for items in Procore.
What is a custom workflow?
Example
The image below shows you an example of what a published custom workflow for subcontractor invoices might look like. The workflow steps and conditions may be different in your environment.

Which Procore tools are supported by the Workflows Tool?
Setup & Configuration
The transition from the legacy workflow engine to the self-service engine is not complete until the update is activated through the Workflows configure settings page. However, allows users to set up and configure their own custom workflow templates before fully updating their workflow version. Workflow templates are not able to be applied to items (contracts and invoices) until updating the workflow version in the Workflows configure settings.
See the steps in the 'Enable Self-Service Workflows' section when you are ready to update.
Quick Start Workflow Templates
What are Quick Start workflow templates?
Quick Start workflow templates are pre-configured workflow templates for Procore's financial tools. These templates were designed based on industry best practices.
You can customize them to meet your company's specific needs by changing statuses, names of steps, and more. See Edit a Workflow Template.
How do I get Quick Start templates in my company's account?
Quick Start workflow templates are automatically available in your company's Workflows tool for all customers in the United States, Australia, New Zealand, Canada, Great Britain, and Ireland.
They appear alongside any custom workflows that are already created within your account, and are labeled with 'Customer Support' to indicate they were created by Procore.
What if I don't want to use Quick Start templates?
You can archive any Quick Start templates you don't want to use by clicking the 'Archive' button next to the template. See Archive a Workflow Template.
Does the addition of Quick Start templates impact my existing custom workflow templates?
No, there is no impact to existing custom templates.
Create a Workflow Template
Objective
To create a workflow template in the Company Workflows tool.
Things to Consider
- Required User Permissions:
- To view, create, or edit a workflow template:
- 'Admin' level permissions on the Company Workflows tool.
OR - 'Read Only' or 'Standard' level permissions on the Company Workflows tool with the 'View Workflow Templates' and 'Create and Edit Workflow Templates' granular permissions enabled on your permissions template.
- 'Admin' level permissions on the Company Workflows tool.
- To view, create, or edit a workflow template:
- Customers using Procore in English can also choose from a selection of pre-populated quick start workflow templates for financial tools. These templates can be used as-is, or edited to meet your company's needs. Quick start workflows templates are not available outside of English speaking regions at this time.
Steps
Add a Workflow
- Navigate to the Company level Workflows tool.
- Click Create.
This opens the 'Add a Workflow' dialog box.

- Enter a Name for the workflow.
- Select the tool for the workflow from the Tool menu.
Note
Some Procore tools must be enabled to appear as a selection in this list. For a list of available tools, see Which Procore tools support Workflows? - Click Create.
Procore opens the workflow builder and creates an 'Untitled' first step for you.
Update the First Step in the Workflow
- Begin by selecting the type of step (Response Step, Condition Step) you will use at the start of the workflow.
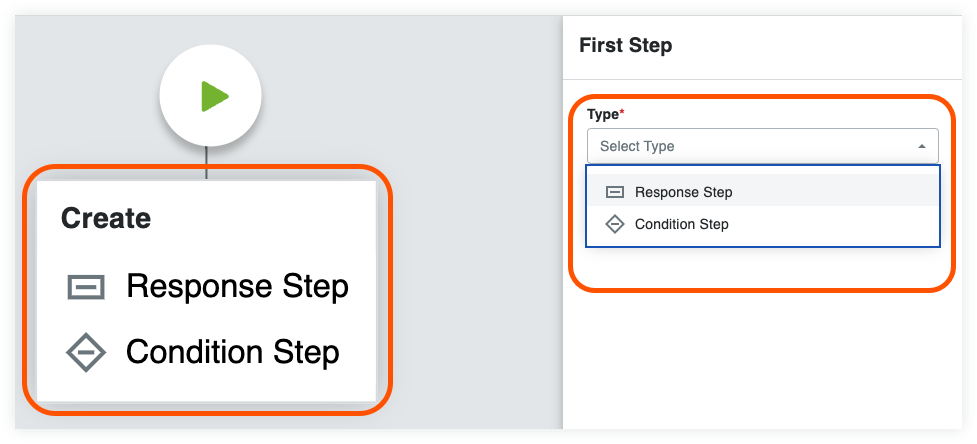
- Follow the instructions for the selected step type:
Add a Response Step to a Workflow
- Enter the following information in the General Information section:
- Step Name. Enter a name for the step.
- Type. Select Response Step.
- Item Status. Enter the item status that will be associated with this workflow step.
- Days to Complete. Enter the number of days the 'Responsible Group' has to complete the workflow step. Then select Calendar Days or Business Days from the drop-down list. Once the set number of days passes, Procore sends a reminder email until the step is complete.
- Optional: Notification Recipients. Select the groups or roles that should receive an automated notification when the workflow step is NOT completed within the number of days specified under Days to Complete. The recipients named here will also receive an email when the workflow step is completed. The default groups include:
- Workflow Manager. A workflow manager is a Procore user who must be designated on a project.
- Item Creator. An item creator is a Procore user who created the item on a project.
- Distribution Group. After you publish this workflow and assign it to a project, you can define different group members when configuring the workflow on the Project level.
- All Project Users from the Company. All project users from the item creator's company who are assigned to the project are automatically notified when you select Item Creator's Company from the notification recipient list.
Add Assignees
- Complete the Assignees section:
- Decision Type. Select one of default decision types for the step. This setting will also determine which response requirement options are available.
- First responder decides.
- Multiple responders decide.
- Only required responders decide. Check this box if you want the final decision on the step to be determined only by responders in roles with one or all members required to respond.
- Decision Type. Select one of default decision types for the step. This setting will also determine which response requirement options are available.
- Click Manage Assignees.
- You can manage assignees based on Project Role or Custom Role assignee type. Depending on your assignee configuration method, follow the relevant instructions:
- Project Role Assignees:
No manual updates are required to manage individual assignees.
Assignees are automatically populated into each workflow step based on the assigned project roles from the Project Directory.
Important: Ensure project directory roles are correctly assigned and up-to-date. See How to auto-assign project roles to workflow steps? for details.
-
Create Project Roles within the Company Admin Tool. Learn how →
-
Assign individuals to Project Roles within the Project Directory Tool. Learn how →
-
Configure a Workflow Template at the company level. When configuring each workflow step, select the relevant Project Role(s) you wish to assign to that step.
-
For any project the template is assigned to, the individuals associated with those Project Roles will auto-populate into each workflow step according to your company-level workflow template configuration.
-
Ensure that all members listed in the Project Directory have the appropriate permissions needed for items within each tool and the correct workflow permissions.
-
To complete the configuration, it is still necessary to manually configure the Workflow Manager for each project template per tool. This step is required because the Project Directory is managed per project, and the Workflow Manager may vary by tool.
- Custom Role Assignees:
- Click Manage Assignees in the step details under the Assignees section.
- Click Edit Members next to the custom role.
- Select users from the available project directory members.
Note: Each custom role on a workflow step must have at least one assigned user. - (Optional) If the decision type is Multiple Responders Decide, you can set each member’s requirement using the Required to Respond? drop-down list.
- Click Done to confirm your assignee updates.
- Click Save to finalize your changes.
Note: If any required fields have missing information, a banner will appear at the top of the workflow viewer. Click Show Details to see which step needs updating.
- Project Role Assignees:
Note
You can also assing project roles in bulk from the Company Directory.Add Responses
Once the assignee roles for the step have been determined, the next step is to add responses. The options available when adding responses are determined by the step's decision type and whether or not any responders are required.
The steps for adding responses are separated by decision type. Follow the steps for the decision type selected on the step.
- First Responder Decides: Show/Hide
- In the Responses card of the step settings, do the following:
- If Response is. Select one (1) or more response(s) from the drop-down menu.
- Go to Step. Select the next step in the workflow if this response is the step's final decision.
- Optional: Click Add Response to create additional responses and fill out the above information as needed.
- In the Responses card of the step settings, do the following:
- Multiple Responders Decide: Show/Hide
- In the Responses card of the step settings, do the following:
- If Only required responders decide IS checked:
- If Required Responders Decide. Select one (1) or more response(s) from the drop-down menu.
- Go to Step. Select the next step in the workflow if this response is the step's final decision.
- If Only required responders decide is NOT checked:
- If All Responders Decide. Select one (1) or more response(s) from the drop-down menu.
- Go to Step. Select the next step in the workflow if this response is the step's final decision.
- Optional: Click Add Response to create additional responses and fill out the above information as needed.
To add more step types, see:
Add a Condition Step to a Workflow
Condition steps allow a workflow path to be routed differently depending on whether the conditions of the step are met. To create a condition step, follow the instructions below.
- Enter the following information in the General Information section:
- Step Name. Enter a name for the step.
- Type. Select Condition Step.
- When. Select the first part of the hypothesis in the conditional statement. Different conditional statements exist for each tool. See Conditional Statements By Tool.
- Greater than. If your organization requires additional signatures for amounts greater than or equal to a specified amount, you will want to choose this option and enter an amount in the field to the right.
OR - Less than. If you want the step to function when the hypothesis is less than a specified number.
- Is. If you want the step to function when a certain field is selected for a custom field.
- Is Checked. If you want the step to function when a custom field checkbox is checked.
- Contains any of. If you want the step to function when one or more multi-select options are chosen for a custom field.
- Greater than. If your organization requires additional signatures for amounts greater than or equal to a specified amount, you will want to choose this option and enter an amount in the field to the right.
- Then. Select a step from the drop-down list or create a new one by clicking the Add Step button.
- Otherwise. Select a step from the drop-down list or create a new one by clicking the Add Step button. This is the workflow's next step if the conditions for the current step are NOT met.
- Choose from these options:
- Cancel. Click this button to discard any changes you have made.
- Save as Draft. Click this button to save a numbered 'Draft' workflow version. Choose this option when you are still working on creating your workflow.
OR - Save and Publish. Click this button to create a newly published version of the workflow. Choose this option when you are ready to assign your workflow to a project.
Conditional Statements by Tool
|
Budget Changes... Show/Hide
|
|||||||||||||||||||||||||||||||||||||||
|
Commitments... Show/Hide
|
|||||||||||||||||||||||||||||||||||||||
|
Commitment Change Orders... Show/Hide
|
|||||||||||||||||||||||||||||||||||||||
|
Correspondence/Custom Tools... Show/Hide
|
|||||||||||||||||||||||||||||||||||||||
|
Owner Invoices... Show/Hide
|
|||||||||||||||||||||||||||||||||||||||
|
Prime Contracts... Show/Hide
|
|||||||||||||||||||||||||||||||||||||||
|
Prime Contract Change Orders... Show/Hide
|
|||||||||||||||||||||||||||||||||||||||
|
Subcontractor Invoices... Show/Hide
|
* Conditional statements linked to the project’s budget are based on the total amount of the budget column selected on the Custom Reporting Budget View located in the company level Admin tool. See Set Up a Budget View for Custom Reporting.
For instructions on how to add additional step types:
Add an End Step (Successful) to a Workflow
A finish step defines the end of a workflow. A finish step indicates the workflow is complete.
- Click the
 icon attached to an existing step in the workflow builder and choose End Step (Successful).
 - Enter the following information in the General Information section:
- Step Name. Enter a name for the step.
- Item Status. Select the appropriate status that indicates successful completion. Status options vary by tool.
- Optional: Notification Recipients. Select the groups or roles that should receive an automated notification when the workflow step is completed. The default groups include:
- Workflow Manager. A workflow manager is a Procore user who must be designated on a project.
- Item Creator. An item creator is a Procore user who created the item on a project.
- Distribution Group. After you publish this workflow and assign it to a project, you can define different group members when configuring the workflow on the Project level.
- Choose from these options:
- Cancel. Click this button to discard any changes you have made.
- Save as Draft. Click this button to save a numbered 'Draft' version of the workflow. Choose this option when you are still working on creating your workflow.
OR - Save and Publish. Click this button to create a newly published version of the workflow. Choose this option when you are ready to assign your workflow to a project.
For instructions on how to add additional step types:
Add an End Step (Unsuccessful) to a Workflow
- Click the
 icon attached to an existing step in the workflow builder and choose End Step (Unsuccessful).
 - Enter the following information in the General Information section:
- Step Name. Enter a name for the step.
- Item Status. Select the appropriate status that indicates unsuccessful completion. Status options vary by tool.
- Optional: Notification Recipients. Select the groups or roles that should receive an automated notification when the workflow step is completed. The default groups include:
- Workflow Manager. A workflow manager is a Procore user who must be designated on a project.
- Item Creator. An item creator is a Procore user who created the item on a project.
- Distribution Group. After you publish this workflow and assign it to a project, you can define different group members when configuring the workflow on the Project level.
For instructions on how to add additional step types:
Saving a Workflow Template
The following options are available to save the workflow template:
- Save as Draft. Click this button to save a numbered 'Draft' version of the workflow. Clicking Save as Draft will not close the workflow builder so you can save your work as you go. Draft workflow templates cannot be used on projects.
OR - Save and Publish. Click this button to create a newly published version of the workflow. Published workflows can be used on projects.
OR - Cancel. Click this button to discard any changes you have made.
Assign Workflow Templates to Projects
Once your workflows are published, the next step is to assign them to a project so they can be configured. The following steps will show you how to assign workflow templates to projects in the company Workflows tool.
- Navigate to the Company Workflows tool.
- In the 'Workflows' table, locate the version that you want to publish.
- Click the hyperlink in the 'Assigned Projects' column.

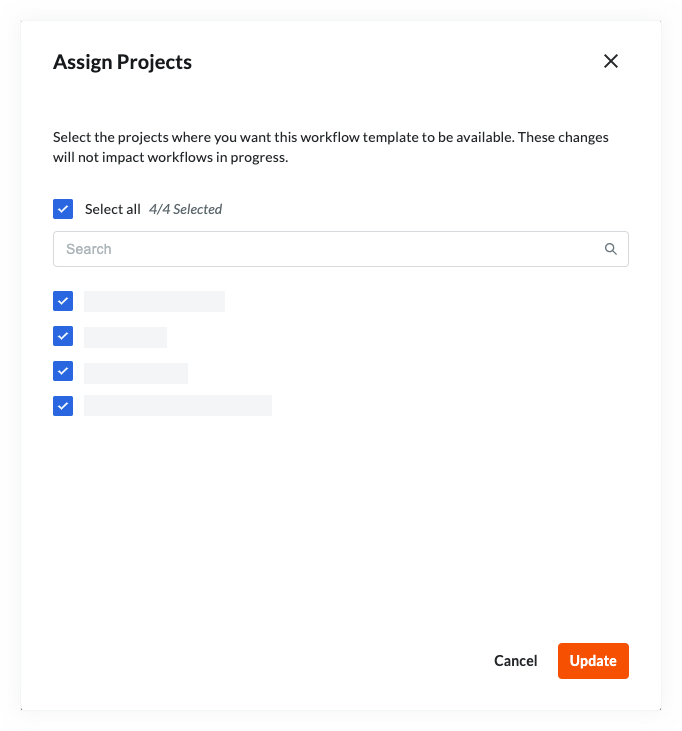
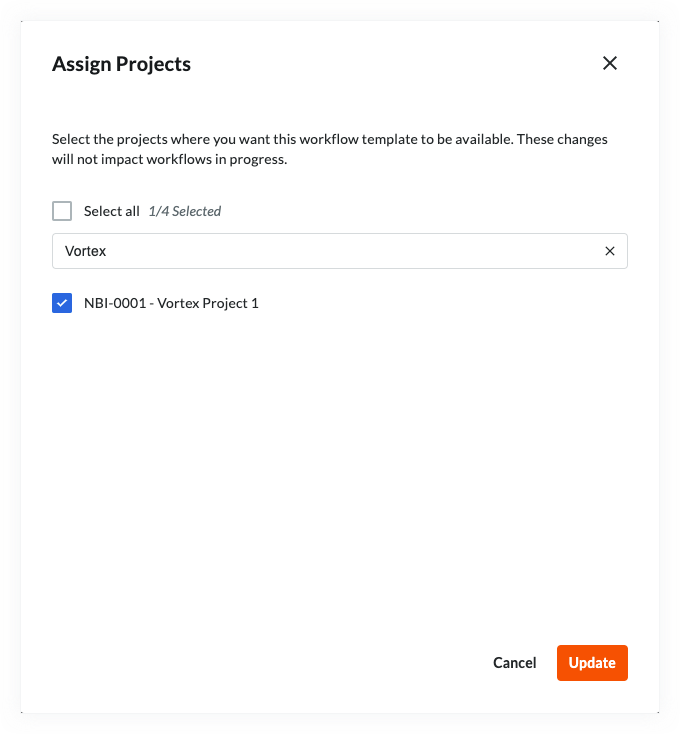
- In the 'Assign Projects' dialog box, do the following:
- To select all of the active projects in your company's account, place a mark in the Select All check box.
- To search for individual projects, start typing the project name in the Search box. Then place a mark in the checkbox(es) that corresponds to the desired project(s).
- To select all of the active projects in your company's account, place a mark in the Select All check box.
- Click Update.
Assign a Workflow Template to New Projects
A workflow template can be assigned automatically to all new projects so it won't need to be done each time a new project is created.
- Navigate to the Company Workflows tool.
- In the 'Workflows' table, locate the version that you want to assign to all new projects.
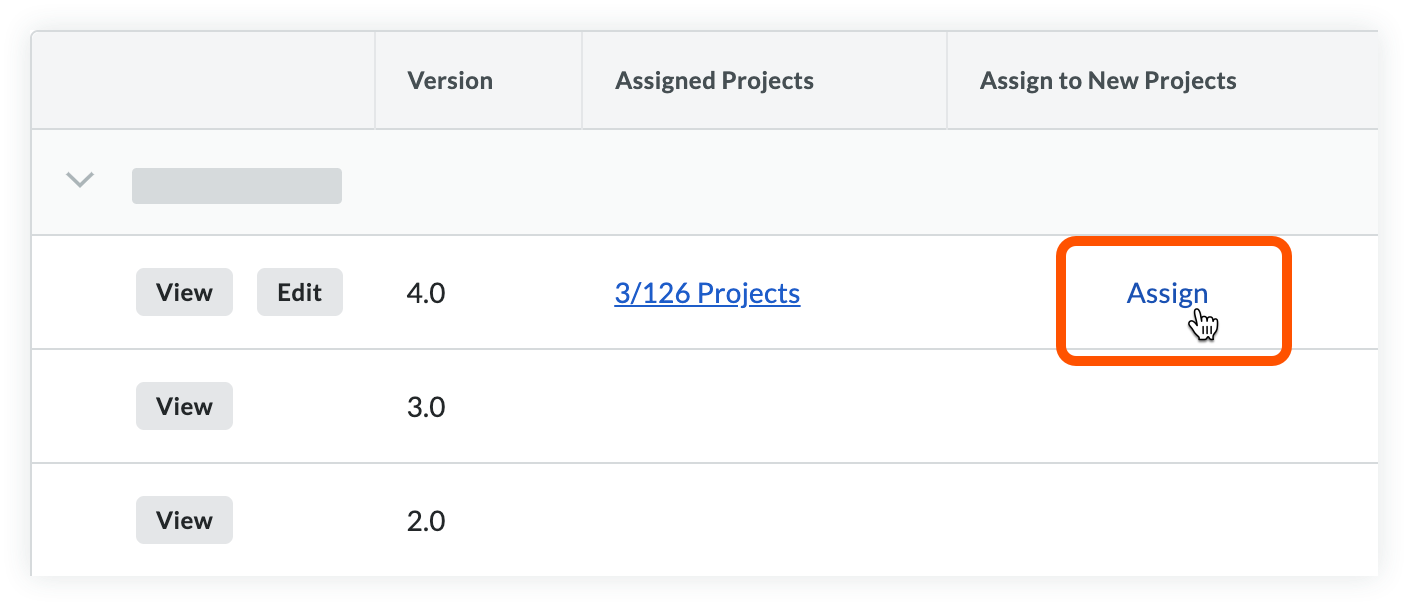
- Hover over the space in the 'Assign to New Projects' column.
- Click Assign.
- A checkmark will appear showing that it has been assigned to all new projects.
Note: Click the checkmark to stop assigning the template to new projects automatically.
Configure Workflow Templates on Projects
Once workflow templates are assigned to projects, they need to be configured with an individual tool's settings. This is the process where workflow steps are assigned to specific users and the amount of days they have to respond is set. A default workflow will also need to be set for the tool it is associated with before it can be applied and used to approve an item.
Objective
To configure a workflow template on a tool.
Background
After a workflow template is published and assigned to a project, it will need to be configured on the project before it can be used. Configuration includes assigning a person to act as the 'Workflow Manager' and assigning the appropriate distribution group(s) and assignees to your workflow. A specific template must also be set as the 'Default' for the tool before it can be used.
Things to Consider
- Required User Permissions:
- 'Admin' level permissions on the project tool being configured.
Steps
- (Optional) You can Enable a Project Level Workflow Templates to provide project teams the autonomy to create and customize workflows directly within their project environment, without relying on company-level permissions.
- Navigate to the tool where the workflow is being configured.
- Click the Configure Settings
 icon.
icon.
Note: For the Correspondence tool, select the configure settings for the specific correspondence type of the workflow template. - (Optional) You can Clone a Project Level Workflow Template to create a new workflow template that's the same or very similar to an existing one.
Note
Project Level Workflow Templates must be enabled in order to use the clone functionality. - Click 'Workflow Settings' in the right pane.
Note: The Invoicing and Correspondence tools do not have a dedicated 'Workflow Settings' page. Scroll to the bottom of the Invoicing tool configure settings to access Invoicing workflow configurations. - Click the Configure button next to the workflow being configured to open the workflow viewer.
Example

- At the top of the workflow viewer, assign a Workflow Manager by selecting a project user from the drop-down list.
- Click Save.
Note: If any required fields have missing information, a banner will appear at the top of the workflow viewer. Click Show Details to see which step needs updating.
Optional steps. Complete based on Workflow requirements.
- Assign Distribution Group. Select a distribution group from this list. These are the groups of users who will receive notification emails from Procore when certain actions occur in a workflow.
- Days to Complete. Enter the number of days assignees will have to submit their responses on the step. In the 'General Information' section of the step details under Days to Complete, enter a number of days in the first box, then select Calendar Days or Business Days from the drop-down list.
Note: If the Assignees do not submit a response within the defined timeframe, they will receive automated email reminders.
Set a Default Workflow
A default workflow must be chosen before a workflow can be started on an item.
- Hover over the 'Default Workflow' column in the 'Workflow Settings' table.
- Click Set as Default in the row of the workflow you want to be the default.
Note: If a default workflow has already been set, the same action will reverse the default designation of the workflow. - Once a default workflow is chosen, a checkmark will appear in the workflow's 'Default Workflow' column.
Start a Workflow
If you have enabled the self-service Workflows engine in the Workflows tool configure settings, you are now ready to use your workflows on project-level items. After creating and configuring a template on a project, the next step is to create an item that needs a workflow for approval. Workflows on subcontractor invoices start automatically, but workflows on contracts and other items need to be started manually. The instructions below will show you how to start a workflow.
Objective
After creating a new Commitment, Prime Contract or Budget Change on a project, the next step will be to start the workflow so assignees can respond.
Things to Consider
- Required User Permissions:
- 'Admin' level permissions on the company's Directory tool.
OR - Users with the 'Can Start Workflows' granular permission enabled on their permissions template. See Grant Granular Permissions in a Project Permissions Template.
OR - Users with the 'Can be Workflow Manager' granular permission enabled on their permissions template. See Grant Granular Permissions in a Project Permissions Template.
- 'Admin' level permissions on the company's Directory tool.
Steps
- Navigate to the tool and item containing the workflow.
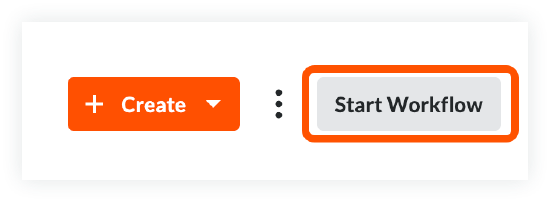
- Click Start Workflow at the top right corner of the item.
Respond to a Workflow
Objective
To respond to a workflow on a project level item.
Background
After a workflow has been started on a project item, designated users can respond to their assigned step.
Things to Consider
- Required User Permissions:
- To respond to a workflow on a commitment, or commitment change order:
- 'Standard' level permissions or higher on the project's Commitments or Prime Contracts tool.
- Must have permission to view the item containing the workflow. If the item is marked ‘Private’, the responder must have ‘Admin’ level permissions or be added to the ‘Access for Non-Admin Users’ list in the item’s privacy settings.
- Must be the assignee of the contract's current workflow step.
- To respond to a workflow on a prime contract, or prime contract change order:
- 'Standard' level permissions or higher on the project's Commitments or Prime Contracts tool.
- Must have permission to view the item containing the workflow. If the item is marked ‘Private’, the responder must have ‘Admin’ level permissions or be added to the ‘Access for Non-Admin Users’ list in the item’s privacy settings.
- Must be the assignee of the contract's current workflow step.
- To respond to a workflow on a subcontractor invoice:
- 'Standard' level permissions or higher on the project's Commitments tool.
- Must be the assignee of the invoice's current workflow step.
- The invoice must be associated with an open billing period.
- Must have permission to view the item containing the workflow. If the item is marked ‘Private’, the responder must have ‘Admin’ level permissions or be added to the ‘Access for Non-Admin Users’ list in the item’s privacy settings.
- To respond to a workflow on a budget change:
- 'Standard' level permissions or higher on the project's Budget tool.
- Must be the assignee of the current workflow step on the budget change.
- To respond to a workflow on a correspondence item:
- 'Standard' level permissions or higher on the project's Correspondence type.
- Must be the assignee of the correspondence item's current workflow step.
- To respond to a workflow on a commitment, or commitment change order:
Steps
- Navigate to the Project item containing the workflow.
- In the right pane of the item, review the 'Current' step in the workflow.
Note: Click 'Show Workflow' if the side panel is collapsed. - Select your response for the workflow at the bottom of the right pane.
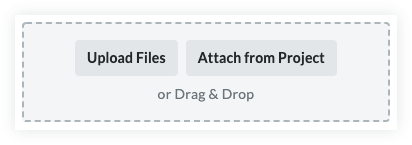
Note: You will still have an opportunity to cancel your response in the next step. - Optional: Upload or attach files to the workflow.
- Optional: Enter a reason for your response.
Note: A reason for your response may be required based on the configuration of the workflow template. - Click Submit to finalize your response or Back to return to change your response.
See Also

