About the Payments Processing Tab in the Payments Tool
Table of Contents
- Tab Overview
- Tab Considerations
- Business Entities
- Payment Permissions
- Project Controls
- Workflow Settings
- Advanced
- Change History
- More
Tab Overview
SEMI-PRIVATE ARTICLE
This article is intentionally set to 'Semi-Private.' It can only be viewed by individuals who have the link and is intended to be viewed as part of the book assembly at https://support.procore.com/products...-payments-tool for https://procoretech.atlassian.net/browse/ILR-508
The Payments Settings page lets payors control how the payment processing features work for Procore Pay. To get there, a Payments Admin clicks the Configure Settings ![]() icon in the Payments tool. You'll see two (2) tabs: 'Payment Processing' and 'Payment Requirements.' This guide details sub-pages and controls in the Payments Processing tab.
icon in the Payments tool. You'll see two (2) tabs: 'Payment Processing' and 'Payment Requirements.' This guide details sub-pages and controls in the Payments Processing tab.
Payment Processing Tab
Payments Admins use these sub-pages and their corresponding controls to manage the payment processing settings for your company's Procore Pay environment.

Tab Considerations
Add Funding Accounts
Important
Author note: Some updates to this task may need to be manually applied in Edit Funding Accounts and Link External Bank Accounts to a Construction Network Account.- Navigate to the Company level Payments tool.
- Click the Payments Settings
 icon.
icon.
This opens the Payments Settings page. The 'Business Entities' page in the 'Payments Processing' tab is active by default and lists the business entities that pay invoices for your company's Procore Pay software. - Go to the desired business entity and click Add Funding Account.

- In the Add Funding Account panel, do the following:
- Nickname. Enter a unique nickname for the account. Nicknames quickly identify the bank account for disbursements while helping to protect the privacy of its account number.
- Business Entity. Shows the name of the current business entity.
- Account Number. Enter the full account number in this field. See Where do I find my routing and account number?
- Reenter Account Number. Reenter the full account number in this field.
- Routing Number. Enter the routing number for this account. See Where do I find my routing and account number?
- Account Type. Choose Checking or Savings.
- Bank ID. Enter a bank identifier. Procore uses the bank ID as a prefix for a payment's check number. You can change this number at any time. However, any new changes only impact new check numbers.
Important
For companies using the ERP Integrations tool: The bank identifier must match the funding account's 'Bank ID' in your integrated ERP system.
 - Check Number. Enter a check number for the next invoice payment. This provides each check a unique identification number for this account. See How does Procore assign numbers to disbursement payouts? It also helps users who Manage Disbursements to identify transactions.
Important
For companies using the
ERP Integrations tool:- After Procore Pay processes an invoice payment in a disbursement, the 'Bank ID' and 'Check Number' combination is exported to your integrated ERP system.
- To avoid potential ERP synchronization errors, ensure the Check Number entered is higher than the last check number in your ERP system to prevent duplication in your integrated ERP system. See How do payments made in Procore Pay sync with an integrated ERP system?
- Preview. Verify that the 'Bank ID' and 'Next Check Number' are correct.
- Click Continue.
This launches the account verification steps.
Get Started with Account Verification
To protect your company's personal and financial information, verification is required. To learn more, see What is a verified bank account in Procore Pay?
- At the verification prompt, click Get Started.
- In Business Details:
- Company Name. Enter your company's name.
- Address 1*. Enter your company's street address.
- Optional. Address 2. Enter your company's additional address information, such as suite number or floor level.
- City. Enter the city.
- State. Enter a valid state or territory abbreviation.
- ZIP Code. Enter a valid ZIP code.
- Phone Number. Enter a telephone number with an area code.
- Optional. Website. Enter your company's primary website URL.
- Click Continue.
- In Taxpayer Identification Number, enter your ten-digit Business EIN for the Internal Revenue Service (IRS).
- Click Continue.
- On the Bank Account Details page:
- Account Type. Choose Checking or Savings.
- Account Number. Enter your bank account number. Entries have a 17 digit maximum. See Where do I find my routing and account number?
- Routing Number. Enter your account's nine (9) digit American Banking Association (ABA) routing transit number. See Where do I find my routing and account number
- On the Congratulations page, click Complete to start verification.
Procore Pay adds the funding account to the business entity and updates its status to Pending. The status does not change until you work with the Payment Operations team to update any required authorizations and perform testing. This helps prevent issues before you use the new account to fund disbursements. Once the account has been successfully tested, the status will be updated to Verified and the new account can be used to create disbursements to send invoice payments.Tip
- What if verification fails? Contact Support.
Edit Funding Accounts
Important
Procore Documentation Team Only: Any updates made to this task may also need to be manually applied in Add Funding Accounts.- Navigate to the Company level Payments tool.
- Click the Payments Settings icon.This opens the Payments Settings page.
The 'Business Entities' page in the 'Payments Processing' tab is active by default and lists the business entities that pay invoices for your company's Procore Pay software. - Locate the business entity to modify and click its funding account link.

- Locate the account to modify.
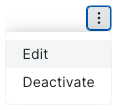
- Click the Overflow menu and choose Edit from the drop-down menu.
This opens the Edit Account Details page. - In the Edit Account Details page, do the following:
- Nickname. Enter a unique nickname for the account. Nicknames quickly identify the bank account for disbursements while helping to protect the privacy of its account number.
- Business Entity. Shows the name of the current business entity.
- Bank ID. Enter a bank identifier. Procore uses the bank ID as a prefix for a payment's check number. You can change this number at any time. However, any new changes only impact new check numbers.
Important
For companies using the ERP Integrations tool: The bank identifier must match the funding account's 'Bank ID' in your integrated ERP system. - Check Number. Enter a check number for the next invoice payment. This provides each check a unique identification number for this account. See How does Procore assign numbers to disbursement payouts? It also helps users who Manage Disbursements to identify transactions.
Important
For companies using the
ERP Integrations tool:- After Procore Pay processes an invoice payment in a disbursement, the 'Bank ID' and 'Check Number' combination is exported to your integrated ERP system.
- To avoid potential ERP synchronization errors, ensure the Check Number entered is higher than the last check number in your ERP system to prevent duplication in your integrated ERP system. See How do payments made in Procore Pay sync with an integrated ERP system?
- Preview. Verify that the 'Bank ID' and 'Next Check Number' are correct.
- Click Save.
Set a Default Funding Account
- Navigate to the Company level Payments tool.
- Click the Payments Settings icon.
This opens the Payments Settings page. The 'Business Entities' page in the 'Payments Processing' tab is active by default. This page lists the business entities configured to pay invoices in your company's Procore Pay software. - Locate the business entity to modify and click its funding account(s) link.
- Locate the account to modify.
- Click the Overflow menu and choose Set as Default Funding Account.

The account is marked Default and moves to the top of the entity's Funding Accounts list.

Tip
Can I deactivate our default account at a later time? No. The default account cannot be deactivated in Procore. Before you can deactivate an account, you must remove the default designation. See Deactivate Funding Accounts as a Payor.
Deactivate Accounts
- Navigate to the Company level Payments tool.
- Click the Payments Settings
icon.
This opens the Payments Settings page. The 'Business Entities' page in the 'Payments Processing' tab is active by default. This page lists the business entities configured to pay invoices in your company's Procore Pay software. - Locate the business entity to modify and click its funding account(s) link.
- Locate the funding account to edit.
- Click the Overflow menu and choose Deactivate from the drop-down menu.
Tip
Can I deactivate a default account? No. A default account cannot be deactivated unless you first designate another account as the default. See Set a Default Funding Account as a Payor.
- In the 'Deactivate Funding Account' confirmation prompt, review the message.
Important
Before you deactivate the funding account, be aware of the following:
- If the account being deactivated is also your default funding account, a Payments Admin must first set a new default account for those projects. See Update Your Project's Bank Accounts.
- Once deactivated, Payments Disbursers can no longer select the funding account when creating new disbursements.
- Drawdown requests for existing disbursements are NOT canceled. If the existing disbursement's funds request is successful, Procore Pay withdraws the aggregate disbursement amount from your funding account and transfers it to your deposit account to process invoice payments.
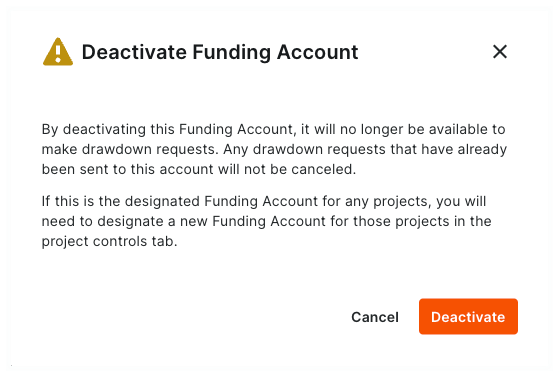
- If you agree, click Deactivate.
Procore Pay marks the account Deactivated.

View Business Entities & Funding Accounts
- Navigate to the Company level Payments tool.
- Click the Payments Settings icon.
This opens the Payments Settings page. The 'Business Entities' page in the 'Payments Processing' tab is active by default. This page lists all of your company's business entities that have been configured to pay invoices. - For each business entity, click the funding account(s) link to view the account information.

Funding Accounts Table
The table below details the elements for the Funding Accounts table. Verified funding accounts can receive drawdown requests when creating disbursements.
| Element | Type | Description | Learn more... |
|---|---|---|---|
| Nickname | Field | A Payments Admin enters the account nickname when linking an account. The nickname allows Payment Disbursers to identify an account when creating disbursements. It also protects your financial privacy by eliminating the need to provide disbursers with the full bank account number. | Add Funding Accounts as a Payor |
| Verification Status | Field | Shows the current verification status of the account. | Add Funding Accounts as a Payor What are the default verification statuses for bank accounts in Procore Pay? |
| Bank ID | Field | A Payments Admin enters a unique Bank ID portion to be part of the unique check number issued to the next invoice payout from this account. A payout is an invoice payment in a disbursement. | Add Funding Accounts as a Payor |
| Next Check No. | Field | A Payments Admin enters a unique Next Check No to be part of the unique check number issued to the next invoice payout from this account. A payout is an invoice payment in a disbursement. | Add Funding Accounts as a Payor |
| Default | Field | Indicates the account is the default withdrawal account for Procore Pay in the payor environment. | Set a Default Funding Account as a Payor |
| Deactivated | Field | Indicates the account has been deactivated. | Deactivate Funding Accounts as a Payor |
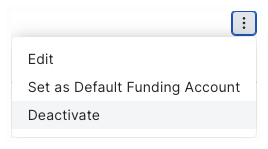
| Overflow | Menu | Click the vertical ellipsis and choose one of the menu options. The available options in this menu are: Edit, Set as Default Funding Account, and Deactivate. On the Default account, only Edit and Deactivate are available. On a Deactivated account, only Edit is available. | Manage Business Entities as a Payor |
Add or Remove Payments Admins
Add Disbursers
- Navigate to the Company level Payments tool.
- Click the Payments Settings
 icon.
icon.
This opens the Payment Settings page. The Funding Accounts page is active by default. - Click the Payment Processing tab.
This is the active tab by default. - Click the Payments Permissions link.
- Scroll to Payments Disbursers.
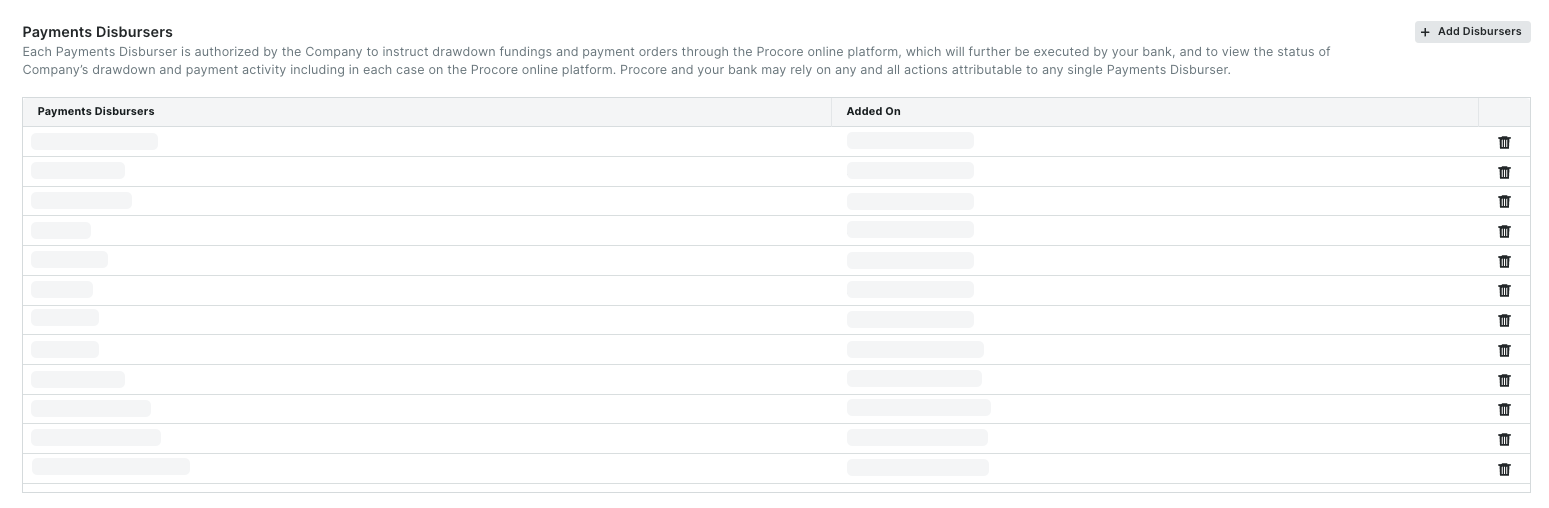
- Click the Add Disbursers button.
This opens the Add Disbursers window. - In the Add Disbursers window, add one (1) or more employees from your company as follows:
Tip
Which users are available in the Search People list? Any Procore user account marked as an employee of your company in the Company level Directory tool. Payment Disbursers must be employees of your company. See How do I add someone as an employee of my company?- Start typing the name of the user to add in the Search People list.
- Select the matching user name(s) from the drop-down list.

- Click Continue.
- Review the names in the Payments Disbursers list.

- Click Add Disbursers.
A GREEN banner indicates the action was successful. Procore also logs the 'User added as Disburser' action in the Change History.
Remove Disbursers
- Navigate to the Company level Payments tool.
- Click the Payments Settings icon.
- Click the Payment Processing tab.
- Click Payments Permissions.
- Scroll to Payments Disbursers.
- Review the names in the Payments Disbursers list.
- Click the trash can icon.

A GREEN banner indicates the action was successful. Procore also logs the 'User removed as Disburser' action in the Change History. The user no longer has access permission to create or view disbursements.
Add Beneficiary Approvers
- Navigate to the Company level Payments tool.
- Click the Payments Settings icon.
This opens the Payment Settings page. The External Bank Accounts page is active by default. - Click the Payment Processing tab.
This is the active tab by default. - Click Payments Permissions.
- Scroll to Payments Beneficiary Approvers.

- Click Add Beneficiary Approvers.
This opens the Add Beneficiary Approvers window. - In the Add Beneficiary Approvers window, add one (1) or more employees from your company as follows:
Tip
Which users are available in the Search People list? Any Procore user account marked as an employee of your company in the Company level Directory tool. Payment Beneficiary Approvers must be employees of your company. See How do I add someone as an employee of my company?- Start typing the user's name in the Search People list.
- Select the matching user from the drop-down list.

- Click Continue.
- Review the names in the Payments Beneficiary Approvers list.
- Click Add Approver.
A GREEN banner indicates the action was successful. Procore also logs the 'User added as Approver' action in the Change History.
Remove Beneficiary Approvers
- Navigate to the Company level Payments tool.
- Click the Payments Settings icon.
- Click the Payment Processing tab.
- Click Payments Permissions.
- Scroll to Payments Beneficiary Approvers.
- Review the names in the Payments Beneficiary Approvers list.
- Click the trash can icon.
- In the Remove Beneficiary Approver? prompt, click Remove Beneficiary Approver.
A GREEN banner indicates the action was successful. Procore also logs the 'User removed as Approver' action in the Change History. The user can no longer manage or approve beneficiary bank accounts.
Enable or Disable Pay
Enable Procore Pay on All Projects by Default
To enable Procore Pay on all new Procore projects by default, move the Enable Pay on All New Projects toggle to the right. Existing projects are not affected. Any changes to this setting are logged in the Change History under the Payment Processing tab.

By default, the 'Select at Disbursement' option is enabled on the project row in the Project Controls table. This allows authorized users to select a funding account when creating disbursements to pay subcontractor invoices. See Create Disbursements. Authorized users can also change this setting under Project Controls. To learn how, see Customize the Payment Controls for Your Active Projects.
Enable or Disable Procore Pay on Specific Projects
- Navigate to the Company level Payments tool.
- Click the Payments Settings icon.
This opens the Payments Settings page. - Click Project Controls.
This opens the Project Controls page shown below. - Optional. Start typing a project name or number in the Search box to narrow the projects in the list.
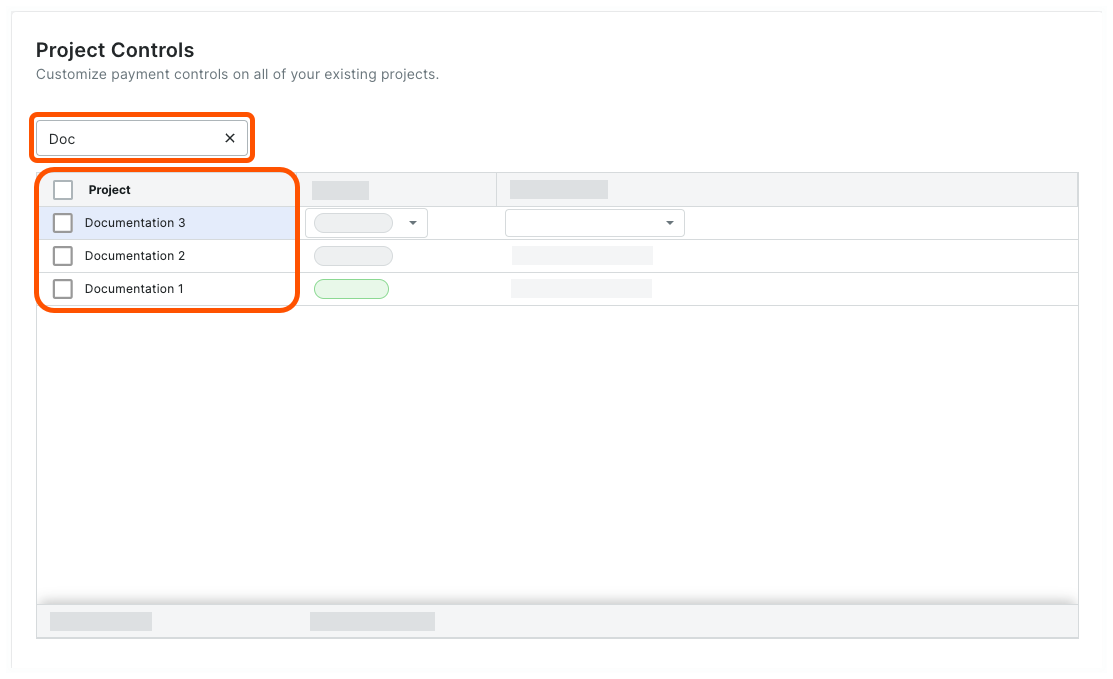
- In the table, select one or multiple projects:
- To select one or multiple projects, mark the checkbox(es) that correspond to the desired projects.
OR - To select all projects, mark the checkbox in the heading of the Project column.
- To select one or multiple projects, mark the checkbox(es) that correspond to the desired projects.
- Click Edit Pay and choose the desired option from the drop-down list.
Tip
Want to change the selected projects' bank accounts? You can change both settings in the same action. For instructions, see Customize the Payment Controls for Your Active Projects.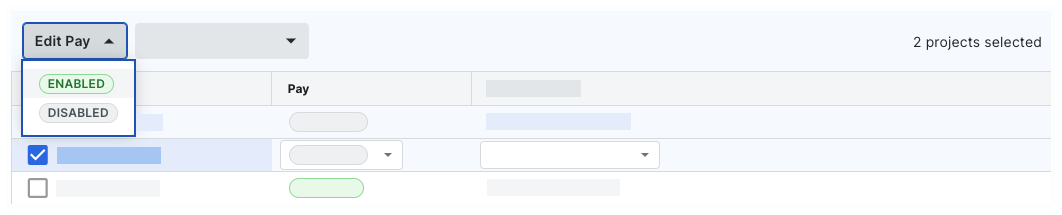
- Enabled. Turns Procore Pay features ON in the selected projects.
- Disabled. Turns Procore Pay features OFF in the selected projects.
- In the Enable Pay or Disable Pay prompt, read the informational message.
- Depending on your selected option, click the Enable or Disable button.
Any changes to this setting are logged in the Change History under the Payment Processing tab.
Manage Controls in Bulk
- Navigate to the Company level Payments tool.
- Click the Payments Settings icon.
This opens the Payments Settings page. - Click Project Controls.
This opens the Projects Controls page.

- Optional. Start typing a project name in the Search box to narrow down the list of projects.
- In the table, select one or multiple projects:
- To select one or multiple projects, mark the checkbox(es) that correspond to the desired projects.
OR - To select all projects, mark the checkbox in the heading of the Project column.
- To select one or multiple projects, mark the checkbox(es) that correspond to the desired projects.
- Choose from these options to make a change in bulk:
- Edit Pay. Choose the Enabled or Disabled setting from the drop-down list.
-
Beta Edit Early Pay Program. Choose one of your company's Early Pay Programs. To learn more, see About Early Pay Programs.Note
Can I change the Apply Fee setting in bulk? No. Fee settings must be configured individually on each project. See Configure Procore Pay Fee Collection for a Procore Project.
Changes are saved automatically. A GREEN success banner confirms the action.
Customize Payment Controls for Projects
- Navigate to the Company level Payments tool.
- Click the Payments Settings icon.
This opens the Payments Settings page. - Click Project Controls.
- Locate the project line item and change its project controls as needed:
Note
If you want to change the project controls in bulk, see Manage Project Controls in Bulk.- Edit Pay. Choose the Enabled or Disabled setting from the drop-down list.
- Edit Business Entity. If your company operates multiple business entities, select one from the drop-down list or choose the 'Select at Disbursement' option. See Add Business Entities as a Payor.
- Edit Funding Account. Choose one of your company's linked external accounts or the Select at Disbursement option. See Add Funding Accounts as a Payor.
-
Beta Edit Early Pay Program. Choose one of your company's Early Pay Programs. To learn more, see About Early Pay Programs.
The system saves your changes automatically.
Configure Fee Collection
- Navigate to the Company level Payments tool.
- Click the Payments Settings icon.
This opens the Payments Settings page. The Funding Accounts page is active by default. - Click Project Controls.
This opens the Project Controls page.

- In the table, locate the project.
Tip
- Looking for a specific project? Start typing the project name in the Search box to narrow the accounts in the list.
- Want to change the selected 'Pay' status? You can update also update this in the table. To learn more, see Enable or Disable Procore Pay on Your Projects.
- To edit the fee settings, click the 'Apply Fee' field and select one of the following options:
Note: 'SC Pays' is selected by default.- GC Pays. Choose this option when the general contractor is paying the fees.
- SC Pays. Choose this option when specialty contractors are paying the fees.
Best Practices
When Procore Pay customers enable the Company level Workflows tool, an authorized team member can create a custom workflow template to approve/reject your disbursements. Your company can create any number of Payments workflow templates. However, only one (1) of those template(s) can be assigned as the default template for Procore Pay.
1. Create and Configure Your Templates |
| Who will be your company's Workflow Manager and who must complete the workflow steps? | How do you manage end-user permissions for Procore Pay + Workflows? | How do you create a Payments Workflow Template? | How do you configure the Payments Workflow Template? |
|
Ready to learn more? |
Ready to learn more? |
Ready to learn more? |
Ready to learn more? |
2. Start Using Your Default Payments Workflow |
| How do you start the Payments workflow? | Need to submit an approve/reject response to a workflow? | Need to start, restart, or return to a previous step in a workflow? |
|
A Payments Admin or a Payments Disburser follows the steps in Create Disbursements. After selecting the funding account, Procore Pay automatically starts the Payments workflow for the disbursement when the Workflow tool is enabled. |
If you are assigned to review a disbursement, submit a response before the due date. To learn more, see Approve or Reject a Disbursement. After submitting an 'Approve' response, an Action Required banner prompts the final reviewer to Authorize the disbursement. Funds are only withdrawn after authorization. See Create Disbursements. |
If you are the designated Workflow Manager for your company's Payments Workflow, learn how to Start a Custom Workflow, Restart a Custom Workflow, or Return a Workflow to a Previous Step. You can also Add Additional Assignees when the existing assignees are unavailable. |

Important
- Invoice approval and disbursement authorization must be completed by two (2) different Procore users.
- If you are the Payments Admin or Payments Disburser who placed any of the invoices on the disbursement into the 'Approved' or 'Approved as Noted' status, Procore Pay will not permit you to approve the disbursement.
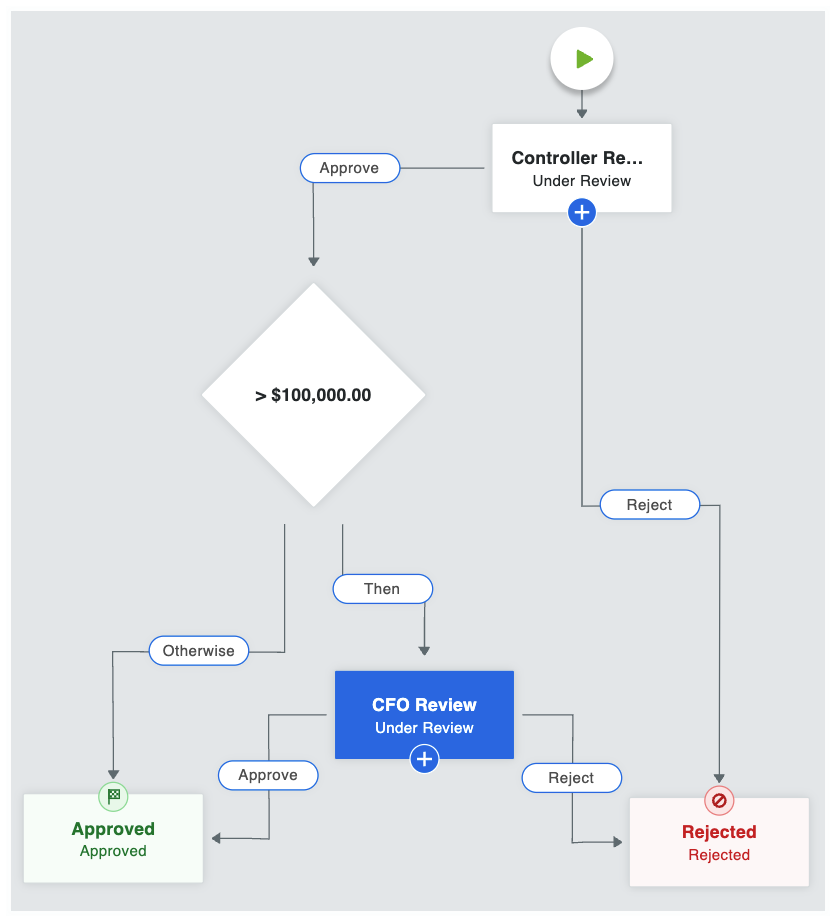
Example Payments Workflow
This is an example of a Payments workflow that starts automatically when a disbursement is created. You can use this example to create your company's Payments Workflow or you can create your own custom workflow to suit your specific business needs. For step-by-step instructions, see Create a Custom Workflow Template.
Example
This table shows you the workflow steps and step details for the example workflow. You can customize the steps and details as needed. To learn more, see What are the different types of steps in a custom workflow?
| Step Name | Step Details | What does it do? |
|---|---|---|
| Controller Review |
|
When a disbursement is created, the workflow is placed into the Under Review status and automatically assigned to the Controller. Emails are sent to the Controller, Workflow Manager & Item Creator. The Controller has five (5) days to provide an approve or reject response. |
| > $100,000.00 |
|
When a controller approves a disbursement and the aggregate disbursement amount is $100,000.00 or greater, the system requires secondary approval by the CFO. If the disbursement amount is less than $100,000, the system automatically moves the disbursement to the Approved step. To learn more about condition steps, see Optional Condition Steps for the Payments Tool. |
| CFO Review |
|
When the aggregate disbursement amount is greater than $100,00.00, the workflow remains in the Under Review status and is automatically assigned to the CFO. Emails are sent to the CFO, Workflow Manager, and Item Creator. The CFO has five (5) days to provide a response. |
| Approved |
|
When the Controller or CFO (only if secondary approval was a required condition), an 'Approve' response updates the disbursement's status to Approved. Emails are sent to the Assignees (Controller and CFO), Workflow Manager, and Item Creator. |
| Rejected |
|
When the Controller and/or CFO submit a Reject response, the system updates the disbursement's status to 'Rejected.' Emails are sent to the Assignees (Controller and CFO), Workflow Manager, and Item Creator. |
Optional Condition Steps for the Payments Tool
When creating conditional statements for the Payments tool, Workflow Managers have these options:
Payments... Show/Hide
| Condition | Definition | Example |
| Disbursement Amount | The total amount of the disbursement is greater than the amount set in the workflow. | If the total amount of a disbursement is greater than or equal to $10,000,000.00, route the disbursement to the CFO for approval. |
| Highest Invoice Amount | The total amount of any project invoice is greater than the amount set in the workflow. | If the amount on any project invoice is greater than $5,000,000.00, route the disbursement to the CFO for approval. |
| Highest Retainage Release | The total amount of retainage release is greater than the amount set in the workflow. | If the amount of retainage released on an invoice payment is greater than $0.00, route the disbursement to the CFO for approval. |
Configure a Template
- Navigate to the Company level Payments tool.
- Click the Payments Settings icon.
This opens the Payments Settings page. The Funding Accounts tab is active by default. - Click Workflow Settings.
- Under Workflow Settings, toggle Enable Workflows on Disbursements to the ON setting.
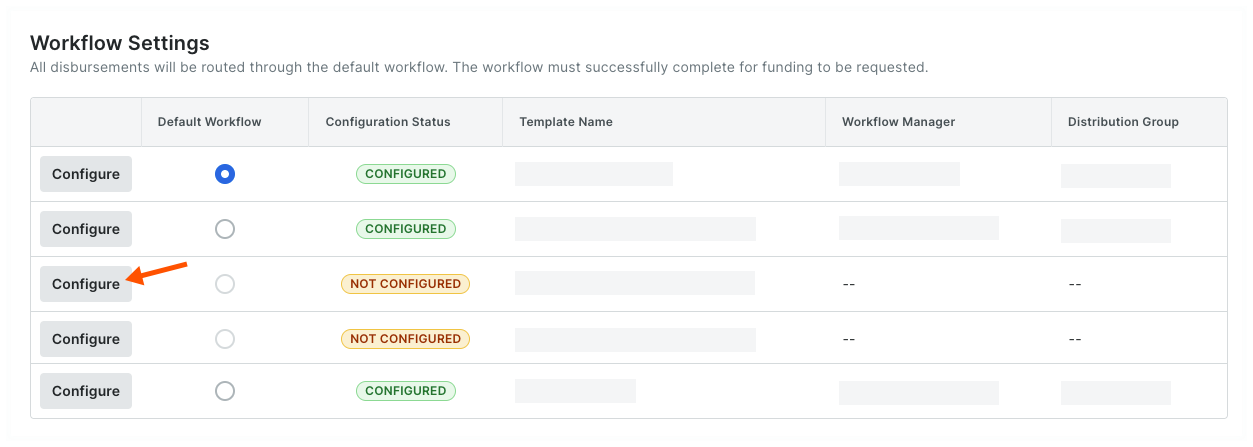
- Under Workflow Templates, locate the workflow template to configure:
- If you are configuring a new workflow template, the configuration status will be Not Configured.
- If you want to reconfigure an existing template, the configuration status will be Configured. You can change the configuration as needed.
- Click the template's Configure button.
This launches the Company level Workflows tool and opens the selected workflow template. - View the step details to configure by clicking the Show Details button.

- Complete the workflow configuration.
Example
In this tutorial, the details are configured using the example workflow from Best Practices for Creating a Payments Workflow, so you'll need to assign the following roles to perform the steps:
- A Payments Admin to be the Workflow Manager. A workflow is only considered complete when a Workflow Manager is assigned to it.
- A Payments Admin or Disburser to be an Assignee for the Controller Review step. Each unique response step in a workflow requires one or more assignees. When there are multiple assignees on a step, the first response given will move the workflow to the next step.
- A Payments Admin or Disburser to be an Assignee for the CFO Review step. Each unique response step in a workflow requires one or more assignees. When there are multiple assignees on a step, the first response given will move the workflow to the next step.
If you have created a custom workflow template, the details you configure will be unique to your environment.
- Click the Save button.
Tip
Can I edit the workflow template later? Yes. You can add or remove steps from your workflow template at a later time. See Edit a Custom Workflow Template. Once editing is complete, you will also need to perform the steps above to re-configure the workflow's details.
Assign a Default Template
- Navigate to the Company level Payments tool.
- Click the Payment Processing tab.
- Click the Workflow Settings link.
This opens a list of workflows that have been created for the Payments tool. It also shows the configuration status of each workflow.Tip
Do you have existing workflows in the Not Configured status? To learn how to configure an existing workflow, see Configure the Settings for a Payments Workflow Template. - In the Default Workflow column, choose the option button that corresponds to the workflow that will be used as the system's default. You can create up to five (5) workflows, but can only assign one (1) default workflow.
Tip
What happens if I change the default workflow? If you decide to change the default workflow, all new disbursements created in the Payments tool will automatically use the new default workflow. Any disbursements that have already started a workflow process will be unaffected by this change.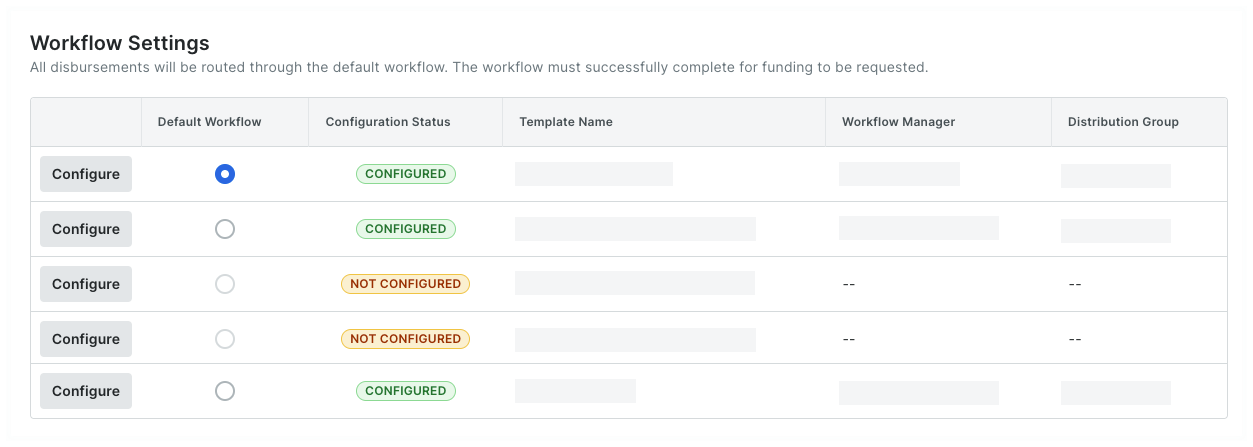
Enable Disbursements
- Navigate to the Company level Payments tool.
- Click the Configure Settings
 icon.
icon. - Click the Payment Processing tab.
- Click Advanced Settings.
- On the Advanced Settings page, review the informational statement under Enable Disbursements.
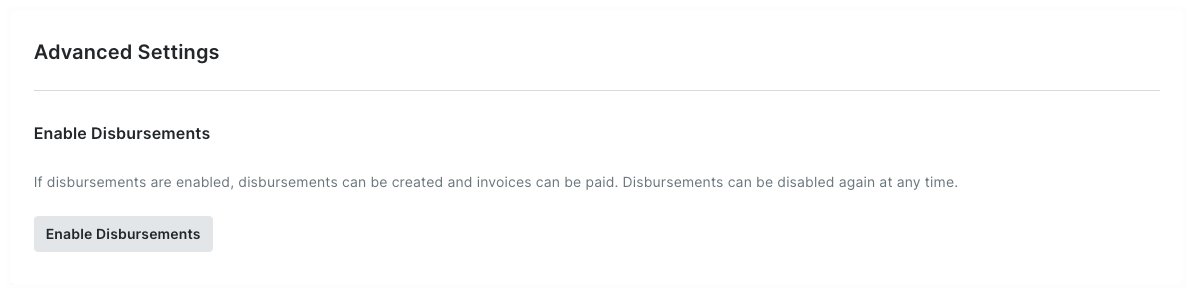
- Click the Enable Disbursements button.
Once enabled:- A GREEN success banner appears to confirm your action.
- Your company's Payments Disbursers can now create new disbursements in the Company level Payments tool.
Disable Disbursements
- Navigate to the Company level Payments tool.
- Click the Configure Settings icon.
- Click the Payment Processing tab.
- Click Advanced Settings.
- On the Advanced Settings page, review the informational statement under Disable Disbursements.
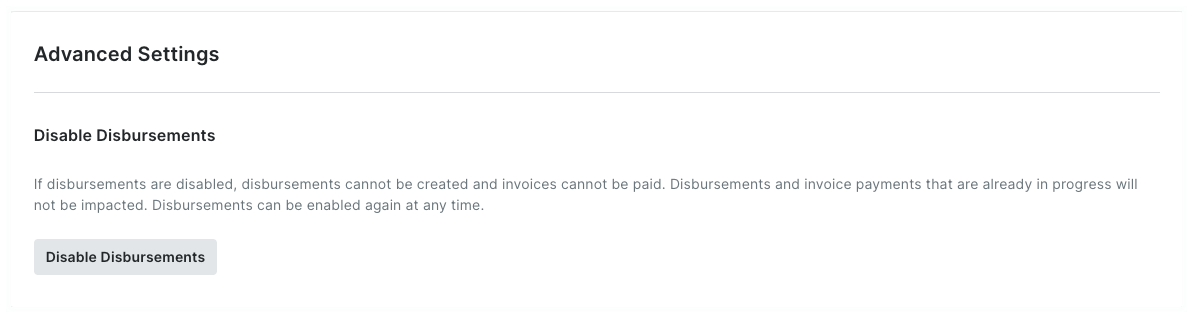
- Click Disable Disbursements.
The following confirmation prompt appears. When disabled, Procore Pay turns the disbursements features off and invite banners no longer display in the Commitments or Invoicing tool.
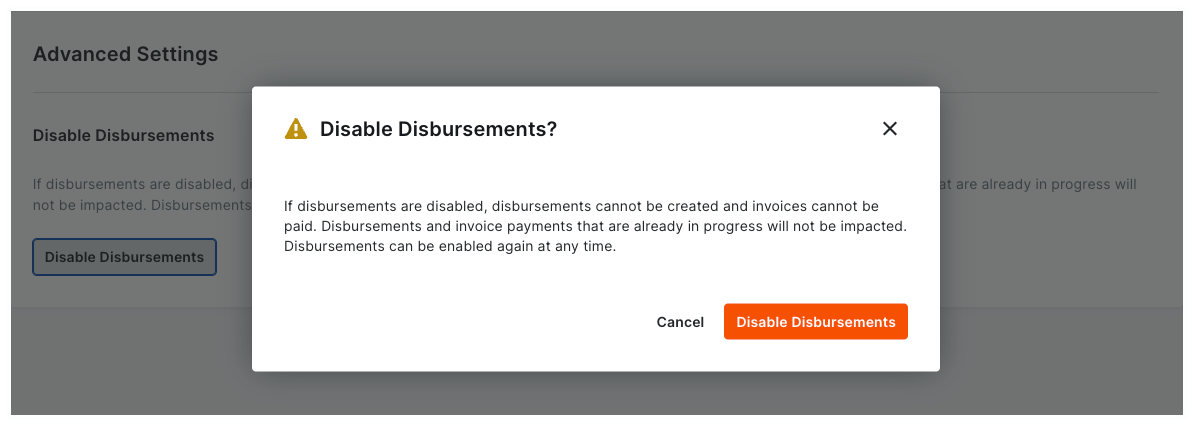
- Confirm that you want to disable disbursements by clicking the Disable Disbursements button.
Once disabled:- A GREEN success banner appears to confirm your action.
- A YELLOW banner appears at the top of the page to alert Payment Admins that the feature is turned OFF.
- Your company's Payments Disbursers can no longer create new disbursements in the Company level Payments tool.
- Procore Pay continues to process any existing disbursements and invoice payments that are in progress.
View History
- Navigate to the Company level Payments tool.
- Click the Payments Settings icon.
This opens the Payments Settings page. - Click the Payment Processing tab.
- Click the Change History link.
This opens the Change History page.Only a Payments Admin has access to view the Payments tool's Change History. The table on the Change History page logs the actions performed by Payments Admins and Payments Disbursers with the Company level Payments tool. For step-by-step instructions, see View the Payments Tool Change History.
Click here to learn about the table.
Change History Page
The table below describes the default columns on the Change History page.
Column Description Date Shows the date and timestamp of the action. Action By Shows the first and last name of the Procore user as their name appears in the Company Directory.
Note: Only a member of Procore's Payments Operations Team can add Payments Admins to your account. This requires an authorized user at your company to complete and sign Procore's Payment Administrator Designation Form. Once added, this entry indicates the user was added by 'Procore Support'. For details, see Add or Remove Payments Admins as a Payor.Changed Provides a brief description of the action. From Shows the value that the action changed from.
Note: If the action originated from a setting with a blank or null value, Procore shows the double dash symbol (--).To Shows the To value that the action changed to.
Note: If the action resulted in a setting with a blank or null value, Procore shows the double dash symbol (--).