Manage PDF Configurations for Exported Meetings
Things to Consider
- Required User Permissions:
- 'Admin' level permissions on the Company level Admin tool.
- Additional Information:
- If your company has custom meeting PDF templates built by Procore's Custom Solutions team, reach out to your Procore point of contact to confirm whether the meetings PDF configurations can be used on your projects.
Steps
- Create a PDF Configuration
- Edit an Existing PDF Configuration
- Update the Assigned Projects for an Existing PDF Configuration
- Delete a PDF Configuration
Create a PDF Configuration
- Navigate to the Company level Admin tool.
- Under 'Tool Settings', click Meetings.
- Click the PDF Configurations tab.
- Click Create.
- In the 'Create PDF Configuration' window, configure the following fields:
a. Name: Enter a name for the PDF configuration.
b. Attendees Phone Number Display: Select Business Phone or Cell Phone to choose which phone number for each attendee will display. The phone numbers included are based on the user's information in the Project level Directory. See Edit a User Account in the Project Directory.
c. Attendees Table Format: Select One Column, Two Columns, Move to end of PDF, or Remove Table.
See What are the Different Attendees Table Formats Supported in the Exported Meeting PDFs? for more information.
Note: If you select Two Columns, the attendees' email addresses and their attendance statuses will not be included in the exported PDF.
d. Disclaimer Footer Text: Enter text you want to display at the bottom of the PDF pages. This will replace Procore's default text.
Note: This text only displays on exported PDF of meetings that are in minutes mode. See Convert a Meeting from Agenda to Minutes Mode.
6. Click Create.
You are prompted to assign projects to PDF configuration.
7. In the Assign Projects to PDF Configuration? screen, click Assign Projects.
A screen appears with the list of projects. You can select one or more projects from the list to apply this PDF configuration.
8. Mark the checkboxes to select the desired projects.
9. Click Assign.
The PDF configuration is assigned to the selected projects.
Important
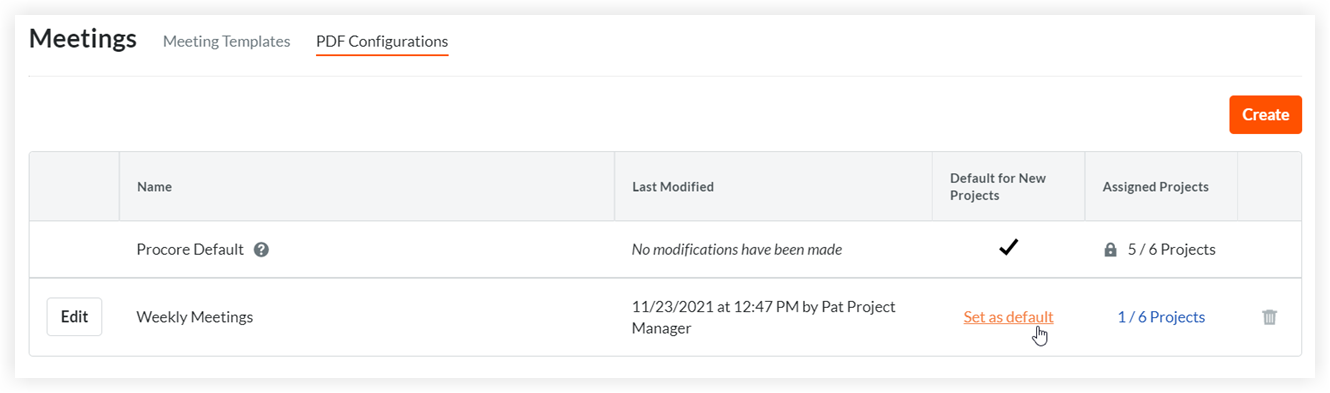
Assigning a PDF configuration to a project will affect all meeting exports in that project, including exports for meetings that existed before the PDF configuration was assigned to the project.Optional: To set the PDF configuration as the default for new projects, hover your cursor under the 'Default for New Projects' column on the 'PDF Configurations' page and click Set as default.
Edit an Existing PDF Configuration
-
Navigate to the company level Admin tool.
-
Under 'Tool Settings', click Meetings.
-
Click the PDF Configurations tab.
-
Click the
 icon in the corresponding row of a PDF configuration you want to edit.
 -
On the Edit PDF Configurations page, update the fields you want to change for the PDF configuration. See Create a PDF Configuration above for more information.
-
Click Save Changes.
-
In the Apply changes to projects window, click Edit Assigned Projects.
-
After editing the project list, click Assign.
Update the Assigned Projects for an Existing PDF Configuration
-
Navigate to the company level Admin tool.
-
Under 'Tool Settings', click Meetings.
-
Click the PDF Configurations tab.
-
Locate the PDF configuration and click the corresponding Manage button under the Assigned Projects column.
-
To add the PDF configuration assignment to one or more projects, mark the checkbox next to each project that you want to assign the PDF configuration to (or mark the Select All Projects checkbox to assign it to all projects) and click Update.
-
To remove the PDF configuration assignment from one or more projects, clear the checkbox next to each project that you want to remove the PDF configuration assignment from (or clear the Select All Projects checkbox to remove it from all projects) and click Update.
Delete a PDF Configuration
Note
PDF configurations can only be deleted when they are not assigned to any projects.- Navigate to the Company level Admin tool.
- Under 'Tool Settings', click Meetings.
- Click the PDF Configurations tab.
- Click the
 delete icon at the end of the PDF configuration's row.
 - In the 'Delete [PDF Configuration Name]' window, click Delete.