Financial Management: New Admin View for Subcontractor Invoices
This announcement represents a single point in time. Future releases may impact the information below.
Pilot Announced: 6/17/2021 | Pilot Started: 7/22/2021 | Beta Started: 11/4/2021 Beta Updated: 2/7/2022
Feature Release Announced: 3/21/2022 | Feature Released: 3/23/2022 | Announcement Updated: 8/9/2022 | Announcement Updated: 1/26/2023
Financial Management: New Admin View for Subcontractor Invoices
Announcement Updated 1/26/2023
On March 23, 2022, the redesigned subcontractor invoice beta experience will be turned ON in all project's using the Commitments and Invoicing tools. To give you time to preview the design changes, Procore is providing users with the option to switch between the new and legacy experience until September 2023 2023. After September 2023, the ability to exit the new experience will be removed and the legacy experience will no longer be available in Procore.
How to Switch Between the new & Legacy Experience (Legacy Experience Available Until September 2023)
To exit the beta experience, click the Exit Beta button in the blue banner at the top of a subcontractor invoice shown below.

To enable the beta experience, click the Enable Subcontractor Invoice Beta button shown below.

On March 23, 2022, the redesigned subcontractor invoice beta experience will be turned ON in all project's using the Commitments and Invoicing tools. To give you time to preview the design changes, Procore is providing users with the option to switch between the new and legacy experience until February 2023 2023. After February 2023, the ability to exit the new experience will be removed and the legacy experience will no longer be available in Procore.
How to Switch Between the new & Legacy Experience (Legacy Experience Available Until February 2023)
To exit the beta experience, click the Exit Beta button in the blue banner at the top of a subcontractor invoice shown below.
To enable the beta experience, click the Enable Subcontractor Invoice Beta button shown below.
Key Features
Features provided with the new Admin view for subcontractor invoicing include:
- Simplified Invoice Creating & Editing for Administrators
- New Summary Preview Area
- Improved Schedule of Values
- Configure Separate Billing for Stored Materials on Commitments
- Relocated Attachments Area
- Send an Invoice with DocuSign©
Notes
- The new experience is turned ON by default for all companies using the Commitments and Invoicing tools.
- The new Admin View supports the Lien Waiver Management by Built integration with the Procore + DocuSign® integration.
- The experience does NOT currently support projects using a custom workflow built by Procore Custom Solutions. See Custom Workflows.
Simplified Admin View for Creating & Editing Subcontractor Invoices
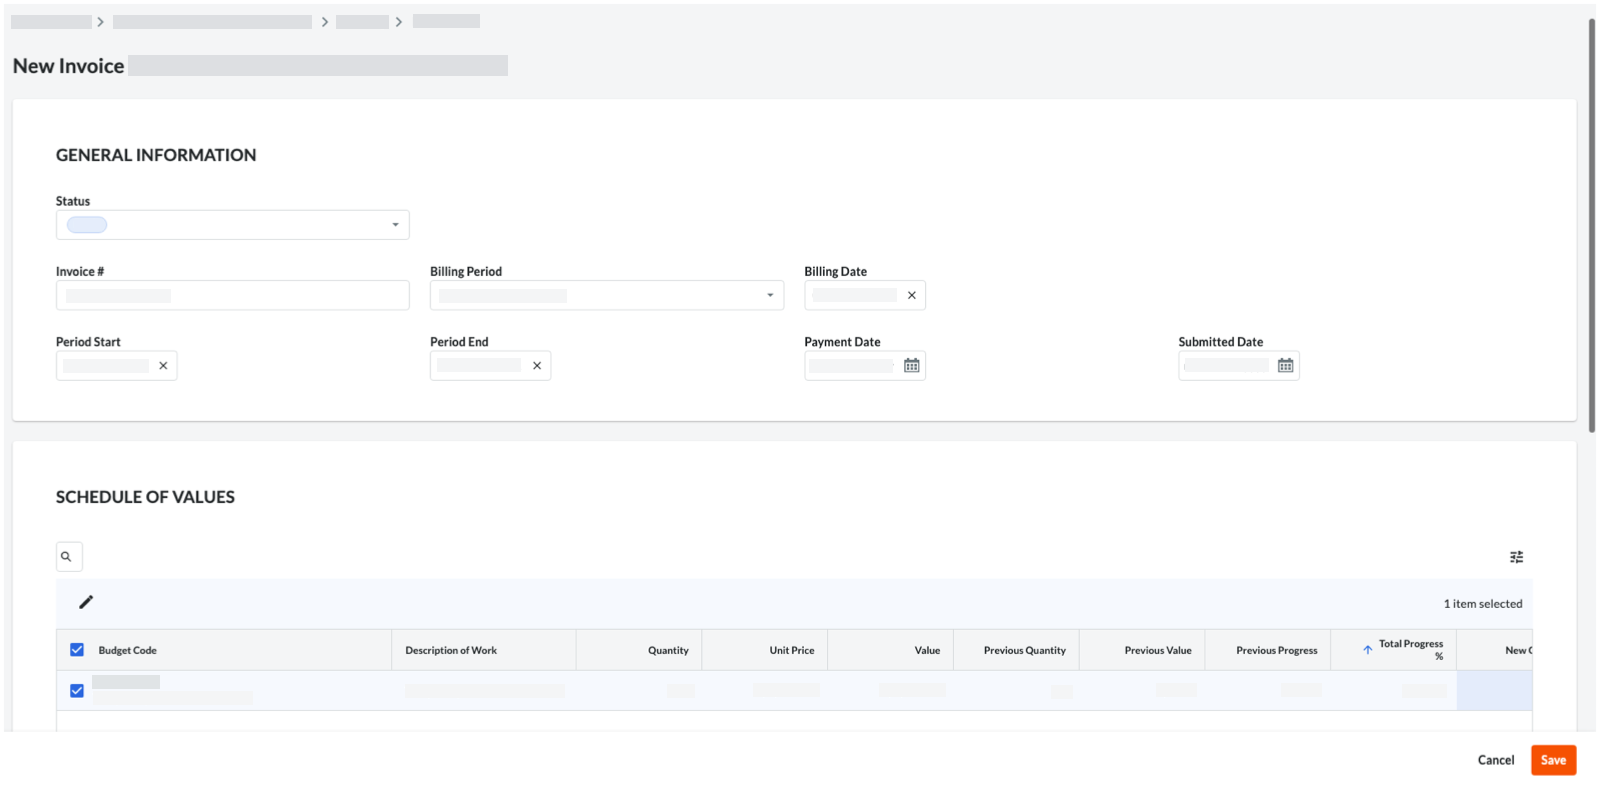
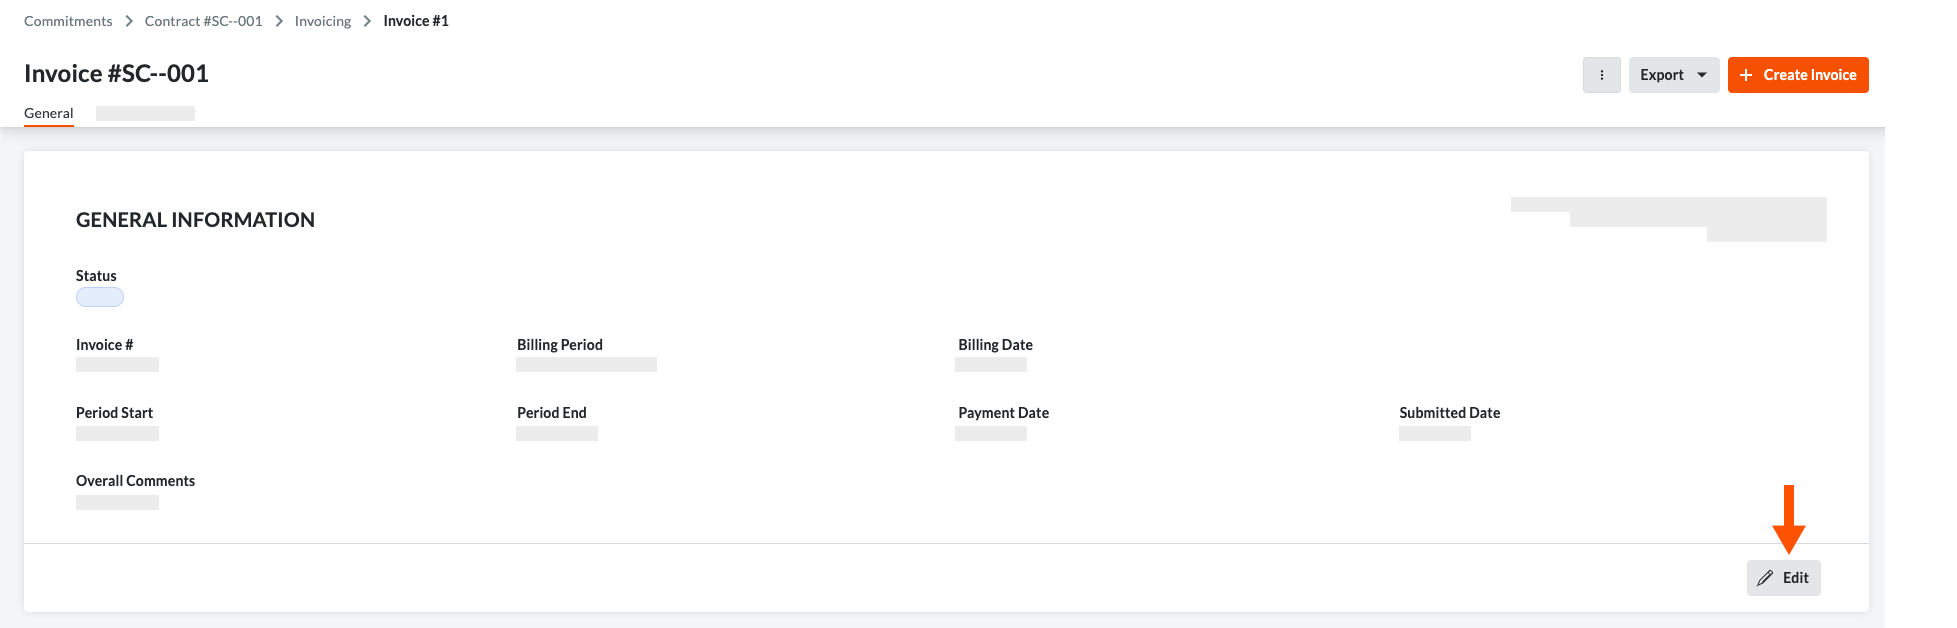
A redesigned 'New Invoice' page provides invoice administrators with a simplified layout, consistent formatting, and a reduced number of data entry fields to streamline invoice entry. Administrators also have the option to save their updates as a draft to complete updates later or to simply click 'Save' to submit their invoice for review. See Create a New Invoice on Behalf of an Invoice Contact. Automatic calculations also simplify data entry for progress billing, so you can input accurate bills based on your collaborators' work progress, track work completed against the plan, and expedite regular payment installments to your collaborators. In addition, we've added new Edit buttons on the lower right corner of each section's card on the invoice.
Example
The image below shows you a subcontractor invoice in create mode.
The image below shows you the new Edit button on subcontractor invoices.
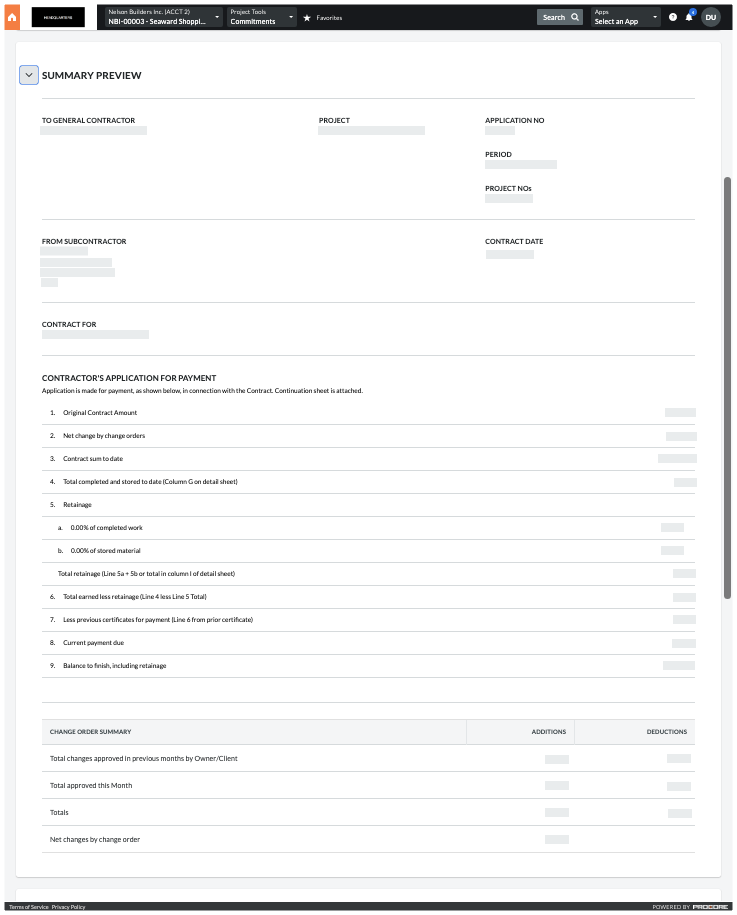
New Summary Preview Area
When reviewing a subcontractor invoice, a new expandable 'Summary Preview' area lets you see what your invoice actually looks like so you can review subtotals and grand totals. This new preview area is available in edit mode and also includes a 'Change Order Summary' that summarizes the invoice's totals for additions and deductions. See View the Summary Preview for a Subcontractor Invoice.
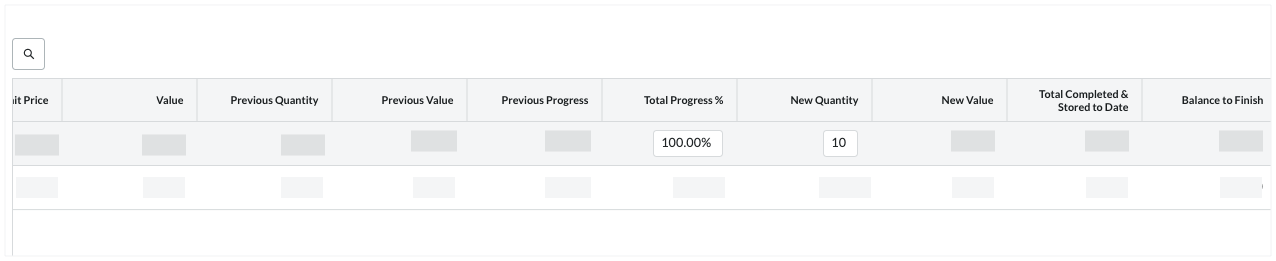
Improved Schedule of Values
A newly improved Schedule of Values (SOV) card provides you with the flexible column, row, and layout options. It also provides improved options to enhance the data entry process and allows invoice administrators to edit the card when the invoice is in the 'Draft' or 'Revise and Resubmit' status.
- Updated columns to better support the Amount-Based and Unit/Qty Based accounting method on commitment contracts (see How do I set the accounting method for a contract or funding?).
- For contracts using the Amount Based accounting method, you have more flexibility when updating SOV line items entering data in these columns: Total Progress %, New Quantity, New Value, Materials Stored, Work Retainage (Amount), Work Retainage %, Materials Retainage (Amount), Materials Retainage %, and Released Retainage. See Create an Invoice on Behalf of an Invoice Contact.

- For contracts using the Unit/Qty Based accounting method, you can update SOV line items Total Progress %, New Quantity, Work Retainage (Amount), Work Retainage %, and Retainage Released. See Create an Invoice on Behalf of an Invoice Contact.
Note
For contracts using one accounting method with its change orders using a different method, the editable line items on the invoice will depend on the line item.
- For contracts using the Amount Based accounting method, you have more flexibility when updating SOV line items entering data in these columns: Total Progress %, New Quantity, New Value, Materials Stored, Work Retainage (Amount), Work Retainage %, Materials Retainage (Amount), Materials Retainage %, and Released Retainage. See Create an Invoice on Behalf of an Invoice Contact.
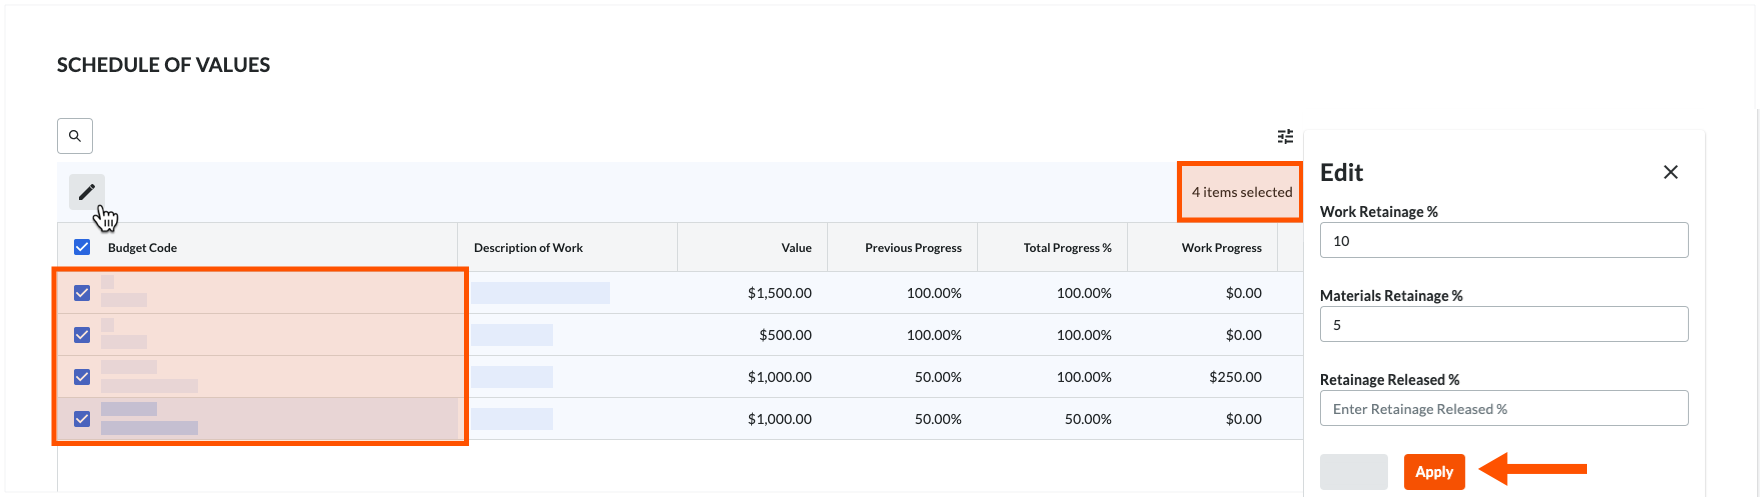
- Set and Release Retainage. To set and release retainage on invoice line items, click the desired line items in the Schedule of Values table to place a mark in the corresponding checkbox. Next, click the pencil icon above the SOV table to open the 'Edit' pane on the right side of the page. You can then enter your retainage values and click Apply to apply to update the selected invoice line items with the settings. See Set or Release Retainage on a Subcontractor Invoice.
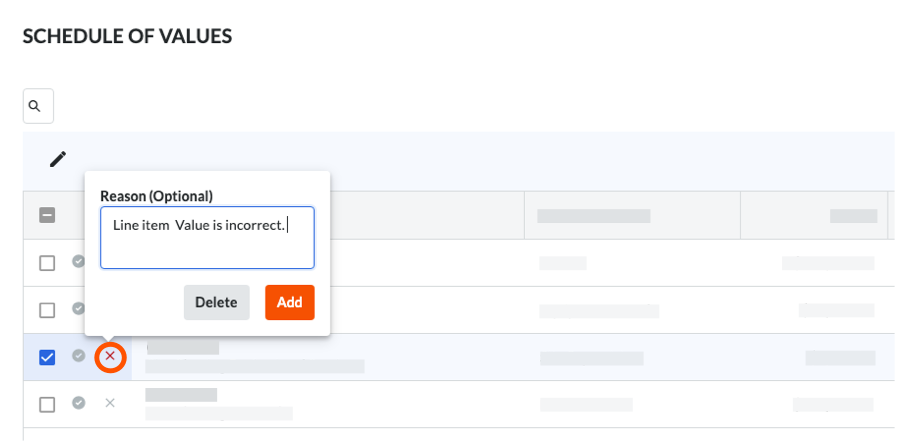
- Approve and reject invoice line items and add an optional rejection reason. To approve line items, click the GRAY checkmark so it turns GREEN. To reject line items, click the GRAY 'x' so it turns RED (pictured below). When rejecting a line item, you can also have the option to enter 'Reason' and click 'Add' to save it. See Review a Subcontractor Invoice as an Administrator. Invoice administrators can also review line items on any invoice, and are no longer limited to reviewing only the most recent invoice. However, it is important to keep in mind that rejecting a line item will NOT change the value of the invoice.
- Line item search. You no longer have to scroll through a long list to find the exact line item to update. A new magnifying glass icon at the top-left of the 'Schedule of Values' area lets you enter keywords and quickly locate a specific line item. The new search feature uses the 'Description of Work' column as its search scope. See Manage Rows and Columns in an Invoice's Schedule of Values.

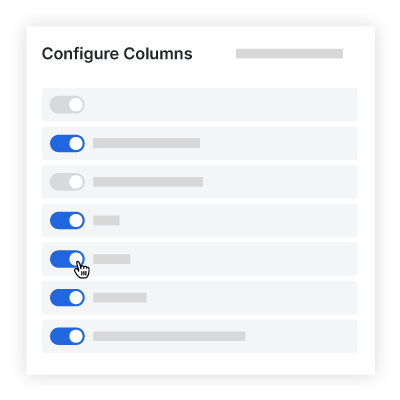
- Personalized table settings. Click the new Table Settings
 icon to reveal a new 'Table Settings' area in the right sidebar. In addition, new controls under the 'Configure Columns' section let you choose which columns to show and hide on the SOV by moving a toggle switch to the left (hide) or right (show). The option at the top of the page lets you toggle the tables totals ON and OFF. In addition, a new vertical scroll bar also lets you move up and down the columns list. To quickly restore Procore's default column settings (which is to show all available columns) at any time, simply click Reset to Default. See Manage Rows and Columns in an Invoice's Schedule of Values.
- Adjust row height. New 'Row Height' buttons let you choose a Small, Medium, or Large row height for your line items (the default setting is Medium). See Manage Rows and Columns in an Invoice's Schedule of Values.

- Group by column. All columns contain an 'Group By' option in the Overflow menu. This lets you group the table's data by the column you select. See Manage Rows and Columns in an Invoice's Schedule of Values.

- Adjust column width. You can now adjust the width of a single column, hover your cursor over the right border of a column heading until the resize handle
 icon appears. Then drag the handle to the left or right to set the desired column width. If you press the SHIFT key while holding down the resize handle, a blue outline appears over the active column to help you see your column adjustment. See Manage Rows and Columns in an Invoice's Schedule of Values.

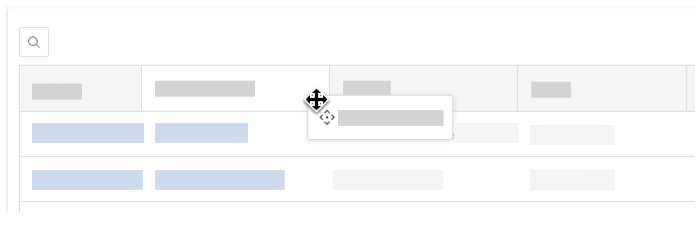
- Arrange columns using drag-and-drop. You can move a column to another position in the table, click and hold the desired column's heading. Then use a drag-and-drop operation to place in the position you want. See Manage Rows and Columns in an Invoice's Schedule of Values.
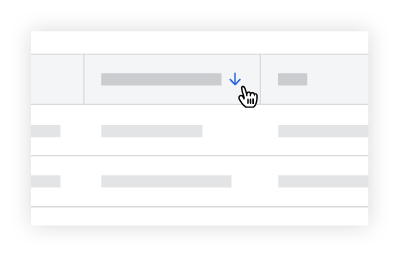
- New column sorting options. To sort the table's data by a specific column, click any column heading to reveal a BLUE arrow to adjust the sort order of the contracts table. See Manage Rows and Columns in an Invoice's Schedule of Values.
- New overflow menu with additional column options. All columns also include additional column options. Simply click the vertical ellipsis
 to reveal an Overflow menu with the additional options: Pin Column, Autosize this Column, Autosize All Columns, and Reset Columns. See Manage Rows and Columns in an Invoice's Schedule of Values.

Configure Separate Billing for Stored Materials on Commitments
For commitment contracts that require billing for stored materials, invoice administrators will be able to turn an 'Enable Billing Separately for Stored Materials' check box at the commitment level. On the contract's 'Advanced Settings' tab, these new settings allow you to control how entries in the 'New Materials' column behave from invoice to invoice. This column allows users to enter a 'New Materials' value for the current billing period.
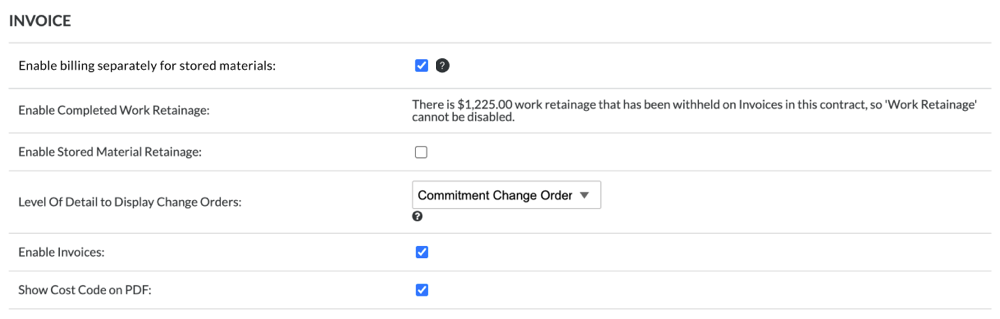
When you mark the new checkbox, the Invoicing tool automatically sets the value of the entry in the 'New Materials' column to zero (0) on the first invoice so that the invoice contact can update the entry to the appropriate value. It also adds a 'Materials Stored' column to the right of the 'New Materials' column. When a subsequent invoice is created, the value entered in the 'New Materials' column is reset to zero (0), and the value previously entered in the 'New Materials' column is automatically moved to the 'Materials Stored' column.
For more details, see How do I bill for stored materials in a subcontractor invoice?
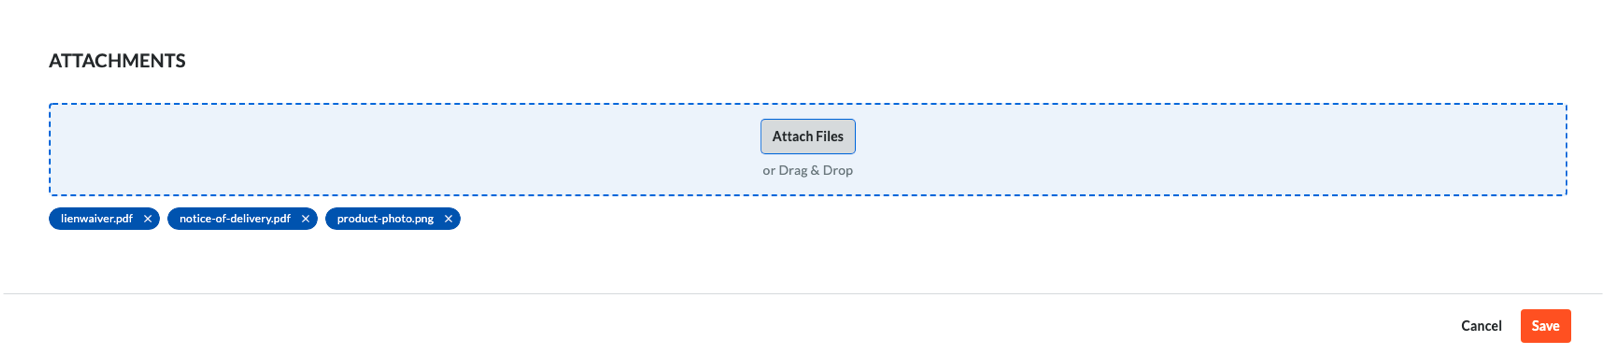
Relocated Attachments Area
The attachments area has been conveniently relocated to the bottom of the invoice page. You can click the Attach Files button to open a separate window or use a drag-and-drop operation to attach files from your computer or network to the invoice, such as project files, lien waivers, delivery details, photos, diagrams, and more.
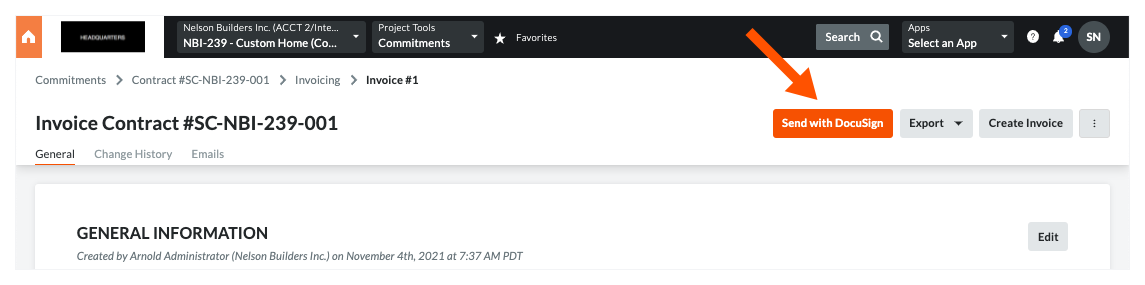
Send an Invoice with DocuSign©
Added February 7, 2022. The new view has been updated to support the Lien Waiver Management by Built integration with the Procore + DocuSign® integration.
If your project team wants to collect signatures on your invoices using the Procore + DocuSign© integration, click the Send with DocuSign© button at the top of the page. To use this button, the DocuSign© integration must be enabled on the project (see How do I enable the DocuSign® Integration?) and the invoice must be in the Approved, Approved as Noted, or Pending Approval status. To learn more about the DocuSign© integration and preparing envelopes for signature, see DocuSign®.
See Also
- Create a New Invoice on Behalf of an Invoice Contact
- Manage Rows and Columns in an Invoice's Schedule of Values
- Set or Release Retainage on a Subcontractor Invoice
- Review a Subcontractor Invoice as an Administrator
If you would like to ask questions or share any feedback, please contact support@procore.com.