Can I mark all photos 'Private' in the project's Photos tool?
Answer
Yes. A user with 'Admin' level permission to the Photos tool can configure the Photo tools settings to mark all photos 'Private' by default (see Configure the Photos tool to Mark All Photos as Private below). There are also several other options for marking photos 'Private' that are detailed below.
Configure the Photos Tool To Mark All Photos as Private
- Navigate to the project's Photos tool.
This reveals the Photos page. - Click the Configure Settings
 icon.
icon.
This opens the Photo Settings page. - Place a checkmark in the Make photos uploaded to the Photos tool private by default box.
Note: This will not make existing public photos private. - Click Update.
The system saves the settings changes.
Mark an Individual Photo as Private
- Navigate to the project's Photos tool.
- Click the photo you want to mark as private.
- Click the lock
 icon in the top left corner of the viewer.
Mark Multiple Photos as Private
- Navigate to the project's Photos tool.
- Mark the checkbox over the photos you want to mark as private in the Timeline view or from within an album.
- Click the Bulk Actions menu.
- Click Bulk Edit.
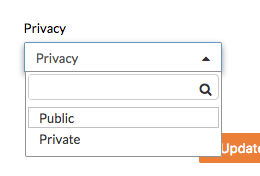
- Click the Privacy menu.
- Click Private.
Mark an Album as Private
- Navigate to your project's Photos tool.
- Click the Album view.
- Click the album that you want to make private.
- Mark the checkbox next to "Private Album" on the right of the screen.
Note: Changes are automatically saved upon click.
