(Beta) Configure a Custom Workflow for Subcontractor Invoices on a Project
Limited Release
 The Progress Billings tool is only available to Procore customers in the United States who have implemented the Procore for Specialty Contractors point-of-view dictionary. To learn more, see (Limited Release) Owners & Specialty Contractors Point-of-View Dictionary Options.
 Objective
Background
Things to Consider
Prerequisites
Steps
- Assign a Project Workflow Manager & Distribution Group to a Custom Workflow
- Customize the Standard Steps in a Custom Workflow for a Project
Assign a Project Workflow Manager & Distribution Group to a Custom Workflow
- Navigate to the Project level Invoicing or Progress Billings tool.
Note
The name of your Procore tool depends on the point-of-view dictionary configured in Procore. See What tool names and terms are different in Procore for general contractors, owners, and specialty contractors? - Click the Configure Settings
 icon.
icon. - Locate the workflow to update in the 'Subcontractor Workflow Settings' table.
- Click the Configure button to open the workflow in the Company level Workflows tool.

- At the top of the workflow, do the following:

- Assign Workflow Manager. Select the project user who is assigned to this role in the drop-down list at the top of the page.
- Assign Distribution Group. Select a distribution group from this list. These users are the individuals who will receive notification emails from Procore when actions are triggered by your workflow steps.
- Click Save in the bottom right corner of the Workflows tool.
Note
A GREEN 'The workflow settings were successfully updated.' message confirms your new settings and the name of the 'Default Item Manager' and 'Default Distribution List' that you selected appears in the workflow's line item. - Click Save in the Configure Settings page of the Invoicing or Progress Billings tool.
Customize the Standard Steps in a Custom Workflow for a Project
- Navigate to the Project level Invoicing or Progress Billings tool.
Note
The name of your Procore tool depends on the point-of-view dictionary configured in Procore. See What tool names and terms are different in Procore for general contractors, owners, and specialty contractors? - Click the Configure Settings icon.
- Locate the workflow to update in the 'Subcontractor Workflow Settings' table and click Configure.
- Click a standard step in the custom workflow to open the right pane for that step.
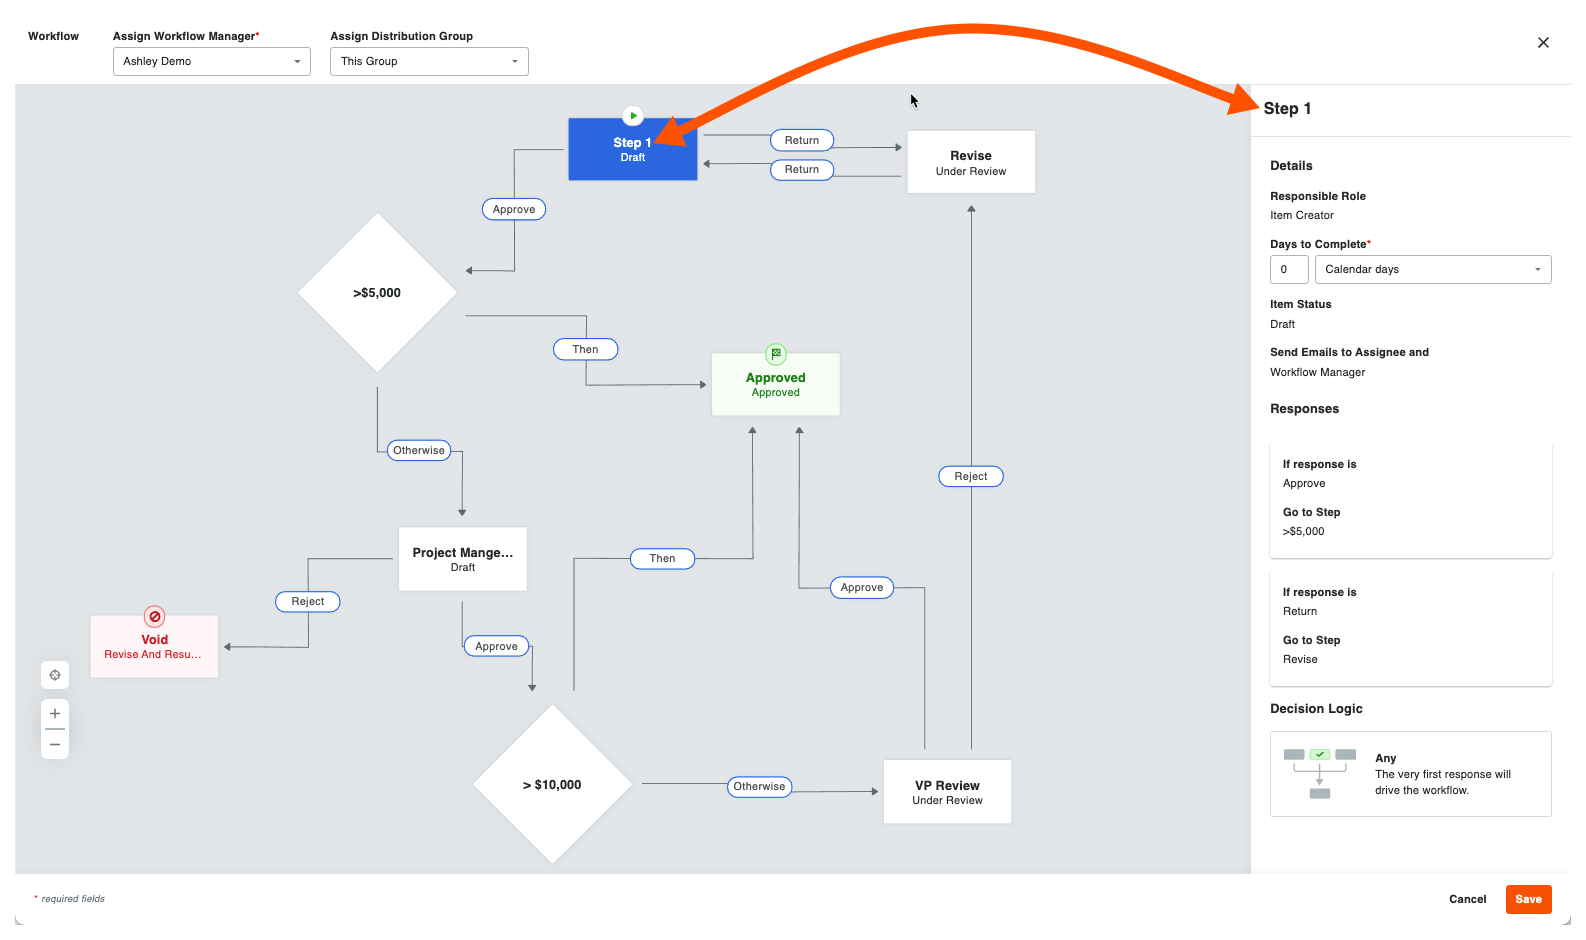
- Do the following:
- Assignee(s). Select one (1) or more Procore user names from this drop-down list. To appear in this list, the individual must be added to the project's Directory tool. Note: If 'Item Creator' was selected for the assignee role of a step in the company level workflow builder, another specific assignee cannot be chosen.
- Days to Complete*. Enter a number in the first box. Then select Calendar Days of Business Days from the drop-down list. Procore's default option is Calendar Days. This defines the number of days the 'Assignee(s)' have to complete the workflow step. If the 'Assignees' do not complete these steps, Procore sends an automated notification to the assignee(s) as a reminder.
- Optional: Send Emails to Assignee and _____. Select the groups or roles that should receive an automated notification when the workflow step is NOT completed within the number of days specified above. The recipients named here will also receive an email when the workflow step is completed. This step is only required when the custom workflow's author specified a role or group in the custom workflow template in the Company level Workflows tool. If the workflow's author skipped this step, the ability to add assignee(s) is available to you.
- Click Save in the Workflows tool. A GREEN 'The workflow settings were successfully updated.' message confirms your new settings and the name of the 'Default Item Manager' and 'Default Distribution List' that you selected appears in the workflow's line item.
- Repeat the steps above for every standard step in the custom workflow.
- Click Save in the Configure Settings page of the Invoicing or Progress Billings tool.