Import a Prime Contract SOV from a CSV File
Objective
To update a prime contract's Schedule of Values (SOV) by uploading a Comma Separated Values (CSV) file to the Prime Contracts tool.
Background
Things to Consider
- Required User Permissions:
- 'Admin' level permissions on the project's Prime Contracts tool.
- Additional Information:
- If the 'Enable Always Editable Schedule of Values' setting is turned OFF in the Prime Contracts Tool's Configure Settings page, the contract must be in the Draft status. This is Procore's default setting.
- If the 'Enable Always Editable Schedule of Values' setting is turned ON in the Prime Contracts Tool's Configure Settings page, the contract can be in any status. However, you cannot replace line items that have been invoiced when performing an import. To learn more, see What is the 'Enable Always Editable Schedule of Values' setting?
Important
Before proceeding with the Steps below, always review the requirements for importing data from a CSV. See What are the requirements for importing SOV line items from CSV?
Steps
- Customize the Delimiter & Download a Blank Template
- Add Line Items to the Blank Template
- Import the Complete Template to Procore
Customize the Delimiter & Download a Blank Template
- Navigate to the project's Prime Contracts tool.
- In the table, click the Number link for the contract to open.
- Click the Schedule of Values tab.
- At the bottom the Schedule of Values page, click Import SOV from CSV.
- In the Import Schedule of Values from CSV window, choose these options:
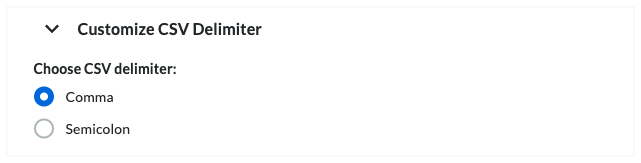
- Click Customize CSV Delimiter to reveal the options.
- Under Choose CSV Delimiter, choose one of these options:
Tip
What is a delimiter? A delimiter is a character used to separate values or text strings. It marks both the beginning and end of a unit of data.- Comma. Separates data using a comma (,). This is Procore's default option.
- Semicolon. Separates data using a semicolon (;).
- Click the Download Blank CSV Template button.
Procore downloads a blank template file named 'Subcontract SOV Template' the download location specified for your web browser.
Add Line Items to the Blank Template
- On your computer, open the template that you just downloaded.
- Follow one (1) of these steps to add line item(s) to your blank template:
Tip
Which accounting method is configured for the commitment? Look at the headings in the blank template. If you see an 'Amount' column, the commitment is configured for the amount-based method. If you see 'Unit', the commitment is configured for the unit-based method. To learn how to set the accounting method to use, see How do I set the accounting method for a contract or funding?
Amount-Based Accounting Method
- When a contract is using the amount based accounting method (see How do I set the accounting method for a contract or funding?), enter line items in the downloaded template file as follows:
- #. Enter the line item number.
- Budget Code. Enter the budget code for the line item.
- Tax Code. Enter a tax code for the line item.
- Amount. Enter the line item amount.
- Billed to Date. Enter the amount billed to date for the line item, if applicable.
- Amount Remaining. Enter the amount remaining for the line item, if applicable.
- Save your data entry in the completed template.
Unit/Quantity Based Accounting Method
- When a contract is using the unit/quantity-based accounting method (see How do I set the accounting method for a contract or funding?), enter line items in the downloaded template file as follows:
- #. Enter the line item number.
- Budget Code. Enter the budget code for the line item.
- Description. Enter a description for the line item.
- Tax Code. Enter a tax code for the line item.
- Qty. Enter the unit quantity for the line item.
- UOM. Enter a Unit of Measurement (UOM) for the line item.
- Unit Cost. Enter the unit cost for the line item.
- Amount. Enter the total amount for the line item.
- Billed to Date. Enter the amount billed to date for the line item, if applicable.
- Amount Remaining. Enter the amount remaining for the line item, if applicable.
- Save your data entry in completed template.
Import the Completed CSV Template to Procore
- Return to the Import Schedule of Values from CSV window.
- Click the Upload File button.
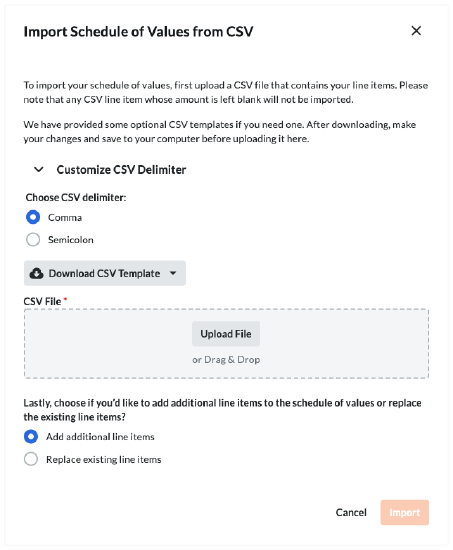
- Navigate to the completed template on your computer and upload it.
- Choose from these options:
- If the commitment's Schedule of Values has zero (0) line items, simply click the Import button.
OR - If the commitment's Schedule of Values has existing line items, choose one (1) of these options:
- Add Additional Line Items. This option adds the line items in the template to the existing line items in the Schedule of Values. Then, click the Import button.
OR - Replace Existing Line Items. This option removes all existing line items from the Schedule of Values and replaces them with the line items in the template. Then, click the Import button. Note: If the 'Enable Always Editable Schedule of Values' setting is turned ON in the project's Commitments tool, this option is grayed out and unavailable for use once an invoice is created and line items are billed. To learn more, see What is the 'Enable Always Editable Schedule of Values' setting?
- Add Additional Line Items. This option adds the line items in the template to the existing line items in the Schedule of Values. Then, click the Import button.
- If the commitment's Schedule of Values has zero (0) line items, simply click the Import button.
Tips
- How do I know if the import was successful? A GREEN success banner appears when the import process is successful.
- How do I get details about a file error? A RED error banner appears where there is a file error. Click the Show Errors button pictured below to reveal more specific information about the error to correct.
