Accept or Reject a CCO for Export to QuickBooks®
Objective
To accept or reject a Commitment Change Order (CCO) that has been sent to the ERP Integrations tool for acceptance by an accounting approver.
Background
After a user sends a CCO to the ERP Integrations tool for accounting acceptance (see Send a Change Order to ERP Integrations for Accounting Acceptance) an accounting approver (see What is the Accounting Approver Role?) has the option to 'Accept' or 'Reject' the budget as follows:
- Accept. Accepts the change order and exports it to QuickBooks® Desktop.
OR - Reject. Rejects the change order and returns it to the Commitments tool in an editable state where the change order can be corrected and then re-sent to the ERP Integrations tool for accounting acceptance. See Resend a Rejected Change Order to ERP Integrations for Accounting Acceptance.
Note: If there is at least one (1) change order in the ERP Integrations tool that's awaiting accounting acceptance, Procore sends an automated email notification to the designated accountant once per day with the subject line 'ERP Integrations Daily Summary.' This notification lists all of items awaiting that person's acceptance.
Things to Consider
- Required User Permissions:
- Prerequisites:
- The company account must be integrated with QuickBooks® Desktop. See QuickBooks® Desktop: Setup Guide.
- The Change Orders tool must be an active tab on the project. See Enable the Change Orders Tool.
- The Commitments tool must be an active tab on the project. See Add and Remove Project Tools.
Steps
Review a Commitment Change Order
- Navigate to the company's ERP Integrations tool.
- In the ERP Integrations tool, click the Change Orders subtab.
- In the 'Views' menu, click the Ready to Export link.
The page that appears lists only the CCOs that have been sent to the ERP Integrations tool for accounting acceptance. See Send a Commitment Change Order to ERP for QuickBooks. - Continue with one of the following:
Accept a Commitment Change Order
- Locate the CCO in the 'Change Orders - Ready to be Exported to QuickBooks® Desktop' list.
- Choose the Accept option.
- If prompted, enter a description in the Description in QuickBooks box.
Notes:- This will appear if the 'Enable Custom CCO Title/Description When Exporting to QuickBooks® Desktop' feature is enabled.
- This feature must be enabled at the Company level by Procore. To submit a request to your Procore point of contact to enable this feature, a user must have 'Admin' level permission to the ERP Integrations tool.
- Procore recommends that you enter the commitment number in this field.
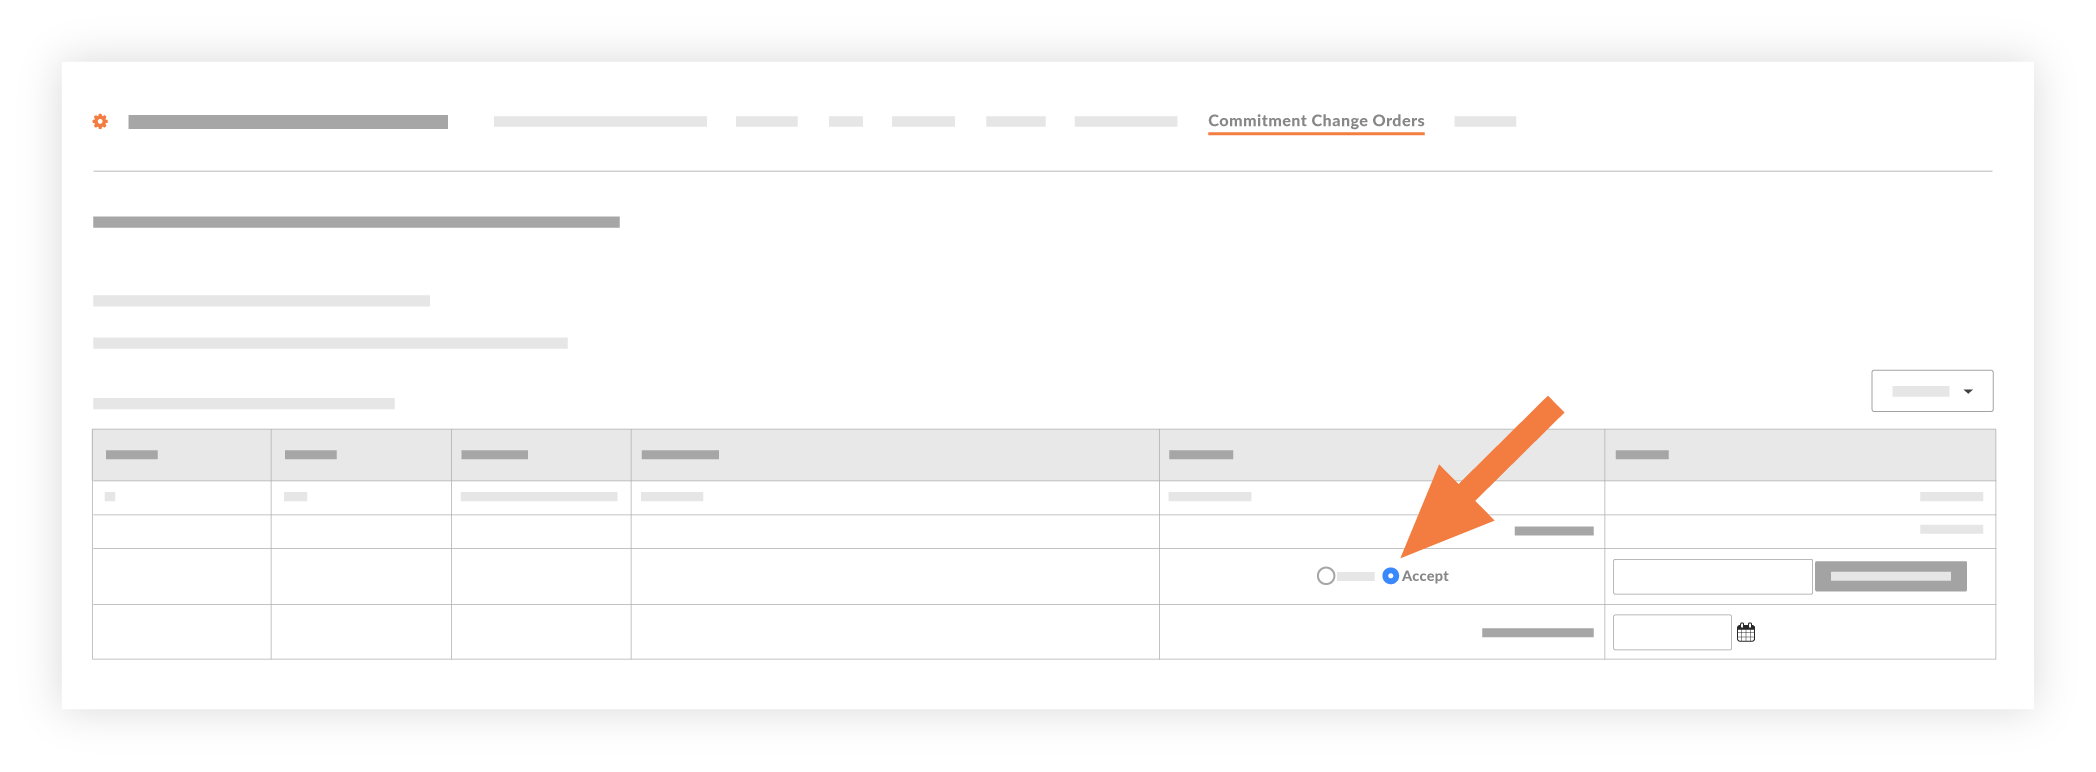
- Click Export.
This syncs the CCO with your QuickBooks® Desktop database. The process typically takes a few minutes.- If for any reason a CCO fails to export to QuickBooks® Desktop, you can view the failed item(s) by clicking the Failed to Export.
- When a CCO fails to export, follow the steps in Reject a Commitment Change Order and then Resend a Rejected Commitment Change Order to ERP for QuickBooks.
- (Optional) To verify that the sync was successful, log into QuickBooks® Desktop and verify that your data appears as expected.
Reject a Commitment Change Order
- Locate the CCO in the 'Change Orders - Ready to be Exported to QuickBooks® Desktop' list.
- Choose Reject.
- Enter a short explanation about the reason(s) for the rejection.
- Click Reject.

The following events occur:- The system removes the CCO from the ERP Integrations tool and returns it to an editable state in the project's Change Orders tool and in the Commitments tool's Change Order subtab. See Edit a Change Order.
- The system sends an automated email notification to the user who created the CCO to alert this person of the 'Reject' response.