Add Markups in the Document Management Tool
Objective
How to add markups to a document in the project's Document Management tool.
Background
When a workflow has been created for a document, Workflow Assignees can add markups while reviewing the document. Markups can only be added during a workflow assignee's step in the workflow.
Things to Consider
- Required User Permissions:
- 'Standard' or 'Admin' level permissions to the project's Document Management tool.
AND - Added as an assignee for a workflow.
Note: By default, only 'Current Step Assignees' can add markups during their step in the workflow. However, the 'Create Markup' permission can be enabled for additional roles ('Workflow Assignees' and 'Workflow Manager'), or disabled for all users. See View and Manage Workflow Permissions in the Document Management Tool.
- 'Standard' or 'Admin' level permissions to the project's Document Management tool.
- Additional Information:
- Currently, markups can only be added to PDF documents that are in a workflow. See About Workflows in the Document Management Tool.
- By default, only 'Current Step Assignees' can add markups during their step in the workflow. However, the 'Create Markup' permission can be enabled for additional roles ('Workflow Assignees' and 'Workflow Manager'), or disabled for all users. See View and Manage Workflow Permissions.
Video
Steps
- Navigate to the project's Document Management tool.
- Make sure you are in the Documents tab.
- Click on the saved view called Assigned to Me that is in the 'In Review' collection.
Note: You can also access these documents from other saved views, such as 'All Documents' at the bottom. If you have been given 'Create Markup' permissions, the 'Assigned to Me' saved view is not the only place where you can find documents that you can markup. - Click the In Review tab.
- Open the document that you want to add markups to.
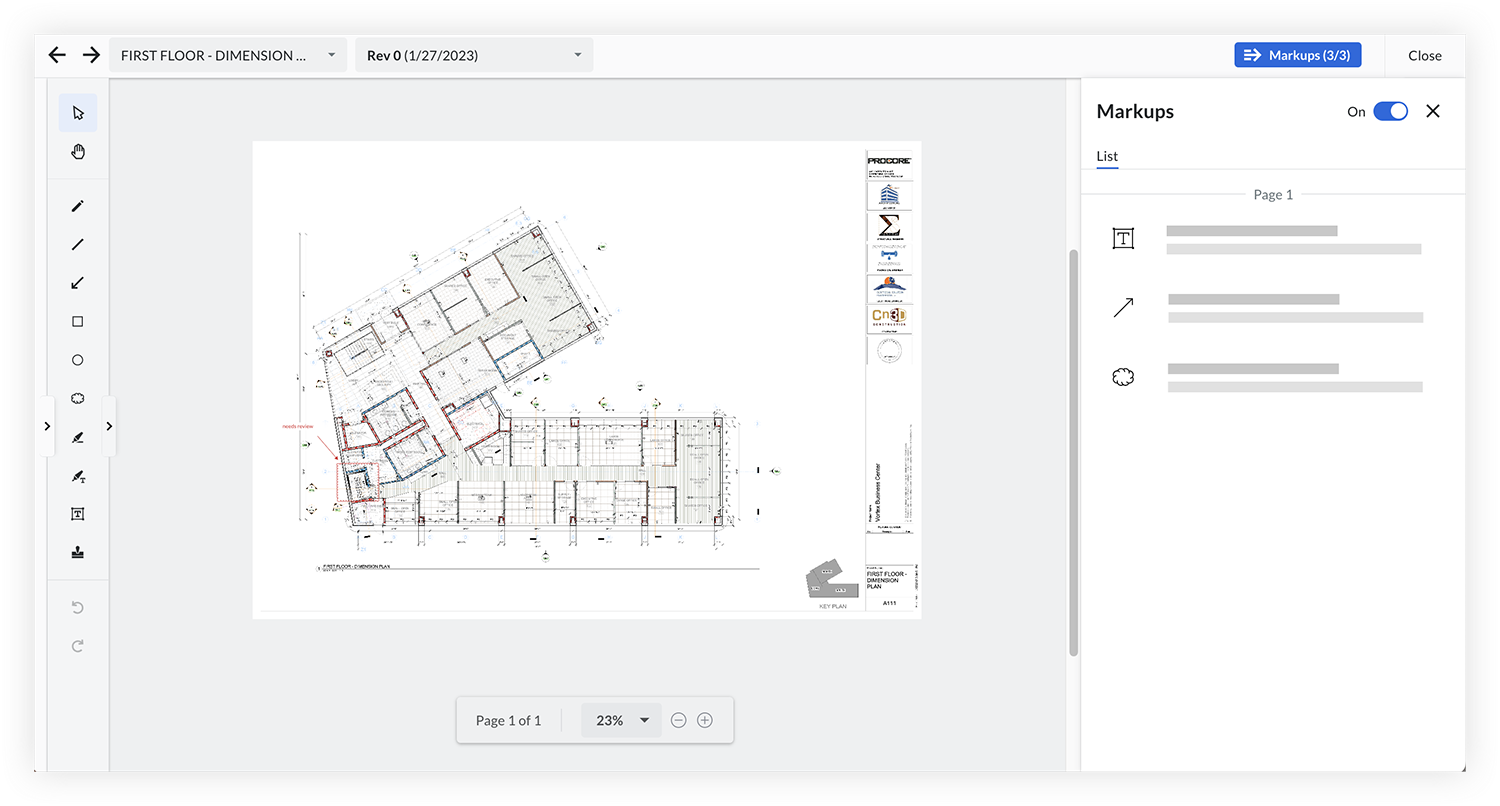
This opens the viewer. - The workflow
 panel automatically opens if a workflow is applied to the item. Click the x to close the panel if you want to see other functions in the viewer such as the markup
  list.
list. - Add markups to the document as necessary. See the Markup Options section below for information about the markup tools.
- When you are finished adding markups, click Close to exit out of the viewer and return back to the list of documents.
Markup Options
This table lists markup tools and keyboard shortcuts to use when adding markups to PDF files.
| Icon | Name | Action | Windows Keyboard Shortcut | Mac Keyboard Shortcut |
|---|---|---|---|---|
| Select |
Select, move, or edit a markup on the page. |
V | V | |
| Pan | Click and drag your cursor to move around on the page. For temporary panning, hold the SPACEBAR and use your mouse wheel. |
SHIFT + V | SHIFT + V | |
| Text | Add a text box. Double click the text to add or edit it. Adust the font size or style in the style menu that appears nearby. Note: After selecting the tool, preset options appear in the toolbar to choose color and style before typing. |
T | T | |
| Highlight | Highlight text on a page. Note: After selecting the tool, preset options appear in the toolbar to choose color and style before highlighting. |
H | H | |
| Callout | Text box with arrow. Click to start the arrow, end the arrow, and again to place the text box that appears. Double click the text to add or edit it. Note: After selecting the tool, preset options appear in the toolbar to choose the style before creating the callout. |
B | B | |
| Line | Draw a line (L), arrow (A), polyline (Y), or curve line (U). Click to end curve line. Double click to end polyline. Note: After selecting the tool, preset options appear in the toolbar to choose color and style before drawing. |
L, A, Y, or U | L, A, Y, or U | |
| Pen | Draw a freehand line or shape. Note: After selecting the tool, preset options appear in the toolbar to choose color and style before drawing. |
P | P | |
| Freehand Highlight | Draw a freehand highlight. Note: After selecting the tool, preset options appear in the toolbar to choose color and style before drawing. |
F | F | |
| Rectangle | Draw a rectangle, ellipse, or polygon. Note: After selecting the tool, preset options appear in the toolbar to choose color and style before drawing. |
R | R | |
| Cloud | Outline or create a shape with cloud lines. | C | C | |
| Distance | Measure the distance of a straight line, arc, or perimeter. Notes: You can edit the scale, unit of measurement, and precision, and save to a preset, as needed. Access presets from the toolbar to apply preferences before measuring. |
D | D | |
| Rectangular Area | Measure the area of a rectangle, ellipse, or area. Notes: You can edit the scale, unit of measurement, and precision, and save to a preset, as needed. Access presets from the toolbar to apply preferences before measuring. |
SHIFT + R | SHIFT + R | |
| Count | Place a checkmark icon, and Procore counts how many are in the document. Click on a checkmark to see the current count. Note: After selecting the tool, preset options appear in the toolbar to choose color and style before placing checkmark. |
K | K | |
|
|
Stamp | Open the stamp menu and click the stamp you want to add or upload a new one. | S | S |
| Eraser | Erase markup objects by clicking on them. | Z | Z | |
|
|
Undo |
Undo the most recent markup action in your current review session. This excludes adding or removing blank or cover pages. |
CTRL + Z | CMD + Z |
|
|
Redo | Redo the most recently undone markup action in your current review session. | CTRL + Y | CMD + Y |
| Zoom In | Zoom in on the page. | CTRL + Plus Sign (+) or CTRL + scroll or pinch out |
CMD + Plus Sign (+) or CMD + scroll or pinch out |
|
| Zoom Out | Zoom out on the page. | CTRL + Minus Sign (-) or CTRL + scroll or pinch in |
CMD + Minus Sign (-) or CMD + scroll or pinch in |
|
|
|
Previous Page | Move to the previous page. | SHIFT + Up Arrow (↑) | SHIFT + Up Arrow (↑) |
|
|
Next Page | Move to the next page. | SHIFT + Down Arrow (↓) | SHIFT + Down Arrow (↓) |