Set Up the hh2 Synchronization Client for Exporting PCCOs
Objective
To configure your hh2 Synchronization Client for exporting Prime Contract Change Orders (PCCOs).
Background
To learn how to export a Prime Contract Change Order, see Export a PCCO to ERP.
Things to Consider
- Required User Permissions:
- The company's Procore Administrator should supply the steps below to the company's IT administrator for the hh2 tool.
- The person performing the steps will need to log into the Sage 300 CRE® server using an account with administrative privileges.
- Supported ERP Integrations:
- Your company's Procore account must already be integrated with Sage 300 CRE®.
- Limitations:
- The sync process for the Prime Contract Change Orders is NOT bidirectional. You will not have the ability to import change orders or updates made in Sage 300 CRE® to Procore.
Steps
- Log into your Sage 300 CRE® server using an account with administrative privileges.
- Launch your company's hh2 Synchronization Client.

- Click Connect.
- Browse to the Local Connections tab.
- Click Mappings.
- Click Advanced Mappings.
- Place a checkmark next to the following items:
Important! Do NOT remove any previously selected checkmarks. Doing so could negatively impact your existing Sage 300 CRE® configuration settings.
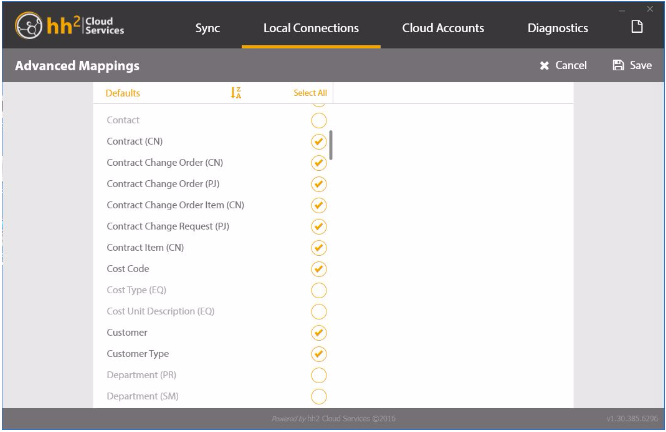
- Contract (CN)
- Contract Change Order (CN)
- Contract Change Order Item (CN)
- Contract Item (CN).
- Customer
- Customer Type
- Invoice (AP)
- Job (CV) Note: This may already be selected.
- Quick Bill Contract
- Quick Bill Contract Item
- If you own the Project Management (PJ) Module in Sage 300 CRE®, you will also place a checkmark next to the following items (if not, go the next step):
- Contract Change Order (PJ)
- Contract Change Request (PJ)
- Click Transaction (JC) to highlight it.
- Place a checkmark next to ALL the items in the panel on the right.
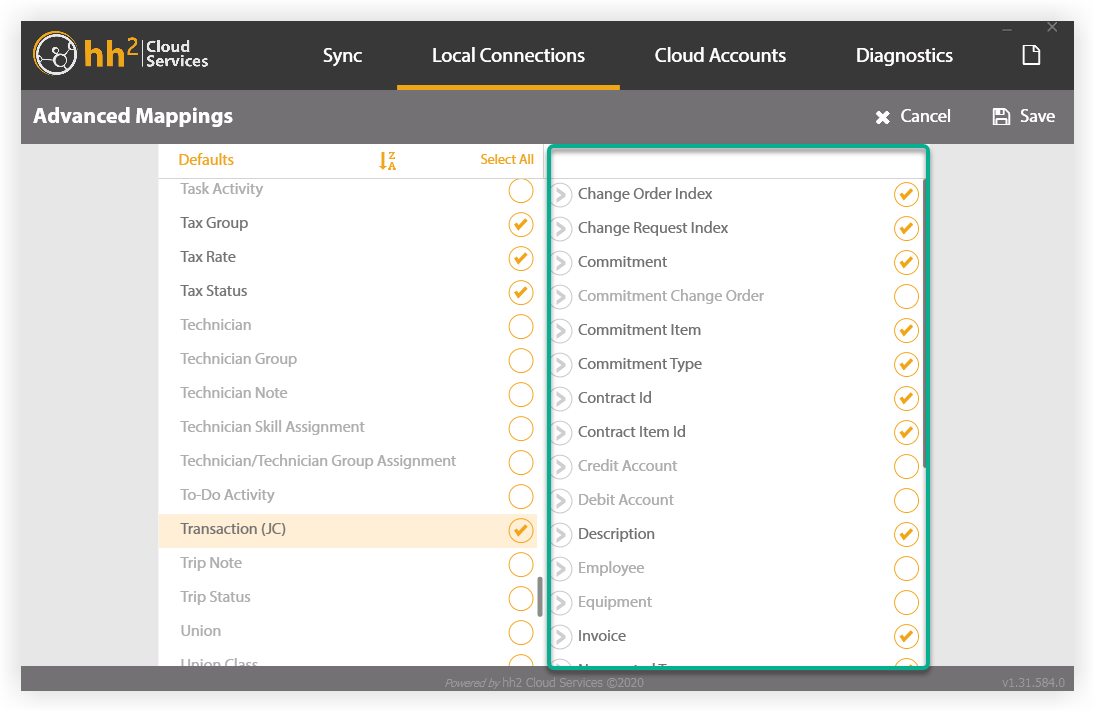
- Remove the following checkmarks from the circles in the panel on the left:
- Commitment Change Order
- Credit Account
- Debit Account
- Employee
- Equipment
- Pay ID
- Reference 1
- Reference 2
- Click Save.
- Navigate to the Sync tab.
- Place a checkmark next to your connection as shown below.
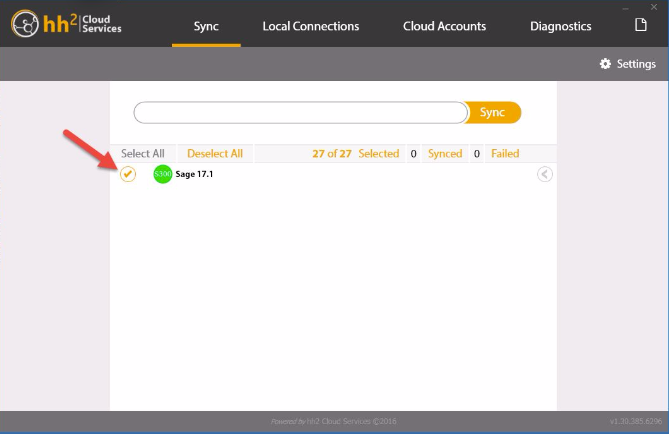
- Click Settings.
- Select a Sync Type of Deep and the timeframe of “The beginning of time”.
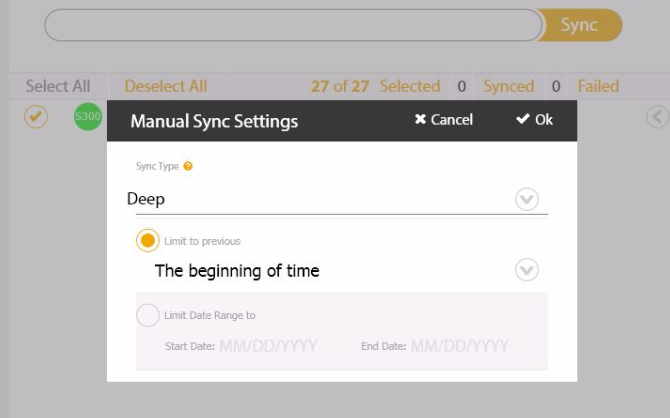
- Click OK.
- Click the arrow to expand the options under your connection as shown below.
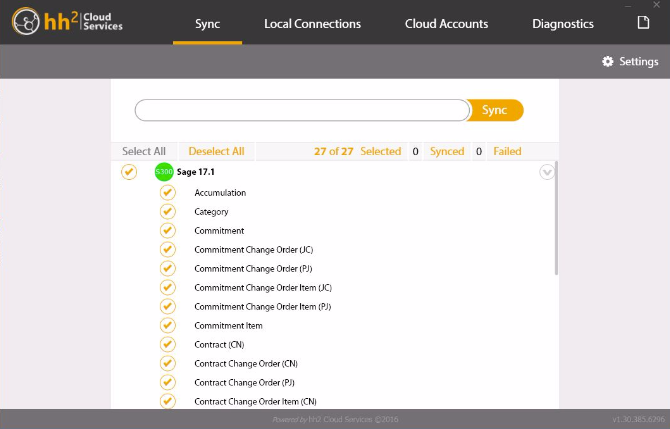
- Click Deselect All.
This removes all the checkmarks from the selected items. - Place a checkmark in the circle next to the following items:
- Contract (CN)
- Contract Change Order (CN)
- Contract Change Order Item (CN)
- Contract Item (CN).
- Customer
- Customer Type
- Quick Bill Contract
- Quick Bill Contract Item
- If you own the Project Management (PJ) Module in Sage 300 CRE®, you will also place a checkmark next to the following items (if not, go to the next step):
- Contract Change Order (PJ)
- Contract Change Request (PJ)
- Click Sync.
After the sync is complete, you can close the hh2 Synchronization Client and log off of the Sage 300 CRE® server.