Procore

Project Assistant Guide

Brinkmann_Logo_Primary_RGB Smaller.png

 
PROCORE FOR PROJECT ASSISTANTS OVERVIEW  

BACKGROUND

Where To Start

  • This list is intended to be a short quick-reference guide for training purposes. Further information on everything contained in this guide can be found on the individual landing pages. They contain step-by-step settings on each tool, as well as recordings of both on site trainings as well as short screen grabs.
  • Updates to the standard requirements will be made directly on the landing pages going forward.
  • You are REQUIRED to complete the Procore Certification Courses to understand the basic structure of Procore and how to navigate the system.
  • As this is not considered an entire list of how-to's for the Project Assistant role, but is a quick reference guide, its possible your project team may request your assistance of different aspects of the project.
  • To ensure every day access (to allow for vacations, out of office, project help, etc), all office specific assistants are automatically added to each project in Procore. 

TABLE OF CONTENTS

The following are what is included in this guide:

  • Project Setup
    • Project Team
    • Project Logo
    • Webcam
    • Project Location Settings
  • Adding contacts
  • Setting up distribution settings for:
    • Daily Log Distribution
    • Auto Update for Drawings
    • Auto Update for Incidents (Safety Team)
  • Document Privacy
  • Copying Precon Files 
  • Loading Plans and Specs
  • Inspection Templates
PROJECT SETUP  

Project Setup General

New Projects Setup

Due to the project cap (amount of projects we can have combined for all offices), and to maintain a subcontractor directory that is active subs only, only active projects or those that are 99.9% certain to be awarded to us should be on Procore. The initial projects are set up by one of the following company-level admins:

  • Miranda Hill
  • Val Strickland
  • Karyn Rios
  • Dawn Keslin

After Initial Setup:
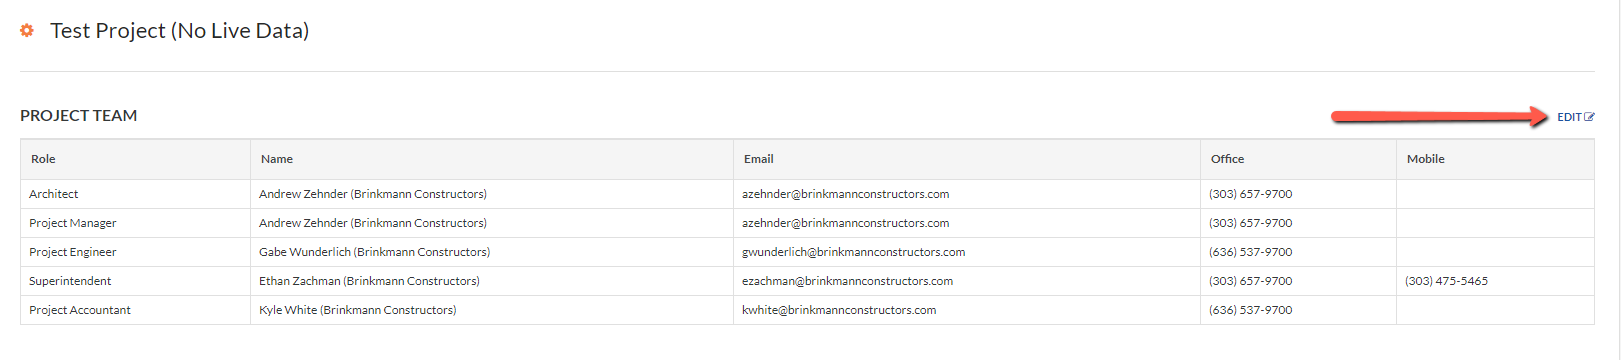
  • Project Assistants should take the initial 'project shell' and set up project specific information as follows in the steps below:
Project Team

clipboard_e04c58212f06c06f8caa2f3d0c5d380d8.png

  • The Project Team is displayed on a projects home page and is visible to all users of the project (internal and external), and allows a quick contact list.
  • Click the "Edit" button as shown above to add/remove contacts.
  • Default settings at a company level will hide certain contacts from external users.


Project Logo
  • A client logo/rendering can be set for each project.
  • To set this logo, navigate to the photos tool, upload/select the photo
  • Click the three dots in the top right.
  • Select "Set as Project Photo"

clipboard_e00d193c4d943086968b49c5316e232a2.png

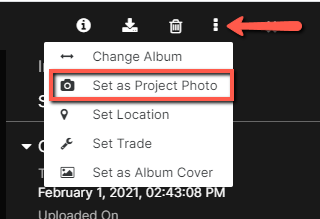
NOTE: Do NOT replace the "Project Photo" found in the Admin tool. This replaces the Brinkmann Logo on top of all documents. If the logo on the top banner of your project (see below) is anything other than the Brinkmann logo, please contact a Project Administrator to adjust.

clipboard_eefcf1f3993f9625d8d9fc4fdd416ae8f.png


Project Webcam
  • A client webcam can be quick linked to the homepage of your project
  • To set this, click the "Project Links" found in the far right column of your projects homescreen.
  • Paste the link to your project webcam.
Location Settings
  • The Daily Logs is automatically linked to the NOAA database to auto-populate weather for each project based on Longitude and Latitude location.
  • To set your Longitude/Latitude, navigate to the Admin Tool and fill in the appropriate fields.
  • One available site to obtain the Longitude/Latitude numbers is: https://www.gps-coordinates.net/
PROJECT DIRECTORY  

Contacts

Click HERE for the landing page on this topic.

Requirements: Currently only company level admins can create companies in Procore. Everyone has the ability to create contacts.

  • Miranda Hill
  • Val Strickland
  • Karyn Rios
  • Dawn Keslin

Specific Items:

  • If you are adding a contact, you MUST tie it to a subcontractor. If the company does not exist, please contact a company level admin (above) to create.
  • You must have an email address in order to add a contact
  • An email address can only exist once
  • A full name (first and last) is preferred for all contacts, although Procore only requires a last name

NOTE: An important note for creating contacts, make SURE the information is correct when entered originally. Once created, the contact cannot be edited, and if incorrect another contact has to be made.

SETTING UP PROJECT SPECIFIC TOOLS  

Distribution Groups

Click HERE for the landing page on this topic.

Requirements/Overview: There are standard distribution groups that can be created for each project. Once set up, these distribution groups ensure that the correct project personnel are immediately notified of specific changes (Daily Logs distribution, new drawings uploaded, etc.)

Specific Items:

  • You can access the distribution groups by clicking the gear icon located in the top left of each tool.
  • Mandatory team members include: Project Manager, Project Director, Project Engineer
  • Mandatory team members for the Incidents tool MUST include the Safety team for the project.  Tim Myatt should be on all projects.
  • You have the option to 'add all', if you exercise this option, make sure you clear out all non-essentials. Example: The Executive Team and Accounting personnel need to be included on the project, but should NOT be emailed on reminders or daily logs.  It is preferred that you NOT use this method, but rather add your team individually.
  • IMPORTANT NOTE: From the gear setting you should ONLY be adjusting Distribution Groups. Do NOT change settings on any of the other options. They are determined at a company-level and should not be adjusted. If requested to change or add something please contact a Procore Administrator before doing so.
DOCUMENT CONTROL  

Document Folder Structure

Click HERE for the landing page on this topic.

Requirements/Overview: All jobs will have a standard folder structure loaded when added to Procore. As revisions to documents are made, they will be updated in the standard structure.

To add new folders and/or files:

  • Click the clipboard_e228a919e8a7ff98b66b2552582965b18.png located in the upper right corner while in the Documents Tool.
  • All files are to be locked by default to avoid accidentally sharing too much information with owners, subcontractors, etc.
  • Folders that are locked are still visible to all Brinkmann employees on the project.
  • To unlock a specific folder or file:
    • Right click on the item
    • Select Permission
      • Uncheck the "Make Private" box for all
      • Manage Permissions and add specific people who should have access

Specific Items:

  • You can quickly reference items marked private based on the lock icon that appears in the folder pane on the left.

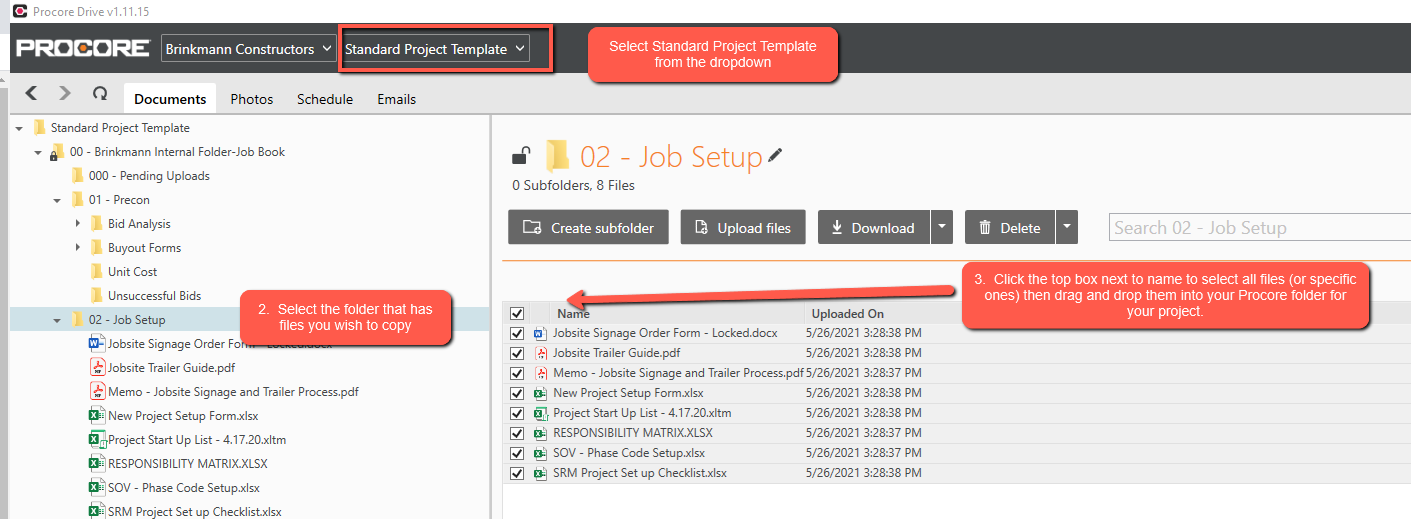
New Project - Document Control

Requirements/Overview: As new projects are set up, the main folder structure will copy. You will have to manually copy/paste specific documents from the standard folder to your new project.

  • Open your job in Procore
  • Select the Documents tool
  • Click on the Settings gear and copy folder structure from the Standard Project Template
  • Leave Procore open and open up Procore Drive
  • Select Standard Project Template
  • Select the folder you wish to copy files from
  • Select the files on the right side you wish to copy and drag them into your folder on Procore

12.png


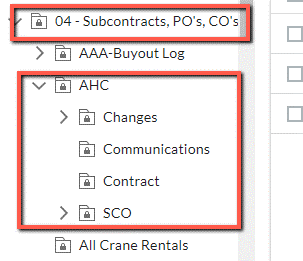
Subcontracts, Purchase Orders, & Change Orders

Requirements/Overview: All jobs will have a standard folder structure loaded with an empty folder for internal Subcontracts, PO's, CO's (A digital job book). You are responsible to ensure the permissions are correctly set for internal access only.  Please CONFIRM all folders are marked PRIVATE.

In the Subcontracts folder you will see a Word document outlining how this folder should be organized.  Below are the standards. Please note that you will create individual folders for your subcontracts based on the company name (not the subcontract number). Within each of those, you will need to create 4 additional folders as outlined below.  Anything pertaining to the specific subcontractor will go into their folder.  This is an effort to move to an online job book in lieu of binders, so you should see less of those requests.  The layout for the Subcontracts, PO, CO folder (internal Job Book) is as follows, a sample view is shown below. 

SUBCONTRACTS , PO’s, CO’s

  • Subcontractor (Company Name)
    • Contract
      • All things subcontract live here
      • Subcontract draft(s)
      • Executed subcontract
      • Final subcontractor bid proposal that subcontract is based on
    • Changes
      • All change requests are stored here individually
    • SCO
      • Subcontract change orders, both draft and executed
      • New folder for each SCO
        • Folder “01” for SCO 1
    • Communications
      • All communications directly related to this sub
        • Delay notice
        • Important emails
        • Etc

Specific Items:

  • Please CONFIRM that all folders are marked private

Sample of how how the folder layout should be named

Folder Layout Sample.png


​​​​​​Procore Drive - Document Control

Requirements/Overview: Download Procore Drive in order to edit documents using Office 365 instead of editing directly from Procore. 

  • If you attempt to edit a document directly from Procore, you will have to download the file, and then work out of Office 365.
  • When editing documents, it will save a newer version when you click save. You can easily access older versions of the document by clicking the item you want to view and select "Open" on the top of the page.

clipboard_ec70ef1ce333ea84b8e01c9a4bd25664e.png

  • If you create a new document that you would like to add to the Procore Documents tool:
    • Open Procore Drive
    • Drag and drop the document into the window pane
  • To collaborate with another user on a document at the same time:
    • While your Microsoft Office document is open, select "Share" in the top right corner of the document.
    • Select One Drive
    • Click the box to check security settings
    • Select the employee you would like to collaborate with and hit send
    • You can see they are collaborating with you when their initials appear in the top right of the document.
    • Any changes will be updated automatically
  • Check Out: Checking a document out will prevent anyone else from opening it during the duration you have it checked out.


Precon Files

Specific Items:

  • Links to Sharepoint P-Files will not work in Procore. Therefore, at the start of each project, the precon folder will remain empty, please COPY any files your project team would prefer into your active project. DO NOT MOVE from the original source location.
PROCORE DRIVE  

DOCUMENTS

See Document Control section for further information on this.

PHOTOS

Upload or Download photos from your project

Delete a group of photos

Open a photo to edit the rotation and description.  Note – you can not edit the file name or the date and time photo was taken.  You can open to crop, edit, draw on it, etc. but you will need to save to your desktop and drag back into Procore Drive if you want them saved.

Create Albums and move photos from one album to the next

Move photos from one album to the next by selecting and dragging it to the album you wish to send it to

SCHEDULE

If you have a P6 schedule you would like to add, you will see the connection here.

EMAILS

You can drag emails from your desktop Outlook here.  These emails will then show up under the Emails tool in Procore


PLANS AND SPECIFICATIONS  

Loading Plans and Specs

Click HERE for the landing page on this topic.

Requirements/Overview: This responsibility will likely fall to the Project Engineer, however it is a good idea for you to be versed in how-to as a backup. 

Specific Items:

  • It is IMPERATIVE that you watch the Procore Drawings Tool video BEFORE you begin to upload plans.
  • You must have a firm understanding of locations and what each date field stands for.


Creating Drawing Logs

Requirements/Overview: Once the drawings and specification sets have been uploaded to Procore, the logs can be auto generated for use in contracts with some minor adjustments.

Details from the Drawings Tool:

  • Select "Export" in the upper right corner, and export as CSV. This will download a CSV file (bottom left of your screen).
  • You will need to convert/save this as an Excel document using the Save As function and changing the file type to Excel 97-2003 Workbook or Excel Workbook.
  • Delete the Discipline, Revision, and Received Date columns. (Option on keeping/removing "Set Name")
  • Clean up the appearance by adjusting the font, adding lines, etc.

​​​​​​Samples

QC AND INSPECTIONS  

Inspection Templates

Click HERE for the landing page on this topic.

Requirements/Overview: The Inspection/Observation tool replaces the old QC Manual.   

Specific Items:

  • There are standard inspections that exist on a company level that may need to be loaded into your project.
  • Both new project templates, and company-level templates can be created on the fly. For a company-level template, please contact a Procore Administrator.
SUPPORT PROGRAMS  

The following programs are currently in rollout, but you should download and familiarize yourself with each:

Procore Drive:

What: Designed to give individuals a convenient method for uploading and downloading large sets of documents, emails, photos, and schedules to Procore. (similar to Windows Explorer) 

Why:  (1) Move supported documents, emails, and photos from a Windows computer or Microsoft Outlook client to Procore. (2) Integrate project schedules created with Oracle Primavera P6. (3) Upload documents, emails, and photos to Procore in batches. (4) Work within the same user permission structure specified in the Procore web application. 

Where: Procore Drive

Procore Extracts:

What: Extracts project information back to a shared location at the end of a project and/or allows you to share specific information with an outside entity (owner, architect, subcontractor, etc.)

Why: Easy access for future reference

Where: Procore Extract

Procore for Outlook

What: Extension located in email to quickly save files and data directly to your Procore project.

Why: Ease of use.

Where: Procore for Outlook (002).pdf

------------------------------------------------------

Procore Imports - Not currently applicable:

What: Designed to give individuals a convenient method for importing large sets of data to Procore.

Why: Upload contacts, cost codes, locations, punch items, and submittals to Procore in batches.

Where: Procore Imports