Procore Maps: User Guide
Table of Contents
- Welcome
- View Photos (Web)
- View Photos (iOS)
- View Photos (Android)
Overview
Procore Maps seamlessly integrates your project images within an easy-to-navigate map, available at your fingertips anytime, anywhere. View photos on an interactive map to quickly understand work status and minimize delays.
Filter photos by date, pinpoint milestones, identify roadblocks and take action quickly. Ensure clarity and confidence in project execution with accurate geolocated data accessible to your entire team.
 |
 |
Considerations
Common Questions
Permissions
Important
Users must have the below permissions for the Photos tool.
Permissions
| | The action is available on Procore's Web, iOS, and/or Android application. Click to view the tutorial.
![]() Users can take the action with this permission level.
Users can take the action with this permission level.
![]() Users can take this action with this permission level AND one or more additional requirements, like granular permissions.
Users can take this action with this permission level AND one or more additional requirements, like granular permissions.
| Action | None | Read Only | Standard | Admin | Notes |
|---|---|---|---|---|---|
|
Add Item Pin to the Map |
|||||
|
Configure the Map View |
|||||
|
Download Items from the Map |
|||||
|
Email Items from the Map |
|||||
|
Move Item Pin on the Map |
|||||
|
Remove Item Pin from the Map |
|||||
|
Set Base Map |
|||||
|
Show or Hide Items on the Map |
|||||
|
Show Your Location on the Map |
|||||
|
View Item Details from the Map |
|||||
|
View Photos on the Map |
View Photos on Map
- Navigate to the project's Photos tool.
- Click the Map tab.
- View the photos that have been added to the map.
Tip
From the list view, you can take the following actions:
- Click Mapped to see the photos that have been added to the map.
- Click the show on map
 icon to center the item's pin on the map.
To add photos to the map, see Add an Item Pin to the Map.
View Photo Details
- Navigate to the tool's map.
- Click the information
 icon next to the photo.
OR
Click the photo on the map, then click the information icon.
Add Photo Pin to Map
- Navigate to the tool's map.
- Click List and select Unmapped to see a list of unmapped items.
- Click the add to map
 icon next to the item.
 - Move your cursor over the map. Then click to add the pin to the desired location.
Move Photo Pin to Map
- Navigate to the tool's map.
- Click the find on map icon next to the item.
OR
Click the item on the map. - In the preview window, click the move pin
 icon.
icon. - On the map, click and hold the move pin icon. Then drag the pin to the desired location.
- Click the map to confirm the new location.
Remove Photo Pin from Map
- Navigate to the tool's map.
- Click Mapped to see a list of mapped items.
- Click the find on map icon next to the item.
OR
Click the item on the map. - Click the remove pin
 icon to remove the pin from the map.
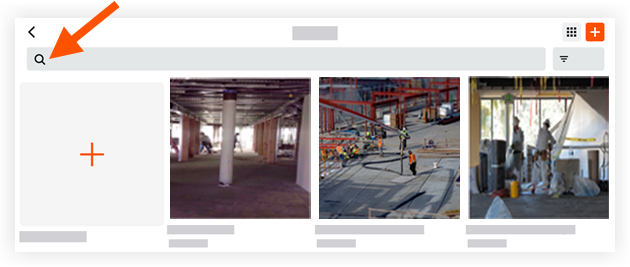
Search for Photos
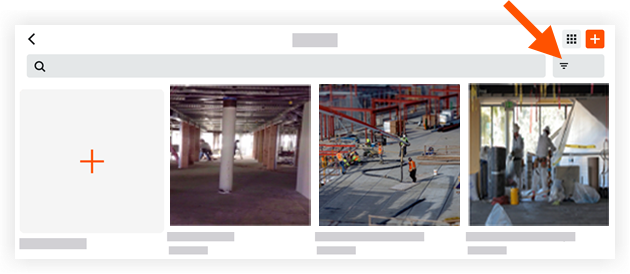
Filter Photos
Show or Hide Photos
- Navigate to the tool's map.
- On the list view, take one of the following actions:
- Click the show
 icon to change all items from shown to hidden.
 - Click the hidden
 icon to change all items from hidden to shown.
- Click the show
Configure the Map View
Change Base Map
- Navigate to the tool's map.
- Click the base map icon on the map.

- Select your preferred base map.
Rotate Map
- Navigate to the tool's map.
- Click the compass
 icon and hold. Rotate the map to your desired orientation.
Note: Double clicking the compass arrow will reset the map orientation to north.
Show Pins or Thumbnails
- Navigate to the tool's map.
- Click the configure
 icon.
icon. - Select one of the following options for your 'Photo Point Style':
- Thumbnails
- Pins
Download Photos
Download an Individual Item
- Navigate to the tool's map.
- Click the item name.
OR
Click the item on the map. - Click the download
 icon.
icon.
Download Multiple Items
- Navigate to the tool's map.
- Mark the checkboxes for the items you want to download.
OR
Tap and hold command or control on your keyboard and click the items on the map. - Click Bulk Actions and select Download.
Email Photos
Email an Individual Photo
- Navigate to the tool's map.
- Click the item name.
OR
Click the item on the map. - Click the email
 icon.
icon. - Enter the email information.
- Click Send.
Email Multiple Photos
- Navigate to the tool's map.
- Mark the checkboxes for the items you want to email.
OR
Tap and hold command or control on your keyboard and click the items on the map. - Click Bulk Actions and select Email.
- Enter the email information.
- Click Send.
View Photos on Map
- Navigate to the project's Photos tool on an iOS mobile device.
- Optional: Tap the ellipsis
 and select the Timeline
  , Albums
 , or Map
  view to change your view.
 - Optional: Search for or filter the photos. See Search for and Filter Photos (iOS).
- Tap a photo to view its details.
Search and Filter Photos
Search for Photos
- Navigate to the project's Photos tool using the Procore app on an iOS mobile device.
- Optional: Tap the ellipsis and select the Timeline , Albums, or Map view to change how you view the project's photos.
- Tap the Search bar to enter a keyword or phrase.
Note: This search will return information matching the following:- From the Timeline View
- Filename
- Description
- From the Album View
- Album Names
- From the Map View
- Filename
- Description
- From the Timeline View
- Tap a photo to view its details.
Filter Photos
- Navigate to the project's Photos tool using the Procore app on an iOS mobile device.
- Tap the options menu and select the Timeline View or Map .
- Tap the filter
 icon.
icon.
- Tap a filter that you want to apply from the following options:
- Grouped By: Choose to filter photos by 'Month,' 'Week,' and 'Day.'
- Filter By: Choose to filter photos by the following options:
- Date Range: Enter a date range to filter photos by the date the photo was captured.
- Privacy: Tap this option to filter photos by 'Public,' or 'Private.'
Note: Filtering by privacy status is only available while in 'Timeline View' from the options menu. - Location: Tap this option to filter photos by an associated location.
- Trade: Tap this option to filter photos by an associated trade.
- Tap Apply.
- Optional: Tap Reset to clear the applied filter.
Show Current Location on Map
- Navigate to the tool's map.
- Tap the compass
 icon.
icon.
The map centers to your current location.
Change Base Map
- Navigate to the tool's map.
Tap the base map
 icon.
icon. - Tap the base map you want as your map background:
- Topography
- Satellite
- Dark
- Light
- None
- Tap X to save.
View Photos on Map
- Navigate to the project's Photos tool using the Procore app on an Android mobile device.
Note: Photos are shown by album by default. - Optional: Tap the Album
 , Timeline
  , Feed
  , or Map icon to change your view.
Note: The icon changes based on the view that is currently selected. - Optional: Search for or filter the photos. See Search for and Filter Photos (Android).
- Tap the photo you want to view.
Search and Filter Photos
- Navigate to the project's Photos tool using the Procore app on an Android mobile device.
This reveals the project's photos feed.
Search for Photos
- Tap the search
 icon at the top of the screen.
 - Enter a keyword or phrase.
Note: This search will return information matching the following:- From the Feed view:
- Description
- Location
- User
- From the Timeline view:
- Description
- Location
- User
- From the Albums view:
- Album Name
- From the Map view:
- Description
- Location
- User
- From the Feed view:
- Optional: Tap the X to clear the applied search.
Filter Photos
- Tap the Timeline , Feed , or Map icon to change your view.
Note: The icon changes based on the view that is currently selected. - Tap the filters
 icon at the top of the screen.
 - Tap to Group by the following options:
- Month
- Week
- Day
- Tap one or more of the following options:
- Date Range: Enter a date range to filter photos by the date the photo was captured.
- Location: Tap this option to filter photos by an associated location.
- Trade: Tap this option to filter photos by an associated trade.
- Privacy: Tap this option to filter photos by 'Public,' or 'Private.'
- Starred: Tap this option to display all photos that have been marked with a star.
- Tap Apply.
- Optional: Tap Reset to clear the applied filter.
Show Current Location on Map
- Navigate to the tool's map.
- Tap the compass icon.
The map centers to your current location.