Configure Your View for Takeoffs
Objective
How to configure your view when creating and managing takeoffs.
Background
On the takeoff tab, you can configure how takeoff measurements appear on drawings, whether or not to show mark up, add grids, zoom in, and more.
Things to Consider
- Required User Permissions for the Bid Board tool.
- Required User Permissions for the Estimating tool.
- Required User Permissions for the Portfolio Planning tool.
Steps
|
 |
Takeoff Display Settings
- Click the display settings
 icon.
icon.
- Takeoff Display Settings
- Move the toggle
 to the ON position to display the takeoff measurements on the drawing.
- Move the toggle
- Mark Up Layer Display Settings
- Move the toggle to the ON position to display mark up.
- Move the toggle
- Point Snapping
- Move the toggle to the ON position to enable Snap to points. Snap to points give you greater control when creating objects. When enabled, you can choose an object's anchor point and move, or snap, it on top of another point.
- Move the toggle
- Takeoff Display Settings
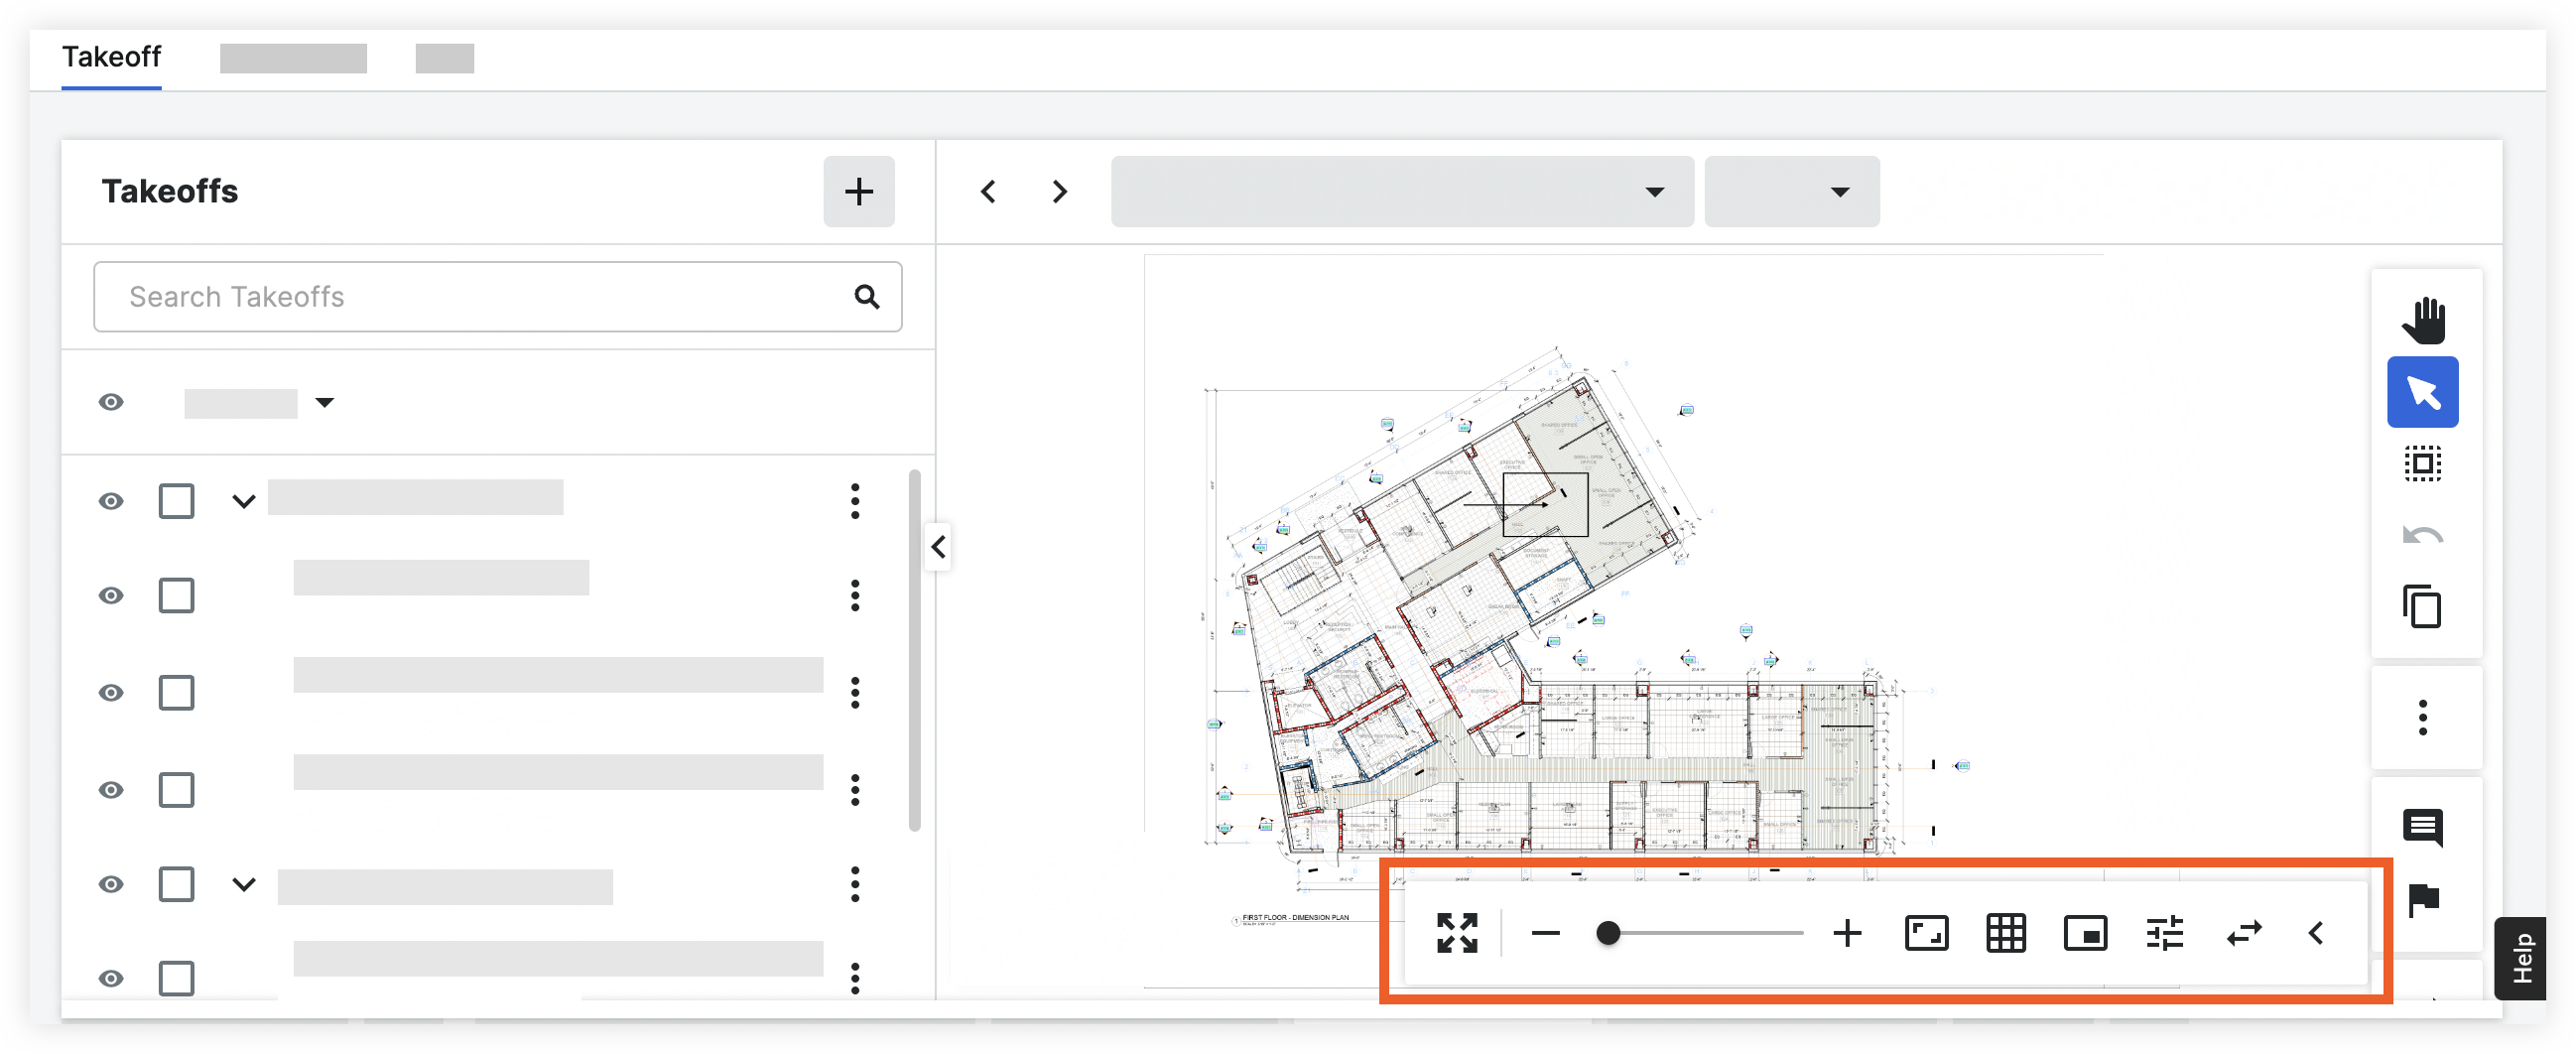
Toolbar Actions
| Icon | Tool | Description |
|---|---|---|
| Show Grid | Click the Show Grid icon to add overlayed grids to the drawing. The specialized grids are customizable depending on needs. This tool is useful for fire safety planning since you can efficiently add fire sprinklers and other related materials. | |
| Show Legend | Click the Show Legend icon to add a legend to the plan indicating the material name and individual count of each material. | |
| Display Settings | Click the Display Settings icon to configure display settings for the takeoffs on drawings. | |
| Zoom In | Click the plus icon, or move the slider to zoom in on the plan. | |
| Zoom Out | Click the minus icon, or move the slider to zoom out on the plan. |