Search, Sort, and Filter Correspondences
Beta OPTION
A modernized user experience is now available for the Correspondence tool's List view. Learn more about this open beta and how your Procore point of contact can help you enable it.Objective
To use the search, filter, and sort options to quickly locate correspondences or personalize how correspondences are listed.
Things to Consider
- Required User Permissions:
- 'Read Only' level permissions or higher on one or more of the project's correspondence types.
- Additional Information:
- Overdue correspondence items are shown in a red font color on certain fields.
- Use the search tool to further narrow the displayed results. The search tool respects any selected filter parameters and will only search for items within the filtered results. Use one or more filters to restrict which items are displayed.
- The filters you apply (by selecting items in the Add Filter drop-down list) are persistent and will be retained for your next session, unless you click Clear All.
- Use sorting to rearrange the way correspondences are listed.
- Search, Sort, and Filter can be used in combination to locate items or further personalize how correspondences are listed.
Steps
You can select any one of the options below to locate a specific correspondence.
Note: These steps do not need to be completed in a specific order.
Search for a Correspondence
Complete the steps below to search for correspondence by entering a keyword or search phrase in the search bar.
Click here to view the steps.
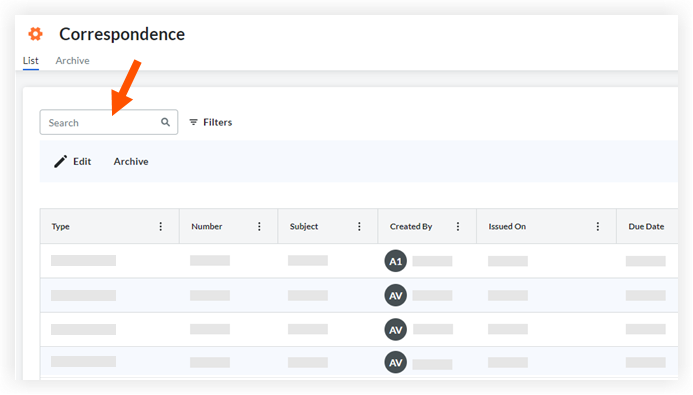
- Navigate to the project's Correspondence tool by selecting Correspondence within Project Tools.
The Correspondence page is displayed, which shows a list of all the correspondences for the project. - Enter a keyword or phrase in the Search
 and press ENTER on your keyboard.
SUPERUSER ONLY
The system also searches the Reference field. The reference field is used only by a limited number of customers.
When using the asterisk (*) in a search query, it can only be used after a term. For example, door* would find door, doors, doorframe, doorframes, and doorway. It cannot be used before a term (e.g., *.pdf) or inside a term (e.g., "Hollow*Doorframe" would not search for Hollow Metal Doorframe or Hollow Wooden Doorframe).
Filter the Correspondences List
Note
You can now access a modernized user experience, featuring new filter and column options, which is available for the Correspondence List View. To enable the open beta and use these features, customers should reach out to their Procore point of contact.Complete the steps below to apply a filter to locate correspondences or personalize how correspondences are listed.
Click here to view the steps.

- Navigate to the project's Correspondence tool.
- Click Filters
 and select custom fields or one or more of the following provided fields:
- Assignees: In the drop-down menu, select one or more names to use as filters.
- Associated Company: In the drop-down menu, select one or more company names to use as filters.
Note: A company is listed here when at least one user in that company is added to at least one correspondence item's Assignee, Created By, Received From, or Distribution field. - Closed On: In the calendar, select one of the two options:
- Single Day: Select a specific day to use as a filter.
- Date Range: Select a date range to use as a filter.
- Cost Code: In the drop-down menu, select one or more cost codes to use as filters.
- Cost Impact: In the drop-down menu, select one or more of the cost-impact options.
- Created At: In the calendar, select one of the two options:
- Single Day: Select a specific day to use as a filter.
- Date Range: Select a date range to use as a filter.
- Created By: Mark the checkbox next to one or more names to use as filters.
- Distribution Member: Mark the checkbox next to one or more names to filter the list items by users who have been added to the Distribution field.
- Due Date: In the calendar, select one of the two options:
- Single Day: Select a specific day to use as a filter.
- Date Range: Select a date range to use as a filter.
- Issued On: In the calendar, select one of the two options:
- Single Day: Select a specific day to use as a filter.
- Date Range: Select a date range to use as a filter.
- Last Activity: This filters the list of correspondence items by the date the most recent response for an item was added. In the calendar, select one of these options:
- Single Day: Select a specific day to use as a filter.
- Date Range: Select a date range to use as a filter.
- Location: In the drop-down menu, select one or more locations to use as filters.
- Overdue: Mark the Yes checkbox to only show correspondence items that are overdue.
- Received From: In the drop-down menu, select one or more names to use as filters.
- Responded By: In the drop-down menu, select one or more names to use as filters.
- Schedule Impact: In the drop-down menu, select one or more of the schedule-impact options to use as filters.
- Schedule Task: In the drop-down menu, select one or more schedule tasks to use as filters.
- Specification Section: In the drop-down menu, select one or more specification sections to use as filters.
- Sub Job: In the drop-down menu, select one or more types to use as filters.
- Status: In the drop-down menu, select one or more statuses to use as filters.
- Trade: In the drop-down menu, select one or more trades to use as filters.
- Type: In the drop-down menu, select one or more types to use as filters.
- Refresh the search results by clicking an empty space outside the selection window to view the filtered list of correspondence items.
- Optional: Repeat the steps above to add more filters.
- To clear one filter, click the X next to its name.
OR
To clear all filters, click Clear All.
Sort the Correspondences List
- Navigate to the project's Correspondence tool.
- Click a column header to sort the correspondence items by data from that field in ascending order.
- Click that same column header again to sort the list of correspondence items by data from that field in descending order.
- Click that same column header a third time to stop sorting the list of correspondence items by data from that field.
Note: This means data is sorted in descending order by 'Last Activity' date so Correspondence items with recent activity appear at the top of the list.

When deciding which column is best for sorting the table data, consider which columns are available:
Columns SHOWN by default:
- Type
- Number
- Subject
- Last Activity
- Assignees
- Created By
- Issued On
- Due Date
- Status
- Location
- Distribution
- Attachments
Columns hidden by default:
By default, these columns are hidden. You can set them to show by toggling them on in Table Settings ![]() .
.
- Sub Job
- Created At
- Quantity
- Received From
- Last Activity
- Custom Fields ('Number', 'Date', 'Checkbox', 'Plain Text', and 'Time')
See Customize the Column Display in the Correspondence Tool for information about showing, hiding, and rearranging columns in the Correspondence list.