Submit a Field-Initiated Change Order as a Collaborator
Objective
To create and submit a field-initiated change order for your contract as a project collaborator.
Background
If the company that hired you to work on their project has granted you the appropriate access permissions to create a Commitment Change Order (or Potential Change Order for two and three-tier Change Orders) on your contract in their Procore company account, use the Steps below.
Things to Consider
- Required User Permissions:
- 'Read Only' or 'Standard' level permissions on the Commitments tool with the required granular permissions. See What granular permissions are available for the project's Change Orders tool?
Steps
- Navigate to the project's Commitments tool.
- Locate the affected contract in the Commitments table. The contract must be in the 'Approved' status.
- Click the contract's Number link to open it.
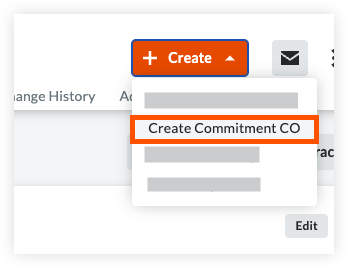
- Click Create.
- Click Create Commitment CO.
- In the New Commitment Change Order page, enter the following information:
- Number (#)
Procore automatically assigns the CCO numbers in sequential order. By default, numbers are assigned as 001, 002, 002, and so on. You can manually override this by typing over the number if desired. - Date Created
Procore automatically adds this date and timestamp. - Revision
When you first create a CCO, the revision number is zero (0). As reviewers provide feedback, a CCO may be subsequently revised. - Created By
Procore automatically adds your name to this field. - Contract Company
Procore automatically adds your company's name to this field using the data in the contract. - Contract
Procore automatically links the contract your change order is associated with in this field. ? - Commitment Change Order
Procore automatically lists (none) in this field. You cannot change this value.
Note: This field is only available when two or three-tier commitments are enabled. - Status
Procore automatically places the new CCO into the 'Draft' status. To learn more, see What are the default statuses for change orders in Procore? - Private
Procore automatically places a checkmark in this box, to ensure the CCO is private. - Change Reasons
Select one (1) of the options from the drop-down list. The options in this list are managed by the Procore company account holder. To learn about Procore's default change reasons, see What are Procore's default change types and change reasons? - Private
Procore automatically selects this checkbox for you. Keeping a mark in this box ensures that your change order remains confidential. - Description
Enter a description of the change in this box. - Request Received From
Select a Procore project user from this list. - Schedule Impact
If known, enter an approximate number of additional days that the proposed change would add to the project's current schedule. - Field Change
Mark this checkbox if the CCO requires a field change. A field change is any modification to the construction project that deviates from the original architectural plans. - Reference
Enter any other relevant information in this box. For example, tools materials, or documents that are related to the CCO. - Paid in Full
Mark this checkbox if the costs that you plan to enter on the SOV are already covered in the Procore account holder's budget. - Attachments
Click Attach Files or use a drag-and-drop operation to attach any relevant files to the CCO.
- Number (#)
- Click the Create and Enter SOV button.
This opens the Schedule of Values tab.
Add the SOV Line Items
- Under the Schedule of Values tab, click Add Line.
- Complete the data entry as follows:
- Budget Code
Select a budget code from the 'In Contract' options. To use budget codes that are 'Out of Contract', your user account must be granted edit access to the contract's Schedule of Values (SOV) with the following granular permissions: 'Update Work Order Contract' and 'Update Purchase Order Contract'. - Description
Enter a description for the line item. - Qty
Enter the number of units. - UOM
Select the Unit of Measure (UOM) from the list. See Which units of measure are included on Procore's master list? - Amount
The system automatically calculates the subtotal for you, based on the Qty, UOM, and Unit Cost entries.
- Budget Code
- Repeat the above steps for all line items that you need to add to the CCO.
- Click Save.
This saves your CCO in Procore as an 'Open' change event.
See Also
If you would like to learn more about Procore's commitments software and how it can help your business, please visit our construction financials tool product page  .
.