Configure a Workflow Template on a Project
Once workflow templates are assigned to projects, they need to be configured with an individual tool's settings. This is the process where workflow steps are assigned to specific users and the amount of days they have to respond is set. A default workflow will also need to be set for the tool it is associated with before it can be applied and used to approve an item.
Objective
To configure a workflow template on a tool.
Background
After a workflow template is published and assigned to a project, it will need to be configured on the project before it can be used. Configuration includes assigning a person to act as the 'Workflow Manager' and assigning the appropriate distribution group(s) and assignees to your workflow. A specific template must also be set as the 'Default' for the tool before it can be used.
Things to Consider
- Required User Permissions:
- 'Admin' level permissions on the project tool being configured.
Steps
- (Optional) You can Enable a Project Level Workflow Templates to provide project teams the autonomy to create and customize workflows directly within their project environment, without relying on company-level permissions.
- Navigate to the tool where the workflow is being configured.
- Click the Configure Settings
 icon.
icon.
Note: For the Correspondence tool, select the configure settings for the specific correspondence type of the workflow template. - (Optional) You can Clone a Project Level Workflow Template to create a new workflow template that's the same or very similar to an existing one.
Note
Project Level Workflow Templates must be enabled in order to use the clone functionality. - Click 'Workflow Settings' in the right pane.
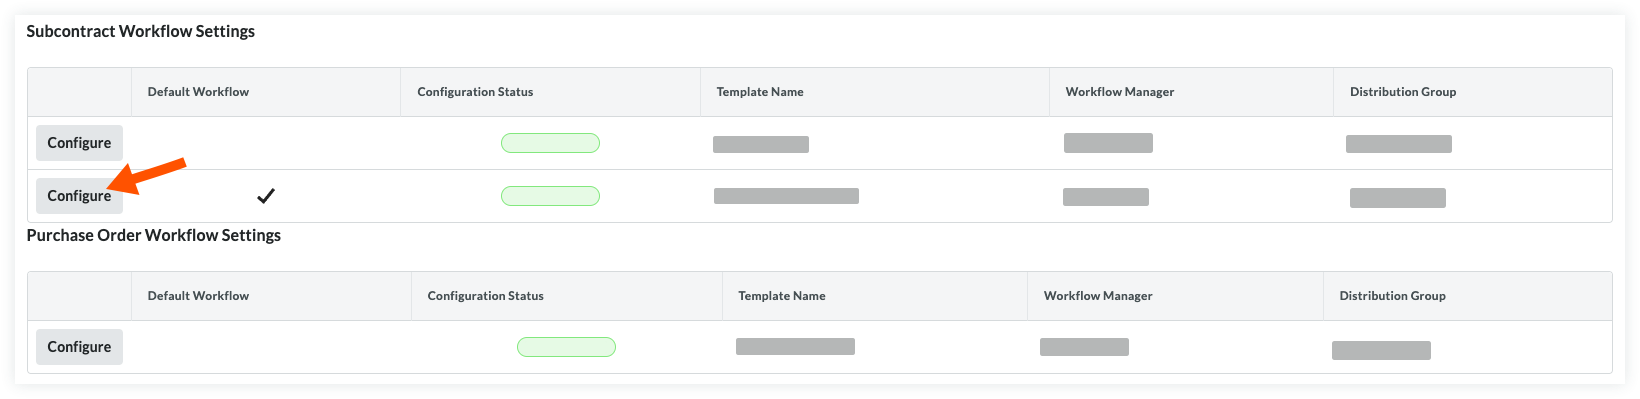
Note: The Invoicing and Correspondence tools do not have a dedicated 'Workflow Settings' page. Scroll to the bottom of the Invoicing tool configure settings to access Invoicing workflow configurations. - Click the Configure button next to the workflow being configured to open the workflow viewer.
Example
- At the top of the workflow viewer, assign a Workflow Manager by selecting a project user from the drop-down list.
- Click Save.
Note: If any required fields have missing information, a banner will appear at the top of the workflow viewer. Click Show Details to see which step needs updating.
Optional steps. Complete based on Workflow requirements.
- Assign Distribution Group. Select a distribution group from this list. These are the groups of users who will receive notification emails from Procore when certain actions occur in a workflow.
- Days to Complete. Enter the number of days assignees will have to submit their responses on the step. In the 'General Information' section of the step details under Days to Complete, enter a number of days in the first box, then select Calendar Days or Business Days from the drop-down list.
Note: If the Assignees do not submit a response within the defined timeframe, they will receive automated email reminders.
Set a Default Workflow
A default workflow must be chosen before a workflow can be started on an item.
- Hover over the 'Default Workflow' column in the 'Workflow Settings' table.
- Click Set as Default in the row of the workflow you want to be the default.
Note: If a default workflow has already been set, the same action will reverse the default designation of the workflow. - Once a default workflow is chosen, a checkmark will appear in the workflow's 'Default Workflow' column.