Manage a Group in the Conversations Tool
Objective
To modify an existing group within the Conversations tool in Procore.
Background
When you create a group in the Conversations tool, you are creating a group conversation that allows you to send a message to designated team members at the same time. See Create a Group in the Conversations Tool. These group messages can be viewed and replied by team members in the Groups section of the Conversations tool, organized by project.
Things to Consider
- Required User Permissions:
- Procore user with the 'Create and Manage Group' privilege. See Configure Access and Settings for the Conversations Tool.
This permission can be set to 'Administrators', 'Internal Employees', or 'Everyone':- If 'Administrators' is selected, you need 'Admin' level permissions to the Project or Company level Directory tool.
- If 'Internal Employees' is selected, you must be marked as an internal employee. See How do I add someone as an employee of my company?
- If 'Everyone' is selected, you must be a member of the Company Directory.
- Procore user with the 'Create and Manage Group' privilege. See Configure Access and Settings for the Conversations Tool.
- Additional Information:
- If the Conversations tool is configured to allow only Admins to create and manage groups, we recommend keeping at least one Admin in a group so that it can be managed. Admin users are shown with
(Admin)after their name in the user selection list. - Each group in the Conversations tool can support up to 2,000 members.
- If the Conversations tool is configured to allow only Admins to create and manage groups, we recommend keeping at least one Admin in a group so that it can be managed. Admin users are shown with
Steps
- Navigate to the Conversations tool (click the conversations
 icon in the top menu of Procore).
 - In the 'Groups' section, click the group that you want to manage.
- Click Manage Group.
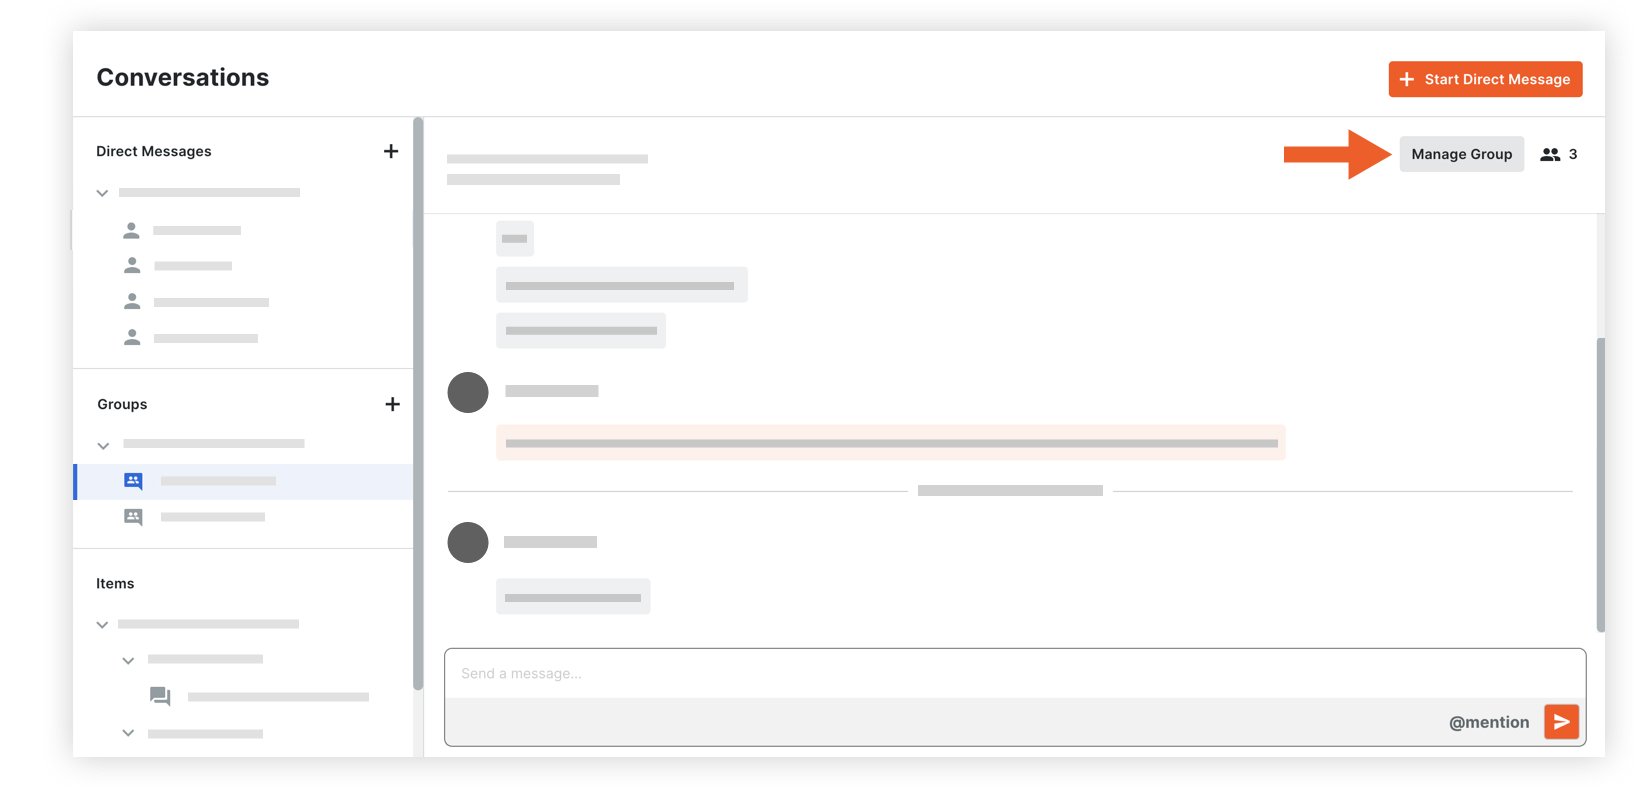
- The following information can be modified:
- Group Name: Edit the name for the group if necessary.
- Team Members: Manage the list of team members as necessary, choosing between manual selection and using the project's Directory:
- Selected users:
- To add users: Click into the menu to see the list of project users. Select any users you want to add to the group.
Note: If your project has distribution groups, you can select one to add those members to the conversation group. See Add a Distribution Group to the Project Directory. - To remove users: Click the x icon on the user's name.
- To add users: Click into the menu to see the list of project users. Select any users you want to add to the group.
- Everyone in this project's Directory: This includes automatic updates to the team members when any user is added or removed from the project Directory in the future.
Note: Company Admins who are not yet in the project's Directory are prompted to add themselves before proceeding with this option.
- Selected users:
- Click Save Changes.