Add Sage Intacct® Standard Cost Codes to a Project
Objective
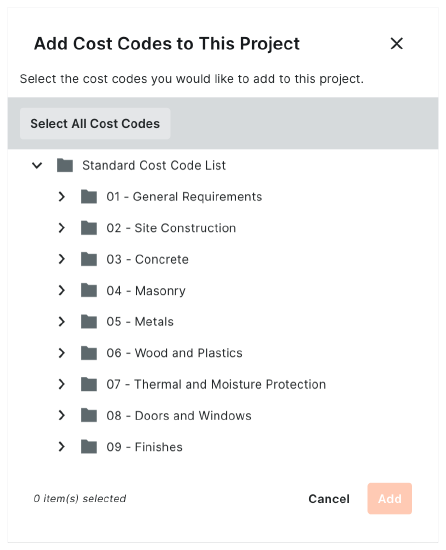
To add 'Sage Intacct® Standard Cost Codes' from the company-level to a 'Project Cost Codes' list in Procore.
Background
During the course of a construction project, users create commitments (a.k.a., purchase orders and subcontracts) and Commitment Change Orders (CCOs). This sometimes results in the need to add new cost codes to a Procore project. Adding new codes is a multi-step process:
- Create the new cost codes in Sage Intacct®.
- Sync the new cost codes with Procore's 'Sage Intacct® Standard Cost Codes' list in the company's Admin tool.
- Follow the Steps below.
Things to Consider
- Required User Permissions:
- To add or edit project cost codes:
- 'Admin' on the project's Admin tool.
OR - 'Standard' or 'Read Only' level permission on the Project level Admin tool with the 'Manage Cost Codes' granular permission enabled on your permissions template.
- 'Admin' on the project's Admin tool.
- To add or edit project cost codes:
- Prerequisites:
- The ERP Integrations tool must be enabled on the project.
- The Sage Intacct® job must be added as a Procore project. See Add a Sage Intacct® Job to Procore.
- Alternatives:
- Add the new cost codes and cost type assignments in Sage Intacct® and then complete the steps in Refresh ERP Cost Codes on a Project.
Steps
- Add Standard Cost Codes to a Project
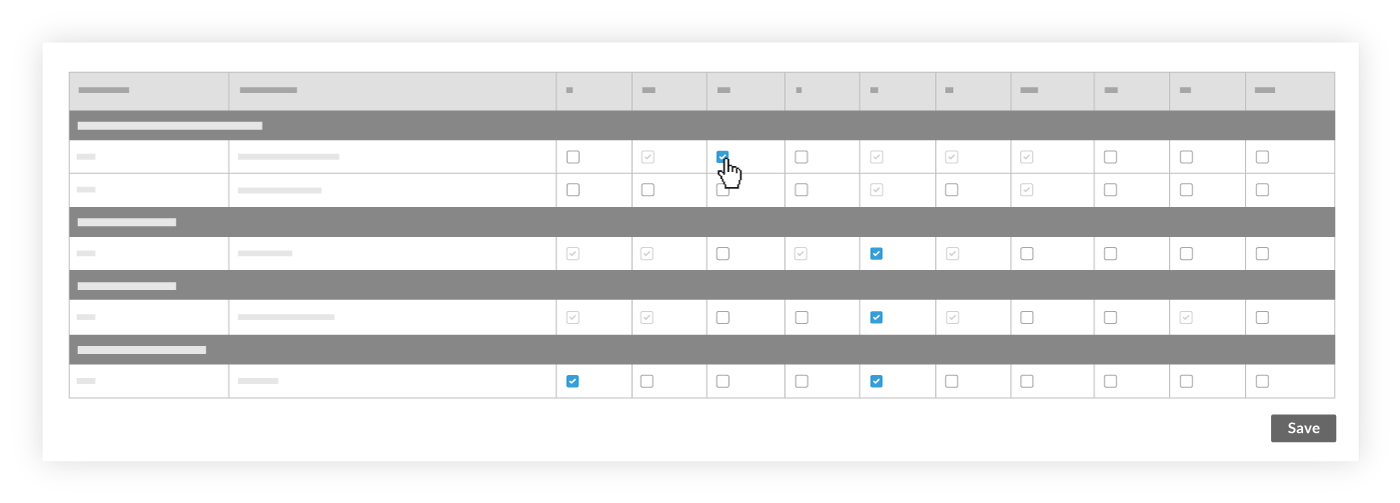
- Update the Project Cost Code Cost Type Assignment
- Resend the Project Cost Codes to ERP
Add Standard Cost Codes to a Project
Update the Project Cost Code Cost Type Assignment
- Navigate to the project's Admin tool.
- Under Project Settings, click Cost Code Cost Type Assignments.
- Mark one or more checkboxes to assign the code to a cost type (or cost types) for every cost code in the list.
Notes:- The cost type abbreviations in this list are populated from Sage Intacct®.
- To learn more about cost code cost types, see What are Standard Cost Types in the Cost Types Configuration Page?

- Click Save.
Resend the Project Cost Codes to ERP
Now that you've added the new cost code(s) and updated the cost type assignment(s) in the Admin tool, you'll need to send those changes to the ERP Integrations tool so it can be reviewed by an accounting approver.
- Navigate to the project's Admin tool.
- Under Project Settings, click General.
Note:- If new codes or cost type assignments exist, a banner appears to notify you to resync Procore with Sage Intacct®.

- If new codes or cost type assignments exist, a banner appears to notify you to resync Procore with Sage Intacct®.
- Click Re-send to ERP.

Procore sends the new cost code and cost type data to the ERP Integrations tool. A banner appears across the top of the page to indicate that the project data in the Admin tool currently being reviewed by an accounting approver. While the project data is being reviewed, users cannot make changes in the Admin tool.
The next step is for the accounting approver to complete the steps in Update Project Cost Codes for Export to Sage Intacct®.


