Customize the Column Display in the Directory Tool
| Previous | Current Lesson - 2/27 | Next |
- Navigate to the Company or Project level Directory tool.
This reveals the Company Directory or Project Directory page.
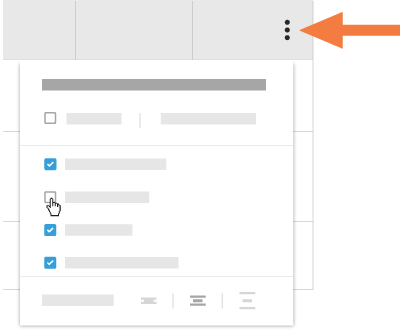
Note: The actions shown in the animations below can be performed on both the Company Directory and Project Directory pages. - On the right side of any of the views, click the vertical ellipsis (⋮).
- This opens the Show, Hide, or Reorder Columns shortcut menu.
- Choose from these options:
- Show a Column
Place a check mark in the box next to column to show on the Directory page. The default setting is to show all available columns.
OR - Hide a Column
Remove the checkmark from the box that corresponds to the column to hide on the Directory page. This immediately removes the column from the page.
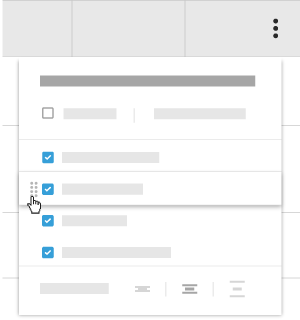
OR - Reorder the Columns
Grab the column name by the dots (⁞⁞). Then use a drag-and-drop operation to place the column into the desired position in the list. This immediately moves the column into the specified position.
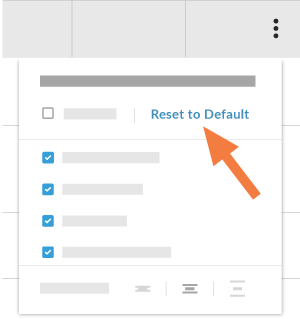
OR - Restore the Default Settings
Click the Reset to Default link at the top of the drop-down menu.
- Set the Row Height
Click one of the available Row Height icons to set the relative height of the rows in the table.

- Show a Column