Conflict Check Updated Design Intake Process for Muni Teams
Objective
This process prepares the documents and workflow for the conflict check process to flow through the required reviewers.
Steps
1)
You will receive an email notification from Procore that a new update design for a Conflict Check has been created.

2)
Download all attachments from the intake form into your OneDrive to load into Procore by clicking the Attachment links at the bottom of the email. The download will automatically start.

3)
Click the View Online link in the same notification email to open the Conflict Check. If you are not already logged into Procore in Google Chrome, you will be prompted to do so.

4)
From the Correspondence page, click the Project Tools dropdown and select Documents to set the conflict check up for the review teams as you will create the file structure, name it to match the intake form, and upload received documents.

5)
In the Documents Tool, drag and drop attachments from the intake form into the 01 Design Files & Sketches folder. You may want to create a new folder to load them so you and others can easily locate them

6)
Return to the intake form by clicking the Project Tools dropdown and navigating to Correspondence. Once on the Correspondence page click on the appropriate correspondence to open it and then click Edit to make updates.

6A)
Update the following:
Subject Line: Intake person will edit the Subject line to be in the following format: "CC #_Project Name_Project Number_SAP Number_% Design"
Distribution: Add Muni Advisor, PM, and other essential internal team members

6B)
Origin Correspondence: Click dropdown to link to the original Conflict Check submission for this project
Attachments: Verify required docs are attached and download to desktop to load into Procore. Click the Download symbol beside the file names to dowload them onto your computer for transfer into Documents.
SAP Project Number: Enter previously received SAP Number
P6 ID: Enter P6 ID number, if available

6C)
Click Save to update. An email notification will go to the creator and all users added in the Distribution field.

7)
Click the Project Tools dropdown and then click the + beside Submittal. A new submittal will open.

7A)
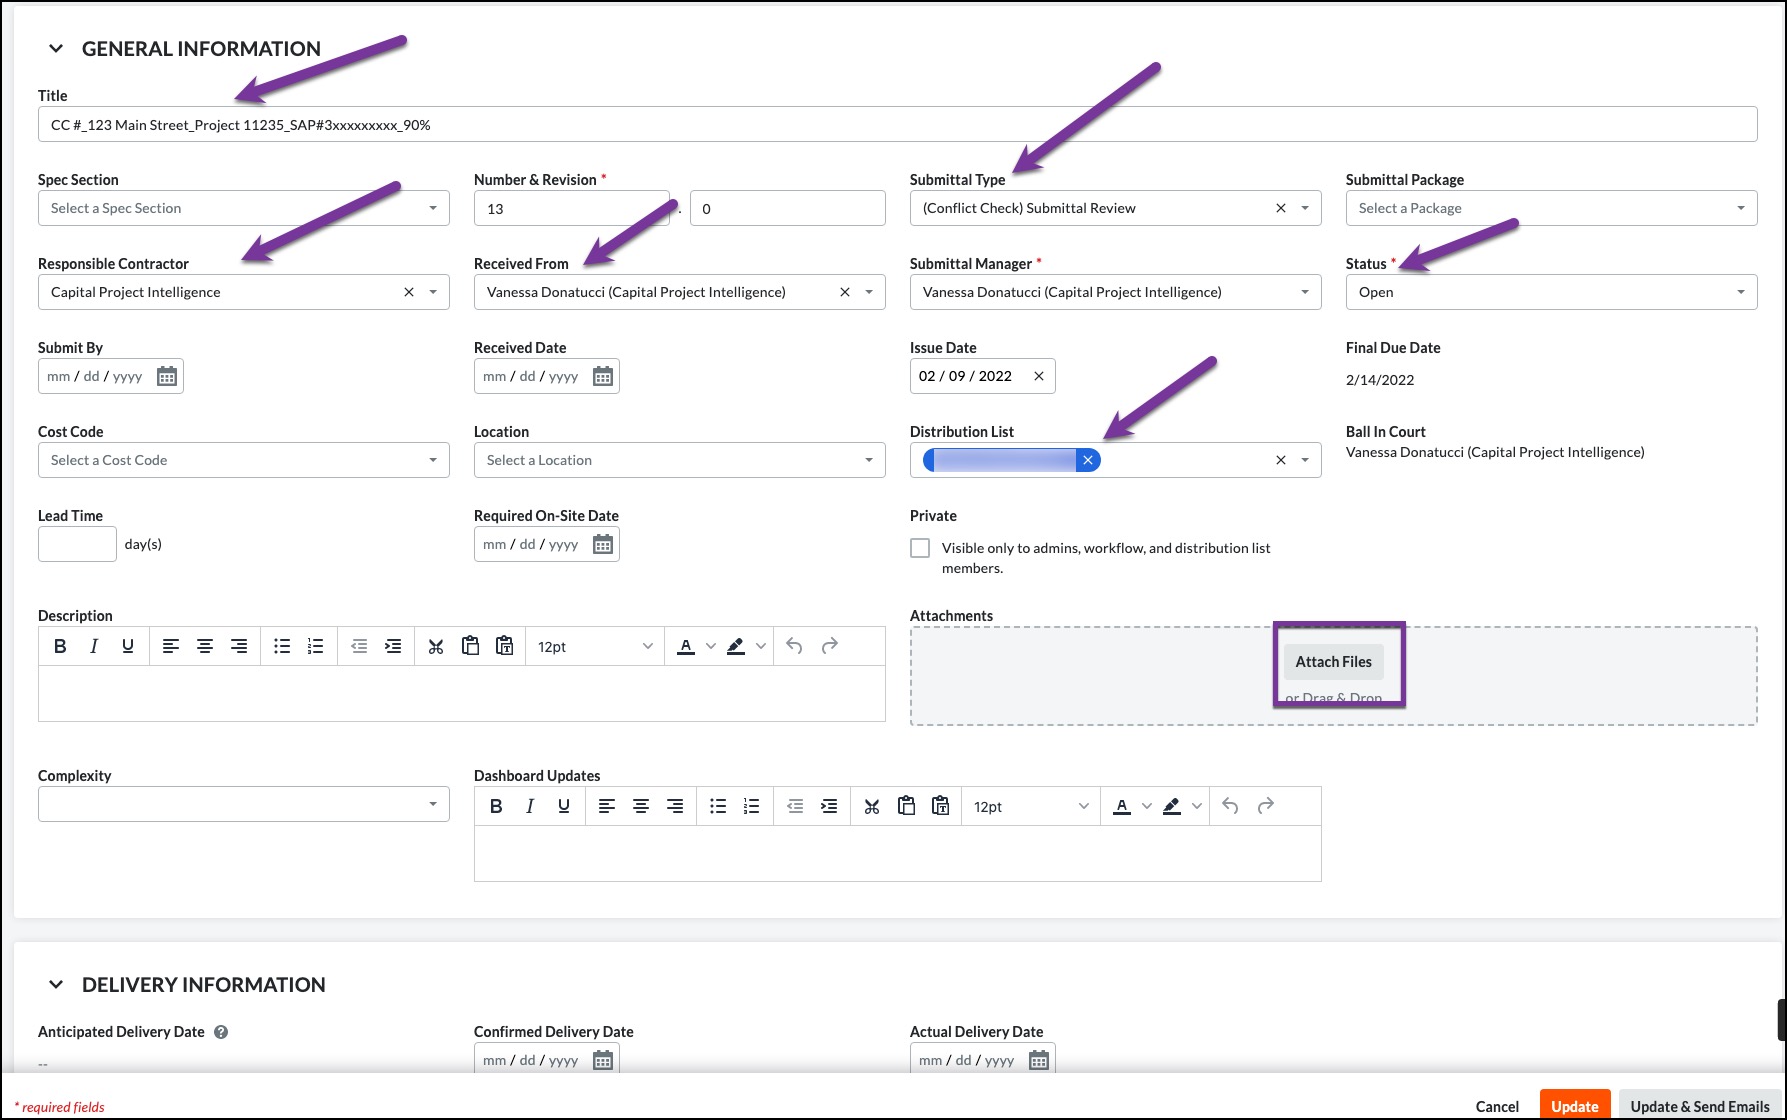
Complete the following fields then click Attach Files:
Title: Enter same naming convention from intake form "CC #_Project Name_Project Number_SAP Number_% Design"
Received From: Enter the individual who submitted the request. It will auto-populate the Responsible Contractor field with the company name.
Type: Select (Conflict Check) Submittal Review from the dropdown.
Distribution List: select the following people from the dropdown:
Appropriate Muni Advisor
Appropriate FUS
Appropriate PM
Other essential internal team reviewers
7B)
Attachments: you may drag and drop if they are still available on your desktop or click Attach File(s) and Select a file from Procore.

7D)
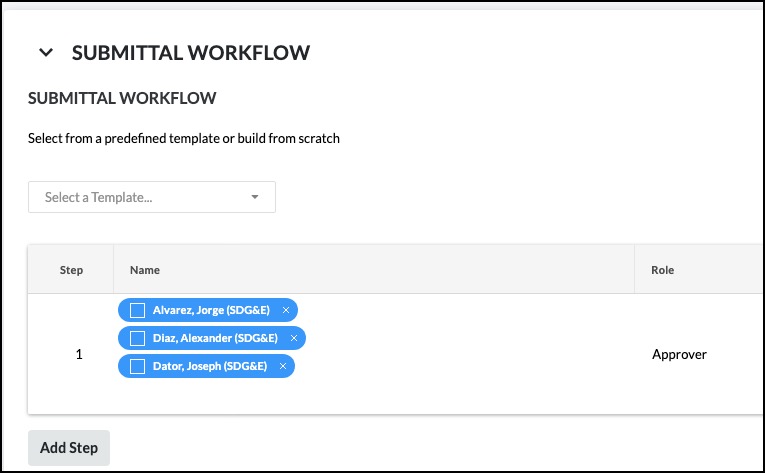
Move down to Submittal Workflow and add Complexity Reviewers from the dropdown into the Name box of Step 1 of the submittal workflow. It will add the complexity reviewers' names. You will want to uncheck all of the boxes so only one person must reply.
Change the due date so it is 3 working days from current date, then click Create & Send Emails.

Approvers that should show in workflow Step 1 - make sure all boxes are unchecked.
7E)
The completed submittal should appear as below with the attachments visible and only the Complexity Reviews currently in the workflow.

8)
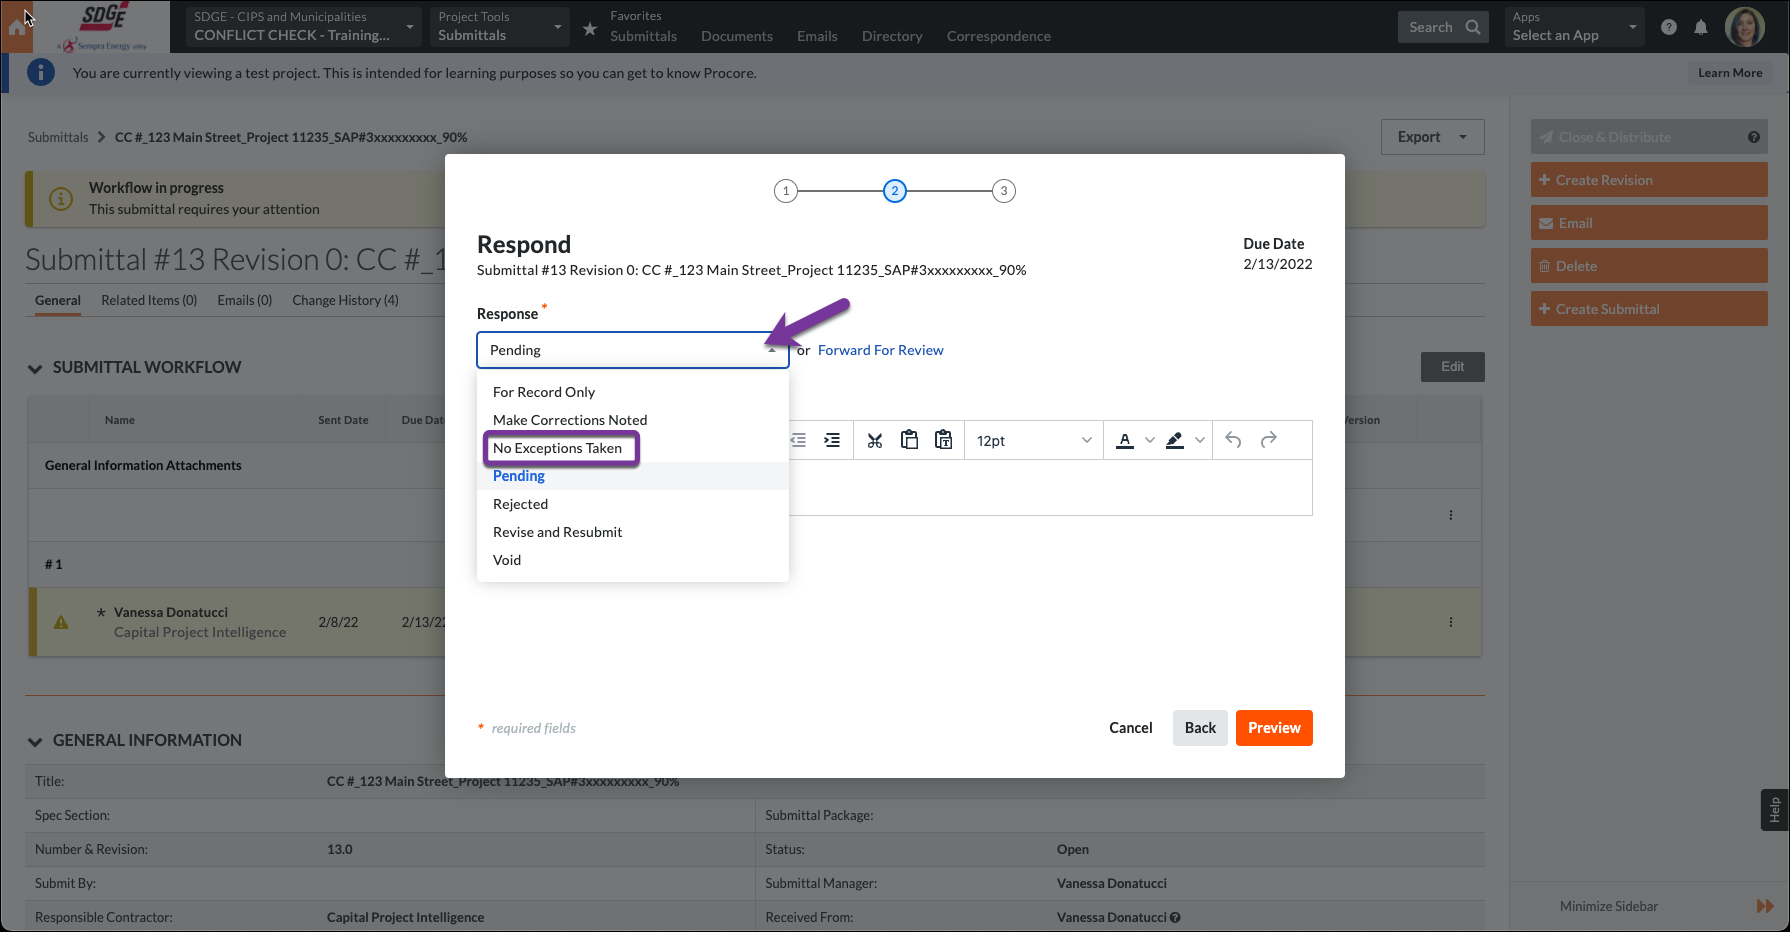
Once all reviewers have completed working on the updated design Conflict Check, you will be added as the final reviewer. You will need to respond to let the reviewers know that you have received the information and are communicating back to the Municipality.
In the submittal line with your name click the Respond button.

8A)
In the popup box click the Next button as you will not need to be responding with attachments.

8B)
Click the Response dropdown and select No Exceptions Taken.
8C)
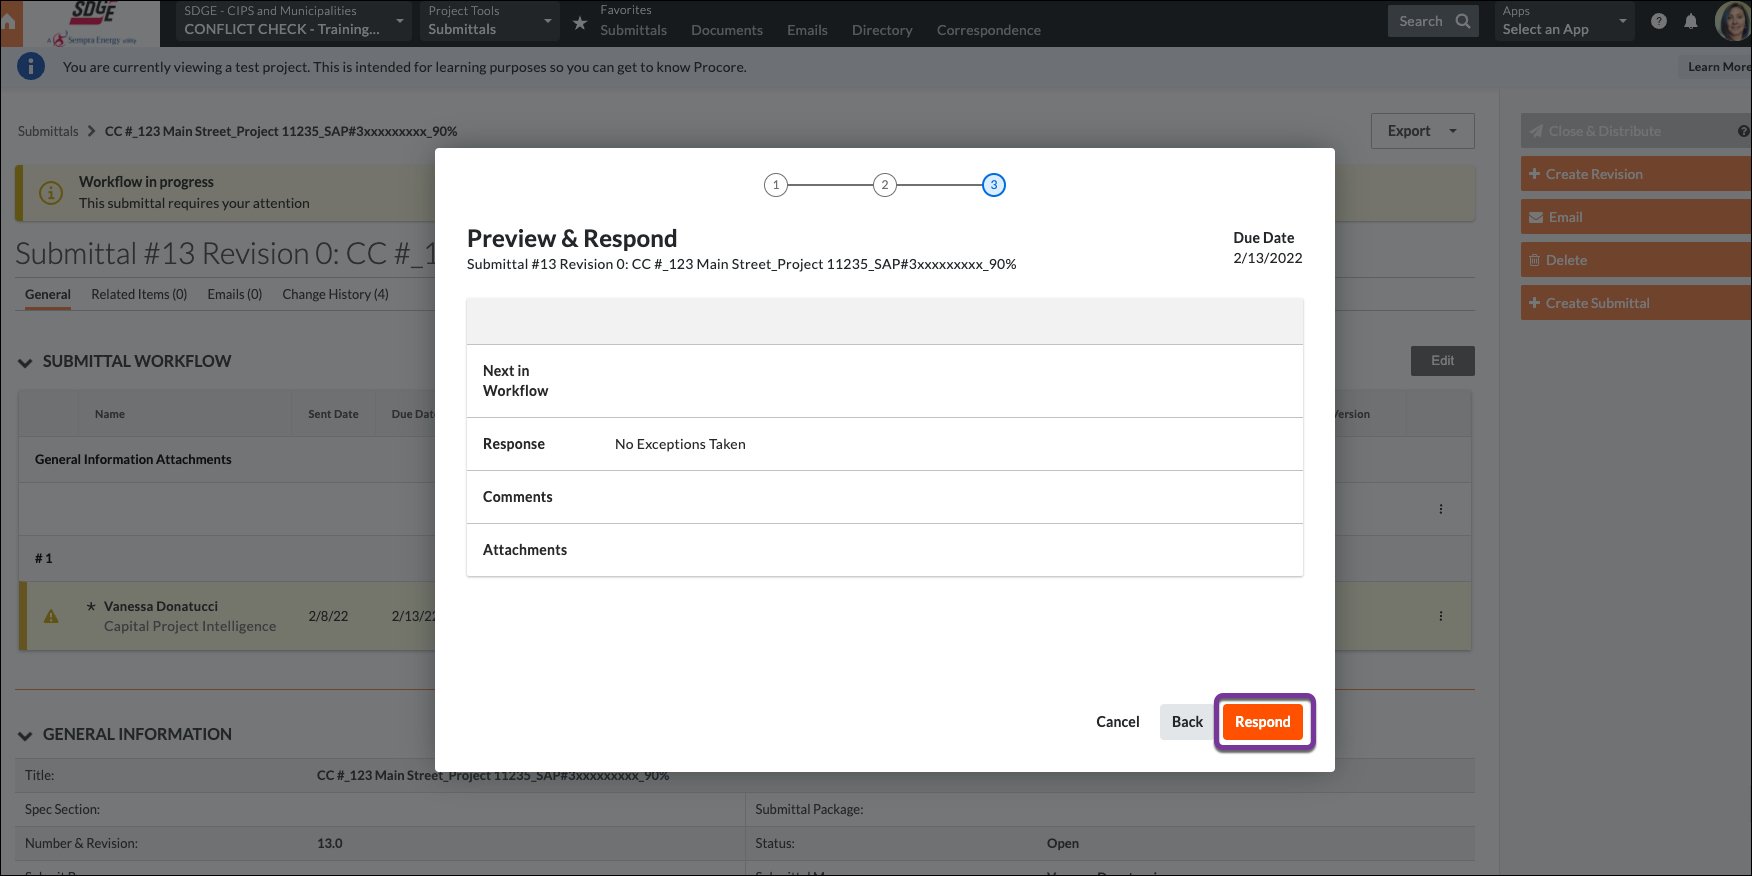
You may add a comment if you want to inform reviewers and people in the Distribution List that you are Communicating with the Municipality, otherwise leave it blank and click Preview.

8D)
Make sure your response is what you want. you may click the Back button to correct. Otherwise, click Respond.
8E)
The workflow will show as complete. You will then want to close the submittal as all reviewers have completed their work. Click the Edit button.

8F)
Toggle the status to Closed the click Update & Send Emails.

Your submittal will now show a status of Closed.

9)
You will then want to communicate with the Agency via the Activity section at the bottom of the intake form (Correspondence) just as was done on the original submission. This logs all communication in Procore as part of the conflict check record. Anytime anything is entered and/or attached into the Activity section of an open correspondence, an email is sent to the Creator, Assignee(s), and Distribution List members. Simply scroll to the bottom to type in your communication, add attachments, and click Post Response.
Communications are logged with date and time allowing everyone with proper permissions visibility. Note: Once the correspondence has been changed to a status of Closed, all email notifications cease.

10)
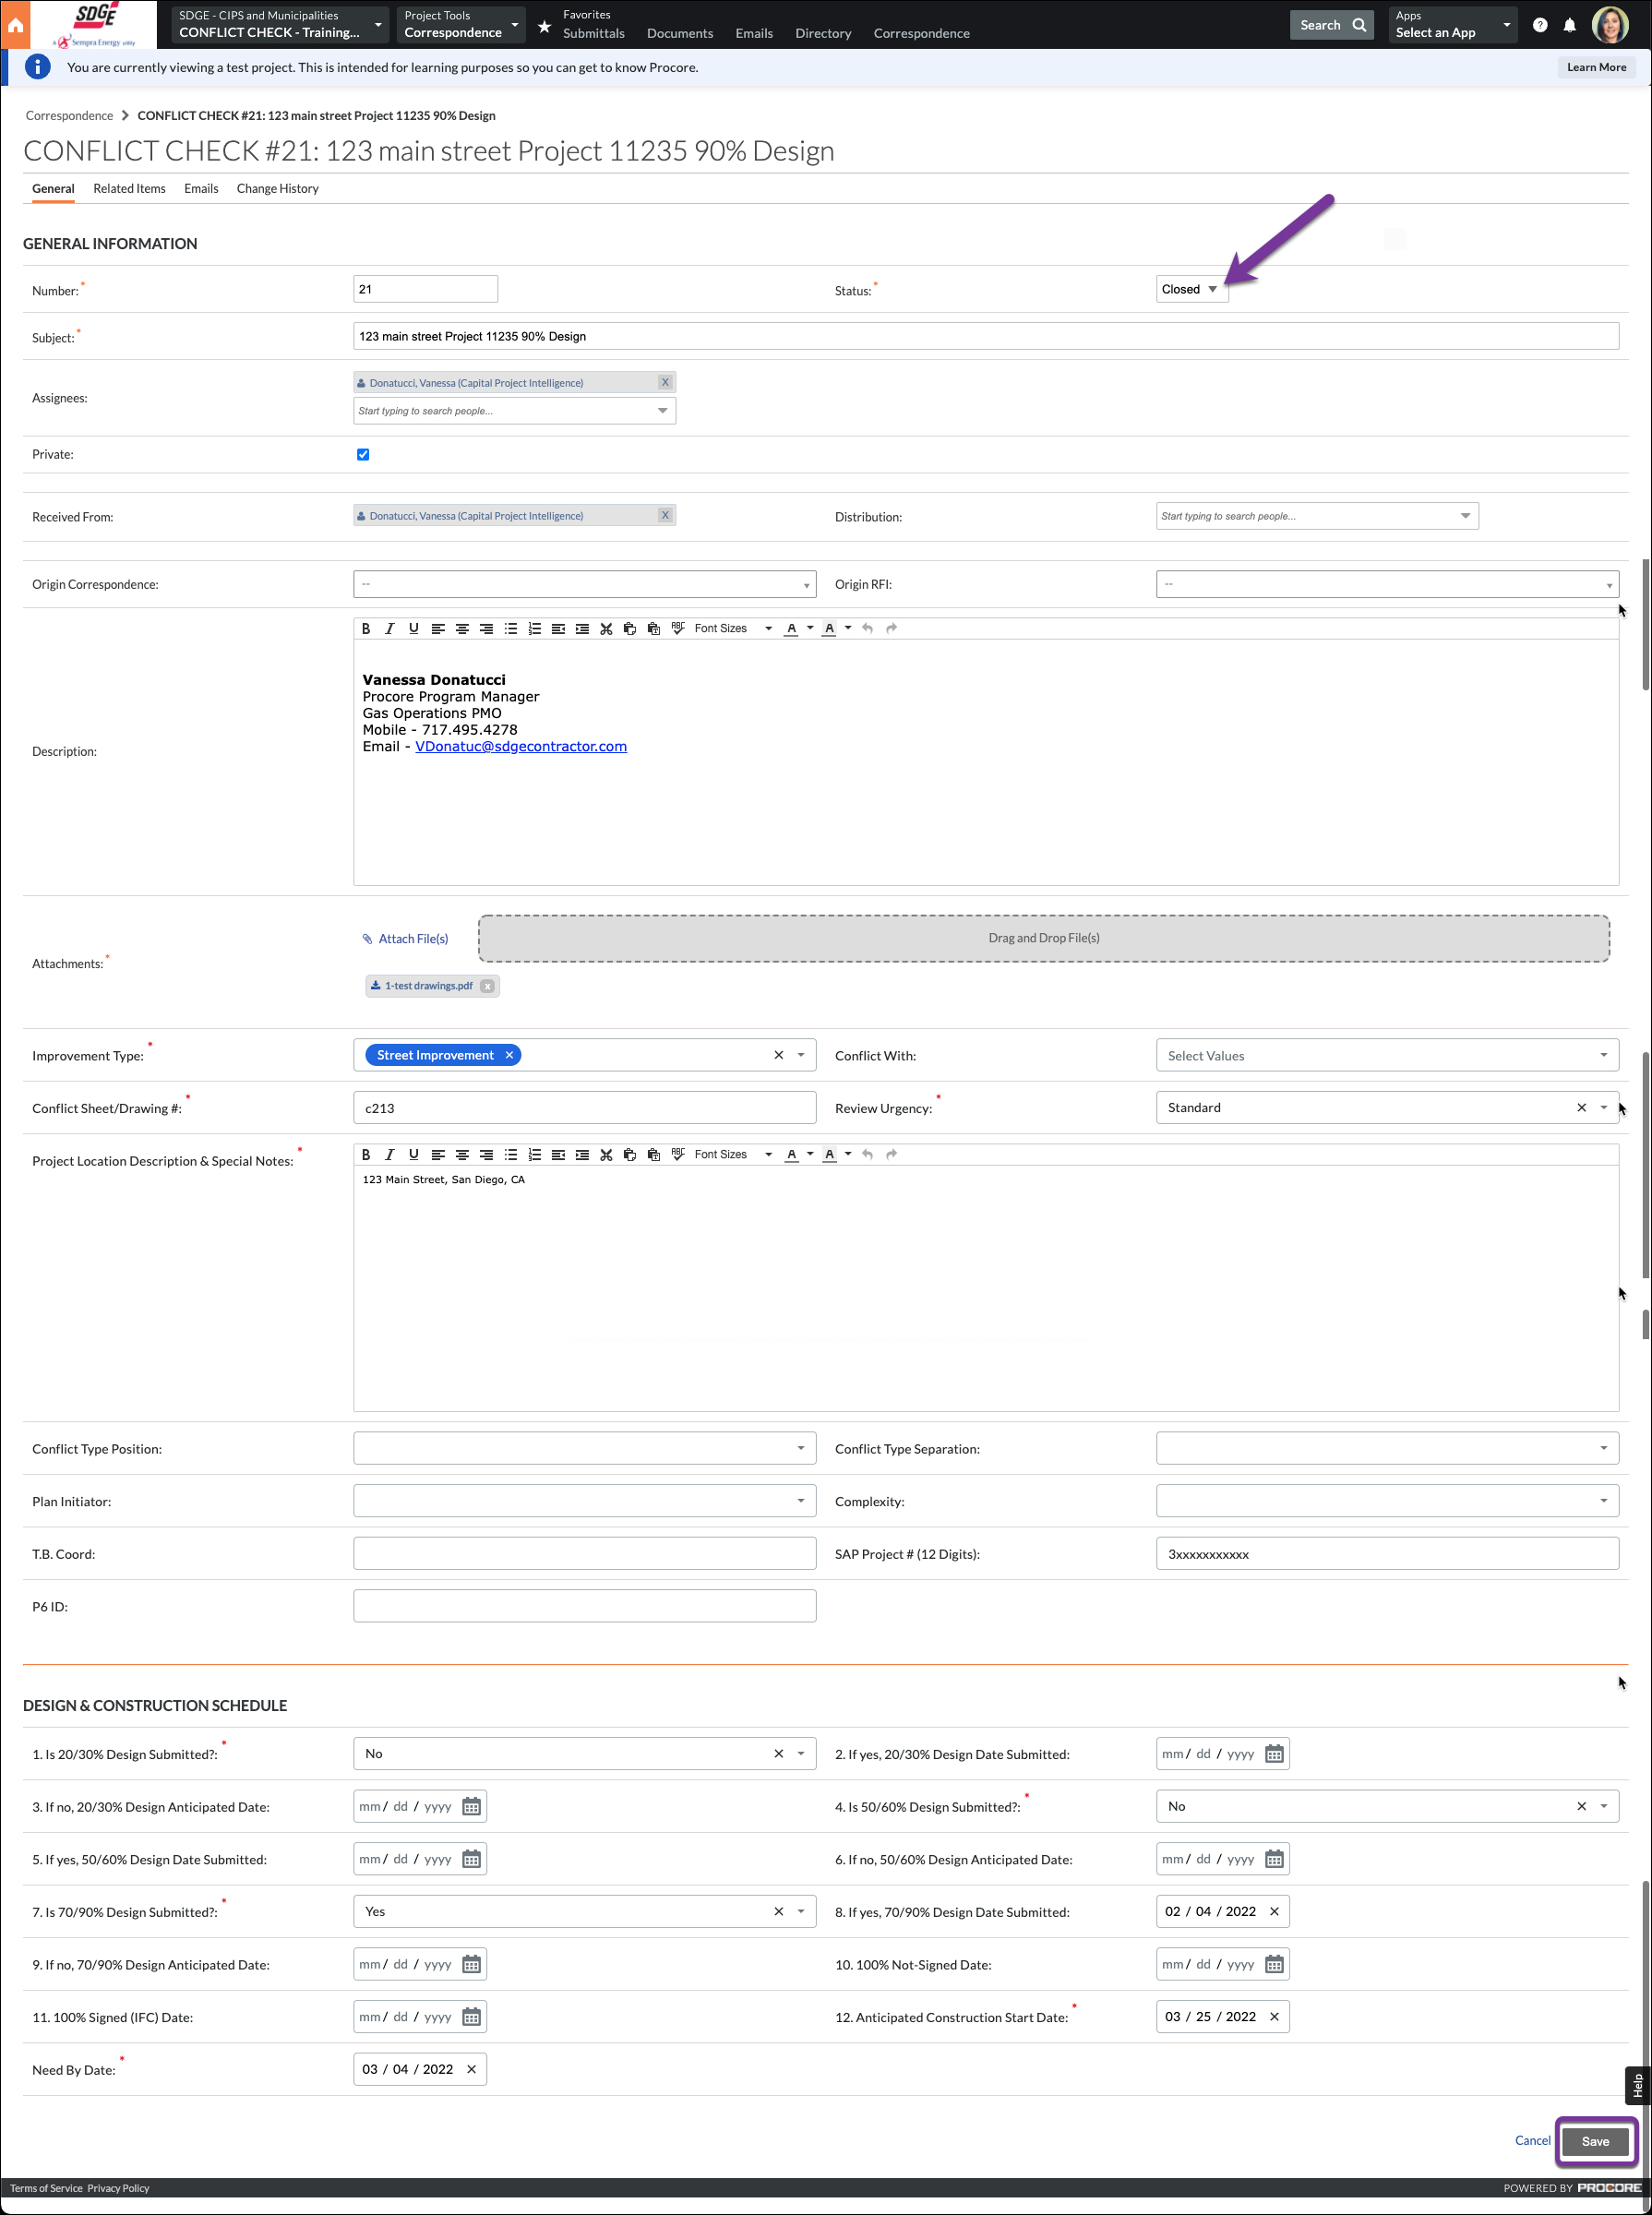
The Correspondence should only be closed when the entire conflict check process has been completed and ALL communication regarding this particular design percentage is complete with the next design percentage to be submitted or a project has been started as a result of the conflict check. Go to the Correspondence and Click Edit.

10A)
Toggle the Status to Closed, then scroll to the bottom and click Save.
An email notification will be sent and the correspondence will show as Closed. No further email notifications will be sent on this since it is closed.
