Create a Calendar Item
Objective
To create a calendar item in the Project level Schedule tool.
Things to Consider
- Required User Permissions:
- 'Standard' or 'Admin' permissions on the project's Schedule tool.
- Additional Information:
- When you create a calendar item in Procore, it will not show up on an integrated schedule in Procore (e.g. Microsoft Project, Primavera).
Steps
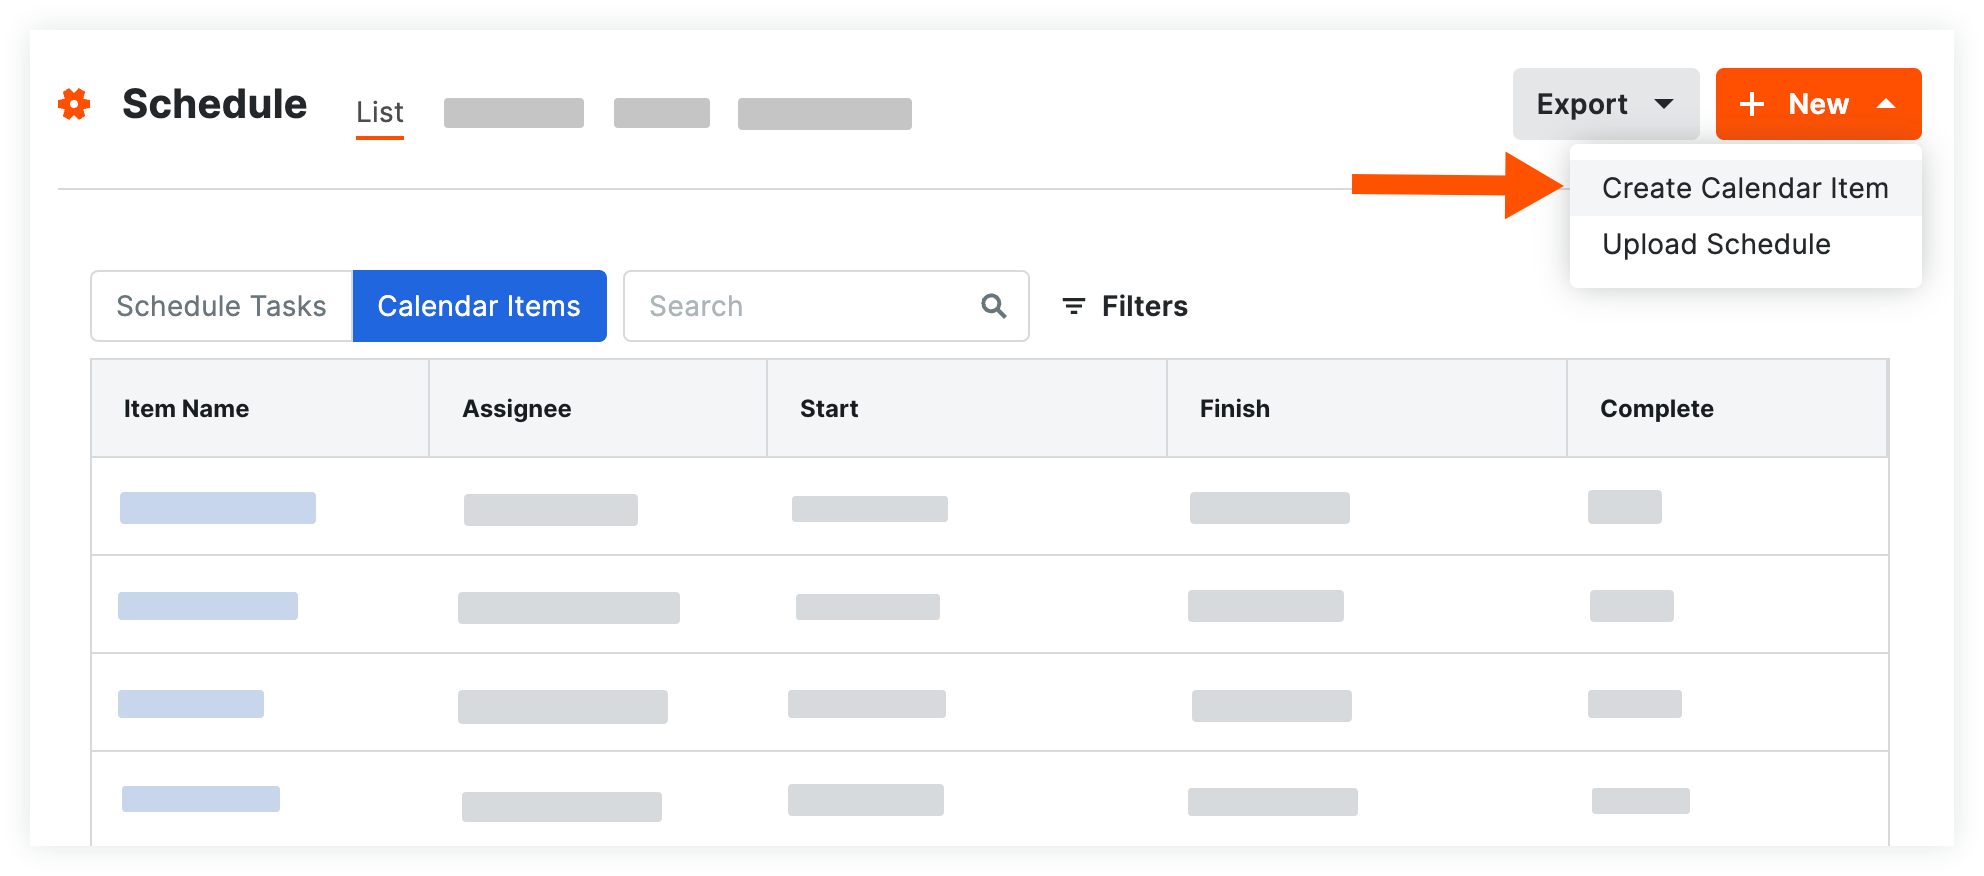
- Navigate to the project's Schedule tool.
- Click the + New button.
- Click Create Calendar Item.
- Fill out the following fields:
- Title: Enter the title of the calendar item to briefly describe the event. This is how the event will be displayed on all schedule views.
- Color: Assign a color for the event so that color is displayed on your schedule to differentiate it from other events.
- Assignee: Assign the calendar item to a person in your project's Directory.
Note: Email notifications are not sent for calendar items. However, an assigned calendar item will appear in the person's My Open Items and the Schedule section of the Home page (if enabled). - Private: Mark this checkbox so that only Admin level users or users who have been assigned this item can see the event.
- Start: Choose a start date for the event.
- Finish: Choose an end date for the event.
- Percent Complete: Enter a percentage to denote work completed for the event.
- Description: Enter a detailed description of the calendar item.
- Click Save.
If you would like to learn more about Procore's scheduling software and how it can help your business, please visit our construction scheduling software product page  .
.