Add Vista Standard Cost Codes to a Project
Objective
To add Company Level 'Vista Standard Cost Codes' to a 'Project Cost Codes' list in Procore.
Background
During the course of a construction project, commitments, and commitment changes orders are created. When this happens, you might need to add new phase codes to Vista. You will also need to add those phase codes to your Procore project. When you create a new phase code in Vista, those codes are synced with your Vista Standard Cost Code List in Procore's Company level Admin tool. After the codes are synced, you can then use the steps below to copy the Vista Standard Cost Code List to the Project Cost Codes list.
Things to Consider
- Required User Permissions:
- 'Admin' level permission on the ERP Integrations tool.
- Prerequisites:
- The ERP Integrations tool must be enabled on the project.
- The Job from the integrated ERP system must be added as a Procore project.
Steps
- Add Standard Cost Codes to a Project
- Update the Cost Code Cost Type Assignments
- Resend the Project Cost Codes to ERP
Add Standard Cost Codes to a Project
- Navigate to the Project level Admin tool.
- Under 'Project Settings', click the Work Breakdown Structure link.
- In the 'Segments' list, click the Cost Codes link.
- Click Cost Codes from Company.
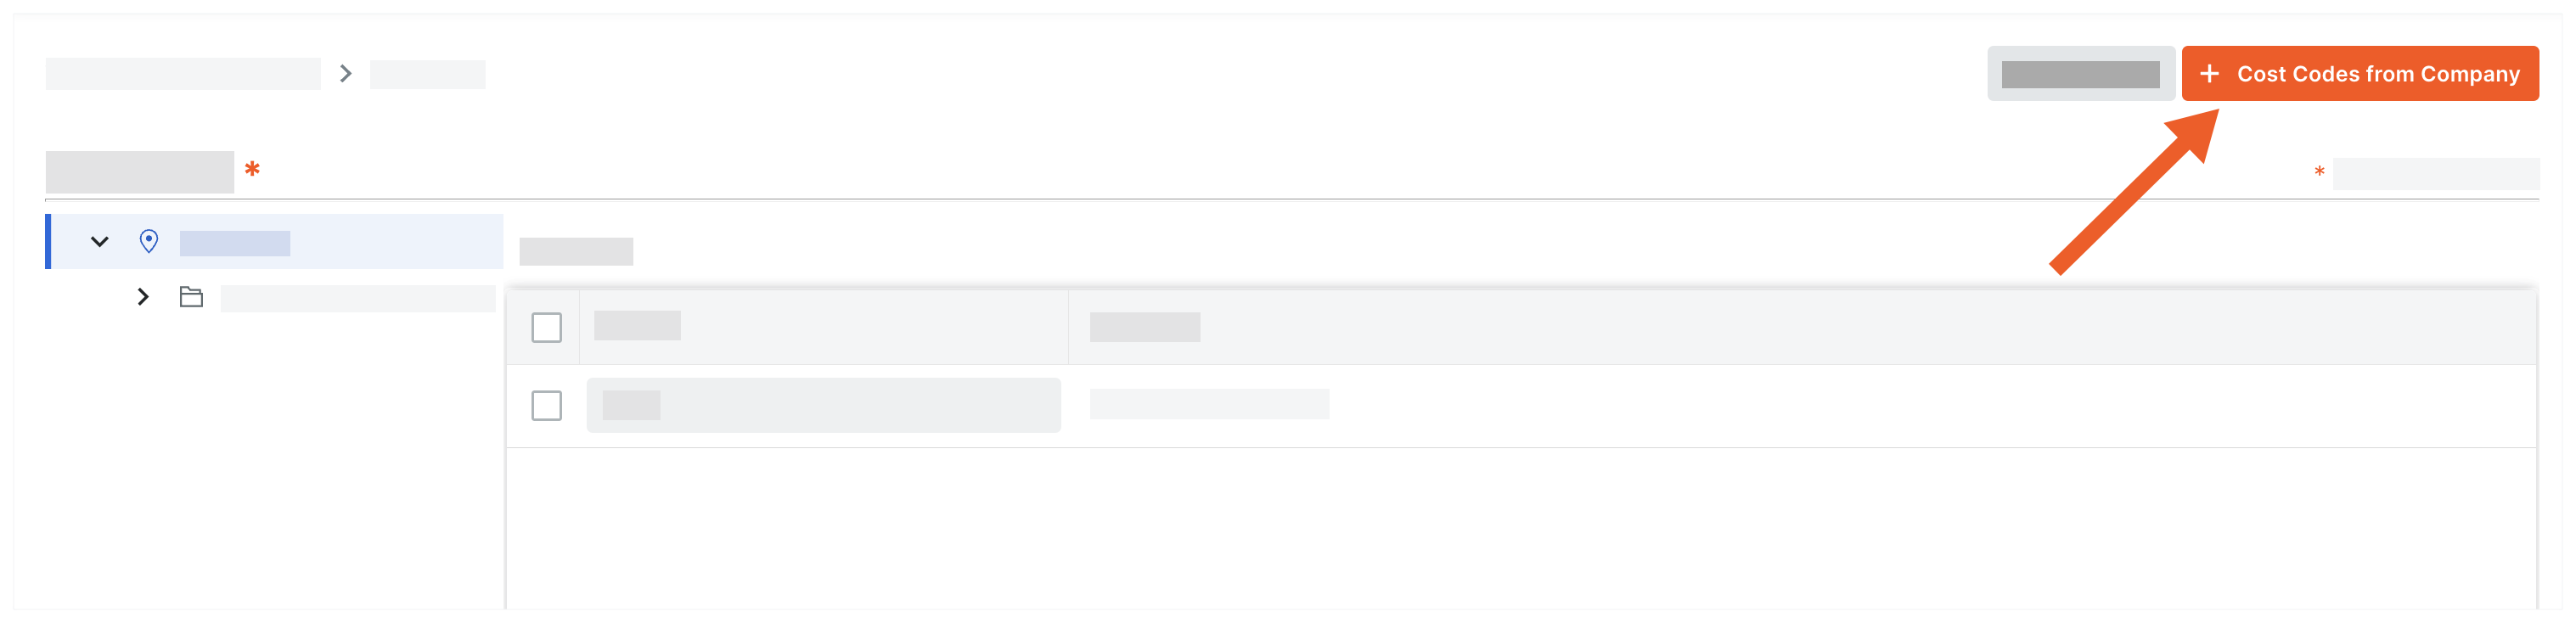
- In the 'Add Cost Codes to this Project' window, choose from these options:

- To copy all company cost codes to the project, click Select All.
- To select specific cost codes, type a code in the Search Cost Codes box and highlight the codes to add.
- To choose cost codes, expand the desired segment items and highlight the segment items to copy.
- Click Add.
Update the Project Cost Code Cost Type Assignment
- Navigate to the project's Admin tool.
This reveals the 'General Project Information' page. - Under 'Project Settings', click Cost Code Cost Type Assignments.
This reveals the 'Cost Code Cost Type Assignments' page. - For every cost code in your project's list, mark one or more checkboxes to assign the code to one or more cost types.
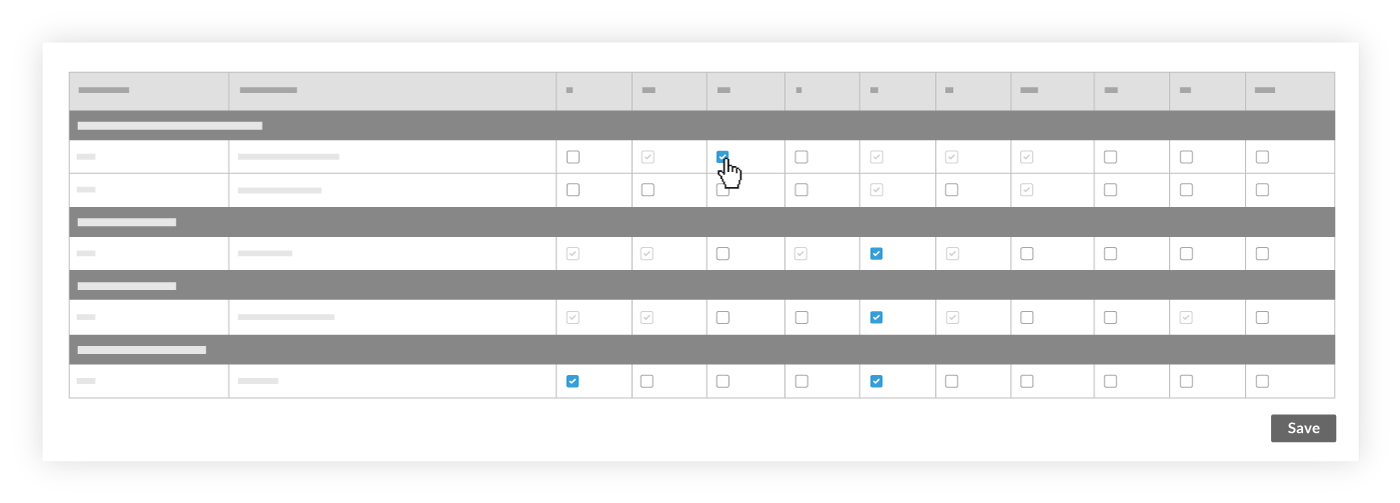
Note: The cost type abbreviations in this list are populated with the abbreviations that have been imported from your Vista system. - Click Save.
- Continue with Resend the Project Cost Codes to ERP.
Resend the Project Cost Codes to ERP
Now that you've added the new cost code(s) and updated the cost type assignment(s) in the Admin tool, you'll need to send those changes to the ERP Integrations tool so they can be reviewed by an accounting approver.
- Navigate to the project's Admin tool.
OR
Under Project Settings, click General. - Under the 'Project Settings' menu in the right pane, click General.
Note: A banner appears across the top of the page to notify you when a project has new cost codes or cost types that need to be synced with Integration by Procore.

- Click Re-send to ERP.
Note: If the Re-send to ERP button is grayed out and unavailable, hover your mouse cursor over the button to view a message with the reason.

Procore sends the new cost code and cost type data to the ERP Integrations tool. A banner appears across the top of the page to indicate that the project data in the Admin tool currently being reviewed by an accounting approver. While the project data is being reviewed, users cannot make changes in the Admin tool.