Configure the Sync Schedule for your ERP Integration
Objective
To configure the automatic data synchronization schedule between your ERP system and Procore.
Things to Consider
- Required User Permissions:
- 'Admin' level permission on the ERP Integrations tool.
Important
Not all ERP integrations should use the configurations settings described on this page. Settings and requirements vary depending on the ERP system your account is integrated with. The information below contains all configuration settings options.
See Things to Know about your ERP Integration to learn if you should adjust the configurations on this page.
Steps
- Navigate to the company's ERP Integrations tool.
- Click Configure Settings
 .
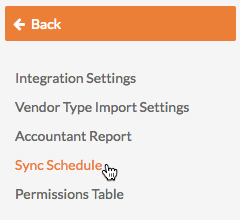
. - Click Sync Schedule.

- Under Sync Schedule, you can configure the options below depending on availability for your integration:
- Payments for Synced Invoices. This can be scheduled to be synced Hourly, Daily, Every 4 Hours, Never, or Every 2 Hours from the drop-down list. All other syncs are done automatically, hourly for company-level syncs and every two (2) hours for project-level syncs.
- Sync Project Job Costs. This automatically syncs the standard and/or project costs codes. It also syncs the project's job costs.
- Refresh ERP Companies List. This automatically syncs the vendor list with your ERP system.
- Refresh ERP Job List. This automatically syncs the job list with your ERP system.
- Sync Payments for Synced Invoices. This automatically syncs bill payments made in your ERP system with Procore's Payments Issued tab in a project's Commitments.
- Click Update.

