ERP DMSA App Installation Guide
Objective
To install a custom ERP application in your company's Procore instance that will automatically create a Directory Managed Service Account (DMSA) for your Procore-built ERP integration. To learn more about how DMSAs work, see What is a Developer Managed Service Account?
Background
When you're working with Procore to implement an ERP integration, your implementation specialist might guide you to install a custom app in your company's Procore account that will create a DMSA through which the integration can manage the flow of data. Not all integration implementations will require this step.
Warning
Do NOT take the actions described in this article unless your integration implementation specialist has explicitly advised you to do so.Things to Consider
- Required User Permissions:
- 'Admin' level permissions on the company's Directory tool.
Prerequisites
- Wait for your integration implementation specialist to direct you to take these steps.
Steps
-
Log in to your Procore account.
-
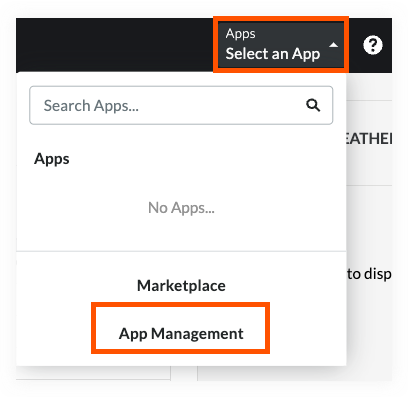
Select App Management from the Apps menu in the toolbar.
-
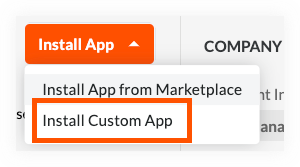
Choose Install Custom App from the Install App menu.
-
Enter the App Version ID for your ERP connector type according to the table below, then click Install.
ERP Integration Type App Version ID Sage 300 CRE® 6abd9d40-ee8d-4aac-ae04-586d74b4f2e8
Sage 100 Contractor® 3f12716f-4737-4c82-953b-27a01e30e813 Sage Intacct® cb22d63e-2805-4a8d-b690-f45f43340b33 Viewpoint® Spectrum® d90a5306-b28c-4b5f-96bd-dee055d4c5f0 QuickBooks® Desktop 356c71df-2963-4c58-ace8-85b311f47d33
Xero™ ebb7162a-f4a3-4c2e-854e-2c342ac3f4f5 Vista b0f554b5-df2b-4267-9c11-a3faf1bfc39a Acumatica® 8309975f-648f-4bc5-b90c-82a12dc9638b MYOB Advanced Construction a9d2a2eb-0143-4395-af0e-ab8d1a83f891 CMiC Internal DMSA: 03f51833-6b06-4196-b0fe-a89238d1241d
External DMSA: 5df6a815-1849-435f-b358-01e4c110128fYardi Voyager® 77d82867-835e-4842-94f1-4a6266983b80 MRI Platform X® e60e1147-13c8-40f0-a8b0-e3a0f35a074a NetSuite® 872c86c9-3995-4a48-81d5-958fee81e2a4 QuickBooks® Online 76b45f67-5c7f-45fc-84c0-de6e61161484 Workday® 504b3f0c-8a49-4019-b43f-5d250aee86f5 ERP Professional Services 61d36a90-62a3-4d49-9cfb-566622ec118d 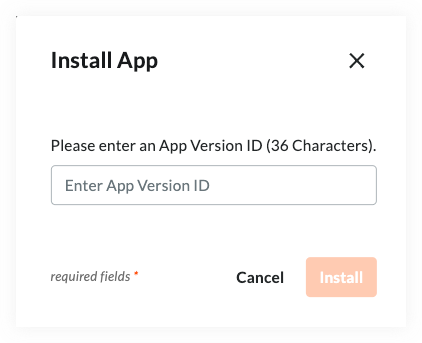
-
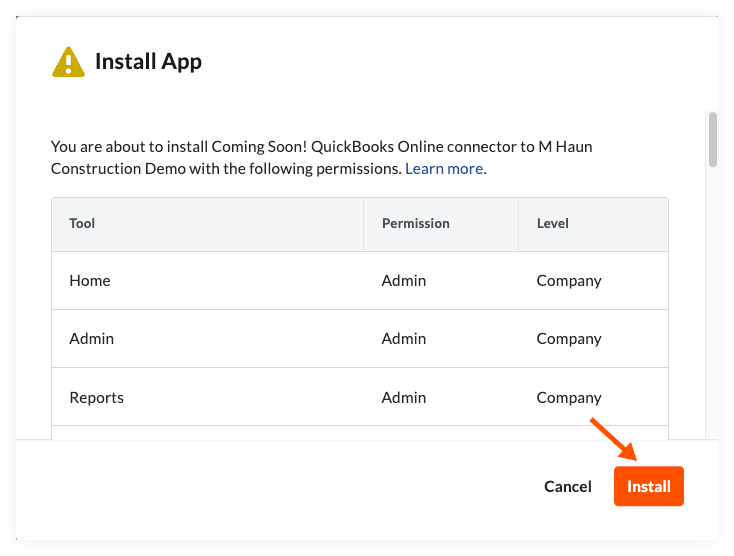
A window will open to confirm the permissions the app requires to be installed successfully. These permissions have already been configured by Procore, and no modification is required. Click Install to continue.
-
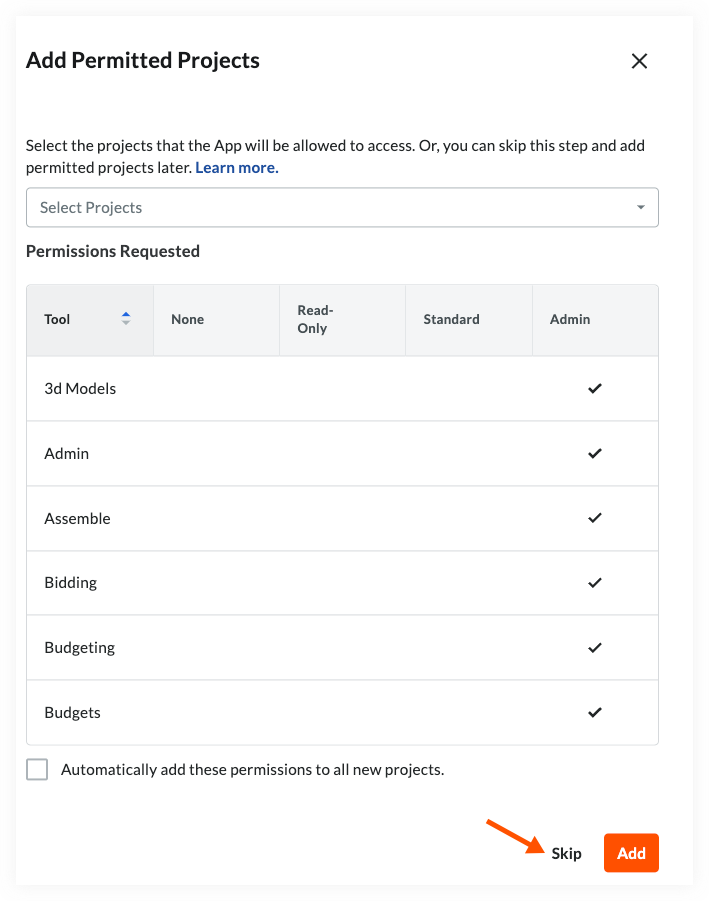
You may be prompted to 'Add Permitted Projects'. If this window appears during your installation, click Skip.
-
Installation is complete.
Next Steps
- Reach out to your integration implementation specialist to let them know this action is complete.