Getting Started With Analytics 2.0
Table of Contents
- Procore Analytics Cloud Connector
- Begin Setup
- Choose A Data Connection Method
- Connect to Power BI Desktop
- Connect to SQL Server Using Python (SSIS)
- Connect to SQL Server Using Python Library
- Connect to SQL Server Using Python Spark
- Connect to ADLS Using Azure Functions
- Connect to ADLS Using Python
- Connect to ADLS Using Spark
- Connect to Fabric Lakehouse Using Data Factory
- Connect to Fabric Lakehouse Using Fabric Notebooks
- Connect to SQL Server Using Azure Functions
- Connect to SQL Server Using Data Factory
- Connect to SQL Server Using Fabric Notebook
- Connect to Databricks
- Connect to Snowflake Using Python
- Connect to Amazon S3 Using Python
- Build Your Own Connection
- Connect to BigQuery
- Connect to Microsoft Excel Using Exponam
Procore Analytics Cloud Connector
Partner Considerations
Verify Permissions
Generate Data Access Credentials
To start accessing your Procore data, there are two options for generating your data access credentials: the Databricks direct connection method or the Delta Share Token method. The access token is a string of digits you will enter in your applicable data connector to access data.
Considerations
- You must have the Analytics tool enabled at the Company level for your company's Procore account.
- By default, all Company Admins have 'Admin' level access to Analytics in the Directory.
- Anyone with 'Admin' level access to the Analytics tool can grant additional users access to the Analytics tool.
- Users must have 'Admin' level access to the Analytics tool to generate an access token.
Steps
- Log in to Procore.
- Click the Account & Profile icon in the top-right area of the navigation bar.

- Click My Profile Settings.
- Under Choose Your Connection with Analytics, you have two options to generate credentials:
- Databricks direct connect OR generate a personal access token with Delta Share.
- Enter your Databricks Sharing Identifier for the Databricks direct connection method, then click Connect. See Connect Your Procore Data to a Databricks Workspace to learn more.
- For the token method, select Delta Share Token.
- Make sure to choose an expiration date.
- Click Generate Tokens.
Important! It's recommended that you copy and store your token for future reference since Procore does not store tokens for users. - You will use your Bearer Token, Share Name, Delta sharing server URL and your Share Credentials Version to begin accessing and integrating your data.

- Explore the additional sections of the Getting Started Guide for next steps on connecting your data based on your desired data connection method.
Note
- The token will disappear after one hour or it will also disappear if you navigate away from the page. To generate a new token, return to Step 1.
- It may take up to 24 hours for the data to become visible.
- Please do not regenerate your token during this processing time as doing so may cause issues with your token.
Upload Reports to Power BI (If Applicable)
- Navigate to Analytics from your Company Tools menu.
- Go to the Getting Started section.
- Under Power BI Files, select and download the available Power BI reports.
- Log in to the Power BI service using your Power BI login credentials.
- Create a workspace where you want to store your company's Analytics reports. See Microsoft's Power BI support documentation for more information.
Notes: Licensing requirements may apply. - In the workspace, click Upload.
- Now click Browse.
- Select the report file from its location on your computer and click Open.
- After uploading the file, click Filter and select Semantic Model.
- Hover your cursor over the row with the report's name and click the vertical ellipsis
 icon.
icon. - Click Settings.
- On the settings page, click Data source credentials and then click Edit Credentials.
- In the 'Configure [Report Name]' window that appears, complete the following:
- Authentication Method: Select 'Key'.
- Account Key: Enter the token you received from the token generation page in Procore.
- Privacy level setting for this data source: Select the privacy level. We recommend selecting 'Private' or 'Organizational'. See Microsoft's Power BI support documentation for more information about the privacy levels.
- Click Sign in.
- Click Refresh and do the following:
- Time zone: Select the time zone you want to use for scheduled data refreshes.
- Under Configure a refresh schedule, turn the toggle to the ON position.
- Refresh frequency: Select 'Daily'.
- Time: Click Add another time and select 7:00 a.m.
Note: You may add up to 8 refresh times. - Optional:
- Mark the 'Send refresh failure notifications to the dataset owner' checkbox to send refresh failure notifications.
- Enter the email addresses of any other colleagues you want the system to send refresh failure notifications to.
- Click Apply.
- To verify that the settings were configured correctly and that the report's data will refresh properly, return to the 'Filter and select Semantic Model' page and complete the following steps:
- Hover your cursor over the row with the report's name and click the circular arrow icon to refresh the data manually.
- Check the 'Refreshed' column to see if there is a warning
 icon.
icon.
- If no warning icon displays, the report's data is successfully refreshed.
- If a warning icon displays, an error has occurred. Click the warning icon to see more information about the error.
- To delete the blank dashboard the Power BI service created automatically, complete the following steps:
- Hover your cursor over the row with the dashboard's name. Click the ellipsis
 icon and click Delete.
- Hover your cursor over the row with the dashboard's name. Click the ellipsis
- To verify that the report renders properly, navigate to the 'All' or 'Content' page and click on the report's name to view the report in the Power BI service.
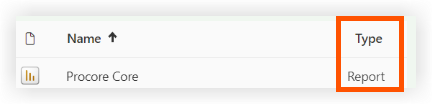
Tip
Reference the 'Type' column to ensure you click on the report instead of a different asset.
- Repeat the steps above within Power BI for each Analytics report file.
Connect to Power BI Desktop
Connect to SQL Server Using Python (SSIS)
Overview
The Analytics Cloud Connect Access tool is a command-line interface (CLI) that helps you configure and manage data transfers from Procore to MS SQL Server. It consists of two main components:
- user_exp.py (Configuration setup utility)
- delta_share_to_azure_panda.py (Data synchronization script)
Prerequisites
- Python and pip installed on your system.
- Access to Procore Delta Share.
- MS SQL Server account credentials.
- Download the zipped package from the company level Analytics tool (via Analytics > Getting Started > Connection Options > SQL Server).
- Install required dependencies: pip install -r requirements.txt.
- Delta Sharing profile file:
- Update the token and endpoint received from the Procore UI in the template_config.share file (found in the downloaded contents), and rename template_config.share to config.share.
- Python Environment:
- Install Python 3.9+ and pip on your system.
Steps
- Initial Configuration
- Data Synchronization
- Delta Share Configuration
- MS SQL Server Configuration
- SSIS Configuration
Initial Configuration
- Run the configuration utility:
python user_exp.py
This will help you set up the following:
- Delta Share source configuration
- MS SQL Server target configuration
- Scheduling preferences
Data Synchronization
After configuration, you have two options to run the data sync:
- Direct Execution python
delta_share_to_azure_panda.py
OR - Scheduled Execution
If configured during setup, the job will run automatically according to your cron schedule.
Delta Share Configuration
- Create a new file named config.share with your Delta Share credentials in JSON format.
{
"shareCredentialsVersion": 1,
"bearerToken": "xxxxxxxxxxxxx",
"endpoint": "https://nvirginia.cloud.databricks.c...astores/xxxxxx"
}
- Get required fields:
Note: These details can be obtained from the Analytics web application.- ShareCredentialsVersion: Version number (currently 1).
- BearerToken: Your Delta Share access token.
- Endpoint: Your Delta Share endpoint URL.
- Save the file in a secure location.
- When configuring the data source, you'll be asked to provide:
- List of tables (comma-separated).
- Leave blank to sync all tables.
- Example: `table1, t able2, table3`.
- Path to your `config.share` file.
MS SQL Server Configuration
You'll need to provide the following MS SQL Server details:
- database
- host
- password
- schema
- username
SSIS Configuration
- Using the command line, navigate to the folder by entering 'cd <path to the folder>'.
- Install required packages using 'pip install -r requirements.txt' or 'python -m pip install -r requirements.txt'.
- Open SSIS and create a new project.
- From SSIS Toolbox, drag and drop 'Execute Process Task' activity.

- Double-click on 'Execute Process Task' and navigate to Process tab.
- In 'Executable', enter the path to python.exe in python installation folder.
- In 'WorkingDirectory' enter a path to the folder containing the script you want to execute (without script file name).
- In 'Arguments' enter the name of the script 'delta_share_to_azure_panda.py' you want to execute with the .py extension and save.

- Click on 'Start' button in upper pane:

- During the execution of the task, output of the Python console is displayed in the external console window.
- Once the task is done it will display a green tick:

Connect to SQL Server Using Python Library
Overview
This guide provides detailed instructions for setting up and using the Delta Sharing integration package on a Windows operation system to seamlessly integrate data into your workflows with Analytics. The package supports multiple execution options, allowing you to choose your desired configuration and integration method.
Prerequisites
Ensure you have the following before proceeding:
- Analytics 2.0 SKU
- Delta Sharing profile file:
- Update the token and endpoint received from the Procore UI in the template_config.share file (found in the downloaded contents), and rename template_config.share to config.share.
- Python Environment:
- Install Python 3.9+ and pip on your system.
Steps
- Prepare the Package
- Install Dependencies
- Generate Configuration
- Configure Cron Jobs and Immediate Execution
- Execution and Maintenance
Prepare the Package
- Create a new file named config.share with your Delta Share credentials in JSON format.
{
"shareCredentialsVersion": 1,
"bearerToken": "xxxxxxxxxxxxx",
"endpoint": "https://nvirginia.cloud.databricks.c...astores/xxxxxx"
}
- Get required fields.
Note: These details can be obtained from the Analytics web application.- ShareCredentialsVersion: Version number (currently 1).
- BearerToken: Your Delta Share access token.
- Endpoint: Your Delta Share endpoint URL.
- Download and extract the package.
Note: You can download the zipped package from the company level Analytics tool (via Analytics > Getting Started > Connection Options > SQL Server). - Unzip the package to a directory of your choice.
- Copy the *.share Delta Sharing profile file into the package directory for easy access.

Install Dependencies
- Open a terminal in the package directory.
- Run the following command to install the dependencies:
- pip install -r requirements.txt
Generate Configuration
- Generate the config.yaml file by running python user_exp.py:
This script helps to generate the config.yaml file that contains necessary credentials and settings. - When configuring the data source, you'll be asked to provide:
- List of tables (comma-separated).
- Leave blank to sync all tables.
Example: `table1, table2, table3`. - Path to your `config.share` file.
- For the first time, you will provide your credentials like Delta Share source configuration location, tables, database, host and etc.
Note: Afterwards, you may reuse or update the config manually or by the running python user_exp.py again.
Configure Cron Jobs and Immediate Execution (Optional)
- Decide whether to set up a cron job for automatic execution.
- Provide a cron schedule:
- Format: * * * * * (minute, hour, day-of-month, month, day-of-week).
- Example for daily execution at 2 AM: 0 2 * * *
- To check scheduling logs, the file 'procore_scheduling.log' will be created as soon as scheduling is set up.
You can also check scheduling by running in terminal command:
For Linux and MacOs:
To edit/delete - edit scheduling cron by using:
```bash
EDITOR=nano crontab -e
```
- After running the command above, you should see something similar to:
- 2 * * * * /Users/your_user/snowflake/venv/bin/python /Users/your_user/snowflake/sql_server_python/connection_config.py 2>&1 | while read line; do echo "$(date) - $line"; done >> /Users/your_user/snowflake/sql_server_python/procore_scheduling.log # procore-data-import
- You also can adjust schedule cron or delete the whole line to stop it running by schedule.
For Windows:
- Check the schedule task is created:
```powershell
schtasks /query /tn "ProcoreDeltaShareScheduling" /fo LIST /v
``` - To edit/delete - scheduling task:
Open the Task Scheduler:- Press Win + R, type taskschd.msc, and press Enter.
- Navigate to the scheduled tasks.
- In the left pane, expand the Task Scheduler Library.
- Look for the folder where your task is saved (e.g., Task Scheduler Library or a custom folder).
- Find your task:
- Look for the task name ProcoreDeltaShareScheduling.
- Click on it to view its details in the bottom pane.
- Verify its schedule:
- Check the Triggers tab to see when the task is set to run.
- Check the History tab to confirm recent runs.
- To delete task:
- Delete task from the GUI.
Immediate Execution question:
- Option to run script for copying data immediately after configuration.
- After generating the config.yaml, the CLI is ready to be run anytime independently, by running script for copying data, depending on your package. See examples below:
python delta_share_to_azure_panda.py
OR
python delta_share_to_sql_spark.py
OR
python delta_share_to_azure_dfs_spark.py
Execution and Maintenance
Common Issues and Solutions
- Cron Job Setup:
- Ensure system permissions are correctly configured.
- Check system logs if the job fails to run.
- Verify the script delta_share_to_azure_panda.py has execute permissions.
- Configuration File:
- Ensure the file config.yaml is in the same directory as the script.
- Backup the file before making changes.
Support
For additional help:
- Review script logs for detailed error messages.
- Double-check the config.yaml file for misconfigurations.
- Contact your system administrator for permission-related issues.
- Reach out to Procore support for issues related to Delta Share access.
- Review log for failed tables: failed_tables.log.
Notes
- Always backup your configuration files before making changes.
- Test new configurations in a non-production environment to prevent disruptions.
Connect to SQL Server Using Python Spark
Overview
This guide provides detailed instructions for setting up and using the Delta Sharing integration package on a Windows operation system to seamlessly integrate data into your workflows with Analytics. The package supports multiple execution options, allowing you to choose your desired configuration and integration method.
Prerequisites
Ensure you have the following before proceeding:
- Analytics 2.0 SKU
- Delta Sharing profile file:
- Update the token and endpoint received from the Procore UI in the template_config.share file (found in the downloaded contents), and rename template_config.share to config.share.
- Python Environment:
- Install Python 3.9+ and pip on your system.
Steps
- Prepare the Package
- Install Dependencies
- Generate Configuration
- Configure Cron Jobs and Immediate Execution
- Execution and Maintenance
Prepare the Package
- Create a new file named config.share with your Delta Share credentials in JSON format.
{
"shareCredentialsVersion": 1,
"bearerToken": "xxxxxxxxxxxxx",
"endpoint": "https://nvirginia.cloud.databricks.c...astores/xxxxxx"
}
- Get required fields.
Note: These details can be obtained from the Analytics web application.- ShareCredentialsVersion: Version number (currently 1).
- BearerToken: Your Delta Share access token.
- Endpoint: Your Delta Share endpoint URL.
- Download and extract the package.
Note: You can download the zipped package from the company level Analytics tool (via Analytics > Getting Started > Connection Options > SQL Server). - Unzip the package to a directory of your choice.
- Copy the *.share Delta Sharing profile file into the package directory for easy access.
Install Dependencies
- Open a terminal in the package directory.
- Run the following command to install the dependencies:
- pip install -r requirements.txt
Generate Configuration
- Generate the config.yaml file by running python user_exp.py:
This script helps to generate the config.yaml file that contains necessary credentials and settings. - When configuring the data source, you'll be asked to provide:
- List of tables (comma-separated).
- Leave blank to sync all tables.
Example: `table1, table2, table3`. - Path to your `config.share` file.
- For the first time, you will provide your credentials like Delta Share source configuration location, tables, database, host and etc.
Note: Afterwards, you may reuse or update the config manually or by the running python user_exp.py again.
Configure Cron Jobs and Immediate Execution (Optional)
- Decide whether to set up a cron job for automatic execution.
- Provide a cron schedule:
- Format: * * * * * (minute, hour, day-of-month, month, day-of-week).
- Example for daily execution at 2 AM: 0 2 * * *
- To check scheduling logs, the file 'procore_scheduling.log' will be created as soon as scheduling is set up.
You can also check scheduling by running in terminal command:
For Linux and MacOs:
To edit/delete - edit scheduling cron by using:
```bash
EDITOR=nano crontab -e
```
- After running the command above, you should see something similar to:
- 2 * * * * /Users/your_user/snowflake/venv/bin/python /Users/your_user/snowflake/sql_server_python/connection_config.py 2>&1 | while read line; do echo "$(date) - $line"; done >> /Users/your_user/snowflake/sql_server_python/procore_scheduling.log # procore-data-import
- You also can adjust schedule cron or delete the whole line to stop it running by schedule.
For Windows:
- Check the schedule task is created:
```powershell
schtasks /query /tn "ProcoreDeltaShareScheduling" /fo LIST /v
``` - To edit/delete - scheduling task:
Open the Task Scheduler:- Press Win + R, type taskschd.msc, and press Enter.
- Navigate to the scheduled tasks.
- In the left pane, expand the Task Scheduler Library.
- Look for the folder where your task is saved (e.g., Task Scheduler Library or a custom folder).
- Find your task:
- Look for the task name ProcoreDeltaShareScheduling.
- Click on it to view its details in the bottom pane.
- Verify its schedule:
- Check the Triggers tab to see when the task is set to run.
- Check the History tab to confirm recent runs.
- To delete task:
- Delete task from the GUI.
Immediate Execution question:
- Option to run script for copying data immediately after configuration.
- After generating the config.yaml, the CLI is ready to be run anytime independently, by running script for copying data, depending on your package. See examples below:
python delta_share_to_azure_panda.py
OR
python delta_share_to_sql_spark.py
OR
python delta_share_to_azure_dfs_spark.py
Execution and Maintenance
Common Issues and Solutions
- Cron Job Setup:
- Ensure system permissions are correctly configured.
- Check system logs if the job fails to run.
- Verify the script delta_share_to_azure_panda.py has execute permissions.
- Configuration File:
- Ensure the file config.yaml is in the same directory as the script.
- Backup the file before making changes.
Support
For additional help:
- Review script logs for detailed error messages.
- Double-check the config.yaml file for misconfigurations.
- Contact your system administrator for permission-related issues.
- Reach out to Procore support for issues related to Delta Share access.
- Review log for failed tables: failed_tables.log.
Notes
- Always backup your configuration files before making changes.
- Test new configurations in a non-production environment to prevent disruptions.
Connect to ADLS Using Azure Functions
Connect to ADLS Using Python
Overview
This guide provides detailed instructions for setting up and using the Delta Sharing integration package on a Windows operation system to seamlessly integrate data into your workflows with Analytics. The package supports multiple execution options, allowing you to choose your desired configuration and integration method.
Prerequisites
Ensure you have the following before proceeding:
- Analytics 2.0 SKU
- Delta Sharing profile file:
- Update the token and endpoint received from the Procore UI in the template_config.share file (found in the downloaded contents), and rename template_config.share to config.share.
- Python Environment:
- Install Python 3.9+ and pip on your system.
Steps
- Prepare the Package
- Install Dependencies
- Generate Configuration
- Configure Cron Jobs and Immediate Execution
- Execution and Maintenance
Prepare the Package
- Create a new file named config.share with your Delta Share credentials in JSON format.
{
"shareCredentialsVersion": 1,
"bearerToken": "xxxxxxxxxxxxx",
"endpoint": "https://nvirginia.cloud.databricks.c...astores/xxxxxx"
}
- Get required fields.
Note: These details can be obtained from the Analytics web application.- ShareCredentialsVersion: Version number (currently 1).
- BearerToken: Your Delta Share access token.
- Endpoint: Your Delta Share endpoint URL.
- Download and extract the package.
Note: You can download the zipped package from the company level Analytics tool (via Analytics > Getting Started > Connection Options > Azure). - Unzip the package to a directory of your choice.
- Copy the *.share Delta Sharing profile file into the package directory for easy access.
Install Dependencies
- Open a terminal in the package directory.
- Run the following command to install the dependencies:
- pip install -r requirements.txt
Generate Configuration
- Generate the config.yaml file by running python user_exp.py:
This script helps to generate the config.yaml file that contains necessary credentials and settings. - When configuring the data source, you'll be asked to provide:
- List of tables (comma-separated).
- Leave blank to sync all tables.
Example: `table1, table2, table3`. - Path to your `config.share` file.
- For the first time, you will provide your credentials like Delta Share source configuration location, tables, database, host and etc.
Note: Afterwards, you may reuse or update the config manually or by the running python user_exp.py again.
Configure Cron Jobs and Immediate Execution (Optional)
- Decide whether to set up a cron job for automatic execution.
- Provide a cron schedule:
- Format: * * * * * (minute, hour, day-of-month, month, day-of-week).
- Example for daily execution at 2 AM: 0 2 * * *
- To check scheduling logs, the file 'procore_scheduling.log' will be created as soon as scheduling is set up.
You can also check scheduling by running in terminal command:
For Linux and MacOs:
To edit/delete - edit scheduling cron by using:
```bash
EDITOR=nano crontab -e
```
- After running the command above, you should see something similar to:
- 2 * * * * /Users/your_user/snowflake/venv/bin/python /Users/your_user/snowflake/sql_server_python/connection_config.py 2>&1 | while read line; do echo "$(date) - $line"; done >> /Users/your_user/snowflake/sql_server_python/procore_scheduling.log # procore-data-import
- You also can adjust schedule cron or delete the whole line to stop it running by schedule.
For Windows:
- Check the schedule task is created:
```powershell
schtasks /query /tn "ProcoreDeltaShareScheduling" /fo LIST /v
``` - To edit/delete - scheduling task:
Open the Task Scheduler:- Press Win + R, type taskschd.msc, and press Enter.
- Navigate to the scheduled tasks.
- In the left pane, expand the Task Scheduler Library.
- Look for the folder where your task is saved (e.g., Task Scheduler Library or a custom folder).
- Find your task:
- Look for the task name ProcoreDeltaShareScheduling.
- Click on it to view its details in the bottom pane.
- Verify its schedule:
- Check the Triggers tab to see when the task is set to run.
- Check the History tab to confirm recent runs.
- To delete task:
- Delete task from the GUI.
Immediate Execution question:
- Option to run script for copying data immediately after configuration.
- After generating the config.yaml, the CLI is ready to be run anytime independently, by running script for copying data, depending on your package. See examples below:
python delta_share_to_azure_panda.py
OR
python delta_share_to_sql_spark.py
OR
python delta_share_to_azure_dfs_spark.py
Execution and Maintenance
Common Issues and Solutions
- Cron Job Setup:
- Ensure system permissions are correctly configured.
- Check system logs if the job fails to run.
- Verify the script delta_share_to_azure_panda.py has execute permissions.
- Configuration File:
- Ensure the file config.yaml is in the same directory as the script.
- Backup the file before making changes.
Support
For additional help:
- Review script logs for detailed error messages.
- Double-check the config.yaml file for misconfigurations.
- Contact your system administrator for permission-related issues.
- Reach out to Procore support for issues related to Delta Share access.
- Review log for failed tables: failed_tables.log.
Notes
- Always backup your configuration files before making changes.
- Test new configurations in a non-production environment to prevent disruptions.
Connect to ADLS Using Spark
Overview
This guide provides detailed instructions for setting up and using the Delta Sharing integration package on a Windows operation system to seamlessly integrate data into your workflows with Analytics. The package supports multiple execution options, allowing you to choose your desired configuration and integration method.
Prerequisites
Ensure you have the following before proceeding:
- Analytics 2.0 SKU
- Delta Sharing profile file:
- Update the token and endpoint received from the Procore UI in the template_config.share file (found in the downloaded contents), and rename template_config.share to config.share.
- Python Environment:
- Install Python 3.9+ and pip on your system.
Steps
- Prepare the Package
- Install Dependencies
- Generate Configuration
- Configure Cron Jobs and Immediate Execution
- Execution and Maintenance
Prepare the Package
- Create a new file named config.share with your Delta Share credentials in JSON format.
{
"shareCredentialsVersion": 1,
"bearerToken": "xxxxxxxxxxxxx",
"endpoint": "https://nvirginia.cloud.databricks.c...astores/xxxxxx"
}
- Get required fields.
Note: These details can be obtained from the Analytics web application.- ShareCredentialsVersion: Version number (currently 1).
- BearerToken: Your Delta Share access token.
- Endpoint: Your Delta Share endpoint URL.
- Download and extract the package.
Note: You can download the zipped package from the company level Analytics tool (via Analytics > Getting Started > Connection Options > Azure). - Unzip the package to a directory of your choice.
- Copy the *.share Delta Sharing profile file into the package directory for easy access.
Install Dependencies
- Open a terminal in the package directory.
- Run the following command to install the dependencies:
- pip install -r requirements.txt
Generate Configuration
- Generate the config.yaml file by running python user_exp.py:
This script helps to generate the config.yaml file that contains necessary credentials and settings. - When configuring the data source, you'll be asked to provide:
- List of tables (comma-separated).
- Leave blank to sync all tables.
Example: `table1, table2, table3`. - Path to your `config.share` file.
- For the first time, you will provide your credentials like Delta Share source configuration location, tables, database, host and etc.
Note: Afterwards, you may reuse or update the config manually or by the running python user_exp.py again.
Configure Cron Jobs and Immediate Execution (Optional)
- Decide whether to set up a cron job for automatic execution.
- Provide a cron schedule:
- Format: * * * * * (minute, hour, day-of-month, month, day-of-week).
- Example for daily execution at 2 AM: 0 2 * * *
- To check scheduling logs, the file 'procore_scheduling.log' will be created as soon as scheduling is set up.
You can also check scheduling by running in terminal command:
For Linux and MacOs:
To edit/delete - edit scheduling cron by using:
```bash
EDITOR=nano crontab -e
```
- After running the command above, you should see something similar to:
- 2 * * * * /Users/your_user/snowflake/venv/bin/python /Users/your_user/snowflake/sql_server_python/connection_config.py 2>&1 | while read line; do echo "$(date) - $line"; done >> /Users/your_user/snowflake/sql_server_python/procore_scheduling.log # procore-data-import
- You also can adjust schedule cron or delete the whole line to stop it running by schedule.
For Windows:
- Check the schedule task is created:
```powershell
schtasks /query /tn "ProcoreDeltaShareScheduling" /fo LIST /v
``` - To edit/delete - scheduling task:
Open the Task Scheduler:- Press Win + R, type taskschd.msc, and press Enter.
- Navigate to the scheduled tasks.
- In the left pane, expand the Task Scheduler Library.
- Look for the folder where your task is saved (e.g., Task Scheduler Library or a custom folder).
- Find your task:
- Look for the task name ProcoreDeltaShareScheduling.
- Click on it to view its details in the bottom pane.
- Verify its schedule:
- Check the Triggers tab to see when the task is set to run.
- Check the History tab to confirm recent runs.
- To delete task:
- Delete task from the GUI.
Immediate Execution question:
- Option to run script for copying data immediately after configuration.
- After generating the config.yaml, the CLI is ready to be run anytime independently, by running script for copying data, depending on your package. See examples below:
python delta_share_to_azure_panda.py
OR
python delta_share_to_sql_spark.py
OR
python delta_share_to_azure_dfs_spark.py
Execution and Maintenance
Common Issues and Solutions
- Cron Job Setup:
- Ensure system permissions are correctly configured.
- Check system logs if the job fails to run.
- Verify the script delta_share_to_azure_panda.py has execute permissions.
- Configuration File:
- Ensure the file config.yaml is in the same directory as the script.
- Backup the file before making changes.
Support
For additional help:
- Review script logs for detailed error messages.
- Double-check the config.yaml file for misconfigurations.
- Contact your system administrator for permission-related issues.
- Reach out to Procore support for issues related to Delta Share access.
- Review log for failed tables: failed_tables.log.
Notes
- Always backup your configuration files before making changes.
- Test new configurations in a non-production environment to prevent disruptions.
Connect to Fabric Lakehouse Using Data Factory
Overview
Integrating Delta Sharing with Microsoft Fabric Data Factory enables seamless access and processing of shared Delta tables for your analytics workflows with Analytics 2.0. Delta Sharing, an open protocol for secure data collaboration, ensures organizations can share data without duplication.
Prerequisites
- Analytics 2.0 SKU
- Delta Sharing Credentials:
- Obtain the share.json (or equivalent) Delta Sharing credentials file from your data provider.
- This file should include:
- Endpoint URL: The Delta Sharing Server URL.
- Bearer Token: Used for secure data access.
- Microsoft Fabric Setup:
- A Microsoft Fabric tenant account with an active subscription.
- Access to a Microsoft Fabric-enabled workspace.
Steps
- Switch to the Data Factory Experience
- Configure the Dataflow
- Perform Data Transformations
- Validation and Monitoring
Switch to the Data Factory Experience
- Navigate to your Microsoft Fabric Workspace.

- Select New, then choose Dataflow Gen2.

Configure the Dataflow
- Go to the dataflow editor.
- Click Get Data and select More.
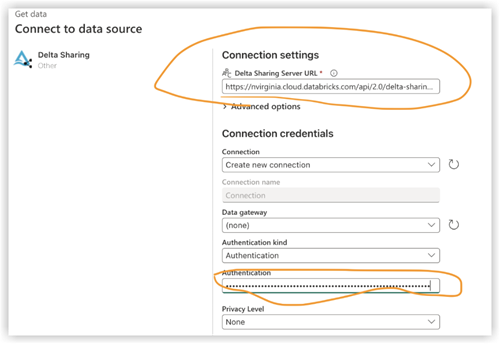
- Under New source, select Delta Sharing Other as the data source.

- Enter the following details:
- URL: From your Delta Sharing configuration file.
- Bearer Token: Found in your config.share file.
- Click Next and select the desired tables.
- Click Create to complete the setup.
Perform Data Transformations
After configuring the dataflow, you can now apply transformations to the shared Delta data. Choose your Delta Sharing Data option from the list below:
- Add Data Destination
- Create/Open Lakehouse
Add Data Destination
- Go to Data Factory.
- Click Add Data Destination.
- Select Lakehouse as the target and click Next.
- Choose your destination target and confirm by clicking Next.
Create-Open Lakehouse
- Create/open yourLakehouse and click Get data.
- Select New Dataflow Gen2.
- Click Get Data, then More and find Delta Sharing.
- Enter the URL bearer token from your config.share file and then select Next.
- Choose your data/table/s to download and click Next.
- After these manipulations, you should have all the selected data in your Fabric Lakehouse.
Validation and Monitoring
Test your data pipelines and flows to ensure smooth execution.Use monitoring tools within Data
Factory to track progress and logs for each activity.
Connect to Fabric Lakehouse Using Fabric Notebooks
Overview
Using Data Factory in Microsoft Fabric with Delta Sharing enables seamless integration and processing of shared Delta tables as part of your analytics workflows with Analytics 2.0. Delta Sharing is an open protocol for secure data sharing, allowing collaboration across organizations without duplicating data.
This guide walks you through the steps to set up and use Data Factory in Fabric with Delta Sharing, utilizing Notebooks for processing and exporting data to a Lakehouse.
Prerequisites
- Analytics 2.0 SKU
- Delta Sharing Credentials:
- Access to Delta Sharing credentials provided by a data provider.
- A sharing profile file (config.share) containing:
- Endpoint URL (Delta Sharing Server URL).
- Access Token (Bearer token for secure data access).
- Create your config.yaml file with specific credentials using the template below:
{
"shareCredentialsVersion": 1,
"endpoint": "your-delta-sharing-server-url",
"bearerToken": "your-master-token"
}
- Microsoft Fabric Environment:
- A Microsoft Fabric tenant account with an active subscription.
- A Fabric-enabled Workspace.
- Packages and Scripts:
- Download the fabric-lakehouse package. The directory should include:
- ds_to_lakehouse.py: Notebook code.
- readme.md: Instructions.
Note: You can download the zipped package from the company level Analytics tool (via Analytics > Getting Started > Connection Options > Azure).
- Download the fabric-lakehouse package. The directory should include:
Steps
Set Up Configuration
- Create the config.yaml file and define the configuration in the following structure
source_config:
config_path: path/to/your/delta-sharing-credentials-file.share
tables: # Optional - Leave empty to process all tables
- table_name1
- table_name2
target_config:
lakehouse_path: path/to/your/fabric/lakehouse/Tables/ # Path to the Fabric Lakehouse
Set Up Your Lakehouse
- Open your Microsoft Fabric workspace.
- Navigate to your Lakehouse and click Open Notebook, then New Notebook.
- If you don’t know the value in config.yaml#lakehouse_path, you can copy it from the screen.
- Click the the ellipsis on Files, and select Copy ABFS path:


3. Copy code of ds_to_lakehouse.py and paste into notebook window (Pyspark Python):

The next step is to upload your own config.yaml and config.share into the Resources folder of the Lakehouse. You can create your own directory or use a builtin directory (already created for resources by Lakehouse):


The example below shows a standard builtin directory for a config.yaml file .
Note: Make sure you upload both files on the same level and for the property config_path:

4. Check the code of the notebook, lines 170-175.
The example below shows the necessary line changes:
config_path = "./env/config.yaml"
to
config_path = "./builtin/config.yaml"
Since the files are in a builtin folder and not in a custom env, make sure to monitor your own structure of the files. You can upload them into different folders, but in such cases, update the code of the notebook to find config.yaml file properly.

5. Click Run cell:

Validation
- Once the job completes, verify the data has been copied successfully to your Lakehouse.
- Check the specified tables and ensure the data matches the shared Delta tables.
- Wait until the job is finished, it should copy all the data.
Connect to SQL Server Using Azure Functions
Connect to SQL Server Using Data Factory
Overview
This document provides step-by-step instructions for setting up a data pipeline in Microsoft Fabric to transfer data from Delta Share to a SQL warehouse. This configuration enables seamless data integration between Delta Lake sources and SQL destinations.
Prerequisites
- Active Microsoft Fabric account with appropriate permissions.
- Delta Share credentials.
- SQL warehouse credentials.
- Access to Data Flow Gen2 in Fabric.
Steps
- Access Data Flow Gen2
- Configure Data Source
- Set Up Delta Share Connection
- Configure Data Destination
- Finalize and Deploy
- Verification
- Troubleshooting
Access Data Flow Gen2
- Log in to your Microsoft Fabric account.
- Navigate to the workspace.
- Select 'Data Flow Gen2' from the available options.
Configure Data Source
- Click on 'Data from another source' to begin the configuration.
- From the Get Data screen do the following:
- Locate the search bar labeled 'Choose data source'.
- Type 'delta sharing' in the search field.
- Select Delta Sharing from the results.
Set Up Delta Share Connection
- Enter your Delta Share credentials when prompted.
- Ensure all required fields are completed accurately.
- Validate the connection if possible.
- Click 'Next' to proceed.
- Review the list of available tables:
- All tables you have access to will be displayed.
- Select the desired tables for transfer.
Configure Data Destination
- Click 'Add Data Destination'.
- Select 'SQL warehouse' as your destination.
- Enter SQL credentials:
- Server details.
- Authentication information.
- Database specifications.
- Verify the connection settings.
Finalize and Deploy
- Review all configurations.
- Click 'Publish' to deploy the data flow.
- Wait for the confirmation message.
Verification
- Access your SQL warehouse.
- Verify that the data is available and properly structured.
- Run test queries to ensure data integrity.
Troubleshooting
Common issues and solutions:
- Connection failures: Verify credentials and network connectivity.
- Missing tables: Check Delta Share permissions.
- Performance issues: Review resource allocation and optimization settings.
Connect to SQL Server Using Fabric Notebook
Overview
Using Data Factory in Microsoft Fabric with Delta Sharing enables seamless integration and processing of shared Delta tables as part of your analytics workflows with Analytics 2.0. Delta Sharing is an open protocol for secure data sharing, allowing collaboration across organizations without duplicating data.
This guide walks you through the steps to set up and use Data Factory in Fabric with Delta Sharing, utilizing Notebooks for processing and exporting data to a Lakehouse.
Prerequisites
- Analytics 2.0 SKU
- Delta Sharing Credentials:
- Access to Delta Sharing credentials provided by a data provider.
- A sharing profile file (config.share) containing:
- Endpoint URL (Delta Sharing Server URL).
- Access Token (Bearer token for secure data access).
- Create your config.yaml file with specific credentials using the template below:
{
"shareCredentialsVersion": 1,
"endpoint": "your-delta-sharing-server-url",
"bearerToken": "your-master-token"
}
- Microsoft Fabric Environment:
- A Microsoft Fabric tenant account with an active subscription.
- A Fabric-enabled Workspace.
- Packages and Scripts:
- Download the fabric-lakehouse package. The directory should include:
- ds_to_lakehouse.py: Notebook code.
- readme.md: Instructions.
Note: You can download the zipped package from the company level Analytics tool (via Analytics > Getting Started > Connection Options > Azure).
- Download the fabric-lakehouse package. The directory should include:
Steps
Set Up Configuration
- Create the config.yaml file and define the configuration in the following structure
source_config:
config_path: path/to/your/delta-sharing-credentials-file.share
tables: # Optional - Leave empty to process all tables
- table_name1
- table_name2
target_config:
lakehouse_path: path/to/your/fabric/lakehouse/Tables/ # Path to the Fabric Lakehouse
Set Up Your Lakehouse
- Open your Microsoft Fabric workspace.
- Navigate to your Lakehouse and click Open Notebook, then New Notebook.
- If you don’t know the value in config.yaml#lakehouse_path, you can copy it from the screen.
- Click the the ellipsis on Files, and select Copy ABFS path:
3. Copy code of ds_to_lakehouse.py and paste into notebook window (Pyspark Python):
The next step is to upload your own config.yaml and config.share into the Resources folder of the Lakehouse. You can create your own directory or use a builtin directory (already created for resources by Lakehouse):
The example below shows a standard builtin directory for a config.yaml file .
Note: Make sure you upload both files on the same level and for the property config_path:
4. Check the code of the notebook, lines 170-175.
The example below shows the necessary line changes:
config_path = "./env/config.yaml"
to
config_path = "./builtin/config.yaml"
Since the files are in a builtin folder and not in a custom env, make sure to monitor your own structure of the files. You can upload them into different folders, but in such cases, update the code of the notebook to find config.yaml file properly.
5. Click Run cell:
Validation
- Once the job completes, verify the data has been copied successfully to your Lakehouse.
- Check the specified tables and ensure the data matches the shared Delta tables.
- Wait until the job is finished, it should copy all the data.
Connect to Databricks
Note
This method of connection is typically used by data professionals.- Log in to your Databricks environment.
- Navigate to the Catalog section.
- Select Delta Sharing from the top menu.
- Select Shared with me.
- Copy the Sharing Identifier provided for you.

- In Procore, click the Account & Profile icon in the top-right area of the navigation bar.
- Click My Profile Settings.
- Click the Analytics tab.
- Enter your Databricks sharing identifier.
- Click Connect.
Note: Once the sharing identifier is added to Procore's system, the Procore Databricks connection will appear within the Shared with me tab under Providers in your Databricks environment. It may take up to 24 hours to see the data.

- When your Procore Databricks connection becomes visible in the Shared with me tab, select the Procore Indentifier and click Create Catalog.
- Enter your preferred name for the shared catalog and click Create.

- Your shared catalog and tables will now show under the provided name in the Catalog Explorer.

Note: Please reach out to Procore Support if you have any questions or need assistance.
Connect to Snowflake Using Python
Connect to Amazon S3 Using Python
Build Your Own Connection
Connect to BigQuery
Connect to Microsoft Excel Using Exponam
Overview
This guide provides step-by-step instructions for importing Analytics data from Delta Share directly into Microsoft Excel using the Exponam.Connect add-in.
Using this method allows you to:
-
Access your Procore data directly in Excel without manually downloading CSVs.
-
Filter and select specific columns before importing, ensuring you only load the data you need.
-
Work with large datasets that might otherwise be too slow to process.
Prerequisites
-
Delta Share Credentials. Access to config.share file containing the Delta Sharing credentials.
-
Licensing:
-
Exponam.Connect Free: Limited to importing 100 rows of data.
-
Exponam.Connect Pro: Required for importing larger datasets (up to 1 million+ rows).
-
Install Exponam Add-in
-
Download the Exponam.Connect installer for your operating system (Windows or Mac).
-
Run the installer file and follow the on-screen prompts.
-
Once installation is complete, launch Microsoft Excel and open a new workbook.
Initialize Delta Share Connection
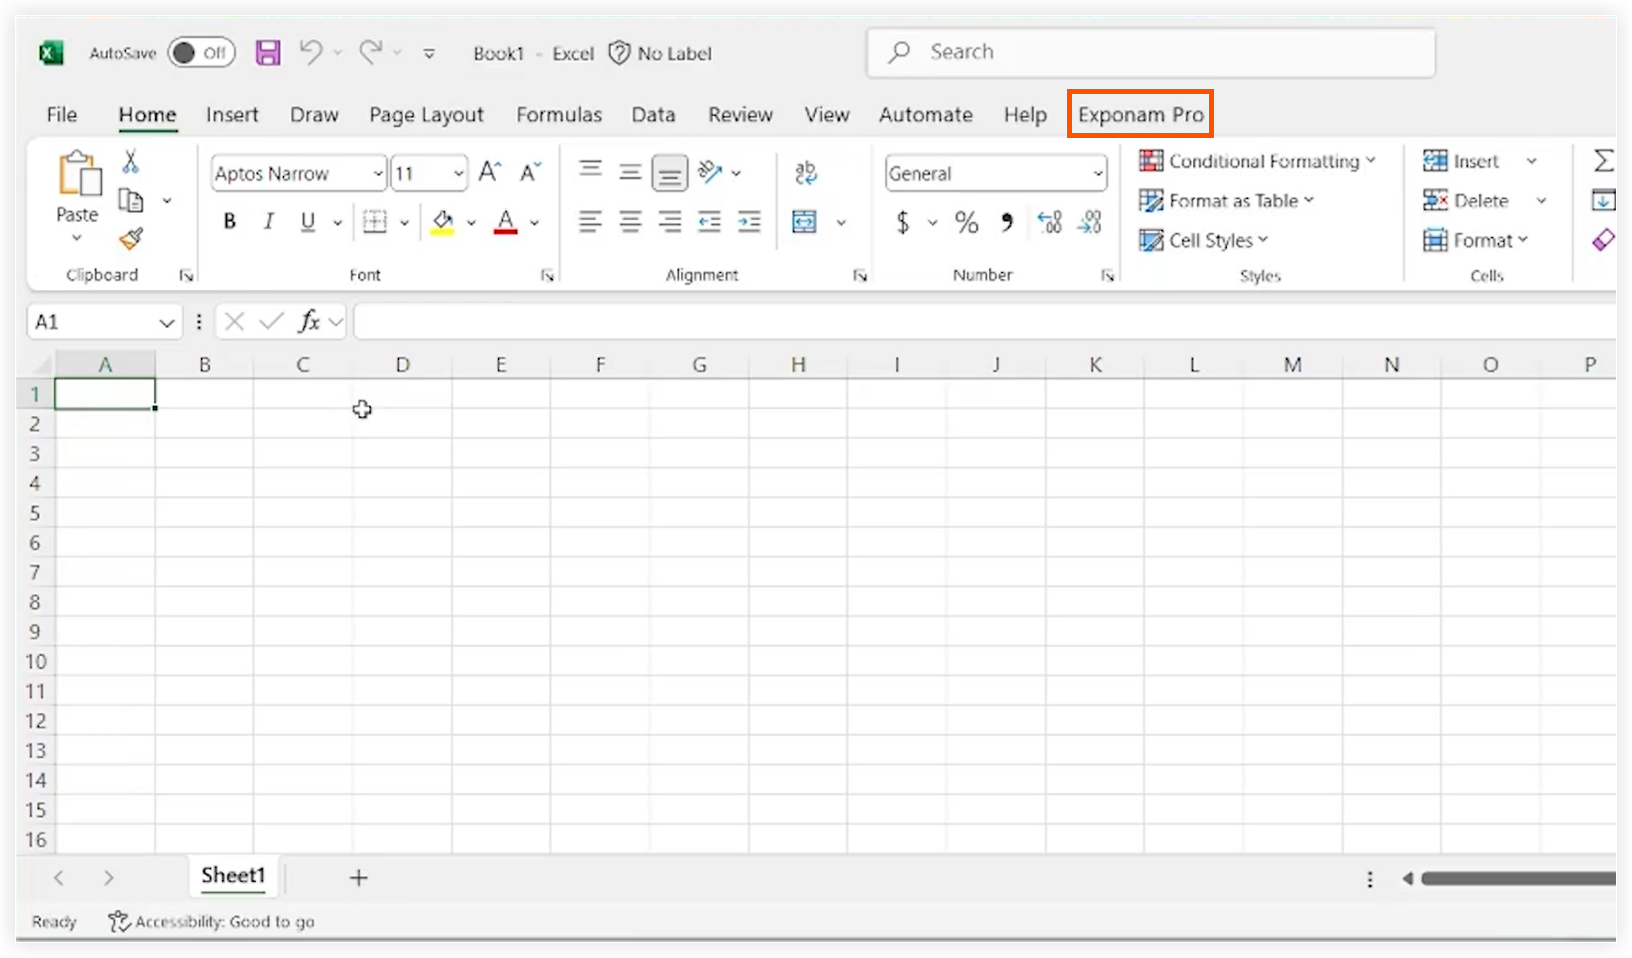
-
In Microsoft Excel, navigate to the Exponam Pro tab.
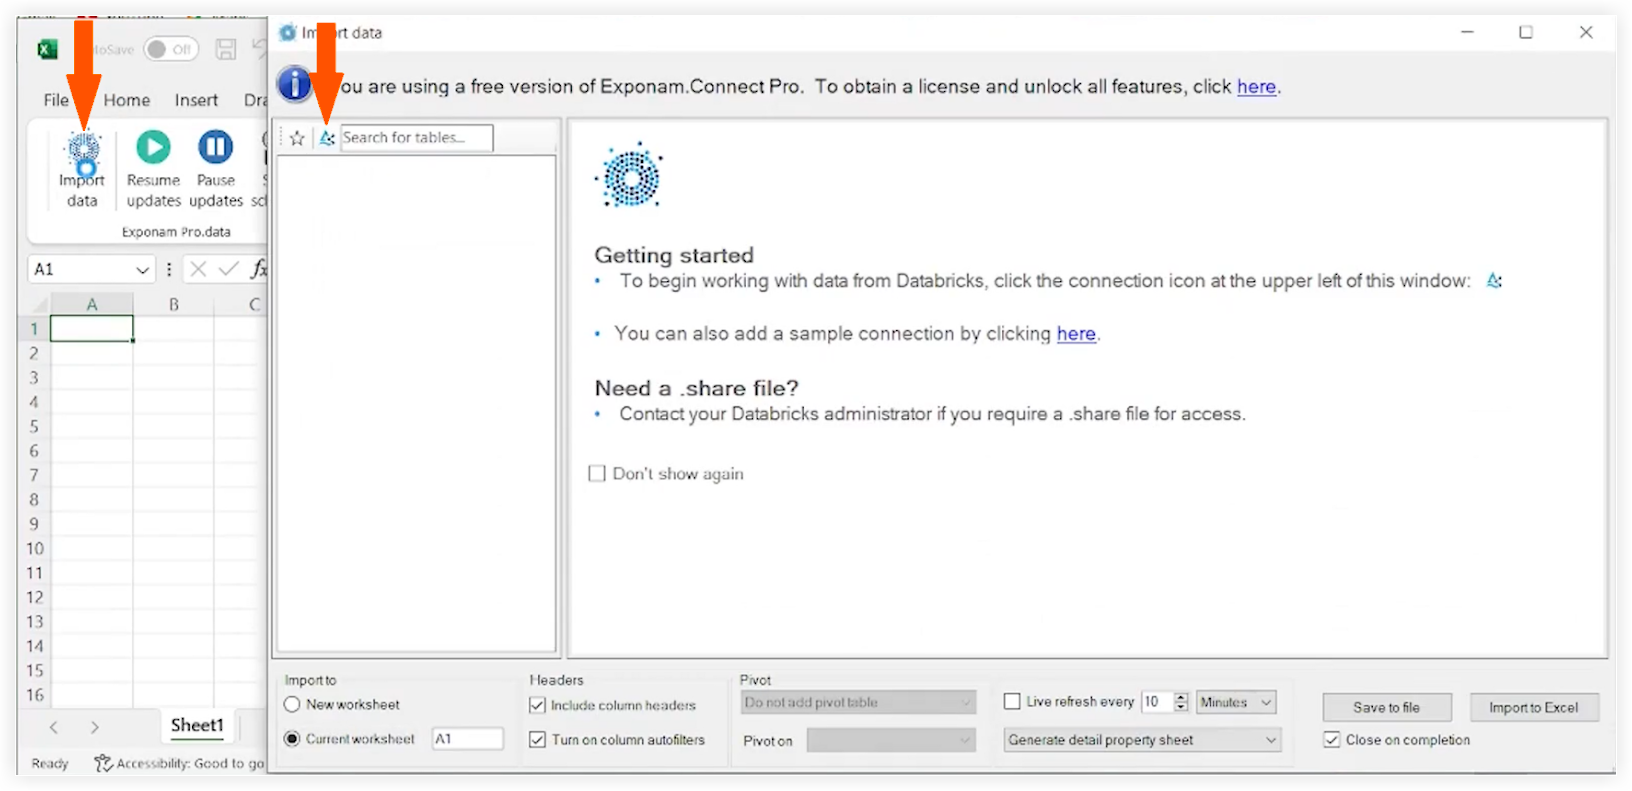
-
Click Import data.
-
Click the Delta Share icon.
-
Locate and select your config.share file.
-
Click Open.
Select and Filter Data
The Exponam interface will now display a list of all available data tables.
-
Click on the name of the table you wish to access.
-
Use the Exponam interface to refine your data before importing to Excel. For example, you can apply filters, select particular columns, and more.
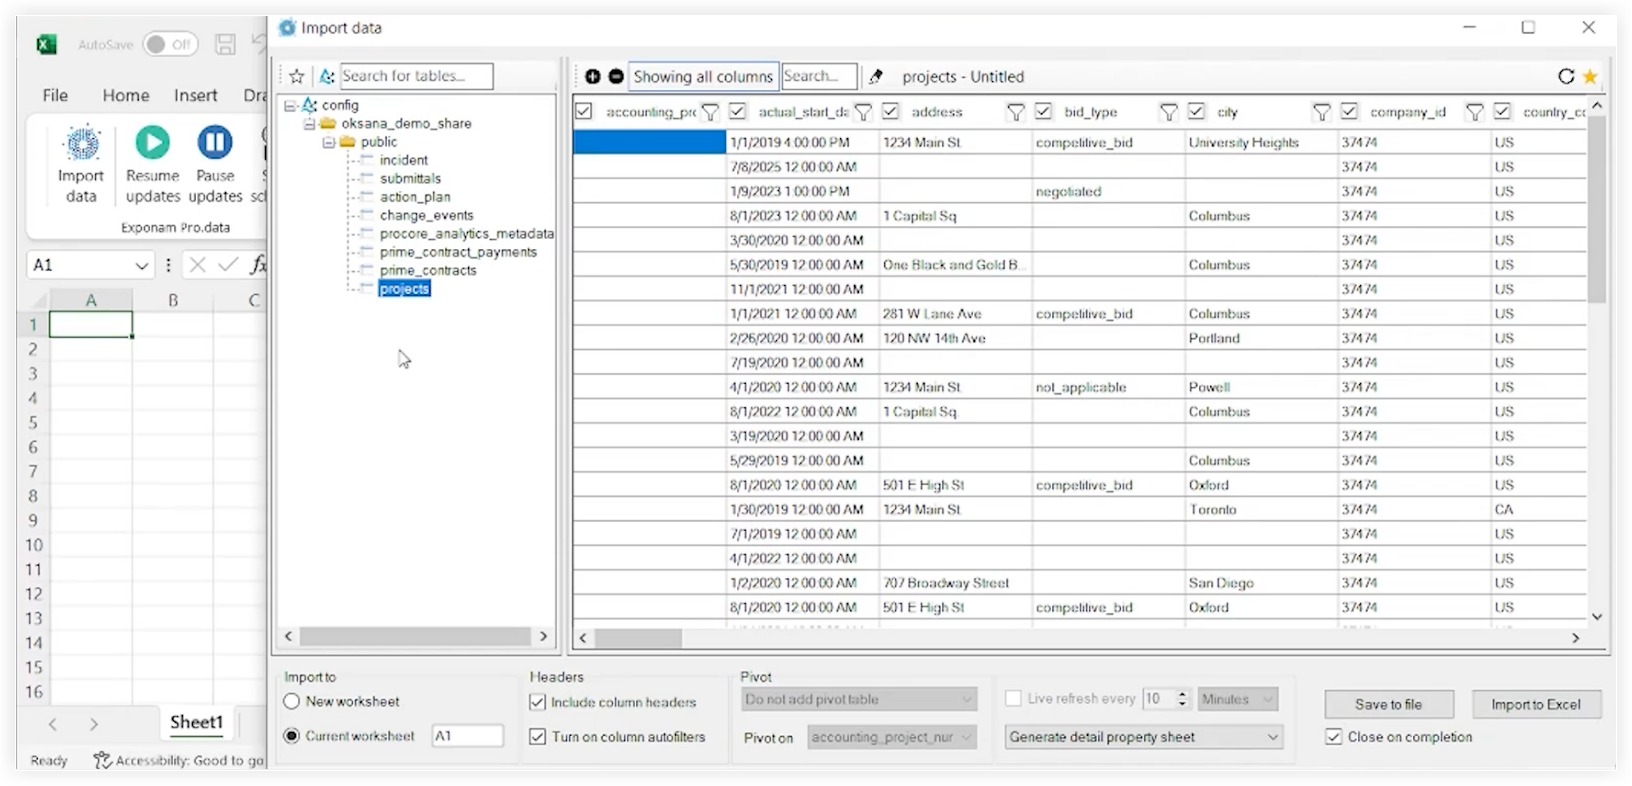
Import to Excel
-
Review your configuration and row count.
Note: Make sure that the row count is within your license limit. -
Click Import to Excel.
The data will populate in your active Excel worksheet.
Verification
-
Make sure that the columns and rows in Excel match what you selected in the Exponam window.
-
Check that data types (dates, currency, and more) are formatted correctly.
Troubleshooting
-
Missing "Exponam Pro" Tab. Make sure the installation was successful and check the Excel "Add-ins" settings to confirm that it is enabled.
-
Connection Error. Verify that your config.share file is still valid and that you have an active internet connection.
-
Row Limit Reached. If only 100 rows are displayed, check your license status in the Exponam settings.