Create a DocuSign Template for Your Custom Form
Objective
To learn how to create a DocuSign® Template for your custom form.
Background
In Procore, a custom form is a Portable Document Format (PDF) file that has been tailored to suit a business need. The Custom Solutions Team can work with you to create custom forms that support most client requests. The examples below detail the most commonly requested customizations:
Example
- Add or remove the signature line(s).
- Add, modify, or delete text (for example, add a legal disclaimer, edit a statement to add or change text, or remove a heading).
- Add pages (for example, add a cover page or legal disclaimer).
- Rearrange, rename, and/or delete sections in a PDF form.
- Change the page orientation of a PDF (portrait or landscape).
Note: Custom forms do have some limitations. To learn about those, see What are the limitations of custom forms?
Things to Consider
- Required User Permissions:
- Sufficient user permissions on the Procore project tool being used to request a DocuSign® signature.
- Additional Information:
- To create a DocuSign® template and to request signatures using the Procore + DocuSign® integration, you must have an active DocuSign® account. For details, see:
Prerequisites
- Review the information Get Started with Custom Forms and What are the limitations of custom forms?
- Familiarize yourself with the basic functions of a DocuSign® template. Read the
 Create Templates page in the DocuSign® Support Center.
 - Work with Procore Custom Solutions to design a custom form that you can use within the DocuSign® Template creation process.
Steps
- Design Your Custom Form with Procore Custom Solutions
- Export Your Custom Form From Procore
- Create a Template for Your Custom Form in DocuSign®
Design Your Custom Form with Procore Custom Solutions
Procore will create a custom form that contains the hidden text (or anchor text) that you specify. This hidden text is used with the AutoPlace feature within DocuSign® to specify the location of completion tags (signer fields). To learn more about AutoPlace feature, see these links from DocuSign®:
- DocuSign® Support: Learn About How to Use AutoPlace Fields to Automate the Placement of Signature Fields for Recipients
- DocuSign® Developer: Auto-place (anchor tagging)
| DocuSign Fields | Description |
|---|---|
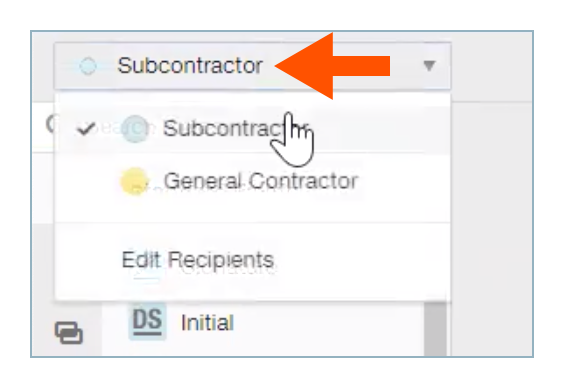 |
Recipient Roles. In DocuSign®, a recipient role represents the recipients of an envelope. In Procore, your signature roles correspond to the users or contacts who will be signing your Procore custom form. The most common recipient roles in Procore include:
In the example on the left, there are two (2) recipient roles: Subcontractor and General Contractor. |
 |
Default Fields. These are the DocuSign® completion tags that are available for use in the Procore-DocuSign® integration by default. Although the recipients these tags are associated with in a custom form depend on the specific Procore tool it was designed for, each form typically includes one or more of the following completion tags:
|
|
Custom Completion Tags in DocuSign® (circled). These will be used with the added hidden text (anchor text) you requested to be added to your form. They are used with the AutoPlace feature when creating your template. The most frequently added custom completion tags are:
In the example on the left, you also have the option to add other completion tags. To be used with the AutoPlace feature, they must have corresponding hidden text (anchor text) added to the form. |
After Procore Custom Solutions completes your form, it is uploaded to Procore tool it was designed for use with. Procore Custom Solutions also provides you with a list of 'hidden tags'. Each hidden tag corresponds to one of the custom fields added to your custom form during the design process.
Example
In this example, Procore Custom Solutions created a custom form for subcontracts. After the form is uploaded to your account by Procore Custom Solutions, you will receive a list of 'tags' that you use to configure your DocuSign® template. Each tag corresponds to a location of a custom field added to your custom form.
For example:
- SubcontractorCheckbox1
- GeneralContractorAdditionalText
Keep in mind that 'hidden tags' in the custom PDF will not be visible when you view your custom form in its printed or online format. Hidden tags are simply invisible text strings that mark the location where you want your recipients to complete their DocuSign® entry. To enable recipients to view the fill-in fields in DocuSign®, you will use the DocuSign® Auto Place feature to place the corresponding DocuSign® signature fields in your DocuSign® template.
Before you can get started with creating your template, you must first export your custom form from the Proore tool that your form works with as described in the next step.
Export Your Custom Form from Procore
- Navigate to the Procore tool that hosts the custom form that you designed. To see a list of tools supporting Procore custom forms, see Supported Procore Tools.
- Export your custom form from the Procore tool.
Note
In most Procore tools, the export Export menu is located in the top-right corner of a Procore tool and contains a PDF menu option. - Save the exported custom form to your computer so you can upload it to DocuSign® to create your template in the next step.
Example
The illustration below shows you an example of a subcontract. Although you cannot see the 'hidden tags', the arrows in the example below point to the location where Procore Custom Solutions placed the hidden tags for you. When creating your template, the DocuSign® AutoPlace feature places your signing fields in these locations.
INSERT SCREEN CAPTURE
Create a DocuSign Template for your Custom Form
After you export your custom form from Procore, you can upload it to DocuSign® and begin creating your DocuSign® template.
- Log into your DocuSign® account at
 https://account.docusign.com.
 - Navigate to the Templates page.
- Click the New button and select Create Template from the drop-down menu.
- Do the following:
- Template Name. Enter a name for your template.
- Optional: Description. Enter a description for your template.
- Under Add Documents, upload the document as follows:
- Click the Upload button and browse to the custom form that you exported from Procore.
OR - Use a drag-and-drop operation to move the custom form that you exported from Procore in DocuSign®.
- Click the Upload button and browse to the custom form that you exported from Procore.
- Under Add Recipients, enter the appropriate recipient roles for each recipient box. You do NOT need to specify a name or email address.
Example
In this example, let's assume you are setting up a DocuSign® template for a subcontract and that you want two (2) recipient roles on your subcontracts:
- Subcontractor. As the entity from whom you are purchasing a good or service, you want a member of your subcontractor's team to sign subcontracts first.
- General Contractor. As the entity purchasing a good or service, you want a member of your team to sign for the General Contractor role.

- Review the list of hidden text strings that you received from the Procore Custom Solutions team.
Example
In this example, Procore has added two (2) custom fields to the custom form as shown below:- Checkbox. A checkbox for the subcontractor to acknowledge at the time of signing.
- Text. A text box for the general contractor to type some text in at the time of signing.
INSERT SCREEN CAPTURE
- Place your first field in DocuSign®:
- Select the recipient role that you want to work with from the 'Recipient Roles' list in the left pane.
- Drag the appropriate DocuSign® field into your new DocuSign® template. For example, drop the Checkbox field on the left side of the page and drop it anywhere in the body of your new DocuSign® template.
- In the pane on the right, click the down arrow to expand the Location section.
- Under Auto Place, click the Set Up button.
The AutoPlace Fields window appears. - Enter the appropriate hidden tag text string in the Place a copy of this field near every instance of " " box.
- Click Apply.
DocuSign® snaps the field into the appropriate location of the form's template.Note
For each recipient role, repeat the steps above for each custom field. When adding custom fields with the AutoPlace feature, be sure to correlate the proper location with the appropriate hidden text string.
- Optional: Define a standard message for your template. You can change this to anything you like. To learn more about messages, read the DocuSign® User Guide.
- Click Save and Close.