How to Work Share Revit Models in BIM360
Create Workshare Cloud Models With BIM360
1. Create The Project In BIM 360
a. Log into Bim 360
b. Go to Account Admin, it should like this:

If you don’t see this symbol, you’re not an account admin, talk to one to get admin privileges.
c. In the project admin homepage click add
d. Enter the project name, type, the start and an arbitrary end date. Save and Continue.
e. Copy the file structure from an older project (make sure the older project has the file structure you want)
f. Add the project members (these have to be entered individually)
g. Give yourself a pat on the back, good job!
2. Add A Revit Model to The BIM 360 Project
a. Open Revit
b. File - New - Project (Make sure its from the current project template)
c. Save the project locally in an arbitrary location (save as a project not a template, do not overwrite the template!)
d. Collaborate Tab, click the collaborate tile.
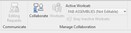
e. Select collaborate with BIM 360, select the project folder in BIM 360 file structure
f. Let Revit set up the cloud model (This will take some time)
g. Give yourself a pat on the back, Great Job!