Getting Started with Document Management - Document Review and Approvals with the Workflows Tool
Overview
Background
It’s often the case that construction companies have to manually move construction documents between folders and siloed systems as their status moves from work-in-progress, to in-review, to approved. This creates a lot of overhead and leads to the potential for mistakes and rework. With Procore Document Management, you don’t need to move documents around as their status changes, and access to revisions are changed automatically once an approval workflow has concluded. In addition, the workflow engine built into the Document Management tool is incredibly customizable, and can suit simple and complex approval scenarios for any kind of document.
How it Works
You can create custom workflow templates that are then assigned to documents that are uploaded to the Document Management tool. Once a workflow has started, workflow participants are notified to review documents, optionally comment on them with markup, and provide an approval outcome.
As a document revision gets reviewed and is either approved or rejected, the revision's status is automatically updated in Procore. This means you don't need to manually change permission settings or move revisions between folders or tools after a document is approved. When a workflow is created for a PDF document, workflow assignees can add markups directly to the PDF during their step in the workflow. After the workflow is complete, all workflow decisions, markups, and additional file attachments are preserved so that they can be referenced later.
Video
Create Document Management WOrkflow Templates
To use workflows for documents, you'll create one or more workflow templates in Procore's Workflows tool and then apply them to your projects.
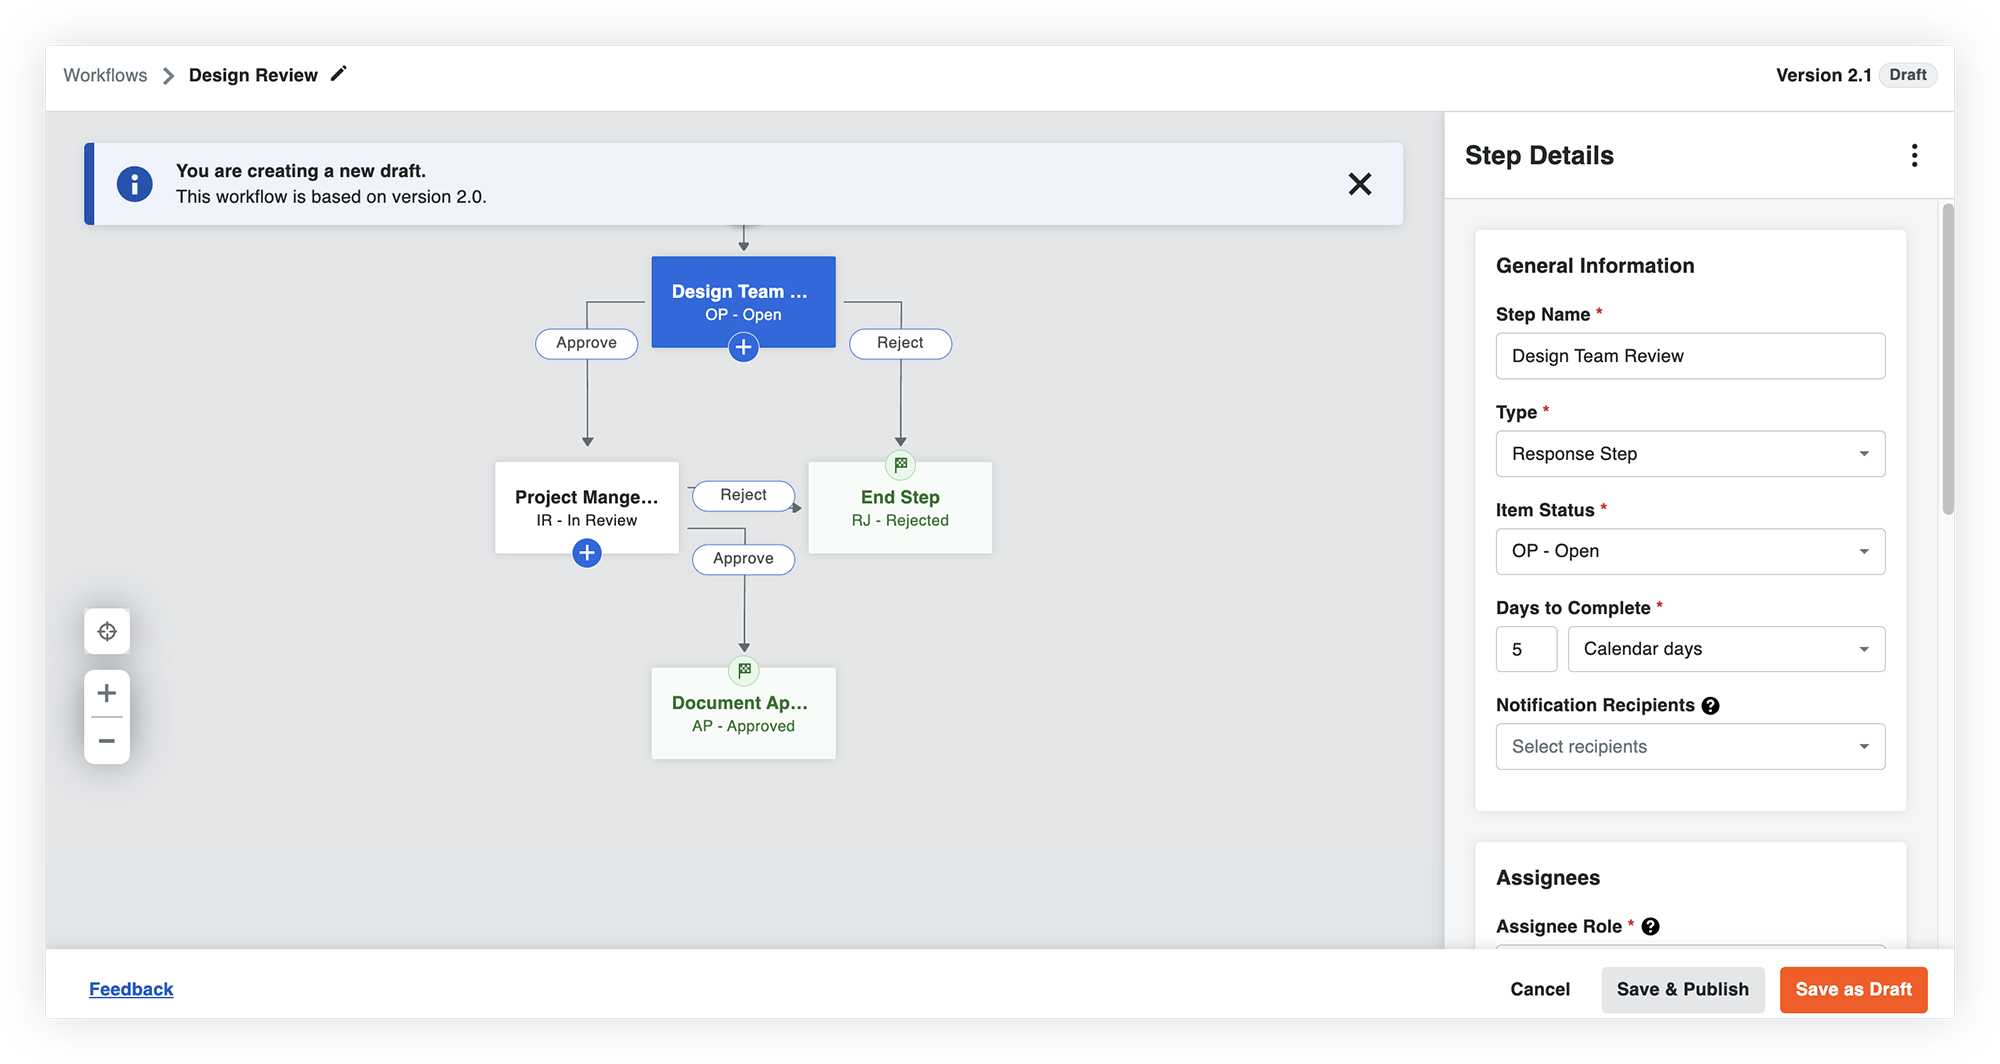
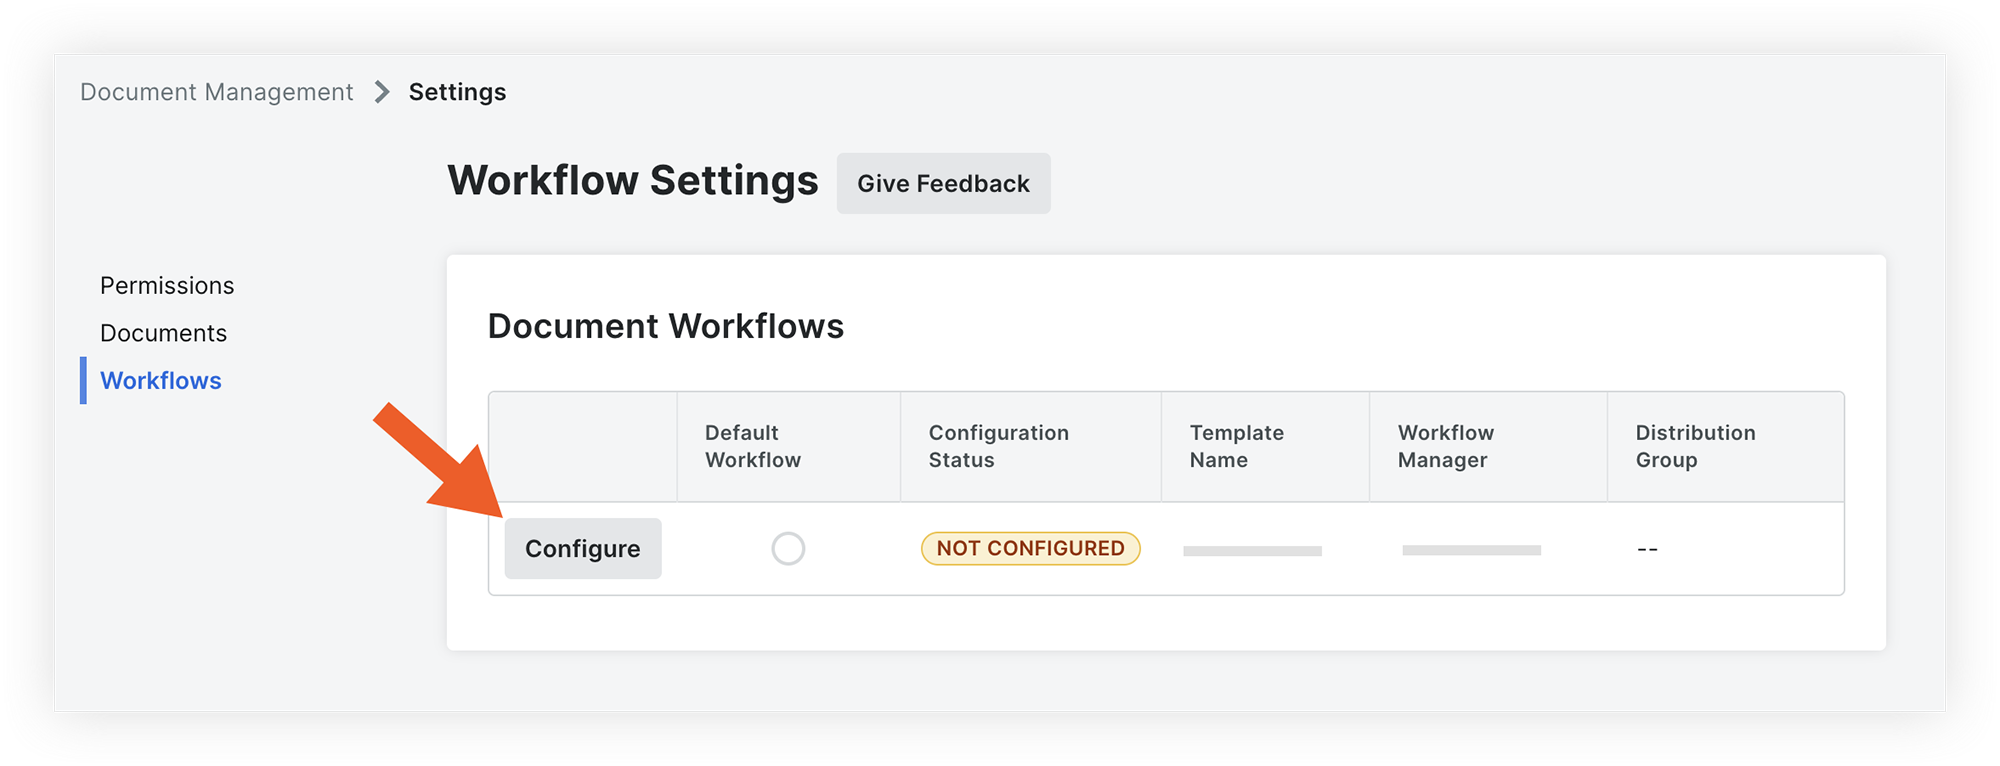
After a workflow template is applied to a project, you'll need to configure it with correct assignees on the Workflows tab of the Document Management tool's Configure Settings page before it can be used.
STart Workflows on Documents
After workflow templates have been configured for the project, workflows can be selected for documents in the 'Assigned Workflow' column. You can also assign a workflow to multiple documents at once using the Bulk Edit option.
Note: If you'd like to require a workflow selection for certain documents, like drawings, you can set this field as a requirement in your upload requirements.

Review and respond in a Workflow
After a workflow for a document starts, a Workflow Assignee can review the document and respond in the workflow.
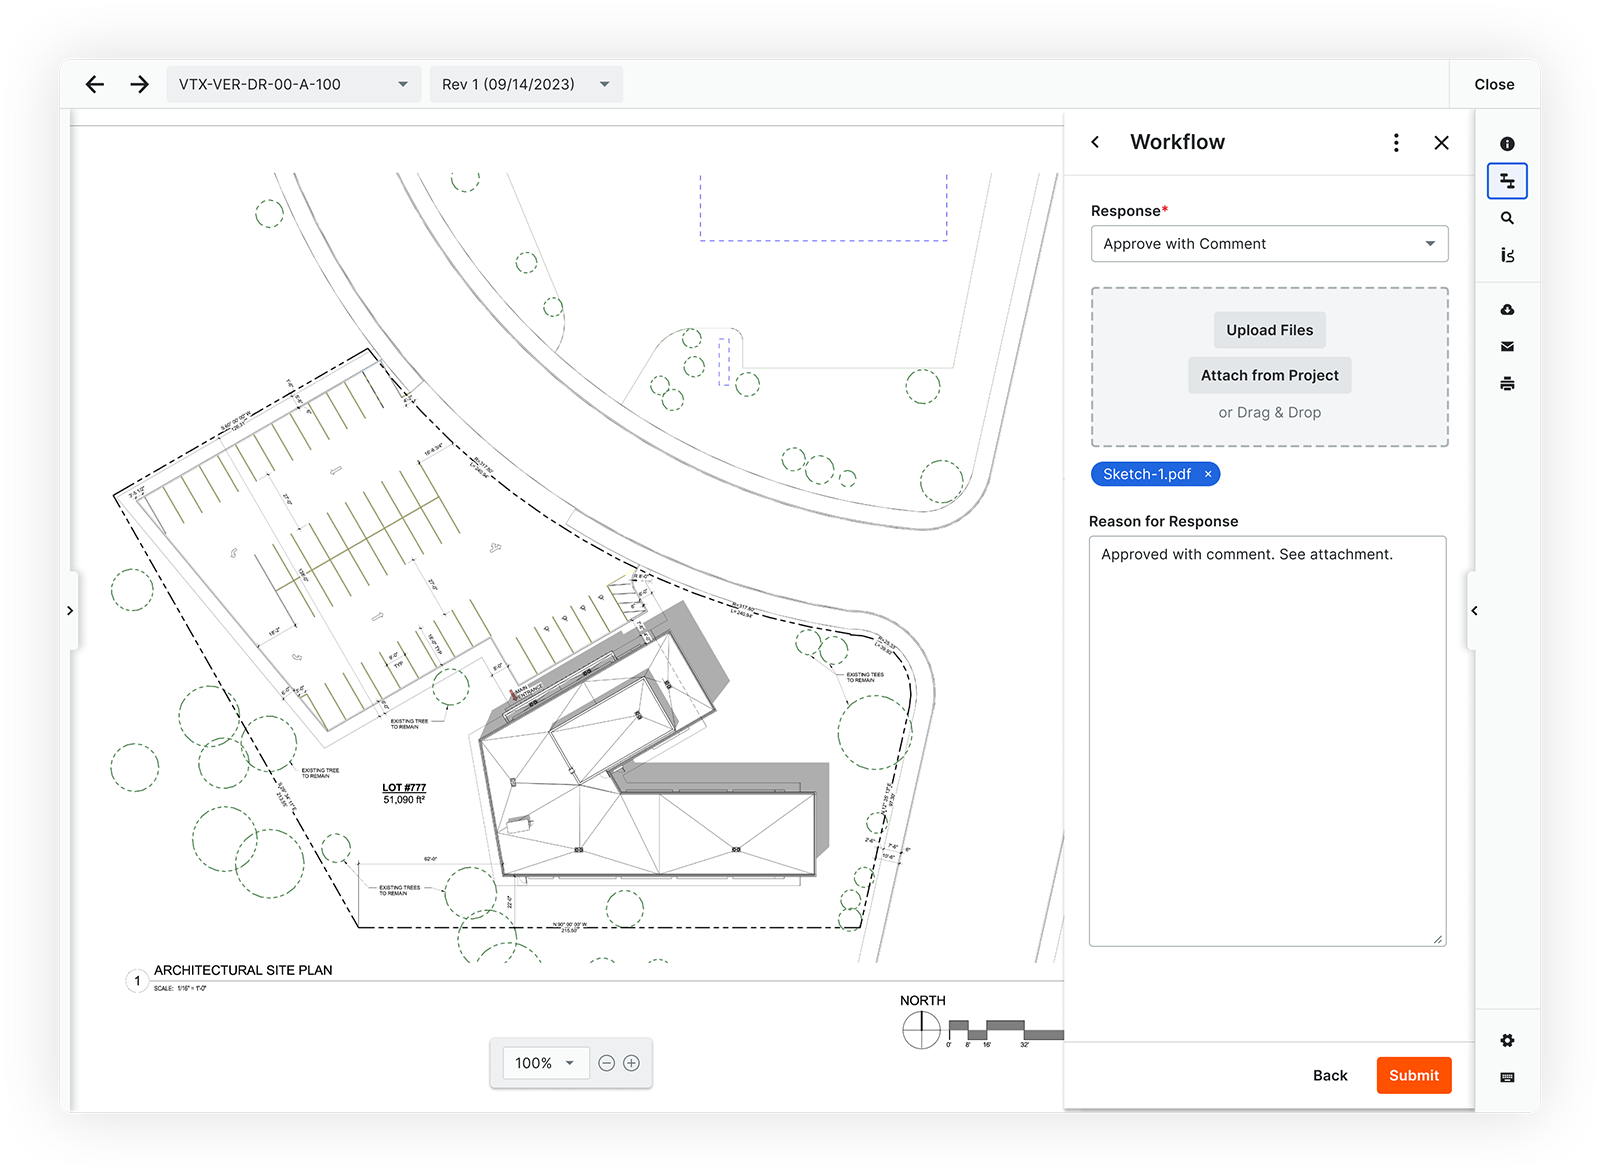
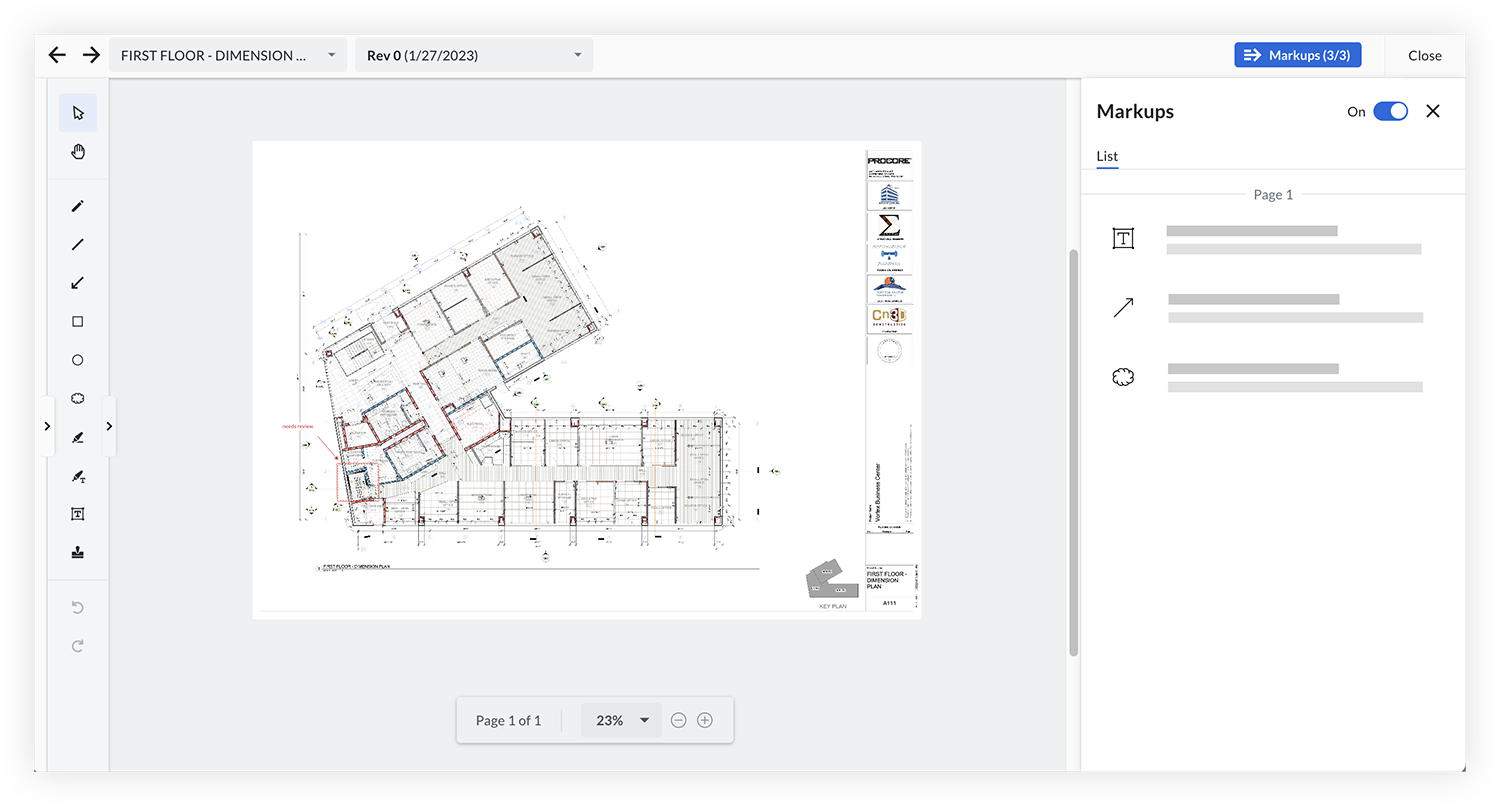
ADD MARKUPS
Workflow assignees can mark up documents as necessary as part of the response.
Best Practices
Before you set up workflow templates for the Document Management tool, consider the following:
- What document review and approval processes do you want to enforce and for which kinds of documents?
- How does the approval flow vary depending on the purpose, type, or source of the document?
- What response options do you need on each step (e.g. approved, approved with comment, rejected)?
- Who should be allowed to create and configure document workflows?
- Who should be allowed to manage active document workflows (e.g. restart them or change assignees mid-flow)?
Example
Below, you'll find an illustrative representation of a workflow for the mechanical drawing approval process. Each box corresponds to a specific step, while the arrows signify the decisions made at each juncture.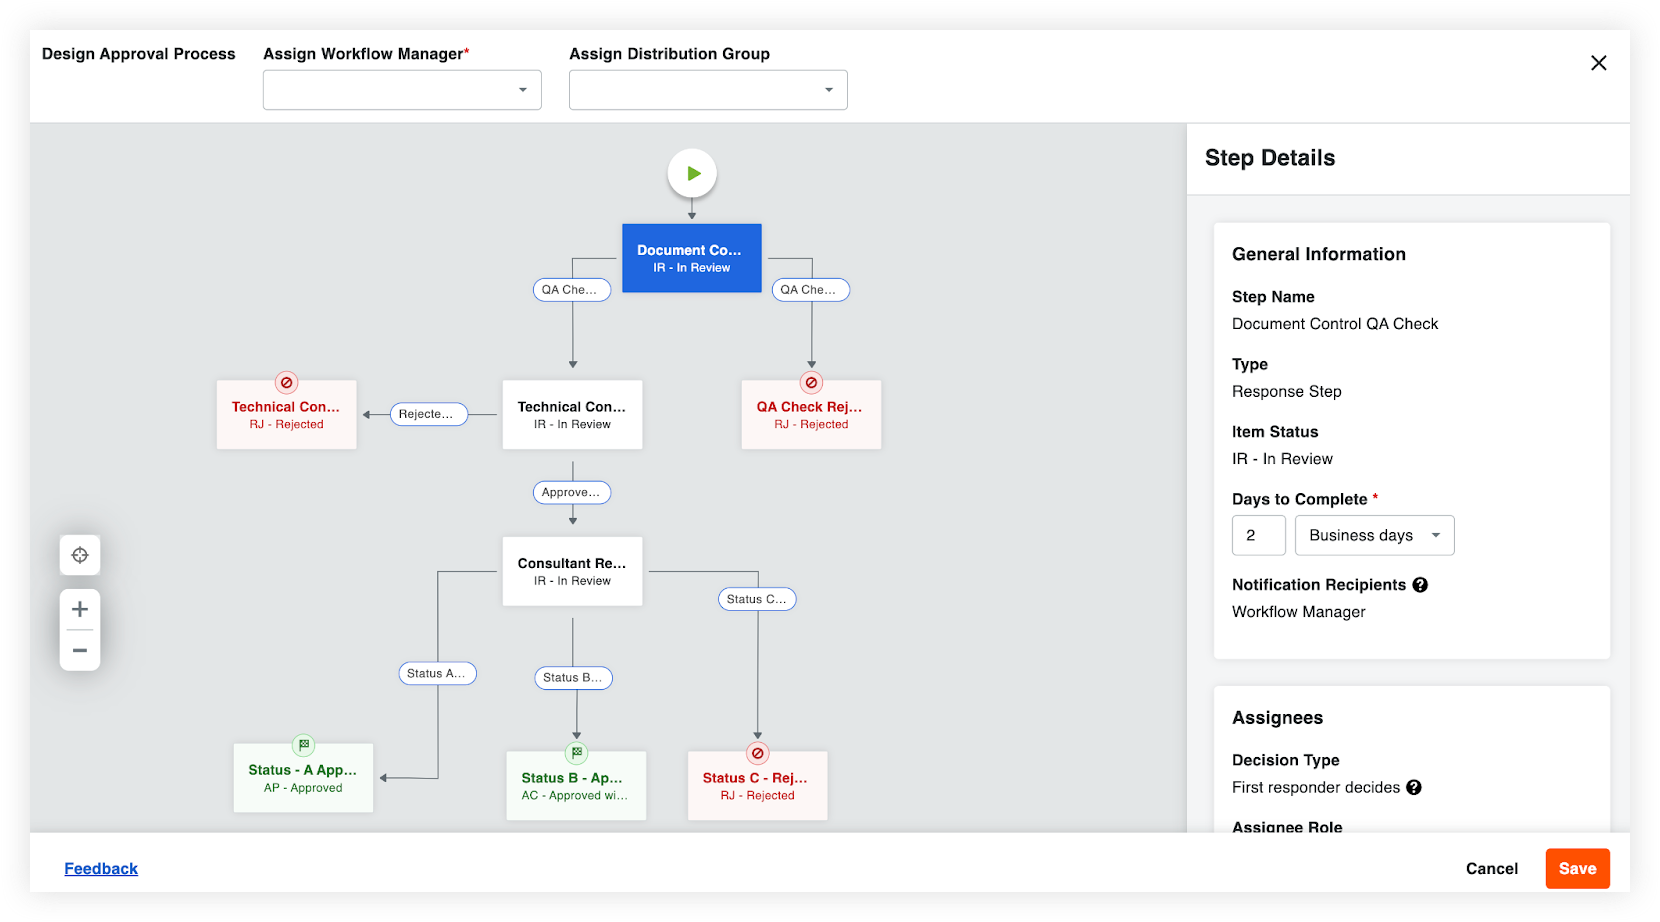
Let's consider a project where a mechanical subcontractor, M's Mechanical, submits drawings for Level 1. The initial destination for these drawings is the Document Controller, who conducts a Quality Assurance (QA) check.
- If the document receives a "Rejected" status during the QA check, it is labeled as "RJ-Rejected" and moves to the subsequent step titled "QA Check Rejected - Resubmit." In this scenario, M's Mechanical is promptly notified of the rejection and instructed to resubmit the document.
- If the document receives an "Approved" status in the QA check, it advances to the next phase, denoted as the "Technical Content Review."
- If the document receives a rejection, it proceeds to the following stage known as "Technical Content Rejected," and it is tagged as "RJ-Rejected."
- In the case of an approval within the "Technical Content Review" stage, the document progresses to the "Consultant Review."
- The outcome can be one of the following: "Approved," "Approved with Comments," or "Rejected." Depending on this decision, the document is assigned a final status of "Status A - Approved," "Status B - Approved with Comments," or "Status C - Rejected".
Note: Permission groups set in the Document Management tool determine who can view the document after its been approved.
- The outcome can be one of the following: "Approved," "Approved with Comments," or "Rejected." Depending on this decision, the document is assigned a final status of "Status A - Approved," "Status B - Approved with Comments," or "Status C - Rejected".
Next Lesson: Document Approvals with Workflows - Set it Up
Set it Up
Now that you've learned about approval workflows for the Document Management tool, you're ready to complete the following actions in Procore:
1. Assign Workflow Permissions
If you haven't already, set up permissions for Workflows.
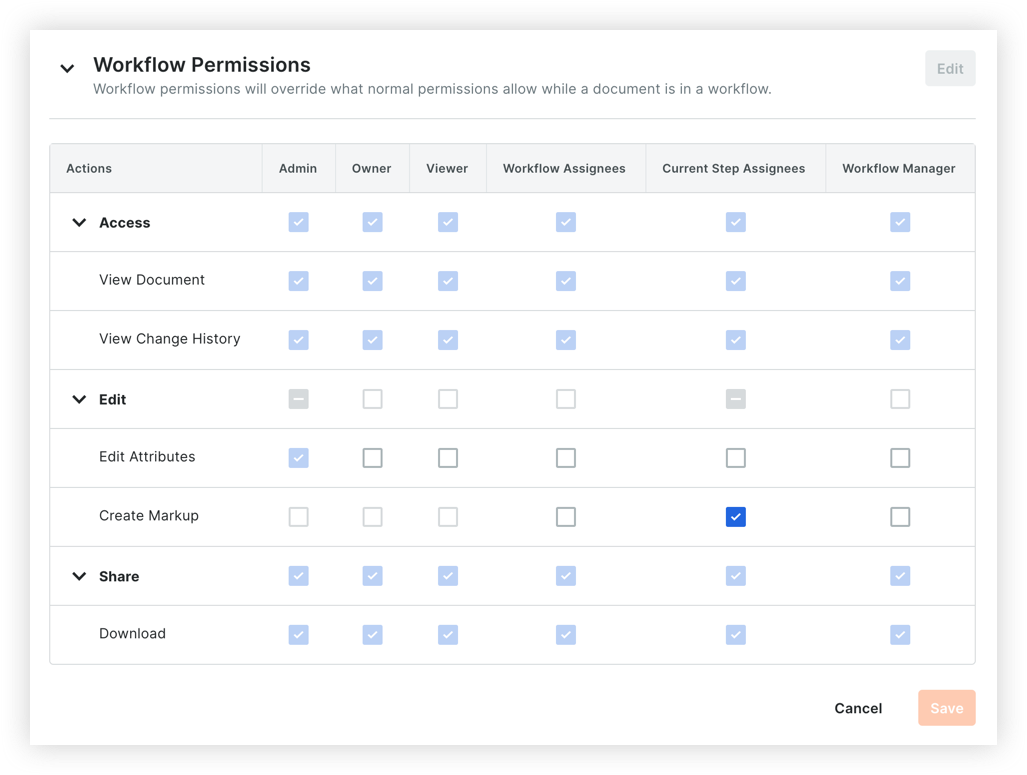
For any users that will be part of an approval workflow, you'll need to assign granular permissions for the Workflows tool in your permission templates.
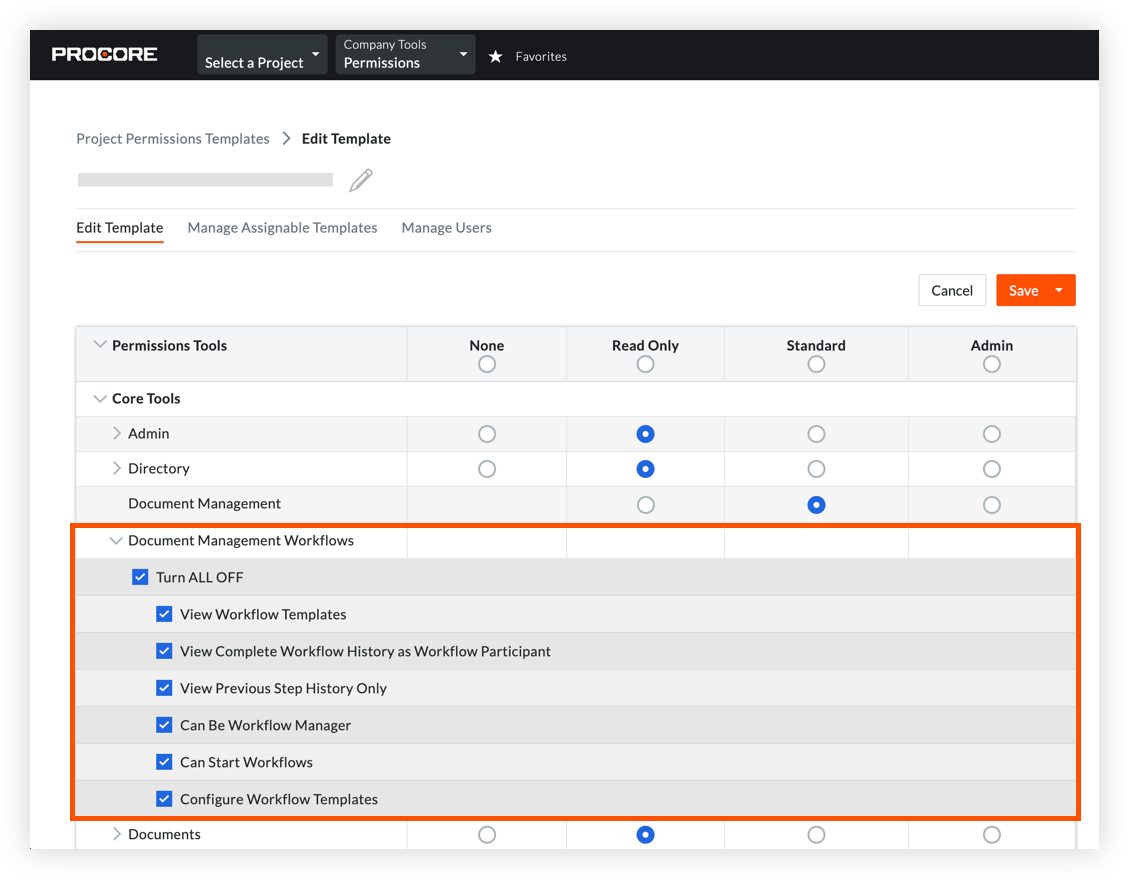
You can also customize the actions reviewers can take on documents within an active workflow, such as who should be able to mark up documents.
2. Create a Document Management Workflow Template
Next, you'll want to create workflow templates in the Company level Workflows tool.
3. Assign the Workflow to a Project
After the workflow template is created, you'll need to assign it to the projects that you want to use it on.

4. Configure a Workflow for the Project
Before being able to use workflows in the Document Management tool, you'll need to configure the workflow for the project, which involves assigning reviewers to individual steps. You can also set whether or not you'd like to use one of these templates as a default for newly uploaded documents.
5. Start a Workflow on Documents
When documents are uploaded to the project, a workflow can be assigned to documents in the 'Assigned Workflow' column. After a document is submitted, the assigned workflow will begin at the first step, and reviewers will be notified.
Note: If you bulk submit documents together, reviewers will get a single email with all of the documents requiring their attention, rather than separate emails for individually submitted documents.