Create and Manage Custom Workflow Responses
Objective
To create custom responses to be used in the creation of workflow templates.
Background
The default response types within the Workflows tool are: Approve, Return, and Reject. When creating workflows templates, you may need to further define the phrasing of a response in a way that more accurately describes the meaning of the response.
For example, you might need to add a response to a template that moves a workflow forward without labeling the response 'Approve'. In this case, you would create an 'Approve' response and give it a custom label other than 'Approve'.
There is no functional difference between the individual response types of 'Approve', 'Return', and 'Reject'. However, types are useful for the organization of custom responses and for locating available responses when editing a step on a workflow template.
Things to Consider
- Required User Permissions:
- 'Admin' level permissions on the Company Workflows tool.
- Additional Information:
- You may have up to thirty (30) active custom responses.
Steps
- Navigate to the Company Workflows tool.
- Click Configure Settings
 .
.
Add a New Response
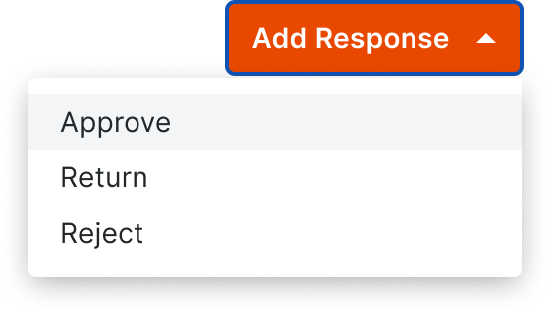
- In the section labeled 'Responses', click Add Response.
- Choose one of the following types:
- Approve
- Return
- Reject
- A new row will appear in the response table for the chosen type.
- Enter a label for the new response.
Note: Response labels are required and must be unique. Response labels are limited to a maximum of 250 characters.
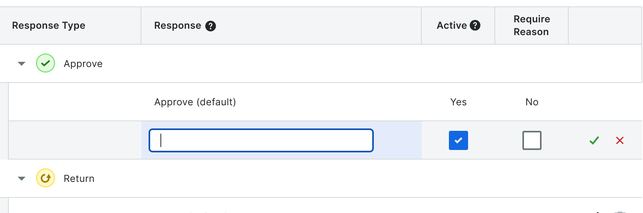
- Optional: The box in the 'Active' column is automatically checked to activate the new response. Only active responses can be added to workflow templates. Uncheck this box if you are not ready to use the custom response.
- Optional: 'Require Reason' is unselected by default. Check the box in the 'Require Reason' column to require workflow responders to submit a reason for their response when this custom response is used on an active workflow.
- Click the green checkmark to save the new custom response or the red 'X' to delete the response.
Edit a Custom Response
- In the section labeled 'Responses', locate the response you want to edit.
- Click the pencil
 icon next to the response.
Note: Responses in use cannot be edited or deleted. - Edit the following fields of the response:
- Response Label. This is the name of the response that will be used when creating workflow templates.
- Active. An active response can be used when creating workflow templates.
Note: If you do not want a response to appear in new workflow templates, deselect Active. This will not affect workflow templates and items already using the response. - Require Reason. If a reason is required for the response, a workflow member choosing this response will be asked to provide a written reason before they can submit.
- Click the green checkmark to save the new custom response or the red 'X' to delete the response.
Delete a Custom Response
- In the section labeled 'Responses', locate the response to want to delete.
- Click the delete
 icon next to the response.
 - Click Delete to confirm.
Note: This action cannot be undone.