Procore for Outlook
Table of Contents
Overview
Interact with your Procore project directly through Microsoft® Outlook
|
Streamline your project communications by enabling your team members to use Microsoft Outlook to forward email content and file attachments to Procore, as well as create RFI's from Outlook emails. With Procore for Outlook you can forward emails you receive in Outlook directly to your project in Procore. You can also send file attachments in Outlook emails directly to the Documents tool in Procore. Streamline your processes by creating RFI's in Procore directly from emails in Outlook. FEATURES
|
NoteProcore only processes emails that you explicitly choose to convert into Procore items. It does not store or process emails automatically. You have control over the data sent to Procore, and all data transfer is secure and encrypted. |
Prerequisites
Outlook Permissions
Procore for Outlook requires access to the following Outlook permissions:

Read your Mail 
Procore for Outlook will be able to read emails in your mailbox.
Why Procore for Outlook Processes Your Email Data? 
Procore for Outlook enables you to convert important emails into actionable items for your construction projects. When you choose to create a task, RFI, correspondence, or other project documents from an email, the integration reads that specific email to:
- Extract the email subject to fill the form titles automatically
- Copy the email content and sender information
- Include email attachments in your Procore documents
- Identify email recipients to suggest project team members
How Procore for Outlook Uses Your Email Data? 
Procore for Outlook only reads your emails when you actively choose to create a Procore item from them. It extracts key information, including the subject, body, sender, recipients, and attachments. This data then automatically pre-populates the relevant forms in Procore, saving you time on manual data entry. Procore for Outlook does not store or access your emails unless you explicitly choose to convert them into Procore items.
Read your Profile 
Procore for Outlook will be able to read your profile.
Why Procore for Outlook Uses Your Profile Information? 
Procore for Outlook uses your profile information to connect your Outlook account to your Procore account. This ensures you have the necessary permissions to create items in your Procore projects.
How Procore for Outlook Uses Your Profile Information? 
- Reads your email address to link your Outlook account to your Procore account
- Uses your name to identify you in Procore documents properly
- Ensures items you create are correctly attributed to you
- Stores only the personal information required for authentication
Maintain Access to Approved Data 
Procore for Outlook will be able to see the data it has been granted access to, even when you are not using the app.
Why Procore for Outlook Maintains Access to Approved Data?
Procore for Outlook works seamlessly by eliminating the need for repeated sign-ins. It keeps your authentication valid for the data you've already chosen to share.
How Procore for Outlook Maintains Access to Approved Data? 
- Maintains secure access tokens, so you won't need to re-authenticate frequently
- Applies only to data that you have already authorized access to
- Does not gain any new permissions; maintains your existing permissions
- Access tokens expire after two weeks, requiring re-authentication for security purposes
Setup Guide
This setup guide will walk you through how to install the Procore for Microsoft Outlook integration and configure it for use.
There are two different sets of steps, depending on your role in your organization:
- Outlook Administrator
-
Install the Procore Application from the Microsoft Marketplace in your Outlook Account for your company.
-
Approve the integration for your company using one of two methods:
-
Admin consent workflow
-
Azure AD workflow
-
-
- Procore for Outlook User (non-admin)
- Activate the integration in your Outlook account.
- Consent to the app's permission requirements (Note: If an administrator has provided consent on behalf of your organization, you do NOT need to perform this step.)
Outlook Administrator Steps
Use the following steps to set up Procore for Outlook and deploy it to your organization. You must have administrative access to your Microsoft Office 365 organization in order to complete the installation and setup steps.
Note
This procedure describes setup for the cloud-based Office 365 (Outlook.com) product. The steps may differ if you are using the on-premise version of Microsoft Exchange and the desktop version of Outlook. More information can be found in this Microsoft support article.1. Install the integration from Microsoft AppSource
- Open your browser and go to the Microsoft AppSource.

- Click Get it Now. You are prompted to sign-in to the Microsoft AppSource,
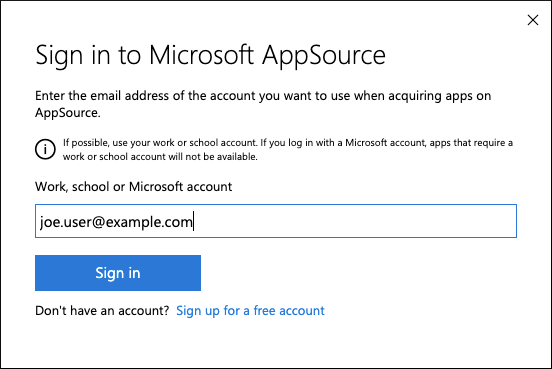
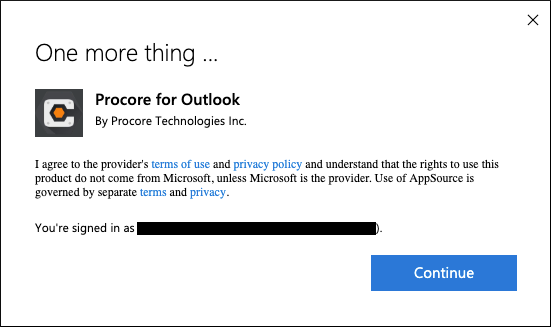
- Click Sign in. Agree to the terms of use and privacy policy and click Continue.
- Begin the deployment process by clicking Next.

- Specify who will have access to the add-in - everyone, specific users/groups, or just you - then click Deploy Now.

- Once the add-in deploys successfully, click Next.

- Complete this stage of the deployment by clicking Close.

2. Grant consent to the integration
There are four (4) ways to grant consent to the integration as an administrator to allow it to function:
-
Grant consent during usage of the integration in Outlook:
An administrator with appropriate roles (like Global Administrator, Cloud Application Administrator, or Application Administrator) can grant consent for the entire organization when they themselves first use the integration.
- Log in to Outlook using your Administrator credentials.
- Access the Procore for Outlook integration
- You are offered consent options for the integration.
- Choose the option to approve for the entire organization, usually shown as a checkbox like "Consent on behalf of your organization". This option only appears for users with appropriate admin roles.
- Click Accept to consent to the permissions requested for all users in your organization.
- When you use this method, no individual users need to consent when accessing the integration.
- Grant consent through the Enterprise Applications Portal:
- Go to the Microsoft Entra admin center (formerly Azure Active Directory admin center).
- Navigate to Identity > Applications > Enterprise applications.
- Find and select the Microsoft Outlook Integration.
- Go to Permissions.
- Click Grant admin consent for procore.com (button language might differ slightly, for example "Grant admin consent").
- Review the permissions the integration is requesting. See Outlook Permissions.
- Click Accept to grant consent.
- Grant consent using a Direct Admin Consent URL:
Administrators can use a specific web link to grant tenant-wide consent. An Administrator visits a specific URL format, which includes your organization's Microsoft Entra tenant ID or verified domain and specifies the application's client ID and requested permissions
-
Sign in with admin credentials.
-
Review the permission request.
-
Grant tenant-wide consent.
Note: The specific URL format requires details like the tenant-id and client_id. The tenant-id can usually be found on the home page of the Entra admin center.
-
URL Format:
https://login.microsoftonline.com/{tenant-id}/v2.0/adminconsent?client_id=3745a70b-3126-48f9-ba78-6491ff1bf925&scope=https://graph.microsoft.com/Mail.Read%20https://graph.microsoft.com/User.Read&redirect_uri=https://outlook-integration.procore.com/auth/outlook_msgraph/callback
- Responding to Individual User Requests (if enabled)
If the "admin consent workflow" is enabled in Microsoft Entra ID, users who cannot grant consent can request administrator approval.- When an end user tries to use the application but doesn't have permission to grant consent, they will see a message like "Need admin approval" or "Approval required" and can request an admin to grant consent on their behalf.
- Administrators can then see a list of these pending requests in the Microsoft Entra admin center under Enterprise applications > Admin consent requests.
- Administrators can review these individual requests and choose to approve or deny them.
- A prompt will appear asking the user to request approval from an admin.
- Administrators can view the pending requests and move to accept or reject the request.
Integration User (Non-Admin) Steps
1. Activate the integration in Outlook
- Log in to Outlook.
- Select an existing email.
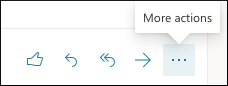
- In the 'ribbon' of the message, click the ellipsis
 icon to open the 'More actions' menu.
- Choose Procore for Outlook.
Note: You must have the Outlook 'Reading Pane' option selected in order for the Procore for Outlook button to be enabled and available. - On the 'Welcome' panel, click Sign In.

- On the Procore login screen, enter your Procore credentials and click Log In.
- Review the required permissions and grant consent to the integration. See Outlook Permissions.
The integration is now ready for use.
Note: Some users' environments might require an admin to approve the activation of the integration. In this case, a window appears that says 'Need admin approval. If the option appears to 'Request approval', select it to send a request to your admin to approve activation. If you do not see that option, reach out to your internal IT team to request they enable the integration for your company.
User Guide
Available Actions
Steps
Save an Outlook Email to the Emails Tool in Procore
- Log in to Outlook.
- Select an existing email.
- In the 'ribbon' of the message, click the ellipsis icon to open the 'More actions' menu.
- Choose Procore for Outlook.
Note: You must have the Outlook 'Reading Pane' option selected in order for the Procore for Outlook button to be enabled and available. - In the 'Procore for Outlook' panel, click Save to Emails Tool.
- Optional: Add one or more tags to the email.
- Confirm your action by clicking Save to Procore.
Note: Any existing email attachments are also saved to Procore. - A success message appears indicating that your email has been saved to Procore.
Save Outlook Email Attachments to the Documents Tool in Procore
- Log in to Outlook.
- Select an existing email that includes at least one file attachment.
- In the message ribbon, click the ellipsis icon to open the 'More actions' menu.
- Choose Procore for Outlook.
Note: You must have the Outlook 'Reading Pane' option selected in order for the Procore for Outlook button to be enabled and available. - In the 'Procore for Outlook' panel, click Save to Documents Tool.
- Enter a file name for the attachment.
- Choose the Documents folder where you want to save the attachment.

- Click Save to Procore.
- A success message appears indicating that the attachment has been saved to Procore.
Quickly Create items in Procore from Outlook
You can use the Quick Create functions to quickly create items in Procore:
Photos
Upload attached image files from an Outlook email directly to the Procore Photos tool.
- Log in to Outlook.
- Select an existing email that includes at least one image file attachment.
- In the message ribbon, click the ellipsis icon to open the 'More actions' menu.
- Choose Procore for Outlook.
Note: You must have the Outlook 'Reading Pane' option selected in order for the Procore for Outlook button to be enabled and available. - Click Photo.
- Enter the following:
- Album. Choose the Procore album to store the image in.
- Trade. Select the appropriate trade.
- Private. Mark this checkbox to make the photo private in Procore.
- Attachments. Enter a file name for the photo.

- Click Save to Procore.
A success message appears indicating that your file has been saved to Procore.
Note: To view your uploaded file in Procore, click View in Procore.
RFIs
Complete the following steps to create a draft RFI directly from Outlook.
- Log in to Outlook.
- Select an existing email that includes at least one image file attachment.
- In the message ribbon, click the ellipsis icon to open the 'More actions' menu.
- Choose Procore for Outlook.
Note: You must have the Outlook 'Reading Pane' option selected in order for the Procore for Outlook button to be enabled and available. - Click RFI.
- Enter the following information:
- Subject. Enter the subject of the RFI.
- Question. Enter your question.
- Assignees. Assign the RFI.
- RFI Manager. Select the RFI's manager.
- Received From. Select the person the question was received from.
- Attachments (Optional). Enter a file name for the attachment.
- Click Create Draft RFI.
A success message appears indicating that your RFI has been saved to Procore.
Note: To view your RFI in Procore, click Continue Editing in Procore.
Correspondence
Complete the following steps to create a 'Draft' correspondence item directly from Outlook.
- Log in to Outlook.
- Select an existing email that includes at least one image file attachment.
- In the message ribbon, click the ellipsis icon to open the 'More actions' menu.
- Choose Procore for Outlook.
Note: You must have the Outlook 'Reading Pane' option selected in order for the Procore for Outlook button to be enabled and available. - Click Correspondence.
- Add the following information as applicable:
- Correspondence Type: Select a correspondence type.
- Title: The subject line from the email is automatically entered as the item's Title, but you can enter a different name for the correspondence item.
- Description: Enter a description for the correspondence item.
- Assignees: Enter one or more users to be designated as assignees for the correspondence item.
- Distribution Members: Enter one or more users to be included in the distribution list for the correspondence item.
- Private: Mark this checkbox to make the correspondence item 'Private'. 'Private' correspondence items are only visible to their creator, the user listed in Received From, the users listed in Assignees, the users listed in Distribution, and users with company or project level 'Admin' permissions.
- Attachments: Any attachments included in the email are automatically included as the correspondence item's attachments. You can remove any irrelevant attachments, but you cannot add new attachments when creating the item.

- Click Create Draft Correspondence.
A success message appears indicating that your Correspondencee item has been saved to Procore.
Note: To view your Correspondence item in Procore, click Continue Editing in Procore.
Tasks
Complete the following steps to create a new Task directly from Outlook.
- Log in to Outlook.
- Select an existing email that includes at least one image file attachment.
- In the message ribbon, click the ellipsis icon to open the 'More actions' menu.
- Choose Procore for Outlook.
Note: You must have the Outlook 'Reading Pane' option selected in order for the Procore for Outlook button to be enabled and available. - Click Task.
- Enter the following details:
- Title
- Description
- Private
- Status
- Category
- Due Date
- Attachments

- Click Create Task Item.
A success message appears indicating that your Task has been saved to Procore.
Note: To view your Task in Procore, click Continue Editing in Procore.
Change Events
Complete the following steps to create a new Change Event directly from Outlook.
- Log in to Outlook.
- Select an existing email that includes at least one image file attachment.
- In the message ribbon, click the ellipsis icon to open the 'More actions' menu.
- Choose Procore for Outlook.
Note: You must have the Outlook 'Reading Pane' option selected in order for the Procore for Outlook button to be enabled and available. - Click Change Event.
- Enter the following details:
- Title
- Description
- Status
- Scope
- Type
- Attachments

- Click Create Change Event.
A success message appears indicating that your Change Event has been saved to Procore.
Note: To view your Change Event in Procore, click Continue Editing in Procore.
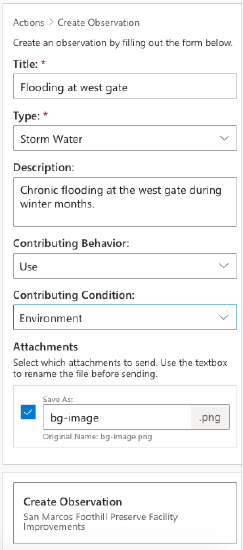
Observations
Complete the following steps to create a new Observation directly from Outlook.
- Log in to Outlook.
- Select an existing email that includes at least one image file attachment.
- In the message ribbon, click the ellipsis icon to open the 'More actions' menu.
- Choose Procore for Outlook.
Note: You must have the Outlook 'Reading Pane' option selected in order for the Procore for Outlook button to be enabled and available. - Click Observation

View My Open Items
You can conveniently view and access your Procore Open Items from Outlook.
- Log in to Outlook.
- Select an existing email that includes at least one image file attachment.
- In the message ribbon, click the ellipsis icon to open the 'More actions' menu.
- Choose Procore for Outlook.
Note: You must have the Outlook 'Reading Pane' option selected in order for the Procore for Outlook button to be enabled and available. - Click My Open Items.
- Your open items are categorized by type. Click the link next to an item to its view details.
