Create a Payment Received for a Prime Contract
Objective
To record a payment received for an upstream invoice on a prime contract.
Background
After you receive a payment from upstream collaborator for an upstream invoice, you can record the payment by adding a line item entry to the 'Payment Received' tab in the prime contract.
Things to Consider
- Required User Permissions:
- 'Admin' level permissions on the project's Prime Contracts tool.
Prerequisites
- The contract must be in the 'Approved' or 'Complete' state. See Approve a Prime Contract.
Steps
The steps you use depend on whether you are using the modernized or legacy experience of the Prime Contracts tool.
- Phased Release. These steps show the beta experience.
- Legacy Content. These steps show the legacy experience.
Phased Release
Use the steps below if you have the beta experience of the Prime Contract's tool. To learn more about this release, see Project Financials: Modernized Experience for Prime Contracts.
- Navigate to the project's Prime Contracts tool.
- Locate the contract to work with, then click its Number link.
- Choose one of these options:
- Click the Create button and choose Create Payment from the drop-down list.
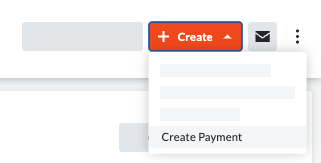
OR - Click the Payments Received tab and click the Add Payment button.
These actions open the Add Payment window.
- Click the Create button and choose Create Payment from the drop-down list.
- In the Add Payment window, do the following:
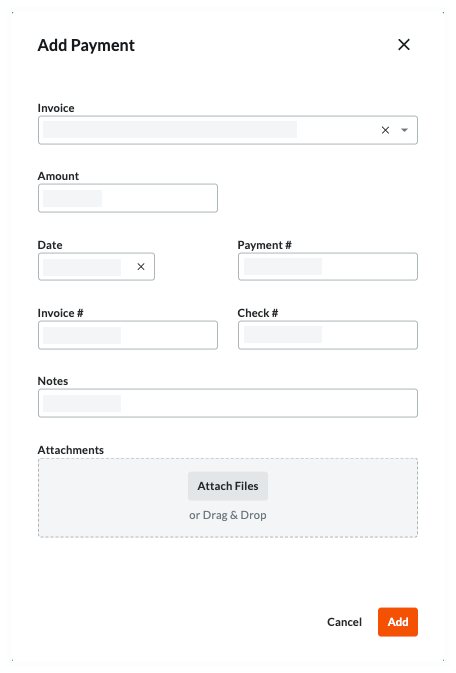
- Invoice
Select an invoice from the drop-down list. This lists all the invoices created for the prime contract by name and billing period. - Date
Use the calendar control to select the date you received the payment. - Payment #
Specify the payment number. This is a free-form text field that you can use to enter a payment number for reference, if desired. - Invoice #
Enter the invoice number for the payment. - Check #
Enter the check number for the payment. - Notes
Include any additional notes about the payment. - Amount
Enter the amount of the payment that was received. - Attachments
Include any attachments related to the payment (e.g. the check or the invoice related to the payment).
- Invoice
- Click Add.
This adds the payment to the 'Payments Received' table in the 'Payments Received' tab. - Optional: Follow the above steps to add another payment.
- Click the close (x) icon or the Cancel link to close the 'Add Payments' window.
Tip
How do you fix a data entry error? Click the pencil icon in the table to modify your entry. You can also click the trash can icon to permanently delete the entry and create a new one. When deleting an entry, Procore prompts you to confirm the delete action. Deleted items cannot be recovered.
Legacy Content
Use the steps below if you have the legacy experience of the Prime Contract's tool.
- Navigate to the project's Prime Contracts tool.
- Locate the contract to work with, then click its Number link.
- Choose one of these options:
- Click the Create Payment button to jump to the 'Payments Received' tab and activate the New Payment entry fields.
OR - Click the Payments Received tab and click Edit. This opens the New Payment entry fields.
- Click the Create Payment button to jump to the 'Payments Received' tab and activate the New Payment entry fields.
- In the New Payment entry fields, add the following information:

- Invoice
Select an invoice from the drop-down list. This lists all the invoices created for the prime contract by name and billing period. - Date
Use the calendar control to select the date you received the payment. - Payment #
Specify the payment number. This is a free-form text field that you can use to enter a payment number for reference, if desired. - Invoice #
Enter the invoice number for the payment. - Check #
Enter the check number for the payment. - Notes
Include any additional notes about the payment. - Amount
Enter the amount of the payment that was received. - Attachments
Include any attachments related to the payment (e.g. the check or the invoice related to the payment).
- Invoice
- Click Add.
This adds your entry to the 'Payments Received' table at the bottom of the 'Payments Received' tab. The 'Total' amount at the bottom of Payment Received table also appears in the 'Contract Summary Report' on the prime contract. See View Prime Contracts.

- Click Save.
This saves the new entry on the contract.Tip
How do you fix a data entry error? Simply delete an entry by clicking the RED icon on the right side of each line item in the 'Payment Received' tab. Then create a new payment with the correct information.